
1. Introduction
This manual provides detailed instructions for the assembly, operation, maintenance, and troubleshooting of your Maupvit Full Size Farmhouse Bed Frame. This bed frame is designed with a farmhouse aesthetic, featuring a headboard with storage shelves, sliding barn doors, integrated LED lighting, a built-in charging station, and four under-bed storage drawers. Please read all instructions carefully before assembly and use to ensure safe and proper operation.
2. Safety Information
Important Safety Warnings:
- Do not exceed the maximum weight capacity of the bed frame. (Specific weight capacity not provided, exercise caution).
- Be cautious of sharp edges during assembly and use to prevent injury.
- Ensure all screws and fasteners are securely tightened before use and periodically check for looseness.
- Keep small parts away from children during assembly to prevent choking hazards.
- Only use the bed frame on a flat, stable surface.
- Unplug the charging station and LED lights from the power source before cleaning or maintenance.
3. Components Overview
The Maupvit Full Size Farmhouse Bed Frame includes the following main components:
- Headboard with integrated storage shelves and sliding barn doors
- Built-in RGB LED lighting system
- Integrated charging station (AC outlets, USB, Type-C ports)
- Metal platform bed frame structure
- Four high-capacity under-bed storage drawers with rollers
- Footboard

Figure 3.1: Product Dimensions and Key Components
4. Setup and Assembly
Your Maupvit Full Size Farmhouse Bed Frame comes with detailed assembly instructions. Please refer to the separate assembly guide included in the packaging for step-by-step directions, part identification, and hardware requirements. It is recommended to assemble the bed frame with at least two people.
General Assembly Tips:
- Lay out all parts and hardware before beginning assembly.
- Use the provided tools or your own appropriate tools.
- Do not overtighten screws until all components are loosely fitted, then tighten fully.
- Ensure the bed frame is level and stable after assembly.
5. Operating Instructions
5.1. LED Lighting System
The headboard features a multi-functional RGB LED light strip. This system offers over 60,000 colors and adjustable brightness levels to customize your bedroom ambiance.
- Control: The LED lights can be controlled via a remote control (batteries not included) or a dedicated mobile application.
- Functions: Adjust color, brightness, select various lighting styles, and utilize music mode or timing functions.
- Power: Ensure the bed frame's power cord is plugged into a wall outlet for the LED lights to function.

Figure 5.1: LED Lighting System with Remote and App Control
5.2. Charging Station
A built-in charging station is located on the headboard, providing convenient access to power for your electronic devices.
- Outlets: Includes 120V/12A AC outlets.
- USB Ports: Features 5V/2A USB and Type-C ports.
- Power Cord: The charging station is powered by a 4.9-foot power cord that needs to be plugged into a wall outlet.
- Usage: Simply plug your devices into the appropriate ports for charging.

Figure 5.2: Integrated Charging Station
5.3. Storage Drawers
The bed frame is equipped with four high-capacity storage drawers located under the bed. These drawers are designed for efficient storage of seasonal clothes, blankets, or other items.
- Operation: Each drawer is fitted with rollers for smooth and easy pushing in and pulling out.
- Capacity: Utilize the full capacity of the drawers for organized storage.

Figure 5.3: Under-Bed Storage Drawers
5.4. Sliding Barn Doors and Adjustable Shelves
The headboard features storage compartments concealed by sliding barn doors. These compartments include adjustable shelves, allowing you to customize the storage space.
- Sliding Doors: Gently slide the barn doors along their tracks to access the storage shelves.
- Adjustable Shelves: The shelves inside the headboard compartments can be adjusted to different heights or removed entirely to accommodate various item sizes.
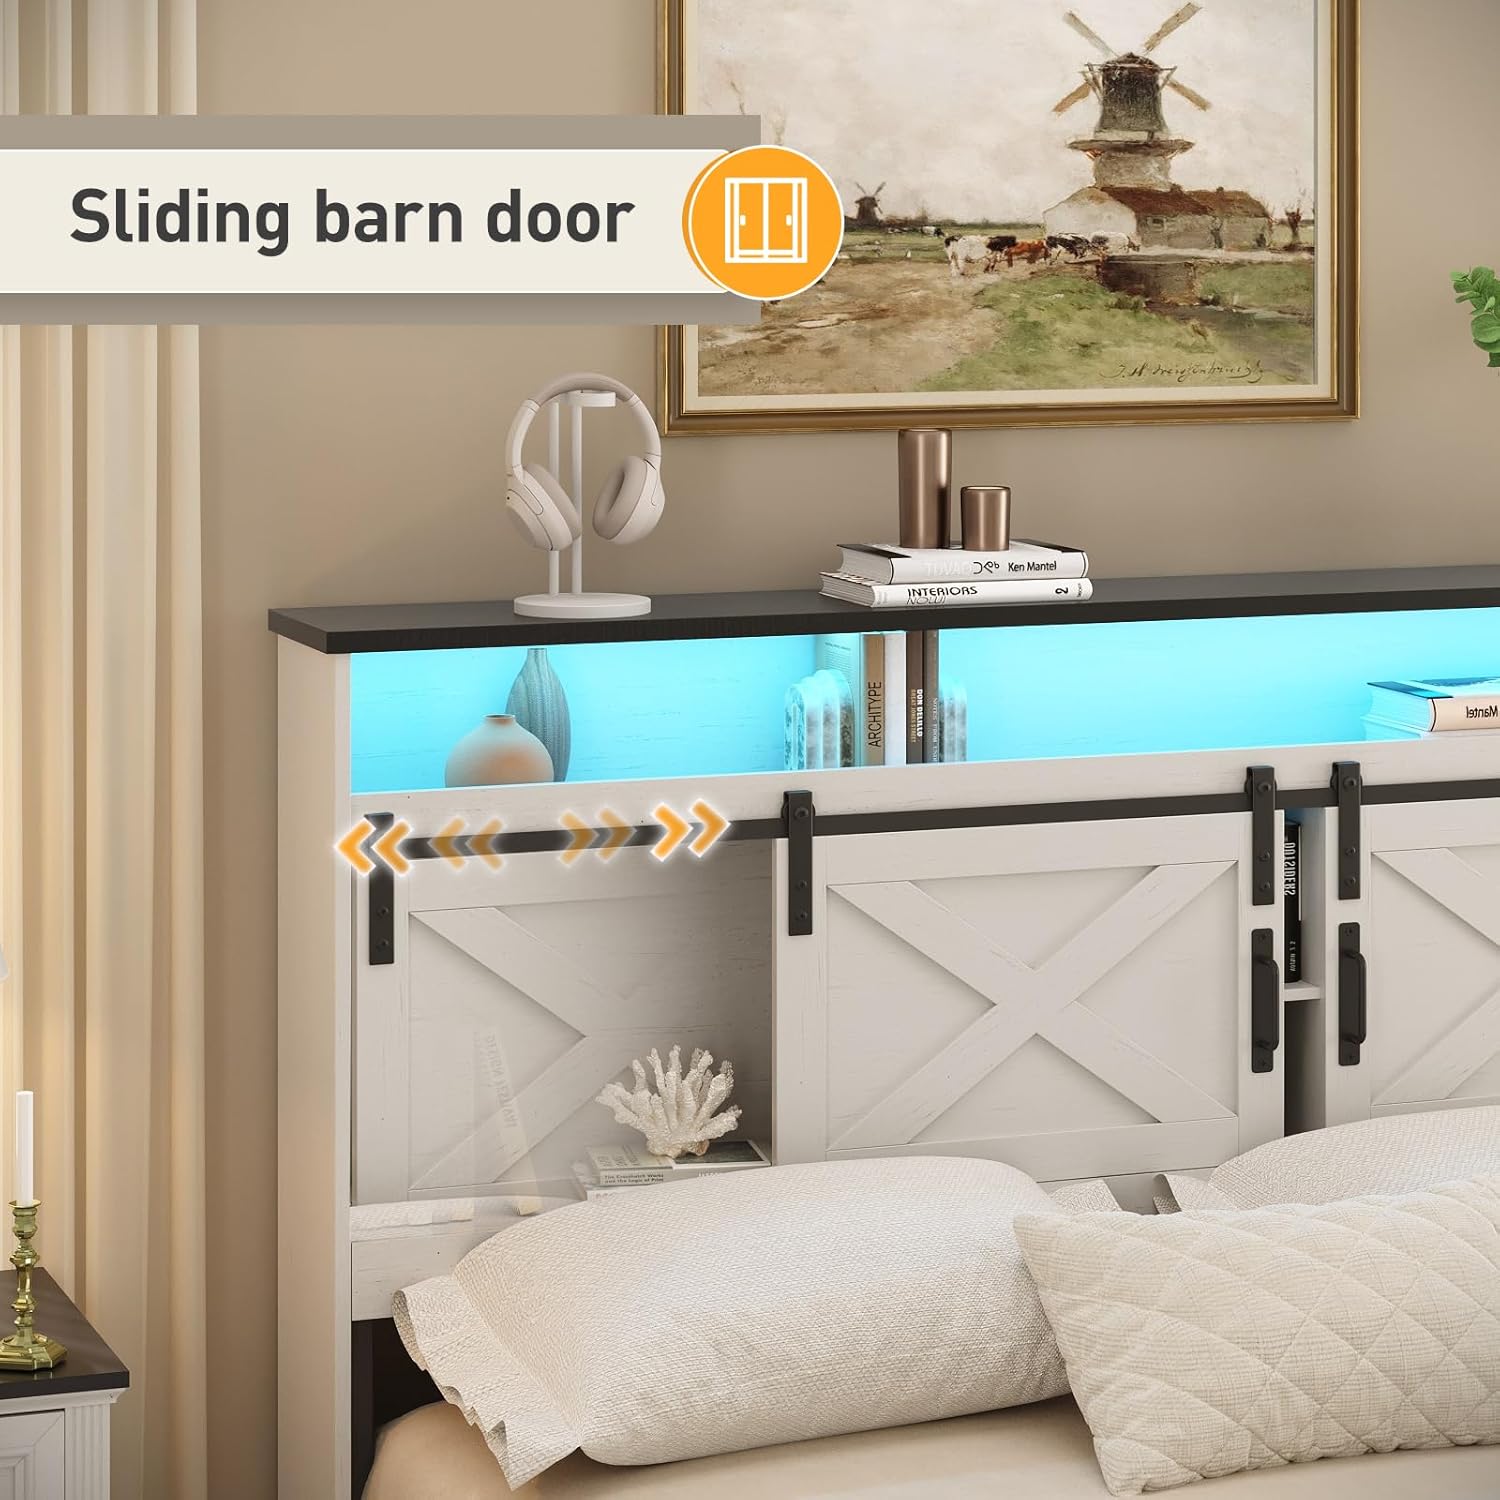
Figure 5.4: Headboard with Sliding Barn Door Storage
6. Maintenance
Regular maintenance will help prolong the life and appearance of your bed frame.
- Cleaning: Wipe surfaces with a soft, damp cloth. Avoid harsh chemicals or abrasive cleaners that may damage the finish.
- Dusting: Regularly dust all surfaces to prevent buildup.
- Hardware: Periodically check all screws and bolts to ensure they remain tight. Retighten as necessary.
- LED Lights: If LED lights dim or flicker, check the power connection. If issues persist, contact customer support.
- Drawers: Keep drawer tracks clean and free of debris to ensure smooth operation.
7. Troubleshooting
Refer to the table below for common issues and their solutions.
| Problem | Possible Cause | Solution |
|---|---|---|
| LED lights not turning on | Power cord unplugged; remote control batteries dead; loose connection. | Ensure power cord is securely plugged in. Replace remote control batteries. Check all LED connections. |
| Charging station not working | Power cord unplugged; device not compatible; faulty cable. | Verify the charging station's power cord is plugged into a live outlet. Use a different device or cable to test. |
| Drawers are difficult to open/close | Obstruction in the track; drawer overloaded; rollers dirty. | Check for items blocking the track. Reduce drawer load. Clean rollers and tracks. |
| Bed frame is wobbly | Loose hardware; uneven floor. | Retighten all assembly hardware. Place shims under legs if the floor is uneven. |
8. Specifications
| Feature | Detail |
|---|---|
| Size | Full |
| Material | Engineered Wood |
| Product Dimensions (L x W x H) | 85.9" x 56.1" x 47.2" |
| Style | Country Rustic / Farmhouse |
| Number of Drawers | 4 |
| LED Light Features | RGB, 60,000+ colors, adjustable brightness, app/remote control |
| Charging Station | 120V/12A AC Outlets, 5V/2A USB & Type-C Ports |
| Power Cord Length | 4.9 feet |
| Assembly Required | Yes |
9. Warranty and Support
For any questions regarding assembly, missing parts, or operational issues not covered in this manual, please contact Maupvit customer support. Refer to your purchase documentation for specific warranty details.
Contact Information: Please refer to the seller's contact information on your purchase platform or the Maupvit official website for support.