1. Product Overview
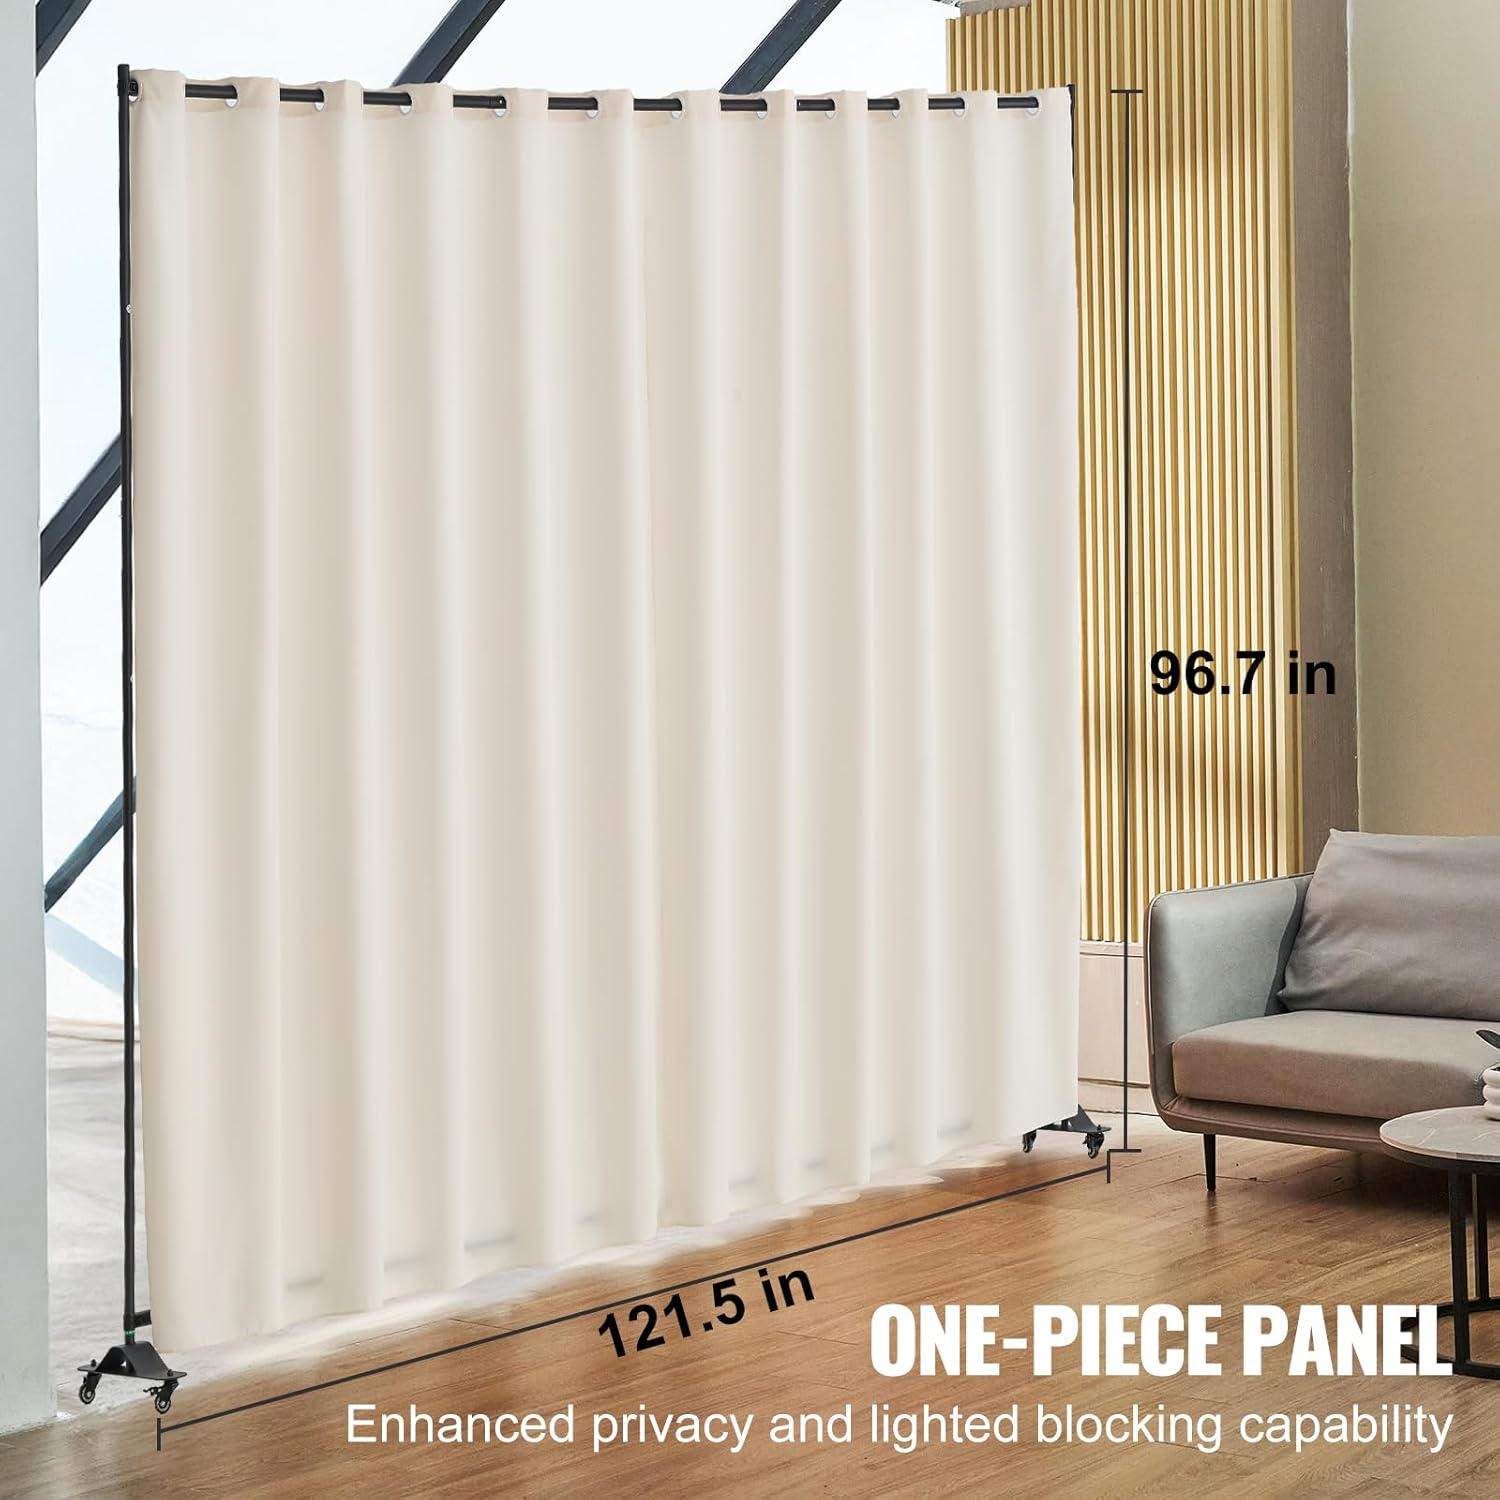
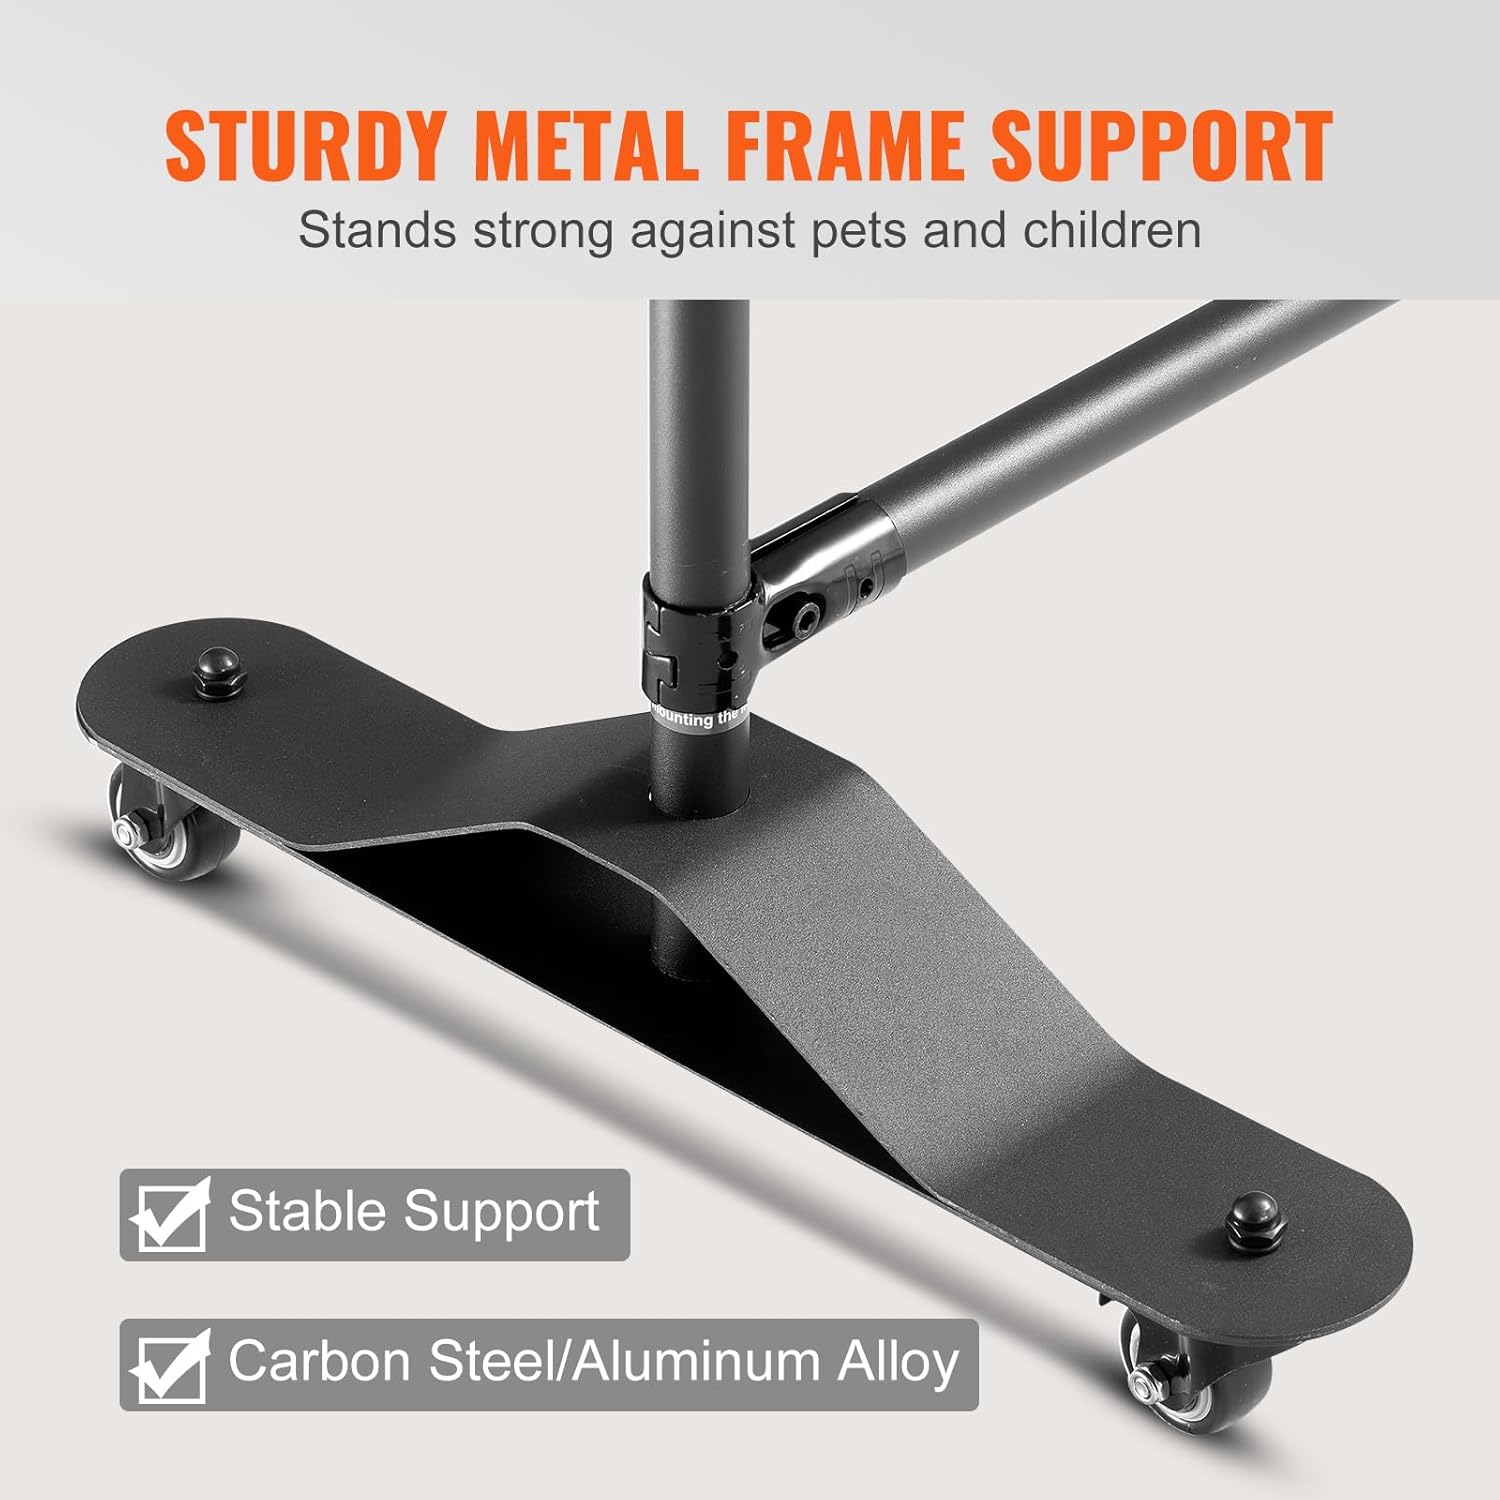
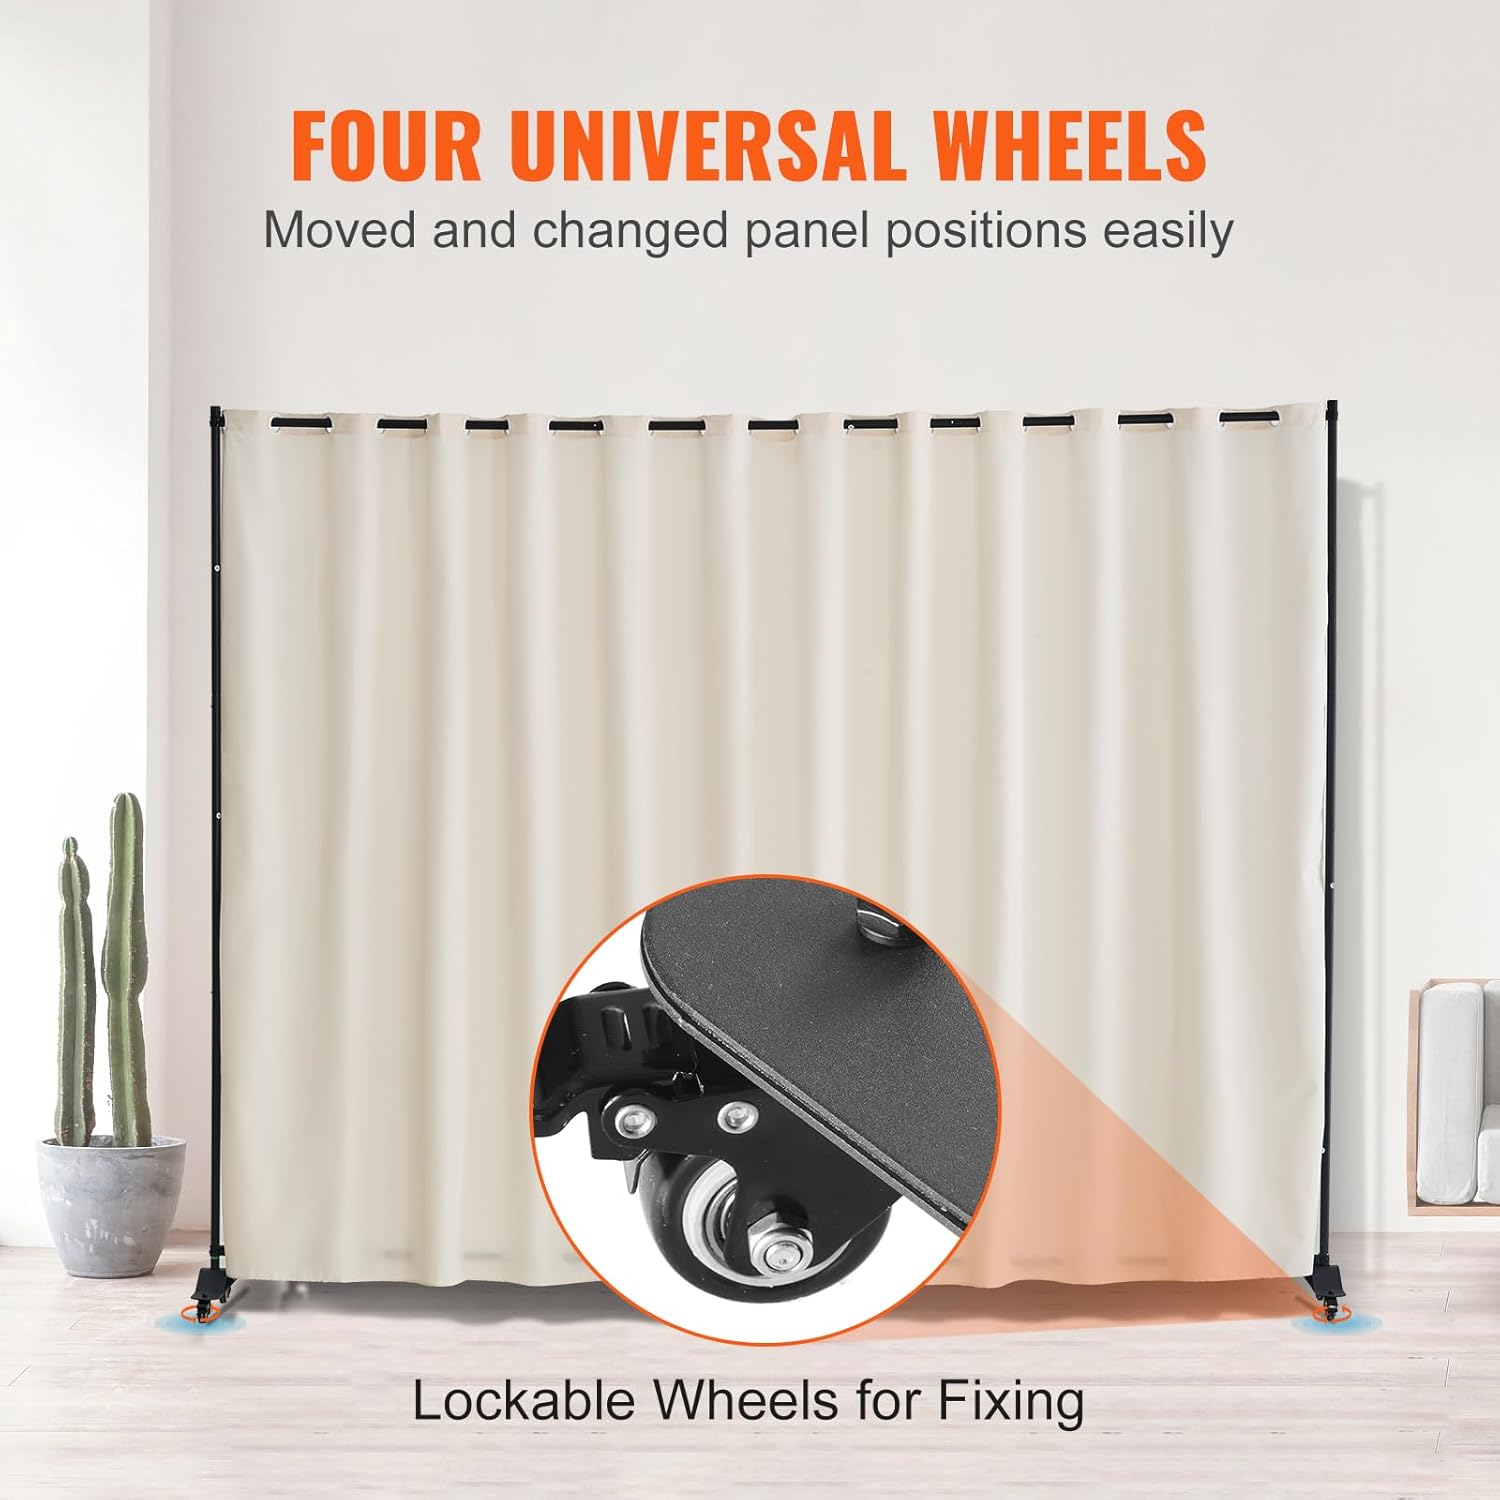
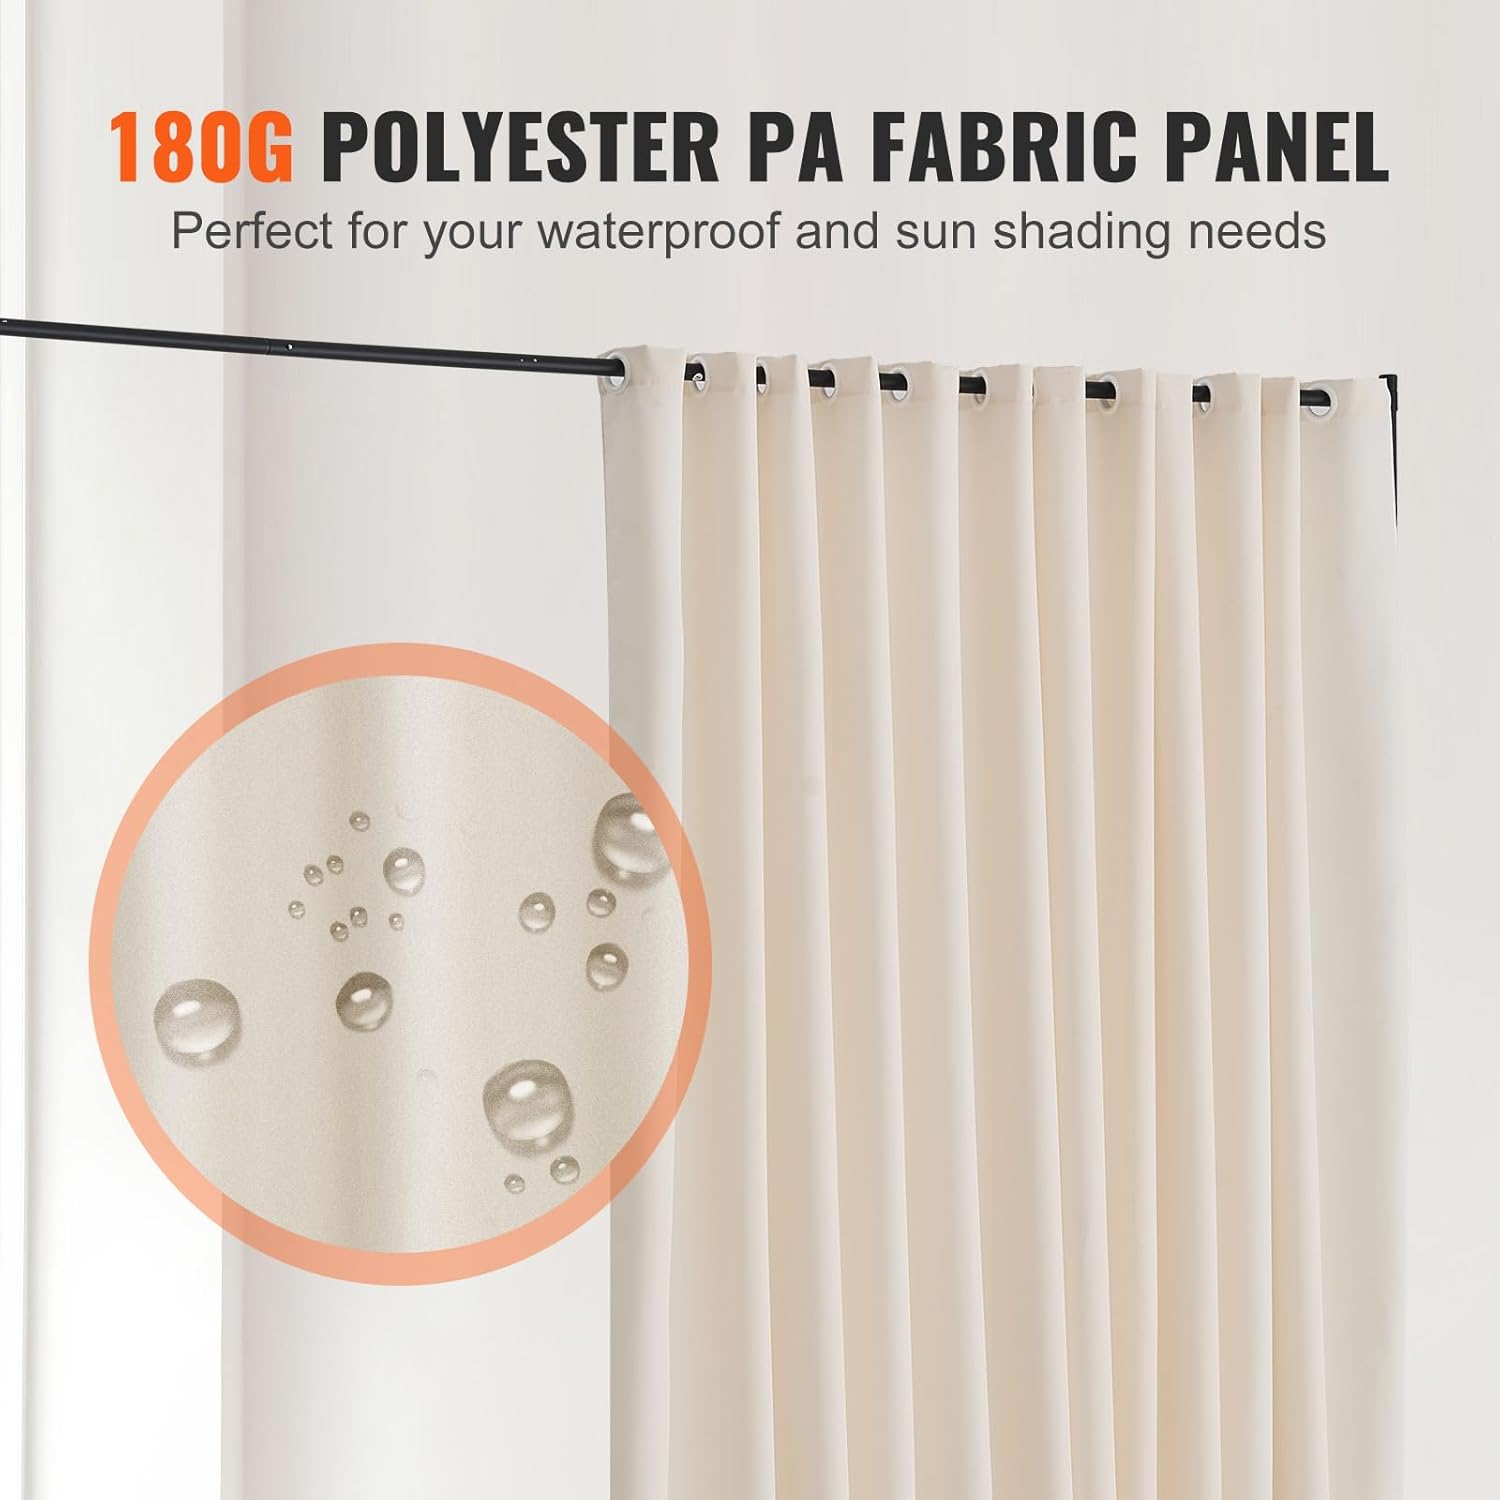
The VEVOR Room Divider is designed to create private spaces and enhance room aesthetics. It features a single panel curtain made of 180g polyester fabric with a PA coating, offering privacy, water resistance, and sun-blocking capabilities. The divider is supported by a carbon steel metal frame and equipped with universal wheels for easy mobility.
This portable room divider is suitable for various settings, including bedrooms, living rooms, offices, and hospitals, providing a flexible solution for space separation.
2. Safety Information
- Ensure all screws and connections are securely tightened during assembly to prevent instability.
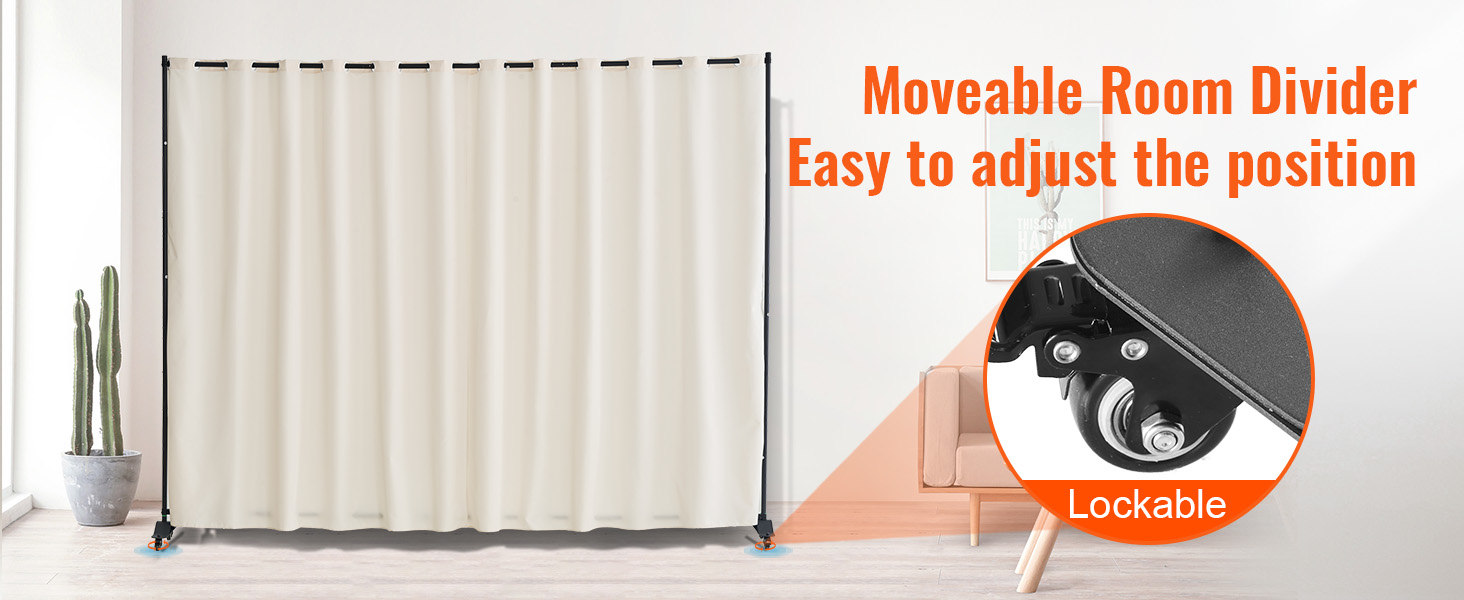
- Always lock the wheels when the room divider is in its desired position to prevent accidental movement.
- Do not allow children or pets to climb on or hang from the room divider, as this may cause it to tip over.
- Place the room divider on a flat, stable surface. Uneven surfaces can compromise stability.
- Avoid placing heavy objects on the frame or curtain.
- Keep the fabric away from open flames or high heat sources.
3. Package Contents
Verify that all components are present before beginning assembly. If any parts are missing or damaged, contact VEVOR customer support.
- 1x Room Divider Curtain Panel (Beige)
- Metal Frame Components (Vertical and Horizontal Bars)
- 4x Universal Wheels (2 lockable, 2 movable)
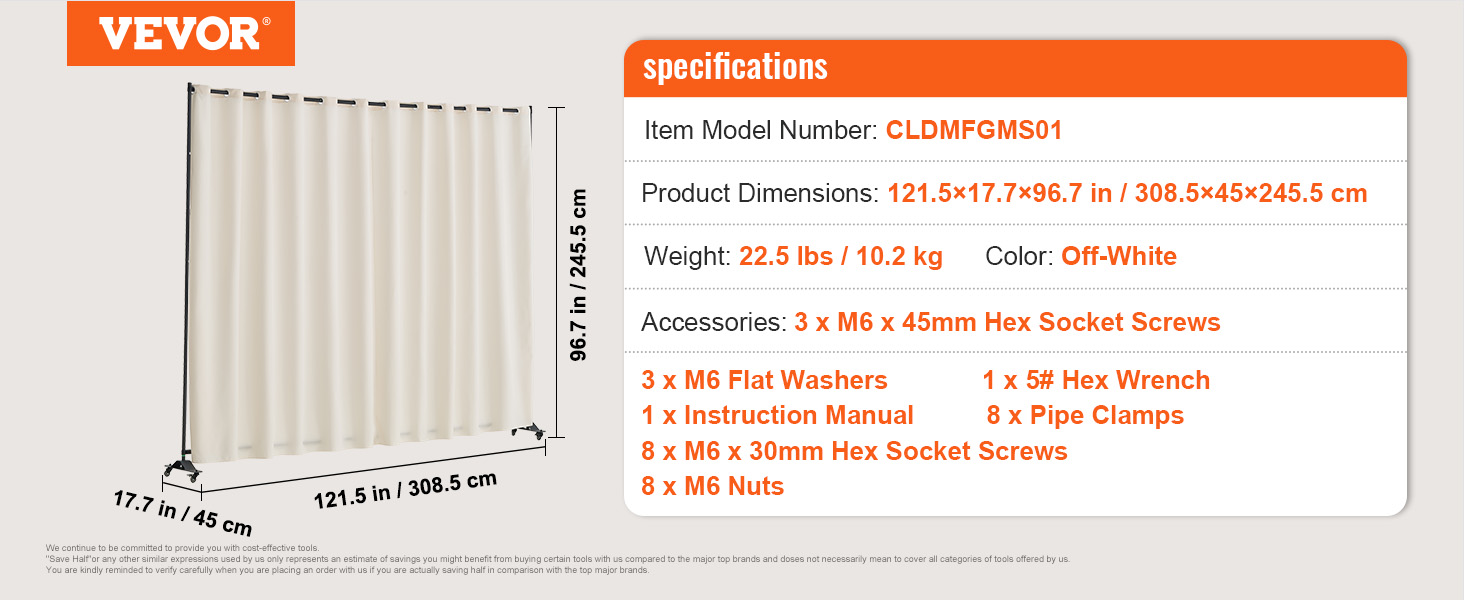
- 3x M6 x 45mm Hex Socket Screws
- 3x M6 Flat Washers
- 8x M6 x 30mm Hex Socket Screws
- 8x Pipe Clamps
- 8x M6 Nuts
- 1x 5# Hex Wrench
- 1x Instruction Manual
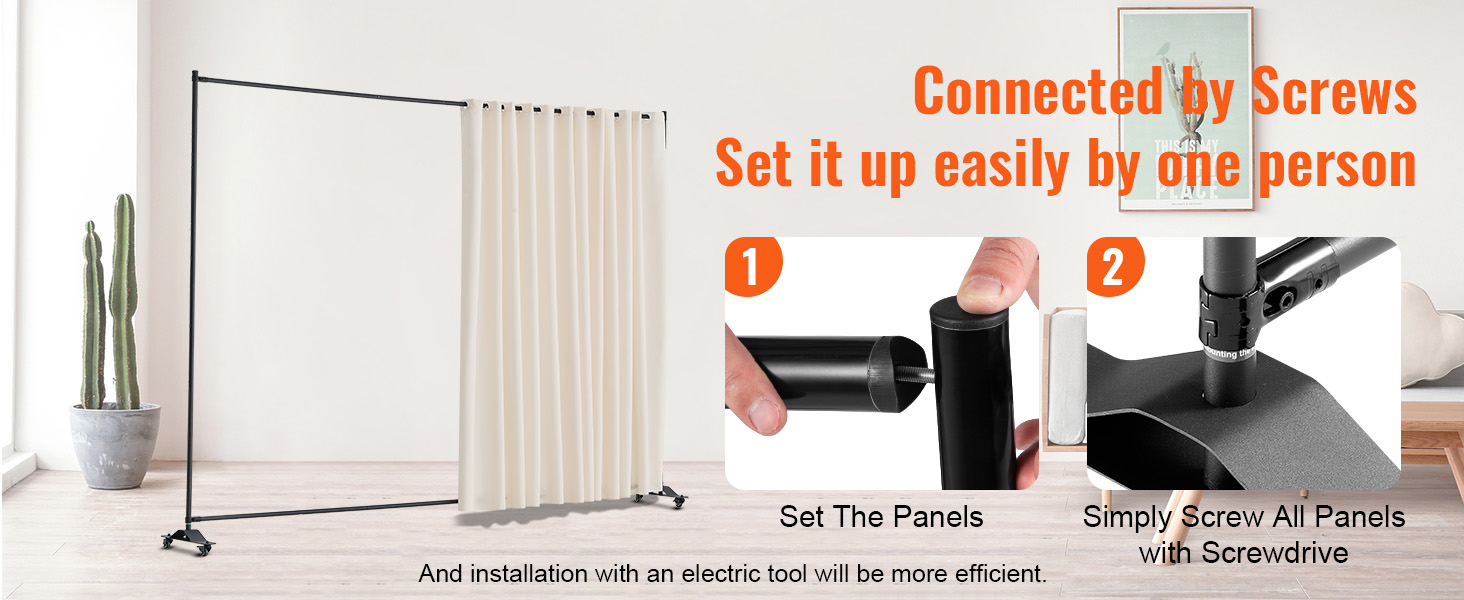
4. Assembly Instructions
Assembly can be completed by one person. For more efficient installation, electric tools are recommended. It is suggested to iron the fabric panel before assembly to ensure a smooth appearance.
- Unpack Components: Carefully remove all parts from the packaging and lay them out on a clean, flat surface.
- Assemble the Base: Attach the universal wheels to the base supports. Ensure the two lockable wheels are positioned as desired for future locking.
- Connect Vertical Bars: Insert the vertical metal bars into the base supports. Secure them using the appropriate M6 screws and washers.
- Attach Horizontal Bars: Connect the upper and lower horizontal bars between the vertical bars. These bars reinforce the structure and provide support for the curtain.
- Install Curtain Panel: Slide the curtain panel onto the upper horizontal bar. The curtain features grommets for easy installation.
- Secure Connections: Use the provided pipe clamps, M6 x 30mm hex socket screws, and M6 nuts to firmly secure all frame connections. Ensure all screws are tightened with the 5# hex wrench for maximum stability.
5. Operating Instructions
The VEVOR Room Divider is designed for flexible use and easy repositioning.
- Moving the Divider: To move the room divider, unlock the two lockable wheels. Gently push or pull the divider to its new location.
- Securing Position: Once the divider is in the desired position, engage the locks on the two lockable wheels to prevent unintended movement.
- Adjusting Privacy: The single panel curtain can be adjusted along the horizontal bar to slightly vary the width of the privacy screen, though it is primarily a fixed-width panel.
6. Maintenance
- Fabric Care: The 180g polyester fabric with PA coating is durable. For wrinkles, gently iron the fabric on a low setting before or after assembly. Spot clean with a damp cloth and mild detergent as needed. Do not bleach.
- Frame Cleaning: Wipe the metal frame with a soft, damp cloth to remove dust and dirt. Avoid abrasive cleaners that could damage the finish.
- Regular Inspection: Periodically check all screws and connections to ensure they remain tight. Retighten if necessary to maintain stability.
7. Troubleshooting
| Problem | Possible Cause | Solution |
|---|---|---|
| Divider is unstable or tips easily. | Loose connections; uneven surface; wheels not locked. | Ensure all screws are tightened. Place on a flat, level surface. Lock the universal wheels. |
| Fabric panel is wrinkled. | Wrinkling during transportation or storage. | Iron the fabric panel on a low setting before or after assembly. |
| Difficulty moving the divider. | Wheels are locked. | Unlock the two lockable universal wheels. |
| Curtain does not provide sufficient privacy/sun shading. | Expectations regarding fabric opacity. | The 180g polyester fabric with PA coating is designed to provide good privacy and sun shading. Ensure the panel is fully extended. |
8. Specifications
- Model Number: CLDMFGMS01
- Product Dimensions (W x D x H): 121.5 x 17.7 x 96.7 inches (308.5 x 45 x 245.5 cm)
- Item Weight: 22.5 lbs (10.2 kg)
- Color: Beige
- Material: 180g Polyester Fabric with PA Coating, Carbon Steel/Aluminum Alloy Frame
- Number of Panels: 1
- Special Feature: Flexible & Folding Design, Universal Wheels (2 lockable)
- UPC: 197988651574
9. Warranty and Support
For warranty information, technical support, or to inquire about replacement parts, please visit the official VEVOR website or contact VEVOR customer service directly.
You can find more information and contact details on the VEVOR Brand Store.