
1. Introduction
This manual provides comprehensive instructions for the assembly, installation, operation, and maintenance of your JUYEER Quick Release Desk Mount. Please read this manual thoroughly before use to ensure proper functionality and safety. Retain this manual for future reference.
2. Product Overview
The JUYEER Quick Release Desk Mount is designed to enhance your gaming experience by providing a stable and adjustable platform for various flight simulation joysticks. Crafted from durable all-metal materials, including an aluminum alloy main body and high-strength metal accessory parts, this mount offers a secure and ergonomic solution for your setup. Its quick-release mechanism allows for easy attachment and removal from desks, accommodating thicknesses up to 2.36 inches (6 cm).
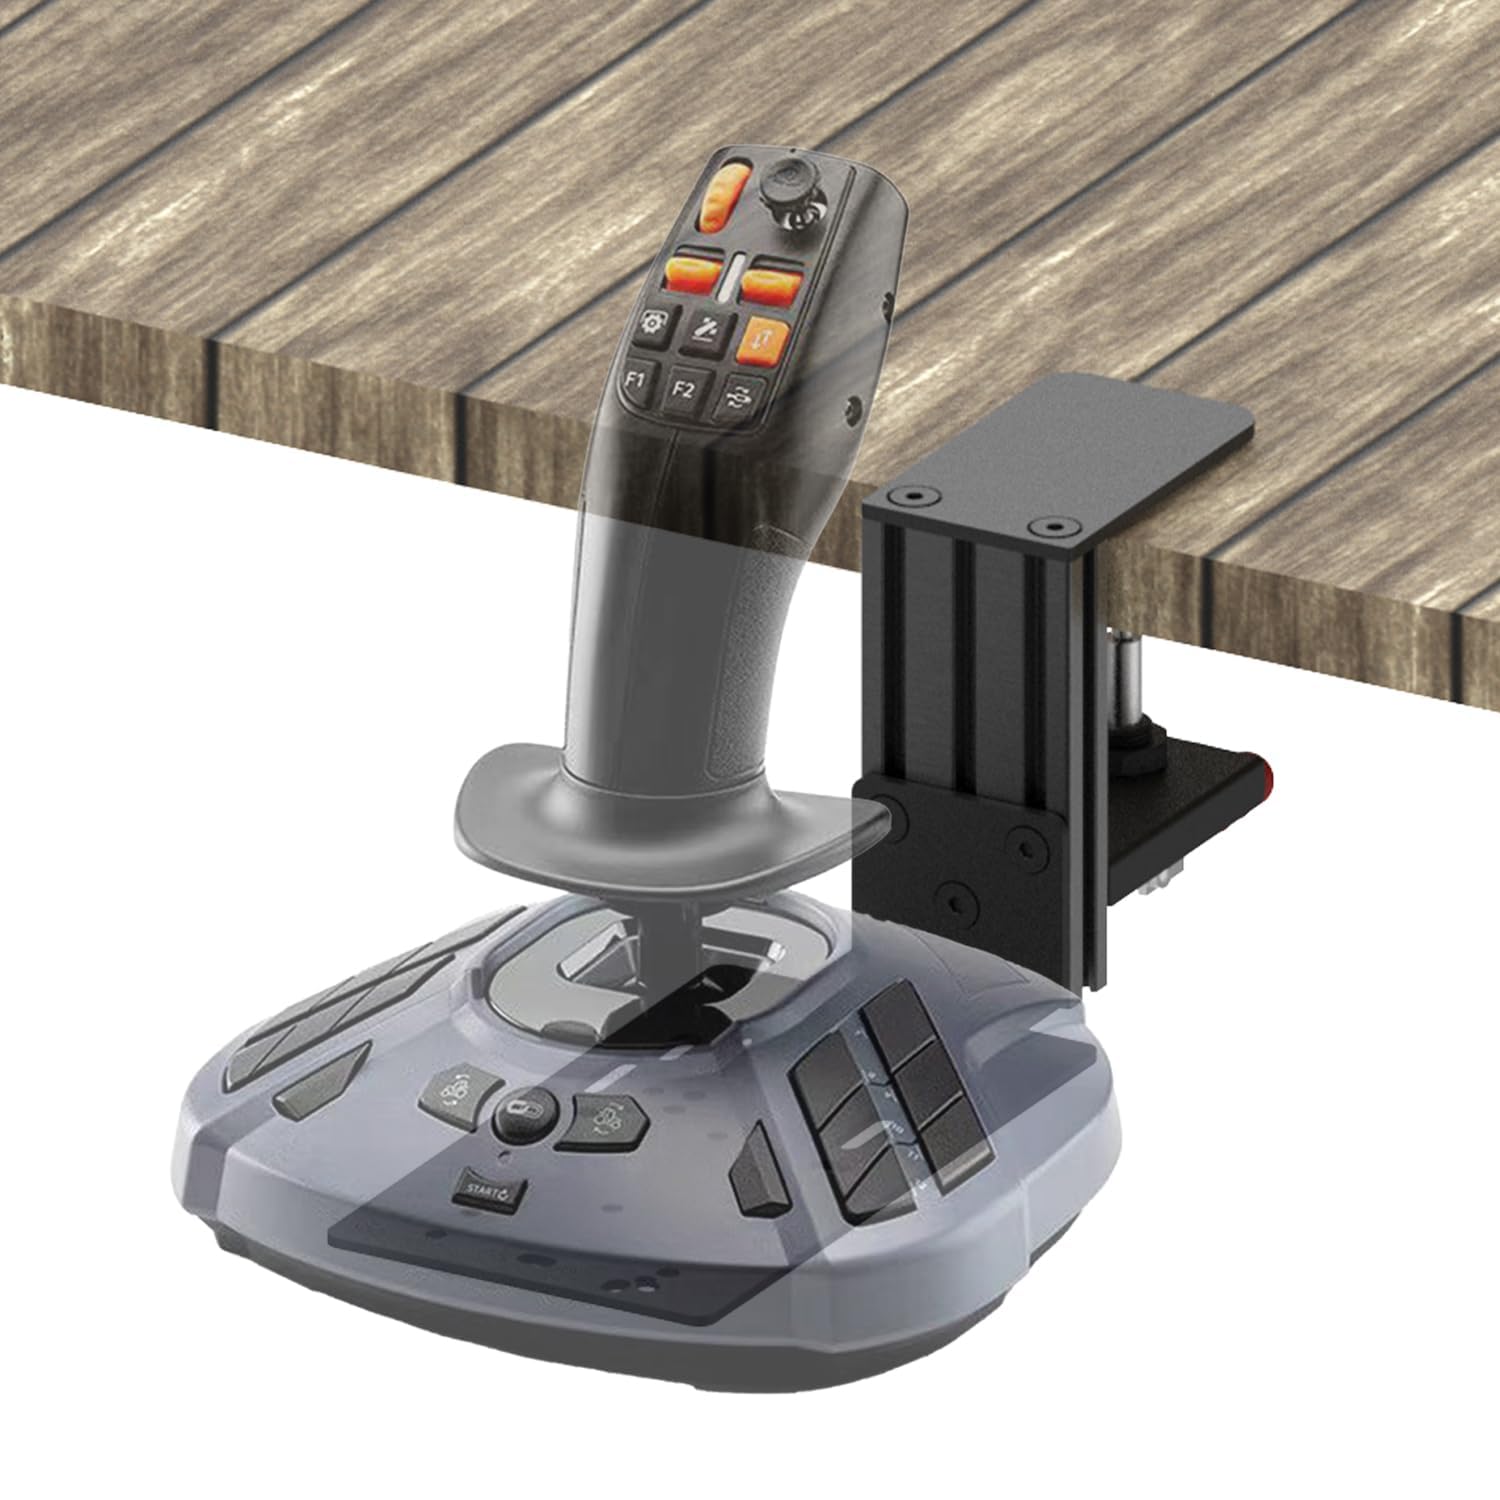
Image 2.1: The JUYEER Quick Release Desk Mount securely holding a joystick on a desk.
3. Package Contents
Please verify that all components are present before proceeding with assembly:
- Desk Mount Assembly (main body, clamping mechanism)
- Mounting Plate for Joystick
- All necessary screws for assembly and joystick attachment
- Screwdriver for assembly
- Silicone anti-slip protective stickers
4. Setup Instructions
4.1. Attaching the Mount to Your Desk
- Identify a suitable location on your desk for the mount. Ensure the desk surface is clean and free of obstructions.
- Apply the provided silicone anti-slip protective stickers to the clamping surfaces of the mount to prevent scratching your desktop and ensure a secure grip.
- Position the mount on your desk. The quick-release fixture should be accessible for tightening and loosening.
- Adjust the clamping mechanism to fit your desk thickness. The mount is compatible with desks ranging from 0 to 2.36 inches (0 to 6 cm) in thickness.
- Engage the quick-release lever to firmly secure the mount to your desk. Ensure it is tight and stable before proceeding.

Image 4.1: Illustration of the quick-release fixture and the maximum desk thickness supported by the mount (2.36 inches).
4.2. Attaching Your Joystick to the Mount
- Place your joystick onto the mounting plate. The plate features multiple pre-drilled holes to accommodate a wide range of joystick models.
- Align the screw holes on your joystick with the corresponding holes on the mounting plate.
- Using the provided screws and screwdriver, securely fasten your joystick to the mounting plate. Do not overtighten.
- Adjust the height of the mounting plate on the vertical aluminum profile to achieve your desired ergonomic position. Secure the plate at the chosen height using the appropriate fasteners.
Video 4.2: A demonstration of attaching a joystick to the desk mount and utilizing its quick-release clamping mechanism for easy setup and removal.
5. Operating Instructions
Once the joystick is securely mounted and the desk clamp is tightened, the mount provides a stable platform for use. The ergonomic design allows for comfortable operation, reducing strain during extended gaming sessions. When not in use, the quick-release mechanism enables swift removal of the mount from your desk, freeing up valuable desktop space.
6. Compatibility
This desk mount is designed for wide compatibility with various popular joysticks. Compatible devices include:
- WINWING URSA MINOR Space/Airline Joystick
- Thrustmaster SimTask FarmStick
- Thrustmaster T.Flight HOTAS ONE
- Thrustmaster T.16000M Joystick
- Logitech G Extreme 3D Pro Joystick
- Turtle Beach VelocityOne Flightstick
- PXN 2113 PRO Joystick

Image 6.1: The desk mount demonstrating compatibility with multiple joystick models.
7. Maintenance
To ensure the longevity and optimal performance of your JUYEER Desk Mount, follow these simple maintenance guidelines:
- Cleaning: Wipe the mount with a soft, dry cloth to remove dust. For stubborn dirt, a slightly damp cloth can be used, followed by immediate drying. Avoid abrasive cleaners or solvents.
- Check Connections: Periodically inspect all screws and the quick-release mechanism to ensure they remain tight. Retighten if necessary.
- Storage: If storing the mount for an extended period, ensure it is clean and dry. Store in a cool, dry place away from direct sunlight.
8. Troubleshooting
If you encounter any issues with your desk mount, please refer to the following common solutions:
- Mount feels unstable: Ensure the quick-release lever is fully engaged and tightened. Check that the desk thickness is within the supported range (0-2.36 inches). Verify that the silicone anti-slip pads are correctly positioned.
- Joystick wobbles on the plate: Confirm that all screws attaching the joystick to the mounting plate are securely tightened.
- Difficulty attaching/removing from desk: Ensure the quick-release lever is fully disengaged before attempting to remove or attach the mount. Do not force the mechanism.
9. Specifications
| Feature | Detail |
|---|---|
| Brand | JUYEER |
| Model Number | B0DTF86GP2 |
| Compatible Devices | WINWING URSA MINOR Space/Airline Joystick, Thrustmaster SimTask FarmStick, Thrustmaster T.Flight HOTAS ONE, Thrustmaster T.16000M Joystick, Logitech G Extreme 3D Pro Joystick, Turtle Beach VelocityOne Flightstick, PXN 2113 PRO Joystick |
| Controller Type | Joystick |
| Connectivity Technology | USB (for compatible joysticks) |
| Additional Features | Ergonomic, Quick-Release |
| Item Weight | 1.24 Kilograms |
| Maximum Desk Thickness | 2.36 inches (6 cm) |
| Material | Aluminum Alloy, High-Strength Metal |
10. Warranty and Support
Specific warranty details for the JUYEER Quick Release Desk Mount are not provided within this document. For warranty information, technical support, or customer service inquiries, please refer to the product packaging or contact the manufacturer directly through their official website or the retailer where the product was purchased.