1. Safety Instructions
Please read all safety instructions carefully before operating the machine to prevent injury or damage. Keep this manual for future reference.
- Ensure the machine is placed on a stable, level surface.
- Do not immerse the machine's electrical components in water or other liquids.
- Keep hands clear of moving parts during operation.
- Unplug the machine before cleaning or performing any maintenance.
- Use only food-grade ingredients in the tanks.
- Ensure proper ventilation around the machine to prevent overheating.
- Children should be supervised to ensure they do not play with the appliance.
2. Product Overview
The Lioncho Commercial Slushy Machine (Model MJ-7031750) is designed for efficient preparation of frozen beverages. It features a durable stainless steel body and food-grade PC liners for reliability and hygiene.
Key Features:
- Dual Tanks: Two 12L (3.2 Gal) tanks, totaling 24L (6.4 Gal) capacity, allowing for two different flavors simultaneously.
- Powerful Compressor: Ensures fast cooling and efficient slush production within 30-45 minutes, with low noise operation.
- 360° Rotating Blending Blade: Freezes liquids evenly for a smooth texture.
- User-Friendly Control Panel: Simple switches for power, freezing, stirring, and individual tank control.
- Auto Cleaning Mode: Simplifies daily maintenance.
- Built-in LED Lights: Illuminates the tanks, enhancing visual appeal.
- Detachable Drip Tray: Easy to remove and clean.

Image: The Lioncho Commercial Slushy Machine, showcasing its 24L capacity across two tanks, capable of producing over 100 cups of frozen beverages.

Image: Internal diagram illustrating the powerful air-cooled compressor, highlighting its low noise and high power features for quick slush preparation.

Image: Detailed view of the control panel, showing the main power switch, freeze/refrigeration switches, light switch, and individual gear motor switches for each bowl.
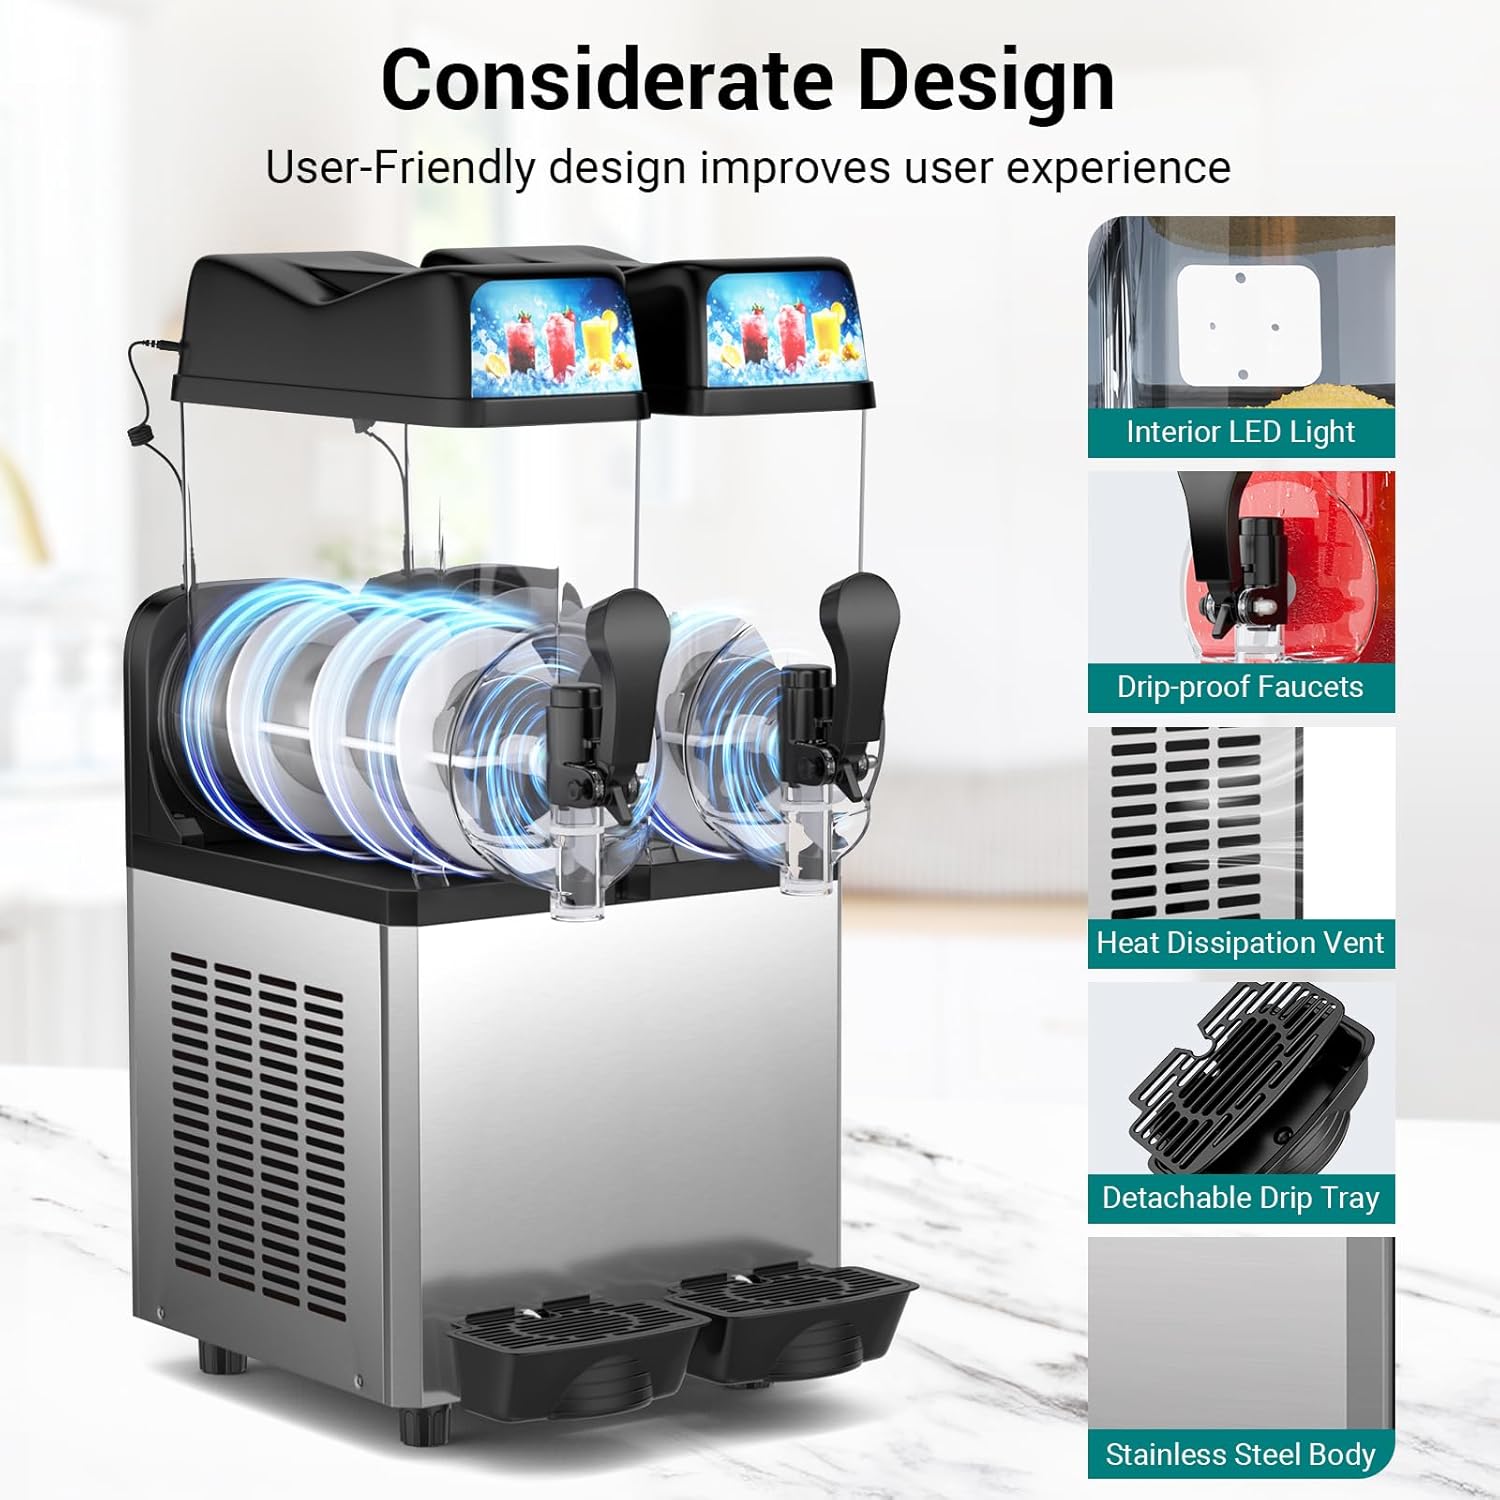
Image: Overview of the machine's thoughtful design, featuring interior LED lights, drip-proof faucets, heat dissipation vents, a detachable drip tray, and a stainless steel body.
3. Setup
3.1 Unpacking and Placement
- Carefully remove all packaging materials.
- Place the machine on a sturdy, flat, and dry surface. Ensure there is adequate space around the machine for ventilation (at least 15 cm on all sides).
- Avoid placing the machine near heat sources or in direct sunlight.
3.2 Initial Cleaning
Before first use, clean all parts that will come into contact with beverages. Refer to the "Maintenance and Cleaning" section for detailed cleaning instructions.
3.3 Power Connection
Connect the power cord to a grounded electrical outlet with the correct voltage (AC120V/60Hz). Ensure the main power switch is in the OFF position before plugging in.
4. Operating Instructions
This machine offers multiple preset modes for various frozen drinks. The sugar content of the liquid material is crucial for proper slush consistency.
4.1 Preparing Slush
- Prepare Liquid: Ensure your liquid mixture (e.g., juice, syrup, water) has a sugar content between 13-20%. This is vital for proper freezing. For alcoholic beverages, the total alcohol content + sugar ratio should be ≥13%.
- Pour Liquid: Open the lid of the desired tank and carefully pour in the prepared liquid. Ensure the liquid level is above the minimum water level line.
- Power On: Turn on the main power switch (ON/OFF).
- Activate Stirring: Press the "STIR" button for the respective tank(s) to ensure even mixing.
- Activate Freezing: Press the "FREEZE" or "SINGLE FREEZE" button for the respective tank(s) to begin the freezing process.
- Monitor: The machine will typically produce slush in 30-45 minutes.
- Dispense: Once the desired consistency is reached, use the dispenser handle to serve.

Image: Visual guide for one-button smoothie making, showing pouring liquid, selecting a tank, and dispensing the finished slush.
4.2 Preset Modes
The machine features 5 unique presets for various drinks, including Wine, Frozen Juice, Frappé, Slush, and Milkshake. Adjust the temperature and duration as needed for optimal results.

Image: Visual representation of the five unique preset drink types the machine can create.

Image: Guide to optimal temperature settings for different beverages, including smoothies (5°C/41°F), slushies (-2°C/28.4°F), and margaritas (-8.5°C/16.7°F).
4.3 Operation Introduction Video
Video: An operational introduction video demonstrating the basic use of the slushy machine, including filling the tanks and starting the freezing process. (Duration: 3:12)
5. Maintenance and Cleaning
Regular cleaning ensures optimal performance and hygiene. The machine features a self-cleaning mode and detachable parts for thorough cleaning.
5.1 Auto Cleaning Mode
- Empty the tanks of any remaining beverage.
- Fill the tanks with clean water.
- Activate the self-cleaning mode (refer to the control panel for specific button).
- Allow the machine to run for a few minutes.
- Drain the water from the tanks.

Image: Illustration of the one-button automatic cleaning process, showing 360° rotation for comprehensive cleaning.
5.2 Deep Cleaning and Disassembly/Assembly
For thorough cleaning, certain parts can be removed. Always unplug the machine before disassembling.
- Remove the water tank, rubber rings, and drip tray.
- Rinse these parts with water or place them in a dishwasher if compatible.
- For detailed visual instructions on disassembly and assembly during cleaning, please refer to the "Operation introduction video" from timestamp 02:22.

Image: Demonstrates the ease of cleaning with detachable parts, such as the drip tray, being rinsed under a faucet.
6. Troubleshooting
If you encounter issues with your slushy machine, refer to the following common problems and solutions.
| Problem | Possible Cause | Solution |
|---|---|---|
| Slush is too watery | Insufficient sugar content in the liquid. | Take out some liquid, add more syrup, or adjust the sugar content to be between 13-20%. Refer to the "Operation introduction video" from timestamp 01:40 for visual guidance. |
| Slush has too much ice/is too thick | Excessive sugar content or too little water. | Take out some liquid, add water, or adjust the sugar content to be between 13-20%. Refer to the "Operation introduction video" from timestamp 01:40 for visual guidance. |
| Machine not turning on | Not plugged in, power switch off, or power outage. | Check power connection, ensure main switch is ON, and verify power supply. |
| No stirring action | Stir button not activated for the tank. | Press the "STIR" button for the affected tank. |
For further assistance, please contact customer support.
7. Specifications
| Specification | Value |
|---|---|
| Brand | Lioncho |
| Model Number | MJ-7031750 |
| ASIN | B0DTF68KX8 |
| Product Size | 20.1 x 17 x 32.3 inches |
| Capacity | 2 x 12L (3.2 GAL) = 24L (6.4 GAL) |
| Product Weight | 99.2 lbs |
| Power | 700 W |
| Voltage | AC120V/60Hz |
| Cooling System | Air Cooling |

Image: Visual representation of the product dimensions and a summary of its key specifications.
8. Warranty and Support
For warranty information or technical support, please contact Lioncho customer service. Keep your purchase receipt and model number handy for faster service.