
Introduction
This manual provides detailed instructions for the installation, operation, and maintenance of your MTX Terminator TN250.1 Mono Block Class D Amplifier and MTX Audio 3512-02 35-Series 12-inch Subwoofer bundle. Please read this manual thoroughly before attempting installation or operation to ensure proper use and optimal performance of your audio system. Retain this manual for future reference.
Product Components
MTX Terminator TN250.1 Mono Block Class D Amplifier
The MTX Terminator TN250.1 amplifier is a compact and efficient Class D mono block amplifier designed to deliver 250W RMS at 2 Ohms. Its design minimizes heat production, making it suitable for installation in various vehicle spaces. The amplifier features adjustable gain, crossover controls, an integrated bass boost, a subsonic filter, and a remote bass knob for convenient audio tuning.

Image: Top view of the MTX Terminator TN250.1 amplifier, showcasing its sleek black finish and branding.
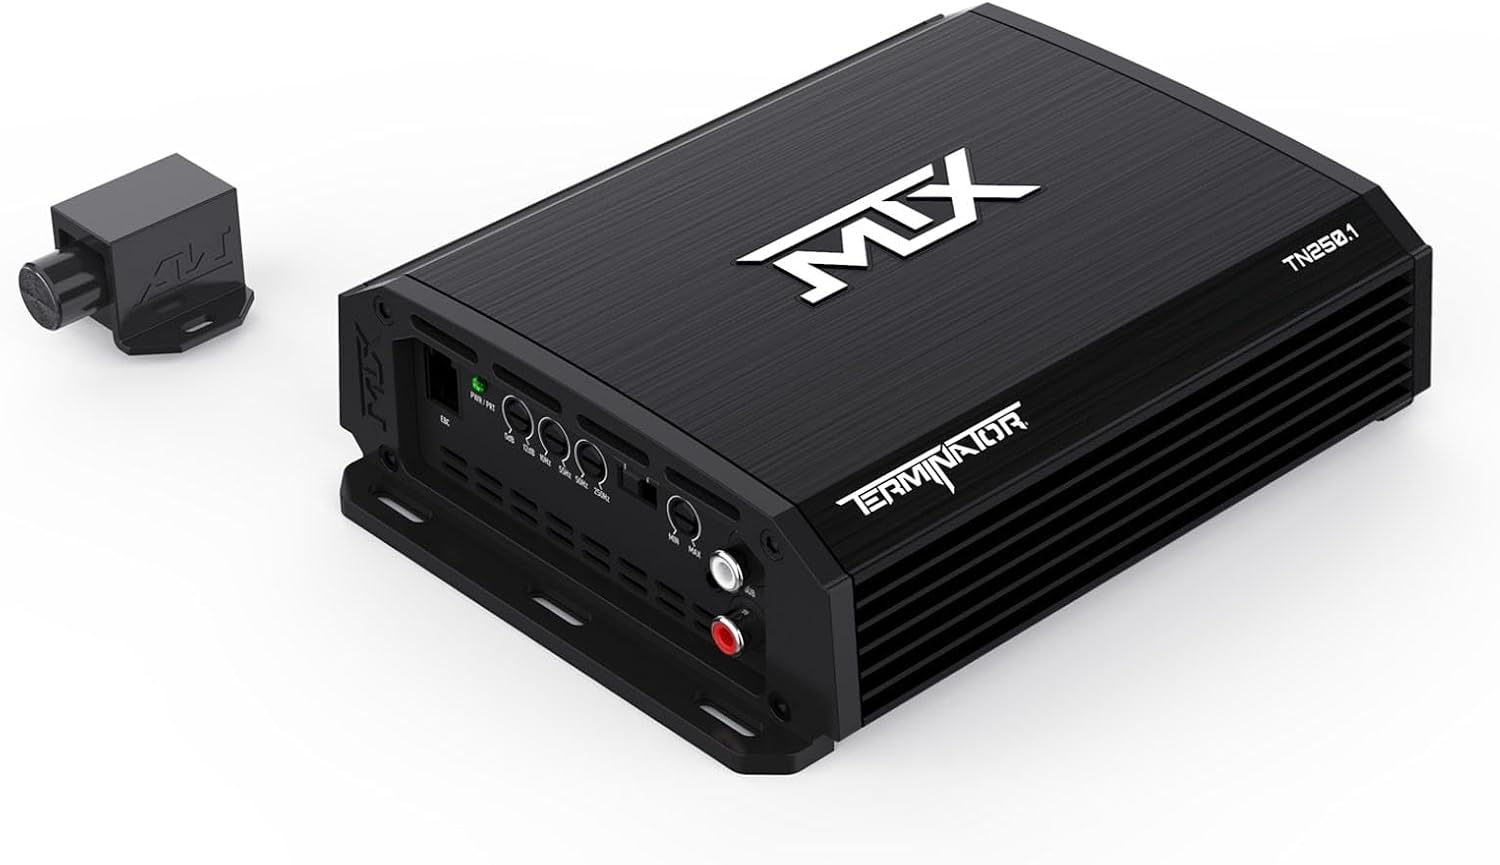
Image: Angled view of the MTX Terminator TN250.1 amplifier, highlighting its compact form factor and the included remote bass control knob.

Image: Rear panel of the MTX Terminator TN250.1 amplifier, displaying all adjustable controls and input/output connections.
MTX Audio 3512-02 35-Series 12-inch Subwoofer
The MTX 3512-02 subwoofer features a 12-inch single voice coil design, rated for 250W RMS with a 2 Ohm impedance. It incorporates an Inverted Apex surround for increased surface area, which enhances air movement and improves Sound Pressure Level (SPL). Spider Plateau Venting technology directs cool air to the voice coil, contributing to performance longevity. This subwoofer is designed for sound quality and loudness while requiring minimal mounting space.

Image: Angled view of the MTX Audio 3512-02 12-inch subwoofer, highlighting its cone and Inverted Apex surround.

Image: Top view of the MTX Audio 3512-02 12-inch subwoofer, showcasing its design and the MTX Audio logo on the dust cap.

Image: Close-up of the MTX Audio 3512-02 subwoofer's magnet structure, detailing its model number, impedance, and RMS wattage.
Setup and Installation
Proper installation is crucial for optimal performance and safety. If you are unsure about any part of the installation process, consult a professional car audio installer.
Safety Precautions
- Disconnect the vehicle's negative battery terminal before starting any electrical work.
- Ensure all wiring is properly insulated to prevent short circuits.
- Mount components securely to prevent movement during vehicle operation.
- Avoid running power cables near sensitive audio cables to prevent noise interference.
Amplifier Installation (TN250.1)
- Mounting Location: Choose a dry, well-ventilated location away from direct sunlight and heat sources. Ensure sufficient airflow around the amplifier.
- Power Wiring: Connect a fused power cable directly from the positive terminal of the vehicle's battery to the amplifier's +12V terminal. The fuse should be located within 18 inches of the battery.
- Ground Wiring: Connect a ground cable of the same gauge as the power cable from the amplifier's GND terminal to a clean, unpainted metal surface on the vehicle chassis. Ensure a solid electrical connection.
- Remote Turn-On: Connect a remote turn-on wire from your head unit's remote output to the amplifier's REM terminal. This will turn the amplifier on and off with your head unit.
- RCA Input: Connect RCA cables from your head unit's subwoofer or full-range output to the amplifier's RCA input jacks.
- Speaker Output: Connect the subwoofer's speaker wires to the amplifier's speaker output terminals. Ensure correct polarity (+ to + and - to -).
Subwoofer Installation (3512-02)
- Enclosure: The 3512-02 subwoofer is designed for use in a sealed or ported enclosure. Refer to the subwoofer's specifications for recommended enclosure volumes.
- Mounting: Securely mount the subwoofer into the chosen enclosure using appropriate fasteners. Ensure an airtight seal between the subwoofer frame and the enclosure.
- Wiring: Connect the subwoofer's terminals to the amplifier's speaker output terminals. The 3512-02 has a 2 Ohm impedance, which is compatible with the TN250.1 amplifier's 2 Ohm stable output.
Operating Instructions
Once installed, adjust the amplifier settings to optimize sound performance for your vehicle and listening preferences.
Amplifier Controls (TN250.1)
- Gain Control (MIN-MAX): This control matches the amplifier's input sensitivity to the output voltage of your head unit. Start with the gain at minimum, then slowly increase it until you hear distortion, then back off slightly. Do not use the gain control as a volume knob.
- Low Pass Filter (LPF) (50Hz-250Hz): This filter allows frequencies below the set point to pass through to the subwoofer. Adjust it to blend the subwoofer's output seamlessly with your main speakers. A common starting point is 80Hz.
- Subsonic Filter (10Hz-55Hz): This filter removes extremely low frequencies that are inaudible and can cause damage to the subwoofer. Set it slightly below your enclosure's tuning frequency (for ported enclosures) or around 20-25Hz (for sealed enclosures).
- Bass Boost (0dB-12dB): This control provides an adjustable boost at a specific low frequency. Use sparingly to avoid distortion and potential damage to the subwoofer.
- Phase (0°/180°): This switch adjusts the phase of the subwoofer's output relative to the main speakers. Experiment with both settings to find the one that provides the most impactful and cohesive bass response.
- Remote Bass Knob (EBC): Connect the included remote bass knob to the EBC port. This allows for convenient, real-time adjustment of the subwoofer's output level from the driver's seat.
Maintenance
Regular maintenance ensures the longevity and optimal performance of your MTX audio components.
- Cleaning: Periodically wipe down the amplifier and subwoofer with a soft, dry cloth. Avoid using harsh chemicals or abrasive cleaners.
- Inspection: Regularly check all wiring connections for tightness and corrosion. Ensure no wires are frayed or exposed.
- Ventilation: Ensure the amplifier's cooling fins are free from dust and obstructions to maintain proper heat dissipation.
- Environment: Protect components from extreme temperatures, moisture, and direct sunlight.
Troubleshooting
If you experience issues with your MTX audio system, refer to the following common problems and solutions.
| Problem | Possible Cause | Solution |
|---|---|---|
| No Power / Amplifier Not Turning On |
|
|
| No Sound from Subwoofer |
|
|
| Distorted Sound |
|
|
| Amplifier Overheating (Protection Mode) |
|
|
If these steps do not resolve the issue, contact MTX customer support or a qualified service technician.
Specifications
MTX Terminator TN250.1 Mono Block Class D Amplifier
- 4Ω RMS Power: 150W x 1
- 2Ω RMS Power: 250W x 1
- THD: <0.25%
- Signal-to-Noise Ratio: >95dB
- Frequency Response: 20Hz-250Hz
- Crossover Range: 50Hz-250Hz (Low Pass Filter)
- Subsonic Filter: 10Hz-55Hz
- Bass Boost: 0-12dB
- Maximum Input: 6V
- Protection: Short, Thermal, Over/Under Voltage
- Item Weight: 5 pounds
- Package Dimensions: 6.5 x 5.5 x 2 inches
MTX Audio 3512-02 35-Series 12-inch Subwoofer
- Recommended Amp Power: 125-250 RMS
- Impedance: 2Ω (Single Voice Coil)
- Frequency Response: 26Hz-130Hz
- Sensitivity: 86dB
- Magnet Weight: 56 oz
- Mounting Depth: 5.313 inches
- Cut Out Diameter: 11.125 inches
Warranty and Support
This MTX product bundle is covered by a 2-Year Manufacturer Warranty. This warranty covers defects in materials and workmanship under normal use. Please retain your proof of purchase for warranty claims.
For technical support, warranty inquiries, or further assistance, please visit the official MTX website or contact their customer service department. You can also visit the MTX Store on Amazon for additional product information and resources.


