Introduction
Thank you for choosing the CLEANmaxx 2-in-1 Cordless Handheld Vacuum Cleaner. This versatile device combines a powerful vacuum and a blower function, making it ideal for cleaning various surfaces, including car interiors, keyboards, and upholstery. It also features integrated emergency tools: a seatbelt cutter and a window breaker. Please read this manual carefully before first use to ensure safe and optimal operation.
Safety Information
- Keep the device away from water and moisture.
- Do not use to vacuum liquids, hot ashes, or sharp objects.
- Ensure the filter is correctly installed before operation.
- Charge the device using the provided USB-C cable and a compatible power source.
- Keep out of reach of children.
- The emergency tools are for emergency use only. Handle with care.
Package Contents
Please check that all items are present in the package:
- 1x Handheld Vacuum Cleaner Unit
- 1x Flat Nozzle
- 1x Flat Nozzle Brush Attachment
- 1x Large Blowing Nozzle
- 1x Vacuum Nozzle
- 1x USB-C Charging Cable

Image: All components included in the CLEANmaxx 2-in-1 Cordless Handheld Vacuum Cleaner package.
Product Overview
The CLEANmaxx 2-in-1 Handheld Vacuum Cleaner is designed for portability and ease of use. It features a main unit with a handle, a dust collection bin, and various attachments for different cleaning tasks.
Main Unit Features:
- Power Button: Located on the handle.
- USB-C Charging Port: For convenient charging.
- Dust Collection Bin: Transparent and removable for easy emptying.
- HEPA Filter: Washable and integrated within the dust bin.
- Emergency Window Breaker: Located at the bottom of the handle.
- Emergency Seatbelt Cutter: Integrated into the top rear of the unit.
Setup
1. Charging the Device
- Locate the USB-C charging port on the handle of the vacuum cleaner.
- Connect the provided USB-C cable to the charging port.
- Plug the other end of the USB-C cable into a compatible USB power adapter (not included) or a USB port.
- The charging indicator light will illuminate during charging and turn off or change color when fully charged. A full charge provides approximately 10 minutes of operating time.
2. Attaching Accessories
The device supports both vacuuming and blowing functions, each requiring specific attachments.
For Vacuuming:
- Flat Nozzle: Attach the flat nozzle directly to the suction opening of the dust collection bin. This is suitable for narrow gaps and corners.
- Flat Nozzle Brush Attachment: Slide the brush attachment over the flat nozzle for cleaning delicate surfaces or dislodging stubborn dirt.
- Vacuum Nozzle: Attach the dedicated vacuum nozzle for general suction tasks.
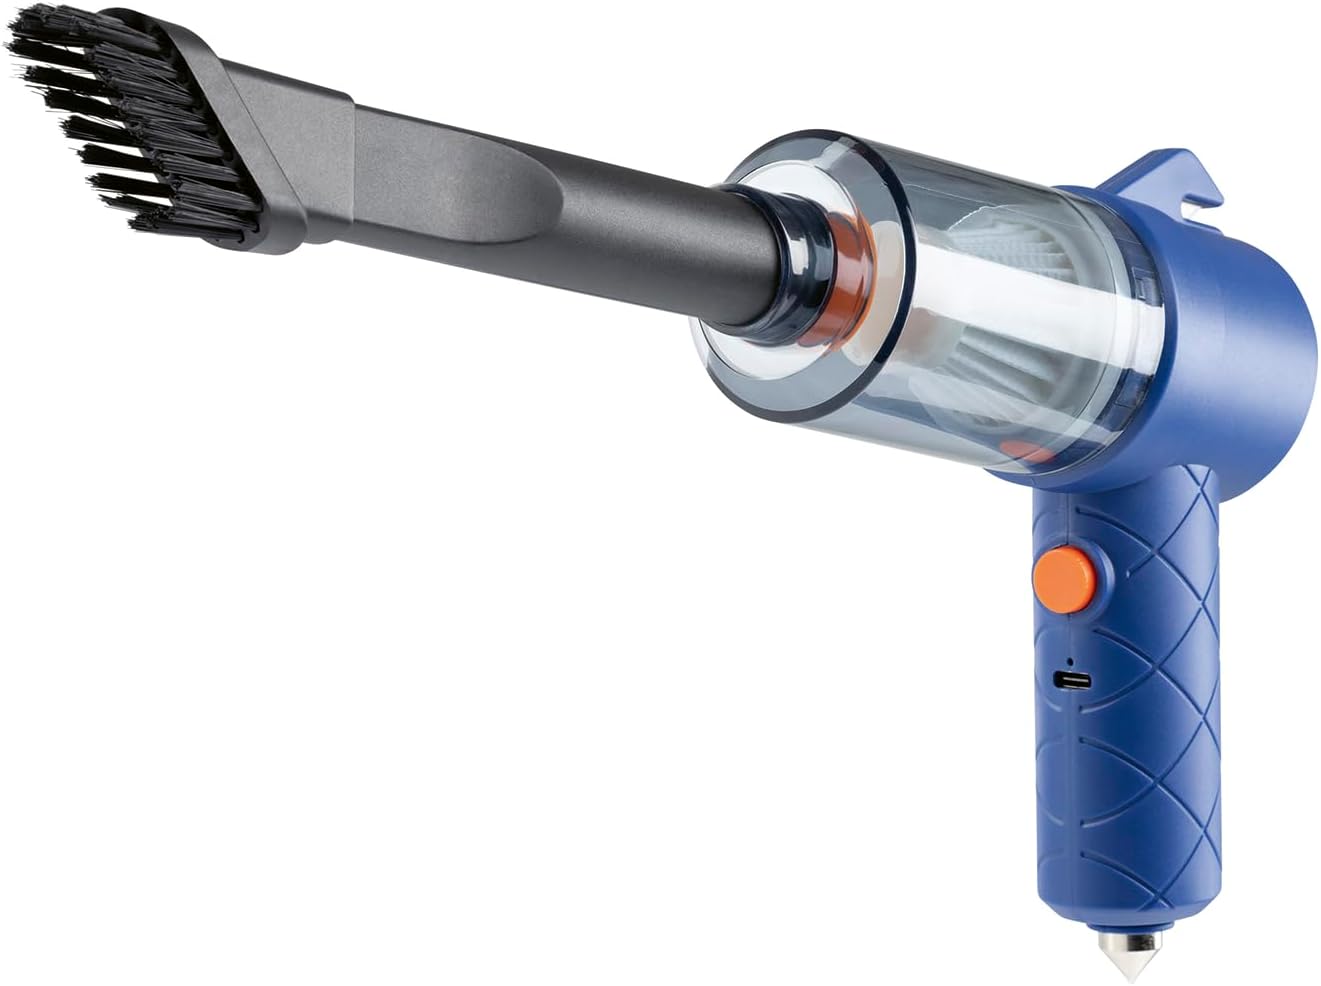
Image: Handheld vacuum with the brush attachment for vacuuming.
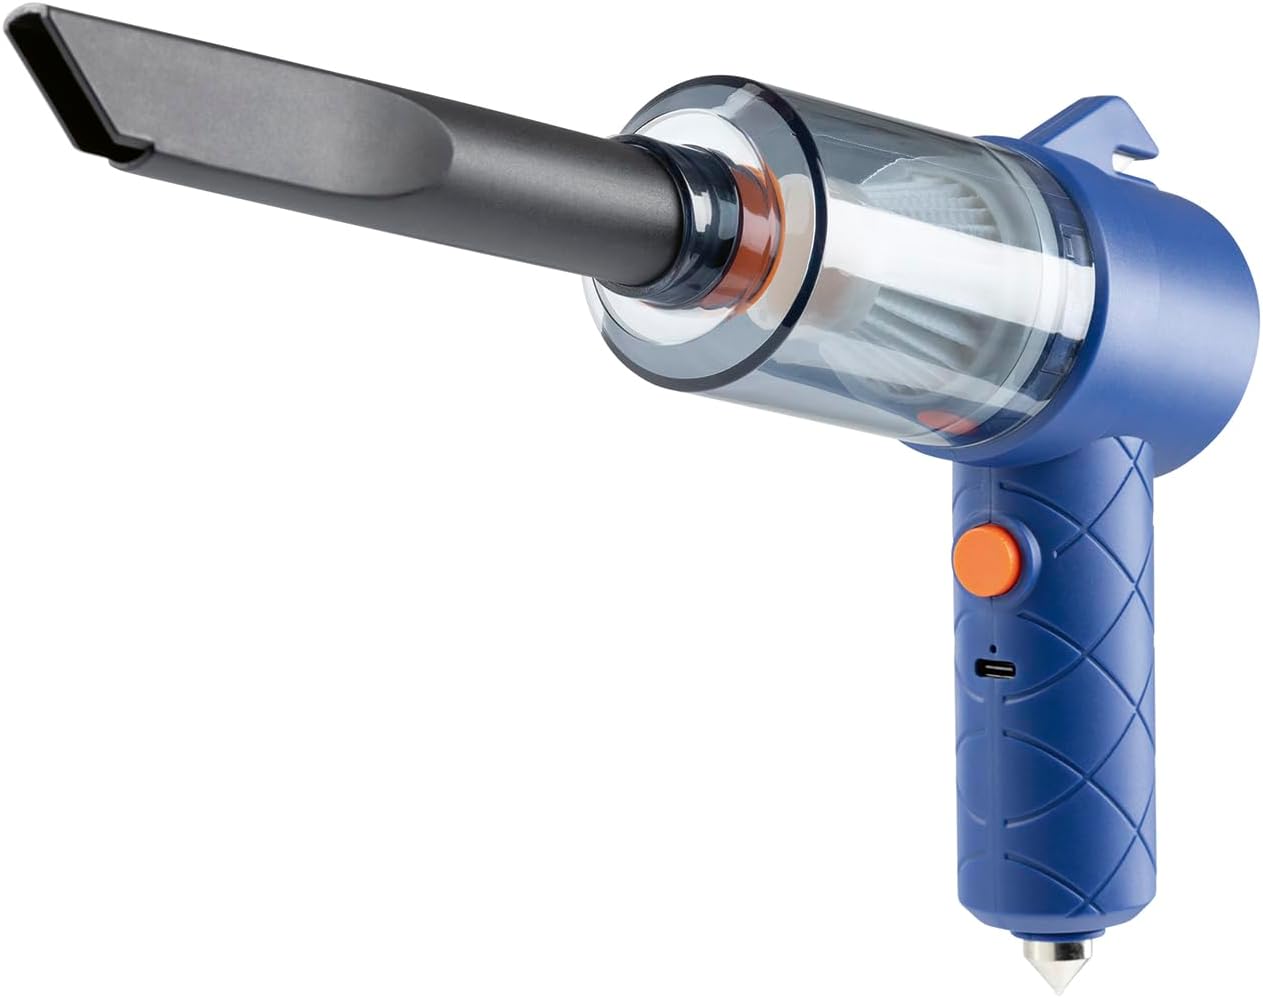
Image: Handheld vacuum with the flat nozzle attachment for vacuuming.
For Blowing:
- Large Blowing Nozzle: Attach the large blowing nozzle to the rear outlet of the main unit. This is used for blowing dust and debris from surfaces like keyboards.

Image: The device configured for its blowing function with the large blowing nozzle attached.
Operating Instructions
1. Powering On/Off
- To turn on the device, press the power button located on the handle.
- To turn off the device, press the power button again.
2. Using the Vacuum Function
- Ensure the desired vacuuming attachment (flat nozzle, brush attachment, or vacuum nozzle) is securely connected to the dust collection bin's suction opening.
- Press the power button to turn on the vacuum.
- Move the nozzle over the surface to be cleaned. The vacuum is effective for crumbs, pet hair, and dust on car seats, upholstery, and hard surfaces.
- After use, turn off the device and proceed to maintenance.

Image: Cleaning a car dashboard with the brush attachment.

Image: Cleaning a car interior with the flat nozzle.
3. Using the Blower Function
- Ensure the large blowing nozzle is securely connected to the rear outlet of the main unit.
- Press the power button to turn on the blower.
- Direct the airflow towards dust and debris on surfaces like keyboards or intricate areas to dislodge them.
- After use, turn off the device.
4. Emergency Features
The device includes two emergency tools for critical situations.
Emergency Window Breaker:
- The window breaker is a sharp, pointed tip located at the bottom of the handle.
- In an emergency, firmly press the tip against a side window of a vehicle to break the glass.
- Caution: Use only in genuine emergencies. Keep away from children.
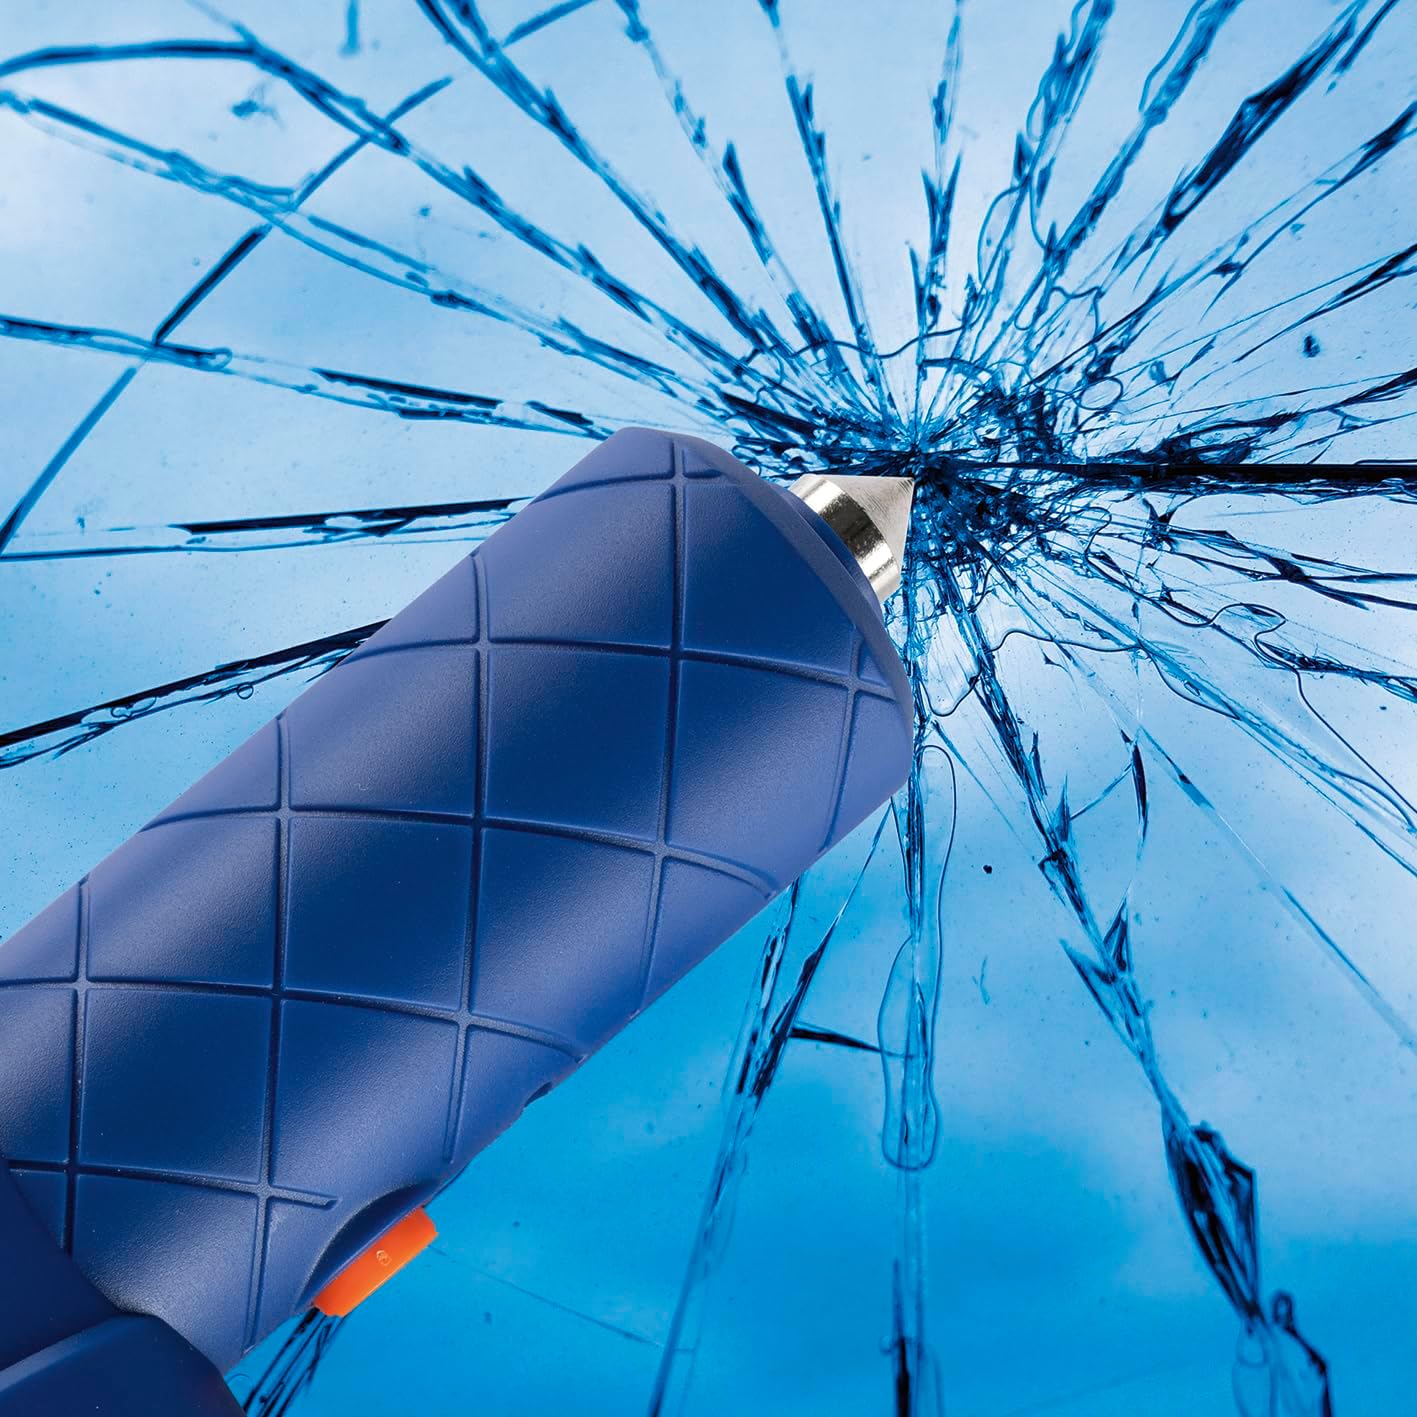
Image: Demonstrating the emergency window breaker function.
Emergency Seatbelt Cutter:
- The seatbelt cutter is a small blade integrated into the top rear of the unit.
- In an emergency, slide the seatbelt into the cutter's slot and pull to cut the belt.
- Caution: Use only in genuine emergencies. Keep away from children.
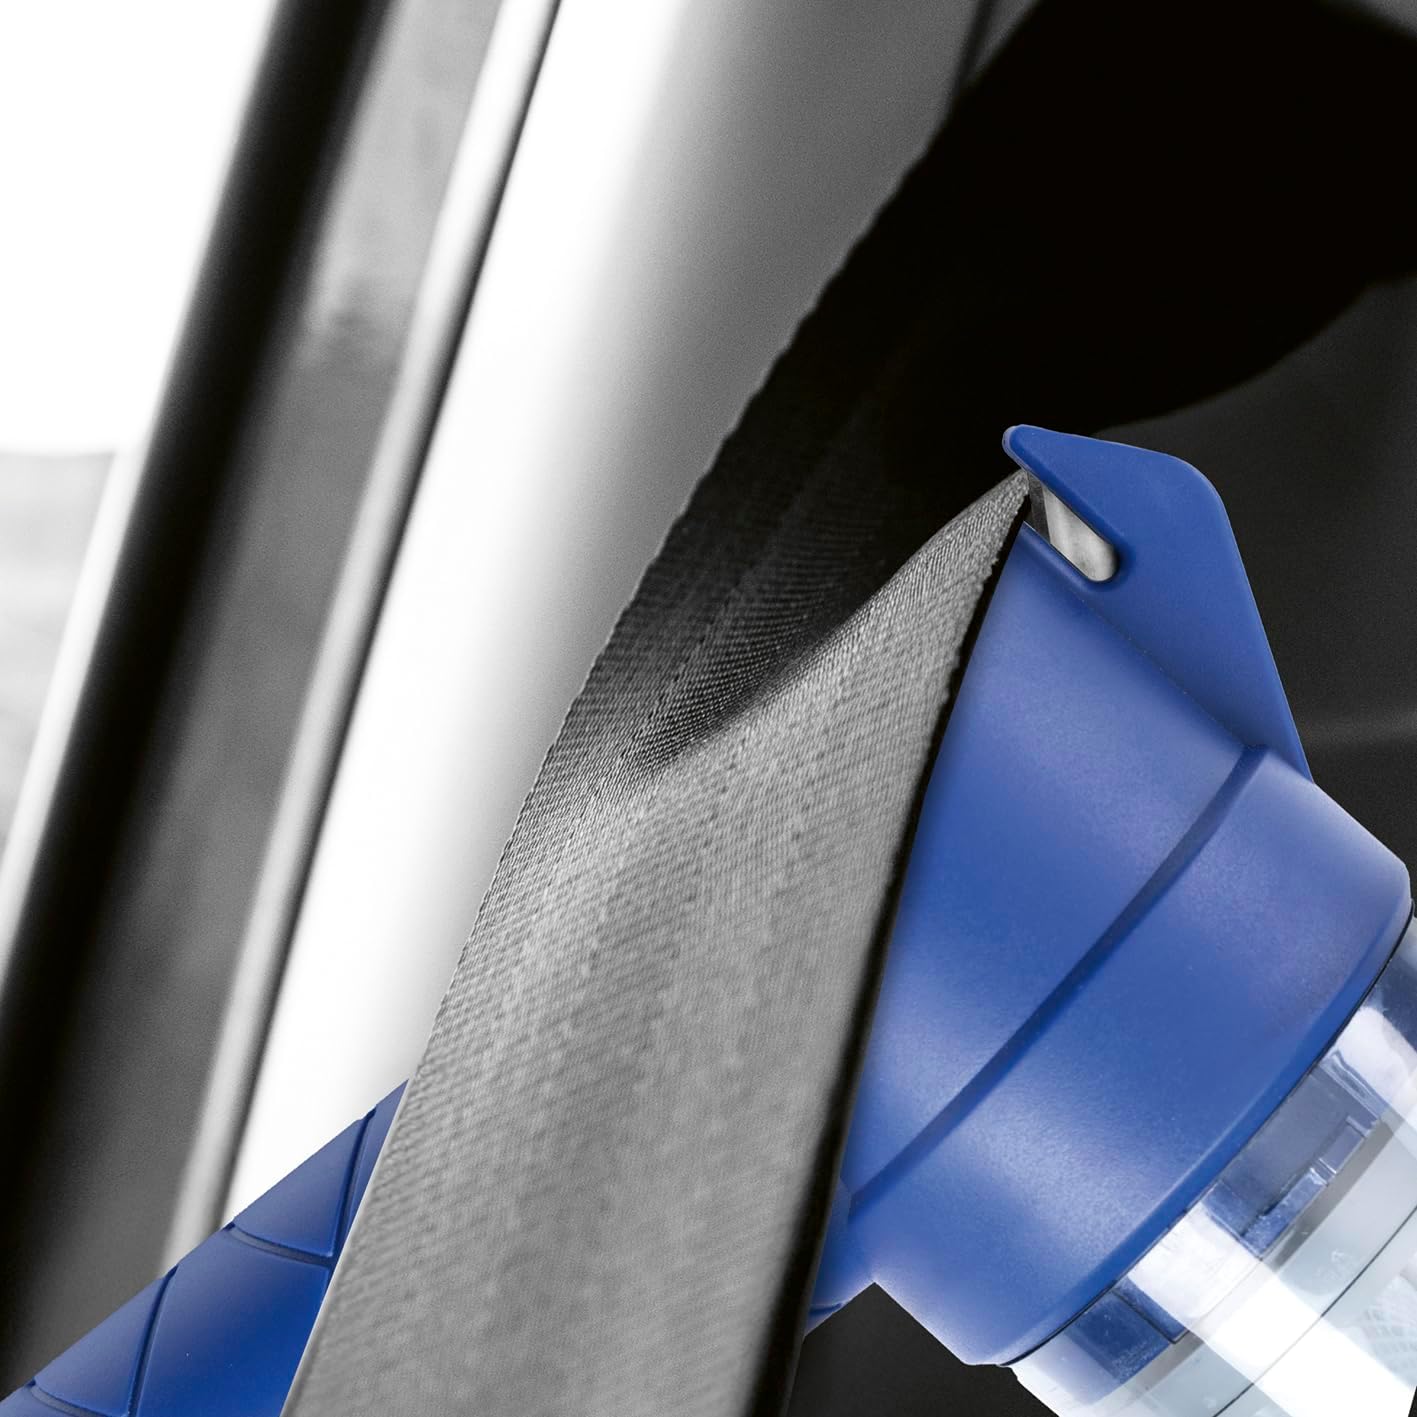
Image: Demonstrating the emergency seatbelt cutter function.
Maintenance
1. Emptying the Dust Collection Bin
- Ensure the device is turned off.
- Detach the dust collection bin from the main unit.
- Open the bin and empty its contents into a waste receptacle. The bin has a capacity of approximately 100 ml.
- Reattach the dust collection bin securely.
2. Cleaning the HEPA Filter
- After emptying the dust bin, carefully remove the integrated HEPA filter.
- Tap the filter gently to remove loose dust.
- If necessary, rinse the filter under cool running water. Do not use detergents.
- Allow the filter to air dry completely before reinserting it into the dust collection bin. Ensure it is fully dry to prevent damage to the motor.
- Reassemble the dust collection bin and filter, then attach it to the main unit.
3. General Cleaning
- Wipe the exterior of the device with a soft, damp cloth. Do not use abrasive cleaners or solvents.
- Ensure all attachments are clean and free of debris before storage.
Troubleshooting
| Problem | Possible Cause | Solution |
|---|---|---|
| Device does not turn on. | Battery is depleted. | Charge the device using the USB-C cable. |
| Low suction power. | Dust collection bin is full. Filter is clogged. Nozzle is blocked. | Empty the dust collection bin. Clean or wash the HEPA filter. Check and clear any blockages in the nozzle or suction path. |
| Battery not charging. | USB-C cable or adapter is faulty. Charging port is dirty. | Try a different USB-C cable or power adapter. Gently clean the charging port. |
| Blower function is weak. | Blowing nozzle is not properly attached. Battery is low. | Ensure the large blowing nozzle is securely attached to the rear outlet. Charge the device. |
Specifications
| Feature | Detail |
|---|---|
| Model Number | 15439 |
| Brand | CLEANmaxx |
| Dimensions (L x W x H) | 33.5 x 17.5 x 5.5 cm |
| Weight | 290 grams |
| Power Source | Battery Powered |
| Battery Type | Li-ion 3.7 V, 1200 mAh |
| Voltage | 3.7 Volts (DC) |
| Wattage | 40 Watts |
| Suction Power | 4 kPa |
| Run Time | Up to 10 minutes |
| Dust Bin Capacity | Approx. 100 ml |
| Filter Type | HEPA Filter (washable) |
| Special Features | Cordless, 2-in-1 (Vacuum & Blower), Integrated Seatbelt Cutter, Integrated Window Breaker |
| Recommended Surfaces | Car, hard floor, upholstery, carpet |
Warranty and Support
For information regarding warranty, returns, or technical support, please refer to the purchase documentation or contact your retailer directly. The manufacturer, DS Produkte GmbH, can also be contacted for product-specific inquiries.