VEVOR ZT-45H
VEVOR Magnetic Drill User Manual
Model: ZT-45H
Powerful and Precise Drilling for Metal Surfaces
1. Introduction
Thank you for choosing the VEVOR Magnetic Drill. This powerful and versatile tool is designed for precision drilling, coring, and tapping on various metal surfaces. With its robust 1450W motor and strong electromagnetic base, it provides stable and efficient operation for a wide range of applications, including home improvement, equipment installation, and industrial fabrication. This manual provides essential information for safe operation, proper setup, effective use, and maintenance of your magnetic drill.

Figure 1.1: VEVOR Magnetic Drill and Included Accessories
This image displays the VEVOR Magnetic Drill unit along with its standard accessories, including coring bits, drill chuck, and various keys.
2. Safety Information
WARNING: Always read and understand all safety warnings, instructions, illustrations, and specifications provided with this power tool. Failure to follow all instructions listed below may result in electric shock, fire, and/or serious injury.
General Safety Precautions:
- Always wear appropriate personal protective equipment (PPE), including safety glasses, hearing protection, and gloves.
- Ensure the workpiece is securely clamped or the magnetic base is fully engaged on a suitable ferromagnetic surface before operation.
- Keep the work area clean and well-lit. Cluttered or dark areas invite accidents.
- Do not operate power tools in explosive atmospheres, such as in the presence of flammable liquids, gases, or dust.
- Keep children and bystanders away while operating a power tool. Distractions can cause you to lose control.
- Always use a safety rope for inverted and horizontal drilling to prevent the drill from falling in case of power loss or magnetic disengagement.
- Ensure the steel plate thickness for magnetic adhesion is at least 0.39 inches (10 mm).
- This drill is not suitable for stainless steel or cast iron. Use only on standard steel or iron surfaces.
- Regularly inspect the power cord for damage. Do not use if the cord is damaged.
- Ensure the cooling system is properly filled and functioning during operation to prevent overheating.
3. Product Components and Features
The VEVOR Magnetic Drill is equipped with several key components designed for performance and user convenience.
- 1450W Copper Motor: Provides powerful driving force for drilling into tough materials.
- Electromagnetic Base: Generates 2810 lbf (12500 N) of robust force for stable operation at any angle.
- Variable Speed Control: Adjustable 10-speed gears (0-800 RPM) for precise operation.
- 3-in-1 Functionality: Capable of drilling, coring, and tapping.
- Cooling System: Features fast heat dissipation to protect the motor and prolong tool life.
- Titanium Magnesium Alloy Guide Rail: Anti-corrosion and wear-resistant for enhanced durability.
- Integrated Scale: Helps pinpoint the distance between the drill bit and the material for accurate holes.
- Ergonomic Handles: Provide comfortable grip and ease of handling.
Included Components:
- 1 x Magnetic Drill Unit
- 1 x Drill Chuck Key
- 1 x Drill Chuck
- 1 x Coolant Tank + Stand
- 1 x Coolant Tube
- 1 x Thimble
- 1 x Rope (Safety Rope)
- 3 x Hand Cranks
- 3 x Hex Keys
- 1 x User Manual
- 1 x Weldon Shank
- 2 x Coring Bits (US: 1/2 in / 12.7 mm + 5/8 in / 15.8 mm, EU/AU: 12 mm + 16 mm)

Figure 3.1: Product Dimensions and Included Accessories
This diagram illustrates the key dimensions of the magnetic drill and provides a visual representation of the accessories included in the package.
4. Setup
- Unpacking: Carefully remove all components from the packaging. Inspect for any shipping damage.
- Attach Hand Cranks: Screw the three hand cranks into their designated holes on the drill's feed mechanism. Ensure they are tightened securely.
- Install Coolant System:
- Mount the coolant tank and stand to the drill unit.
- Connect the coolant tube from the tank to the drill's coolant inlet.
- Fill the coolant tank with appropriate cutting fluid.
- Select and Install Drill Bit:
- For coring bits, insert the Weldon shank of the coring bit into the drill's spindle and secure it.
- For twist drills, attach the drill chuck to the spindle, then insert the twist drill bit into the chuck and tighten with the drill chuck key.
- Attach Safety Rope: For inverted or horizontal drilling, always attach the provided safety rope to a secure anchor point and to the drill unit. This is a critical safety measure.
5. Operating Instructions
5.1 Basic Operation:
- Position the Drill: Place the magnetic base of the drill firmly on the metal workpiece. Ensure the surface is clean and free of debris for maximum magnetic adhesion.
- Engage Magnet: Flip the 'MAGNET SWITCH' to the 'ON' position. The magnetic base will activate, securing the drill to the workpiece. Verify the drill is stable before proceeding.
- Select Speed: Use the 10-speed regulation knob to select the appropriate RPM for your drilling task and material. Lower speeds are generally for larger holes or tougher materials, while higher speeds are for smaller holes.
- Start Drilling: Flip the 'ELECTRIC DRILL SWITCH' to the 'ON' position. The drill motor will start.
- Feed the Drill: Slowly and steadily feed the drill bit into the material using the hand cranks. Apply consistent pressure. Do not force the drill.
- Apply Coolant: Ensure the coolant system is delivering fluid to the cutting area during drilling to reduce heat and extend bit life.
- Complete Drilling: Once the hole is complete, retract the drill bit from the workpiece.
- Turn Off: First, turn off the 'ELECTRIC DRILL SWITCH', then turn off the 'MAGNET SWITCH'.
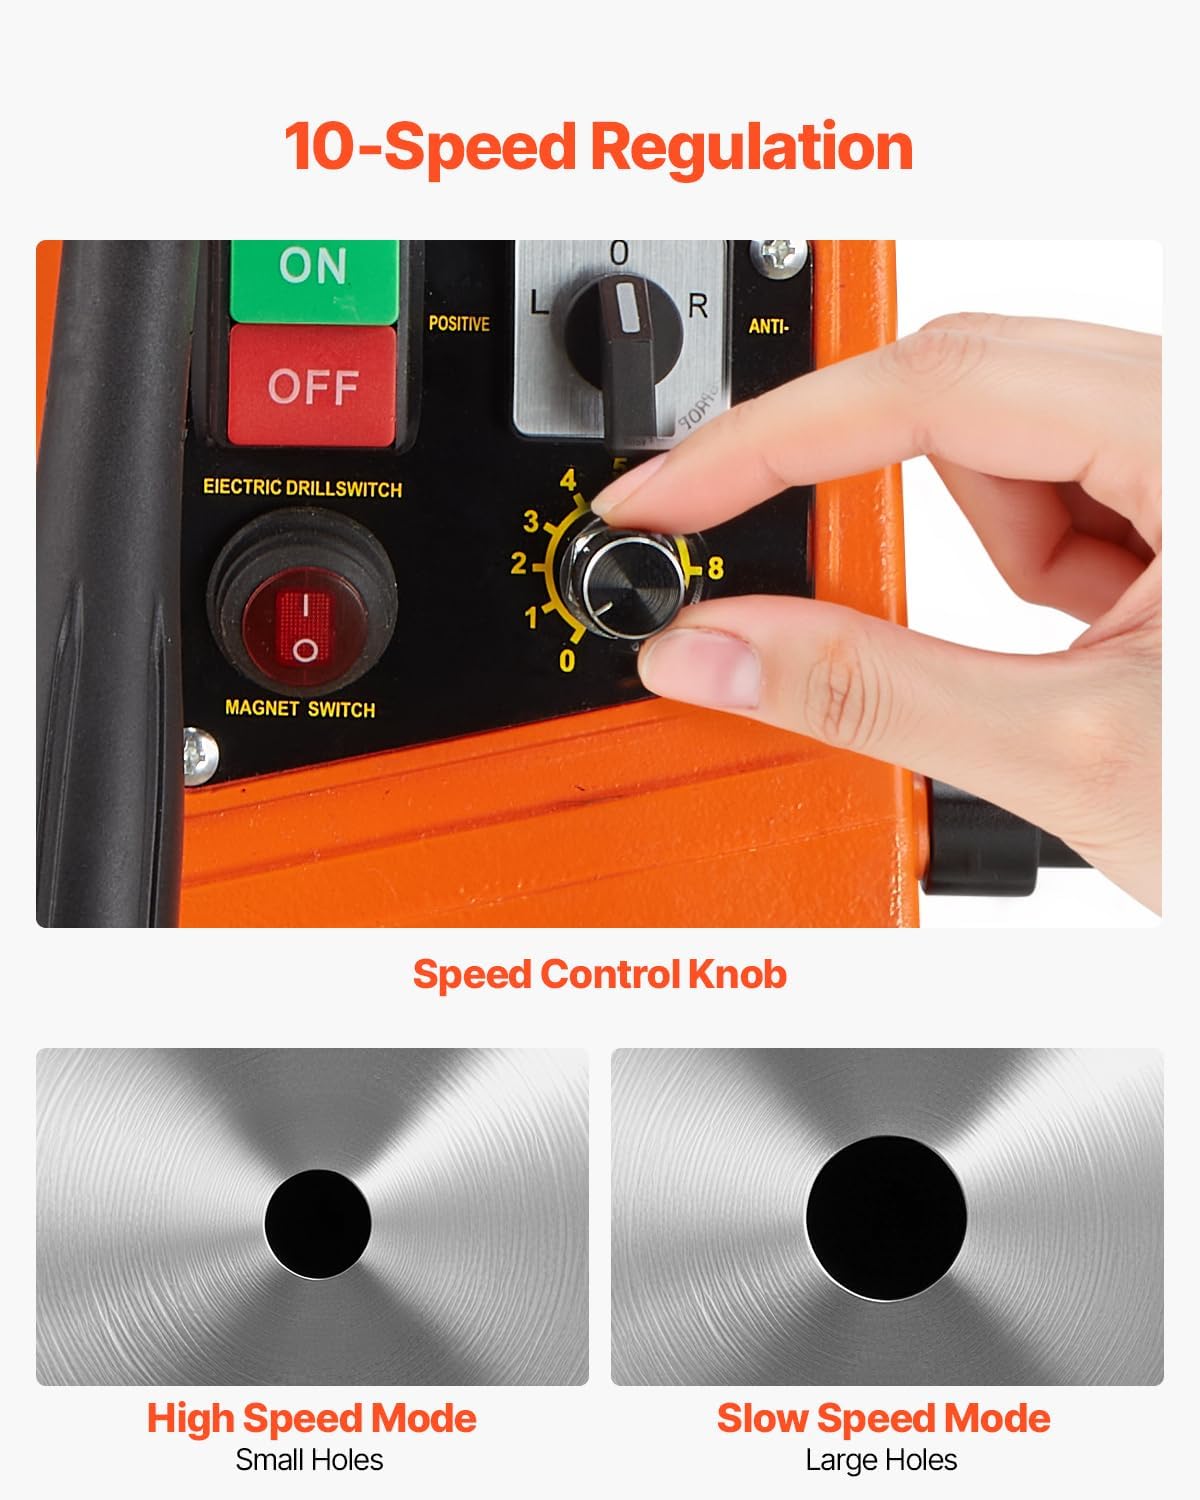
Figure 5.1: Speed Control Knob
This image shows a close-up of the 10-speed regulation knob, allowing users to adjust the rotational speed for different drilling requirements.
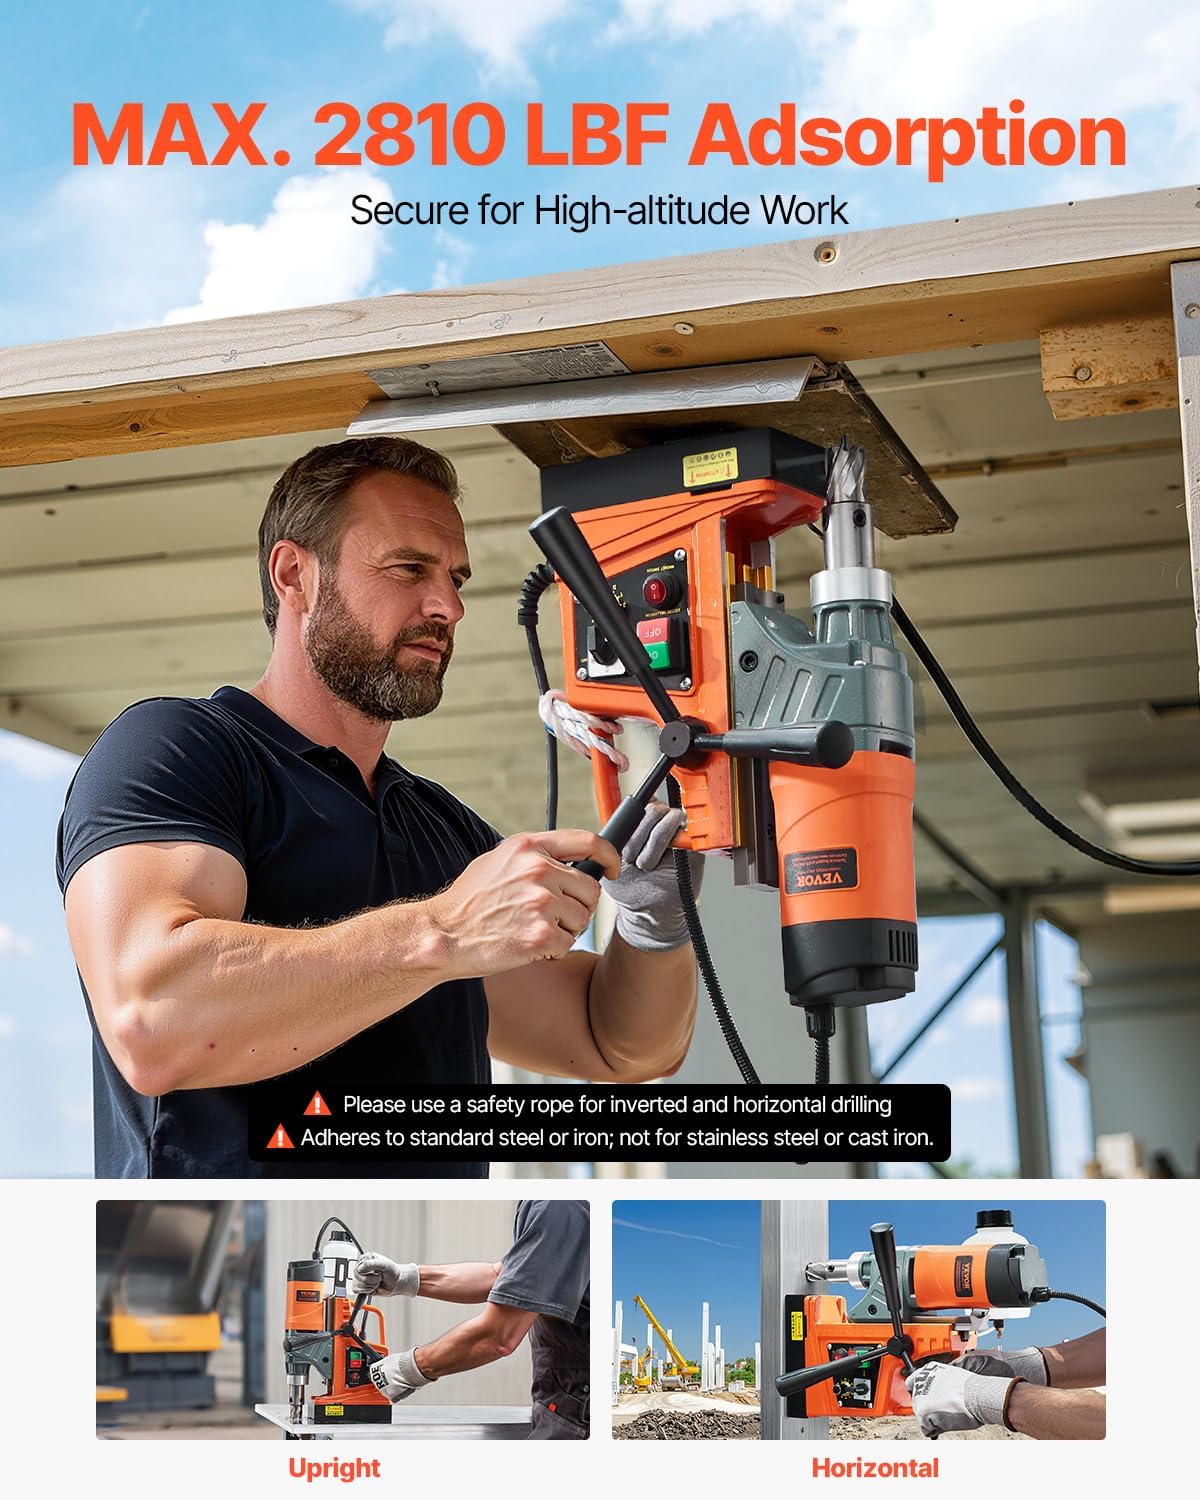
Figure 5.2: Upright and Horizontal Drilling
This image demonstrates the versatility of the magnetic drill, showing it in both upright and horizontal drilling positions. Note the safety rope for horizontal use.
5.2 Drilling, Coring, and Tapping:
The VEVOR Magnetic Drill supports three primary functions:
- Drilling: For creating solid holes using twist drill bits. Max. Boring Diameter (Twist Drill): Φ0.1-0.6 in / Φ3-16 mm; Max. Boring Depth: 3.9 in / 100 mm.
- Coring: For creating larger diameter holes using annular (coring) cutters. Max. Boring Diameter (Coring Drill): Φ1.6 in / Φ40 mm; Max. Coring Depth: 2 in / 50 mm.
- Tapping: For cutting internal screw threads. Tap Size Range: M3-M16. Utilize the forward and reverse rotation function for tapping.

Figure 5.3: 3-in-1 Functionality
This visual illustrates the drill's capability to perform drilling with twist bits, coring with annular cutters, and tapping with appropriate taps.
6. Maintenance
Regular maintenance ensures the longevity and optimal performance of your VEVOR Magnetic Drill.
- Cleaning: After each use, clean the drill unit, especially the magnetic base and spindle area, to remove metal chips and dust. Use a dry cloth or compressed air.
- Coolant System: Regularly check the coolant level and refill as needed. Clean the coolant tank and lines periodically to prevent clogs.
- Guide Rail Lubrication: Apply a thin layer of machine oil to the guide rail periodically to ensure smooth movement and prevent wear.
- Carbon Brushes: Inspect carbon brushes periodically. Replace them when they are worn down to approximately 1/4 inch (6 mm) or if the motor performance degrades.
- Power Cord: Inspect the power cord for any cuts, fraying, or damage before each use. Replace immediately if damaged.
- Storage: Store the drill in a clean, dry place away from direct sunlight and extreme temperatures.
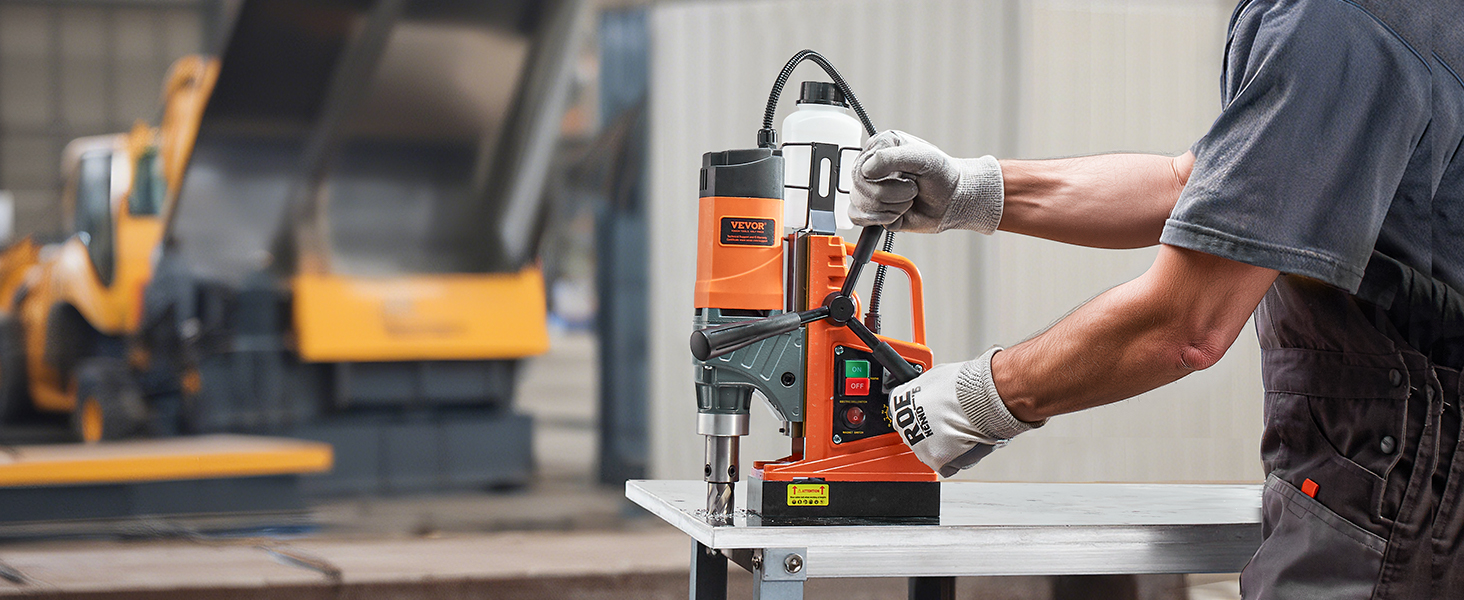
Figure 6.1: Cooling System and Airflow
This diagram highlights the dustproof air inlet, 2-sided cooling vents, and the large capacity coolant tank, all contributing to reduced wear and extended lifespan.
7. Troubleshooting
This section addresses common issues you might encounter with your VEVOR Magnetic Drill.
| Problem | Possible Cause | Solution |
|---|---|---|
| Drill does not turn on. | No power supply; Power cord damaged; Overload protection activated; Faulty switch. | Check power connection; Inspect power cord; Reset overload protector; Contact service if switch is faulty. |
| Magnet does not engage or is weak. | Workpiece surface is not clean/flat; Workpiece material is not ferromagnetic (e.g., stainless steel, cast iron); Magnet switch off; Power supply issue. | Clean and flatten workpiece surface; Ensure material is standard steel/iron; Turn magnet switch ON; Check power supply. |
| Drill bogs down or stops during operation. | Excessive feed pressure; Dull drill bit; Incorrect speed setting; Overheating. | Reduce feed pressure; Replace/sharpen drill bit; Adjust speed; Allow drill to cool down, check coolant. |
| Excessive vibration or runout. | Drill bit not properly installed; Damaged drill bit; Worn spindle/chuck. | Re-install drill bit securely; Replace damaged bit; If persistent, contact service for inspection of spindle/chuck. |
| Coolant not flowing. | Coolant tank empty; Coolant tube clogged; Pump malfunction. | Refill coolant tank; Clear any clogs in the tube; Contact service if pump is faulty. |
8. Specifications
| Specification | Value |
|---|---|
| Item Model Number | ZT-45H |
| Brand | VEVOR |
| Maximum Load Power | 1450W |
| Voltage | 110 Volts |
| Amperage | 13 Amps |
| Maximum Rotational Speed | 800 RPM |
| US No-Load Speed Forward Rotation | 0-800 rpm |
| US No-Load Speed Reverse Rotation | 0-770 rpm |
| Maximum Magnetic Force | 2810 lbf / 12500 N |
| Max. Boring Diameter (Coring Drill) | Φ1.6 in / Φ40 mm |
| Max. Coring Depth | 2 in / 50 mm |
| Max. Boring Diameter (Twist Drill) | Φ0.1-0.6 in / Φ3-16 mm |
| Max. Boring Depth (Twist Drill) | 3.9 in / 100 mm |
| Tap Size Range | M3-M16 |
| Shank Type | Weldon Shank |
| Max. Travel Distance | 8.7 in / 220 mm |
| Product Dimensions (L x W x H) | 11"L x 7.3"W x 14.2"H (290 x 210 x 380 mm with crank attached) |
| Item Weight | 26.5 Pounds / 12 kg |
| Material | Metal |
| Power Source | Corded Electric |
9. Warranty and Support
For information regarding warranty coverage, terms, and conditions, please refer to the warranty card included with your product or visit the official VEVOR website. If you encounter any issues or require technical assistance, please contact VEVOR customer support. Have your model number (ZT-45H) and purchase details ready when contacting support.
Ask a question about this manual
Ask about setup, troubleshooting, compatibility, parts, safety, or missing instructions. Manuals+ will review the question and use this page’s manual context to help answer it.