1. Introduction
Thank you for choosing the Zivisamt Commercial Hot Water Dispenser. This manual provides essential information for the safe and efficient operation, installation, and maintenance of your new appliance. Please read this manual thoroughly before use and retain it for future reference.
Important Safety Instructions
- Always place the product on a stable, flat countertop.
- This appliance is designed exclusively for heating water. Using it for other purposes may cause malfunction and voids the warranty.
- Read the entire operating manual before initial use, paying close attention to all safety warnings.
- Ensure the power supply matches the specifications of the dispenser (110V, 1800W).
- Do not immerse the appliance, cord, or plug in water or other liquids.
- Keep out of reach of children. Hot water can cause severe burns.
- The appliance features overheat protection and an anti-dry burn function for enhanced safety.
2. Product Overview
The Zivisamt Commercial Hot Water Dispenser is designed for efficient and intelligent water heating in various commercial settings. It features a durable stainless steel construction and an intuitive control panel.

Figure 2.1: Front view of the Zivisamt Commercial Hot Water Dispenser, showcasing its sleek silver design and integrated control panel and faucet.
Components Included
- 1 x Electric Water Boiler
- 1 x PE Adapter Pipe (approx. 1.2m/3.94ft)
- 1 x Drip Tray
- 1 x English Manual (this document)
Key Features
- Intelligent Step Heating: Automatically heats water when the level is low and refills in short intervals to maintain temperature.
- Adjustable Temperature: Set desired water temperature between 40-99℃ (104-210.2℉) for various needs.
- User-Friendly Operation: Features an intuitive LCD display and sensitive buttons for easy control. Indicator lights show operational status.
- Healthy Water Dispensing: Utilizes layered heating technology to prevent mixing of hot and cold water and avoid repeated boiling, ensuring fresh water.
- Multiple Safety Protections: Includes overheat protection, anti-dry burn function, and a heat-dissipation design. The faucet has a splash-proof design.

Figure 2.2: Detailed view of the control panel, showing the LCD display, 'UP' and 'DOWN' temperature adjustment buttons, and the 'ON/OFF' power button.

Figure 2.3: Close-up of the durable faucet, designed for easy and splash-proof water dispensing.

Figure 2.4: View of the removable drip tray, designed to catch any spills and maintain cleanliness.
3. Setup
3.1 Unpacking
Carefully remove all components from the packaging. Inspect the dispenser for any signs of damage. Retain packaging materials for future transport or storage if necessary.
3.2 Placement
Place the hot water dispenser on a flat, stable, and heat-resistant countertop. Ensure there is adequate clearance around the unit for ventilation, especially at the back where heat dissipation occurs. Avoid placing it near heat sources or in direct sunlight.
3.3 Water Connection
- Connect the provided PE adapter pipe to a suitable cold water supply. Ensure the water pressure is within the rated range of 100-400kPa.
- Connect the other end of the PE pipe to the water inlet on the back of the dispenser.
- Ensure all connections are secure to prevent leaks.
3.4 Power Connection
Plug the power cord into a grounded 110V electrical outlet. Ensure the outlet is easily accessible and not overloaded with other appliances.
4. Operating Instructions
4.1 Initial Use
- After connecting water and power, press the ON/OFF button to power on the unit.
- The dispenser will begin to fill with water and initiate the heating process. The LCD will display the current water temperature.
- For the first use, it is recommended to dispense and discard a full tank of hot water to clean the internal system.
4.2 Setting Temperature
- Use the UP (+) and DOWN (-) buttons on the control panel to adjust the desired water temperature.
- The temperature can be set between 40℃ and 99℃ (104℉ and 210.2℉).
- The dispenser will automatically heat the water to the set temperature.
4.3 Dispensing Water
- Place a cup or container under the faucet.
- Push the faucet lever down to dispense hot water. Release the lever to stop the flow.
- Be cautious as the water dispensed is hot and can cause burns.
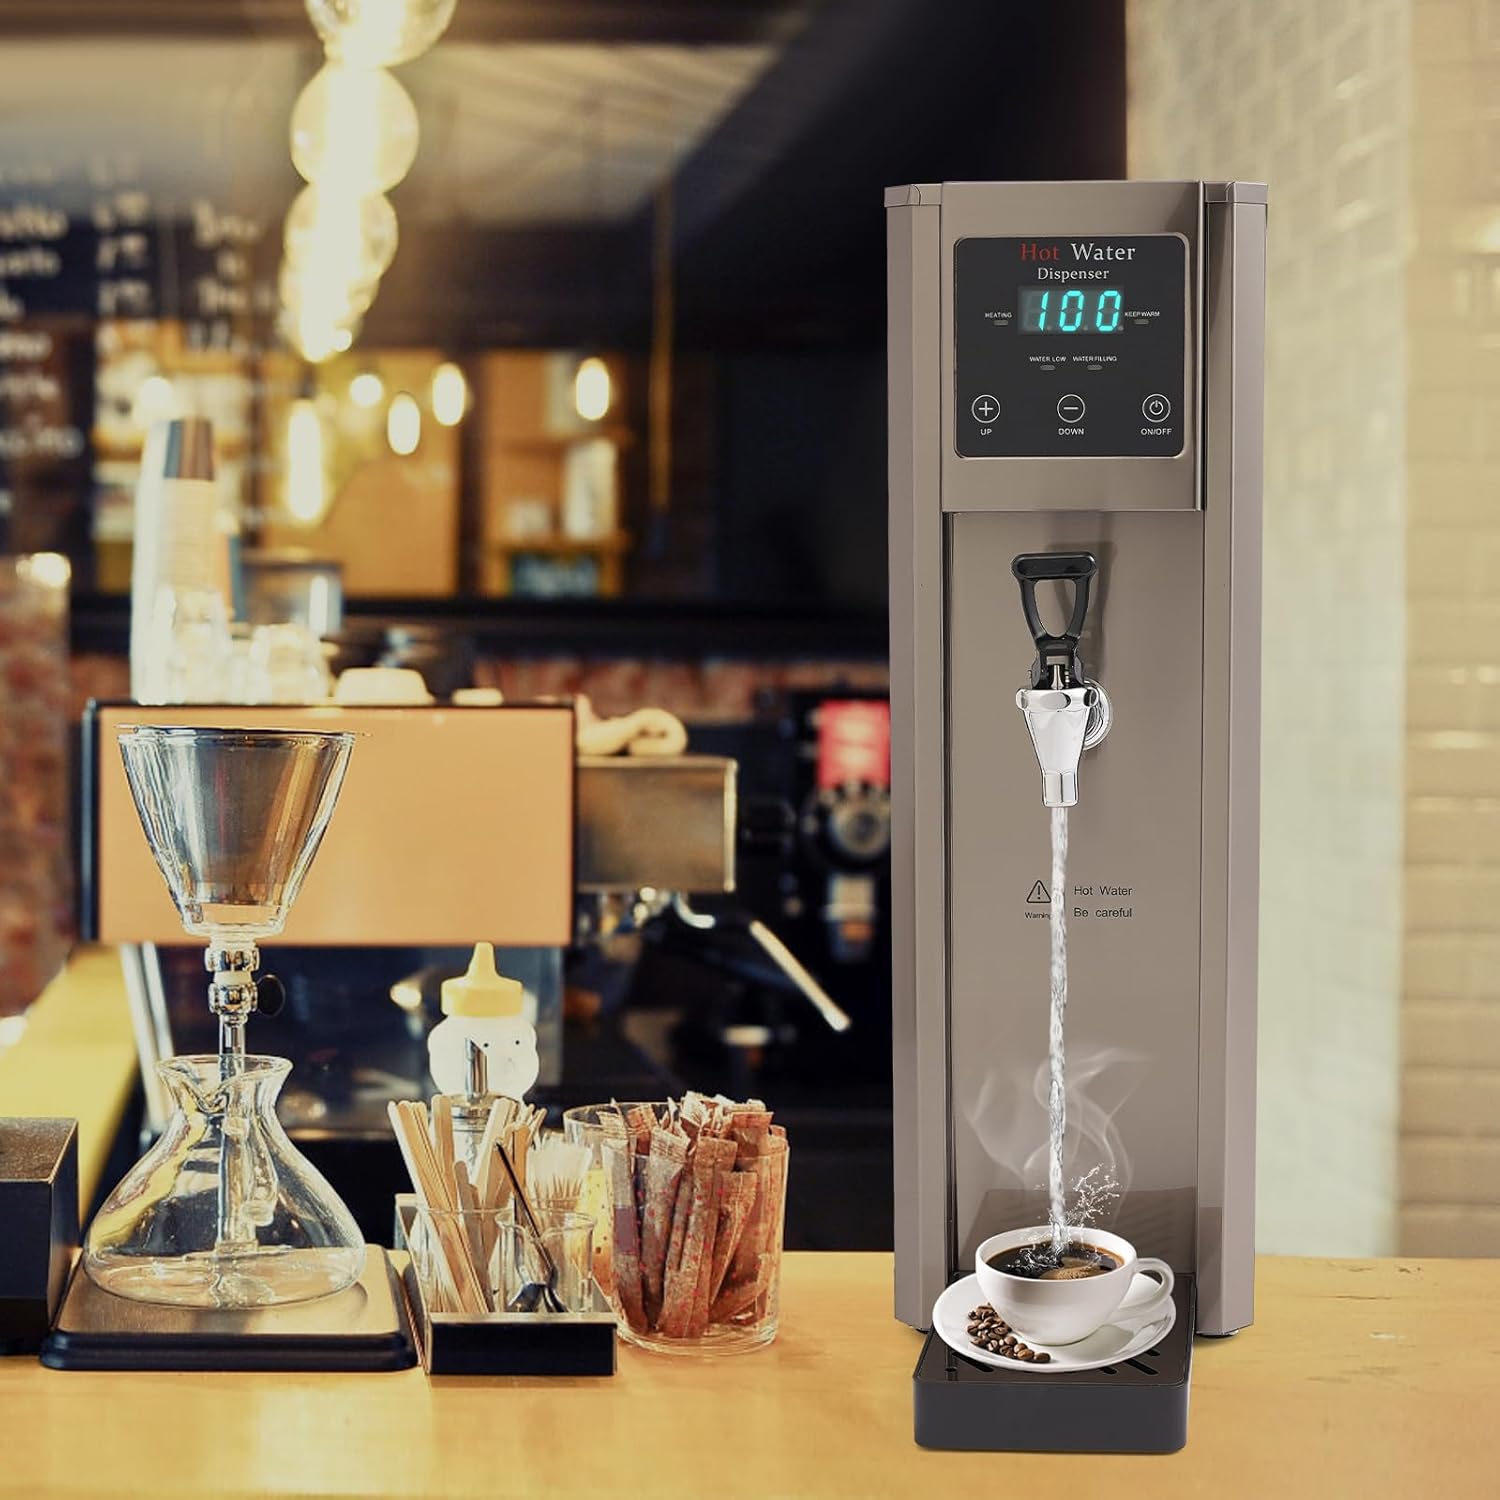
Figure 4.1: The hot water dispenser actively dispensing hot water into a coffee cup, demonstrating its use in a commercial setting.
4.4 Automatic Heating and Refilling
- When the water level drops, the dispenser will automatically initiate heating.
- Once the water reaches the set temperature, the system will automatically refill (feeding for approximately 1.5 seconds, then pausing for 17 seconds).
- If the water temperature falls approximately 3℃ (37.4℉) below the set temperature, the dispenser will automatically reheat.
5. Maintenance
5.1 Cleaning
- Always unplug the dispenser and allow it to cool completely before cleaning.
- Wipe the exterior with a soft, damp cloth. Do not use abrasive cleaners or scouring pads.
- Remove and empty the drip tray regularly. Wash it with warm, soapy water and rinse thoroughly.
- For internal cleaning, follow descaling instructions.
5.2 Descaling
Over time, mineral deposits (limescale) can build up inside the dispenser, affecting performance. Descale the unit regularly, especially in areas with hard water.
- Unplug the dispenser and ensure it is cool.
- Drain any remaining water from the unit.
- Fill the water tank with a descaling solution (e.g., a mixture of water and white vinegar or a commercial descaling agent, following product instructions).
- Allow the solution to sit for the recommended time (usually 30 minutes to an hour, or as per descaling agent instructions).
- Turn on the dispenser and heat the descaling solution.
- Dispense the solution through the faucet.
- Rinse the dispenser thoroughly by filling it with fresh water and dispensing it several times until no descaling solution residue remains.
5.3 Storage
If the dispenser will not be used for an extended period, unplug it, drain all water, clean it thoroughly, and store it in a dry, cool place.
6. Troubleshooting
Before contacting support, please refer to the following table for common issues and their solutions.
| Problem | Possible Cause | Solution |
|---|---|---|
| Dispenser does not turn on. | No power supply. | Check if the power cord is securely plugged into a working outlet. |
| Water is not heating. | Heating element malfunction or low water level. | Ensure water supply is connected and turned on. If problem persists, contact support. |
| Water flow is slow or inconsistent. | Limescale buildup or low water pressure. | Perform descaling. Check water supply pressure. |
| Leakage from connections. | Loose water pipe connections. | Tighten all water pipe connections. |
| Error code on display. | Internal fault. | Refer to specific error code in a more detailed manual (if available) or contact customer support. |
7. Specifications
Detailed technical specifications for the Zivisamt Commercial Hot Water Dispenser.
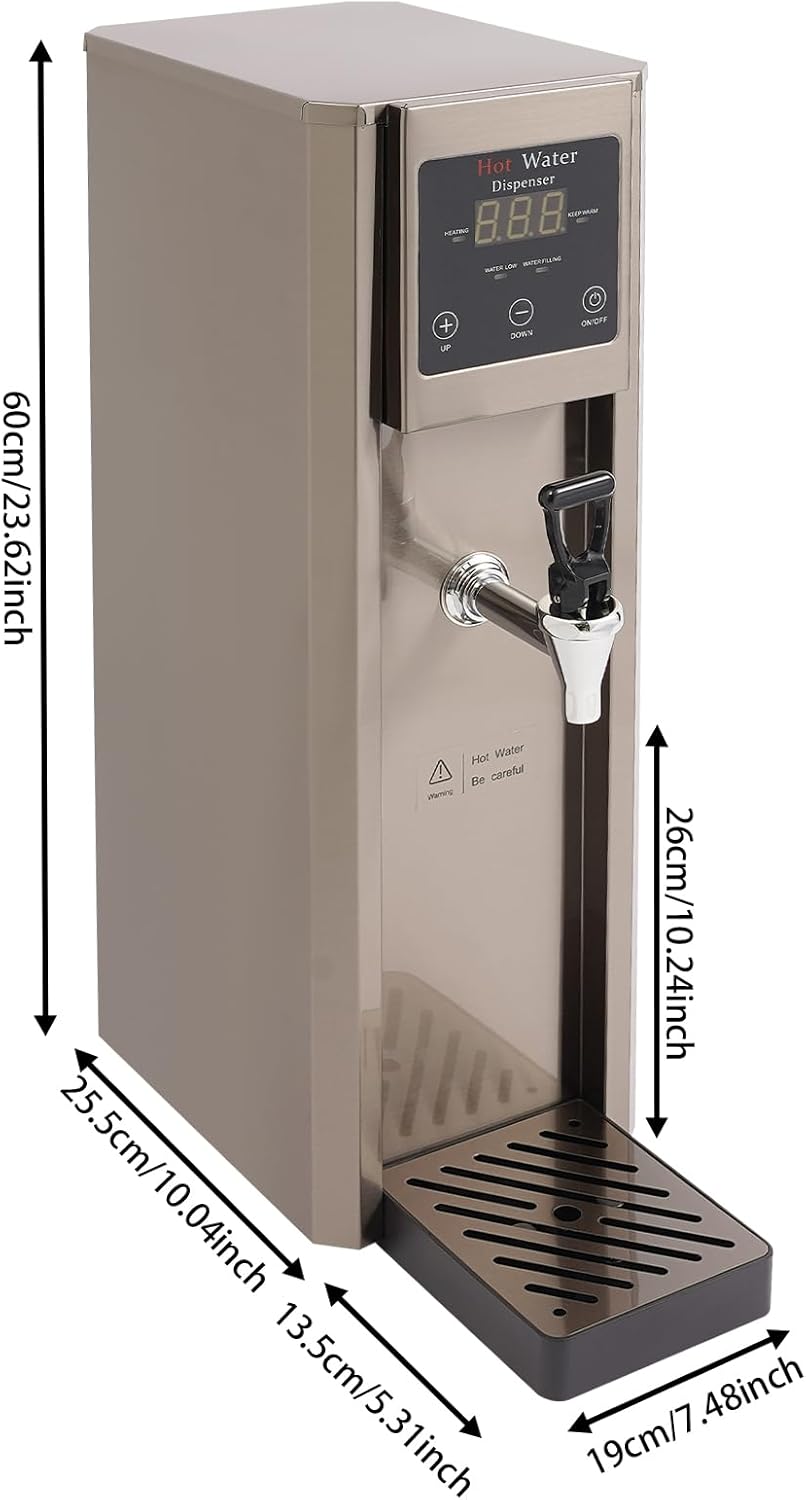
Figure 7.1: Diagram illustrating the key dimensions of the hot water dispenser, including height, width, and depth.
| Feature | Specification |
|---|---|
| Brand | Zivisamt |
| Model Name | Hot Water Dispenser Countertop |
| Color | Silver |
| Material | 304 Stainless Steel, 201 Stainless Steel |
| Heating Method | Stepping Type |
| Display Type | LCD |
| Plug Type | US Standard |
| Voltage | 110V |
| Power | 1800W |
| Capacity | 7.8L / 2.06 Gallons |
| Water Production | Approx. 20L / 5.28 Gallons per hour |
| Adjustable Temperature | 40-99℃ / 104-210.2℉ |
| Timing Range | Within 24 Hours |
| Rated Water Pressure | 100-400kPa |
| Power Cord Length | 1.5m / 4.92ft |
| PE Adapter Pipe Length | Approx. 1.2m / 3.94ft |
| Product Dimensions (Drip Tray Excluded) | 19 x 25.5 x 60 cm / 7.48 x 10.04 x 23.62 inches (L x W x H) |
| Drip Tray Size (L x W) | 13 x 13.5 cm / 5.12 x 5.31 inches |
| Net Weight | 7 kg / 15.43 lbs |
8. Warranty and Support
For warranty information, technical support, or service inquiries, please contact the manufacturer directly or refer to the official Zivisamt brand store. Keep your purchase receipt as proof of purchase.
For further assistance, please visit the official Zivisamt Store.