
Skuehod Richmat HJC18
Richmat HJC18 Control Box Instruction Manual
Model: Richmat HJC18
Introduction
This manual provides comprehensive instructions for the installation, operation, and maintenance of the Richmat HJC18 Control Box, designed as a replacement part for adjustable beds. Please read this manual thoroughly before use to ensure proper function and safety.

Figure 1: Richmat HJC18 Control Box in an adjustable bed setup. This image shows the Richmat HJC18 control box alongside an adjustable bed, demonstrating its application as a replacement part for controlling bed frame recline functions.
Product Overview
The Richmat HJC18 Control Box is a vital component for adjustable bed systems, facilitating the control of various bed functions including recline and massage. It features multiple ports for motor and accessory connections, along with a reset coding button for pairing with remote controls.

Figure 2: Top and bottom view of the HJC18 Control Box. This image displays the Richmat HJC18 control box from both the top and bottom. The top view highlights the 'Reset Coding' button and the labeled connection points for head recline, foot recline, head massage, foot massage, and USB. The bottom view shows the physical ports for these connections.
Key Features:
- Designed for adjustable bed systems.
- Supports head recline, foot recline, massage, and USB functions.
- Equipped with a reset coding button for remote pairing.
- Features a removable plug lock for secure connections.

Figure 3: Connector Diagram. This diagram visually explains the function of each of the five connectors on the Richmat HJC18 control box. From left to right, they are identified as head recline motor (8-pin), foot recline motor (8-pin), head massage (1-pin), foot massage (1-pin), and USB (1-pin).
Setup and Installation
Before installation, ensure the adjustable bed is unplugged from the power source. Verify that the cord labels on your existing control box match the HJC18 to ensure compatibility.
Steps for Installation:
- Prepare the Control Box: If the plug lock is in place, gently remove it to expose the connection ports.

Figure 4: Removing the Plug Lock. This image shows a hand lifting the 'PLUG LOCK' cover from the Richmat HJC18 control box, indicating that this component is removable to access the connection ports.
- Connect Motors: Connect the head recline motor (8-pin) and foot recline motor (8-pin) cables to their respective ports on the control box. Refer to Figure 3 for port identification.
- Connect Accessories: If applicable, connect the head massage (1-pin), foot massage (1-pin), and USB (1-pin) cables to their designated ports.
- Secure Connections: Once all cables are connected, re-attach the plug lock to secure the connections and prevent accidental disconnections.

Figure 5: Plug Lock in place. This image displays the Richmat HJC18 control box with its 'PLUG LOCK' cover installed, protecting the connection ports.
- Connect Power: Connect the control box's power cord to a suitable power outlet.

Figure 6: Control Box with Power Cord. This image presents the Richmat HJC18 control box with its integrated power cord, ready for connection to a power source.
Operating Instructions
The Richmat HJC18 Control Box operates in conjunction with your adjustable bed's wireless remote control. After installation, you may need to pair the control box with your remote.
Pairing the Control Box with Remote:
Follow these steps to pair your remote control with the HJC18 control box:
- Press Remote Buttons: Press and hold the required pairing buttons on your remote control. Do not release them until instructed. Common pairing button combinations include:
- Method 1: "Head up" & "Foot up"
- Method 2: "Head up" & "Foot down"
- Method 3: "Head down" & "Foot up"
- Press Reset Coding Button: While still holding the remote buttons, press the "Reset coding" button located on the side of the control box.
- Confirm Pairing: The control box will beep 3 times to indicate successful pairing. You can then release the buttons on the remote.

Figure 7: Pairing Instructions. This image provides step-by-step instructions for pairing the control box with a remote. It outlines three methods for pressing buttons on the handset ('Head up' & 'Foot up', 'Head up' & 'Foot down', 'Head down' & 'Foot up'), followed by pressing the 'Reset coding' button on the control box. The control box will beep 3 times upon successful pairing.
Maintenance
The Richmat HJC18 Control Box requires minimal maintenance. To ensure longevity and proper function:
- Keep the control box clean and free from dust and debris. Use a dry, soft cloth for cleaning.
- Ensure all cable connections are secure and the plug lock is properly seated.
- Avoid exposing the control box to excessive moisture or extreme temperatures.
- Do not attempt to open the control box. It is not designed for user servicing and should only be opened by authorized personnel.
Troubleshooting
If you encounter issues with your Richmat HJC18 Control Box, consider the following common solutions:
- Bed Not Responding:
- Check if the control box is properly plugged into a power outlet.
- Verify that all motor and accessory cables are securely connected to the control box.
- Attempt to re-pair the remote control with the control box using the "Pairing the Control Box with Remote" instructions.
- Intermittent Operation:
- Inspect cables for any signs of damage or loose connections.
- Ensure the plug lock is firmly in place.
- Remote Not Pairing:
- Ensure you are pressing the correct button combinations on the remote as described in the pairing section.
- Confirm that you are pressing the "Reset coding" button on the control box at the correct time.
Warning: Do not attempt to open or repair the control box yourself. Refer to authorized service personnel for complex issues.
Specifications
The following are the technical specifications for the Richmat HJC18 Control Box:
| Parameter | Value |
|---|---|
| Item No. | HJC18 |
| Input | DC 24-30V, 8A Max, IP20 |
| Output | DC 24-30V |
| Duty Cycle | 10%, Max. 2min ON/18min OFF |
| Item Weight | 1 pound |
| Package Dimensions | 9 x 5 x 4 inches |
| Model Number | Richmat HJC18 |
| ASIN | B0DT6H7QGY |
| Certifications | Intertek 5006684, Conforms to UL Std. 962, Certified to CSA Standard C22.2 No.68 |
| Serial Number (Example) | SN18C241000008 |
| Item Number (Example) | 121480C180036A |
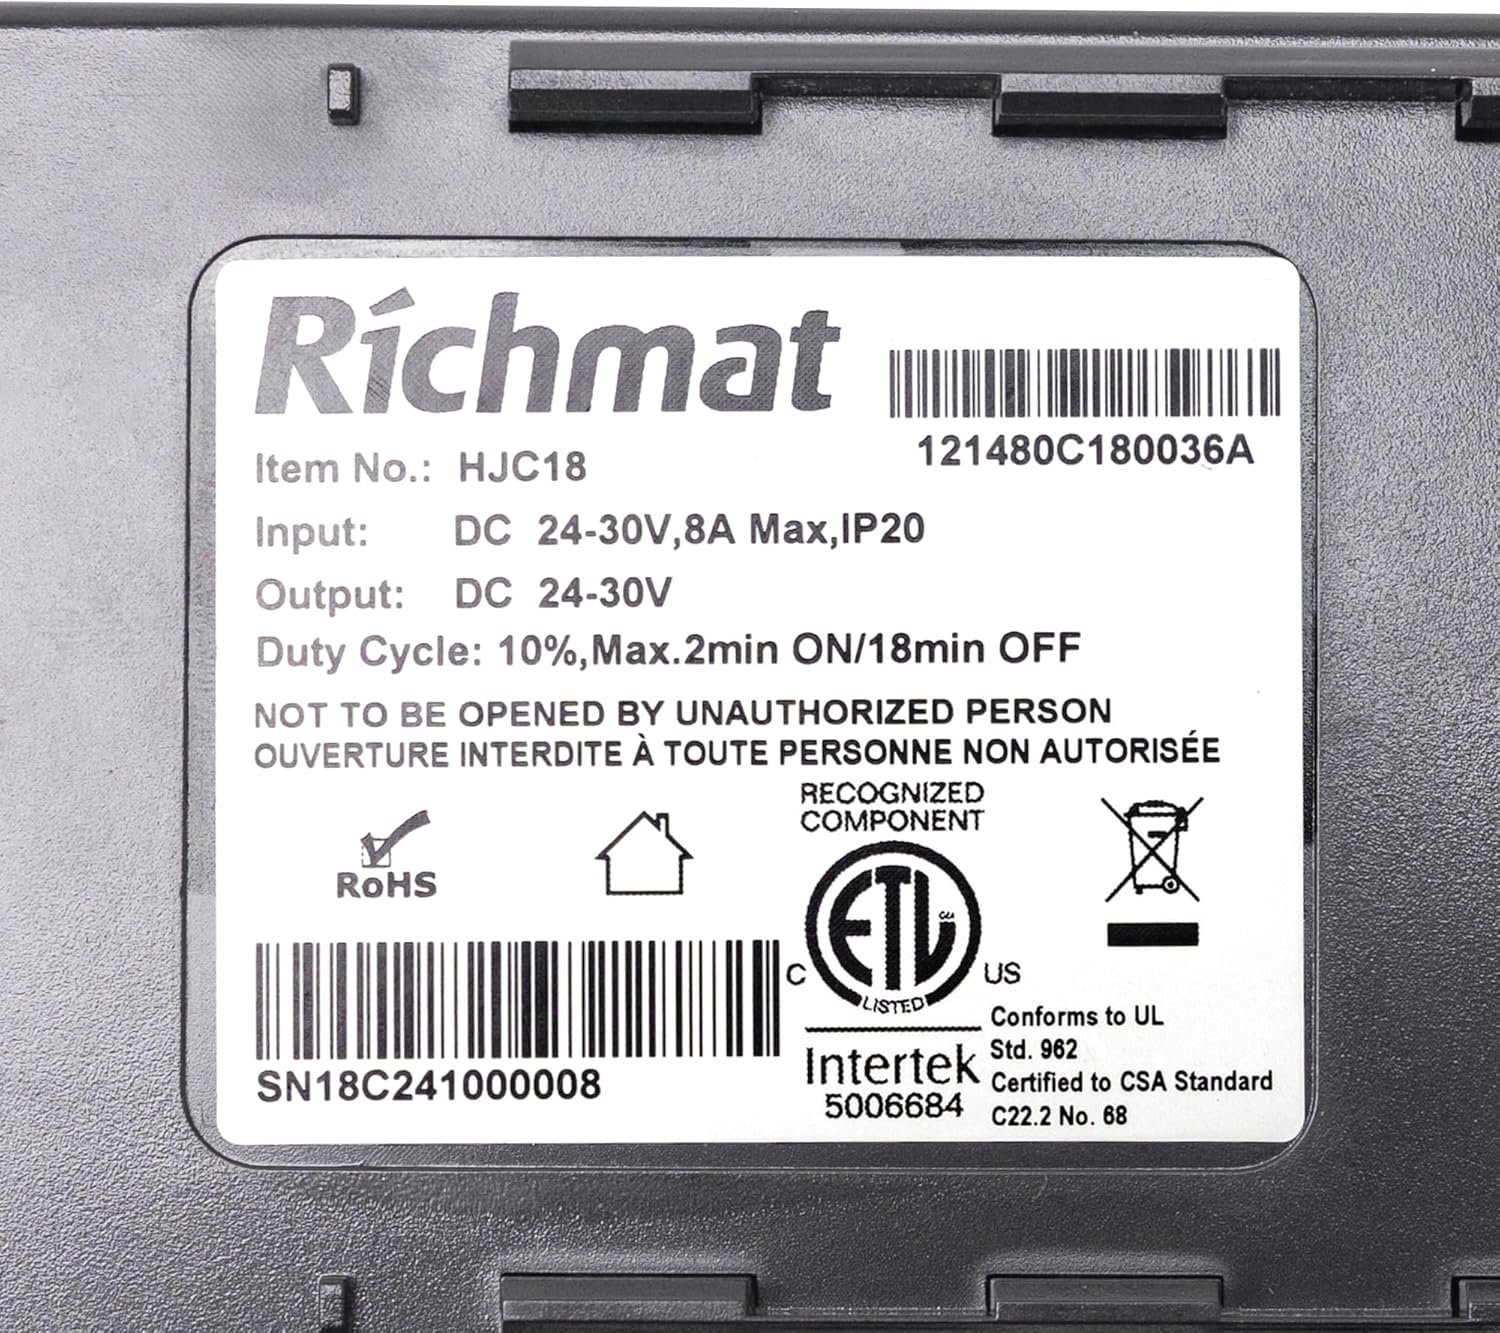
Figure 8: Product Label. This image provides a detailed view of the Richmat HJC18 control box's product label. It lists the Item No.: HJC18, Input: DC 24-30V, 8A Max, IP20, Output: DC 24-30V, Duty Cycle: 10%, Max.2min ON/18min OFF. It also includes warnings, serial numbers (SN18C241000008), and certifications like Intertek 5006684, Conforms to UL Std. 962, and Certified to CSA Standard C22.2 No.68.
Warranty and Support
Specific warranty information for the Richmat HJC18 Control Box is not provided in this manual. For warranty details or technical support, please contact the seller or refer to the official Skuehod Store on Amazon.
Ask a question about this manual
Ask about setup, troubleshooting, compatibility, parts, safety, or missing instructions. Manuals+ will review the question and use this page’s manual context to help answer it.