1. Introduction
This manual provides essential instructions for the safe and efficient operation, installation, and maintenance of your Oxhark Flame 48-inch Electric Fireplace. Please read this manual thoroughly before installation and use, and retain it for future reference.
The Oxhark Flame 48-inch Electric Fireplace offers versatile installation options (freestanding, wall-mounted, or recessed) and features adjustable flame colors, fuel bed colors, brightness, and speed settings. It includes a thermostat-controlled heater with two power settings (750W/1500W) and a timer function for convenience and energy efficiency. Safety features include an overheat protection system.
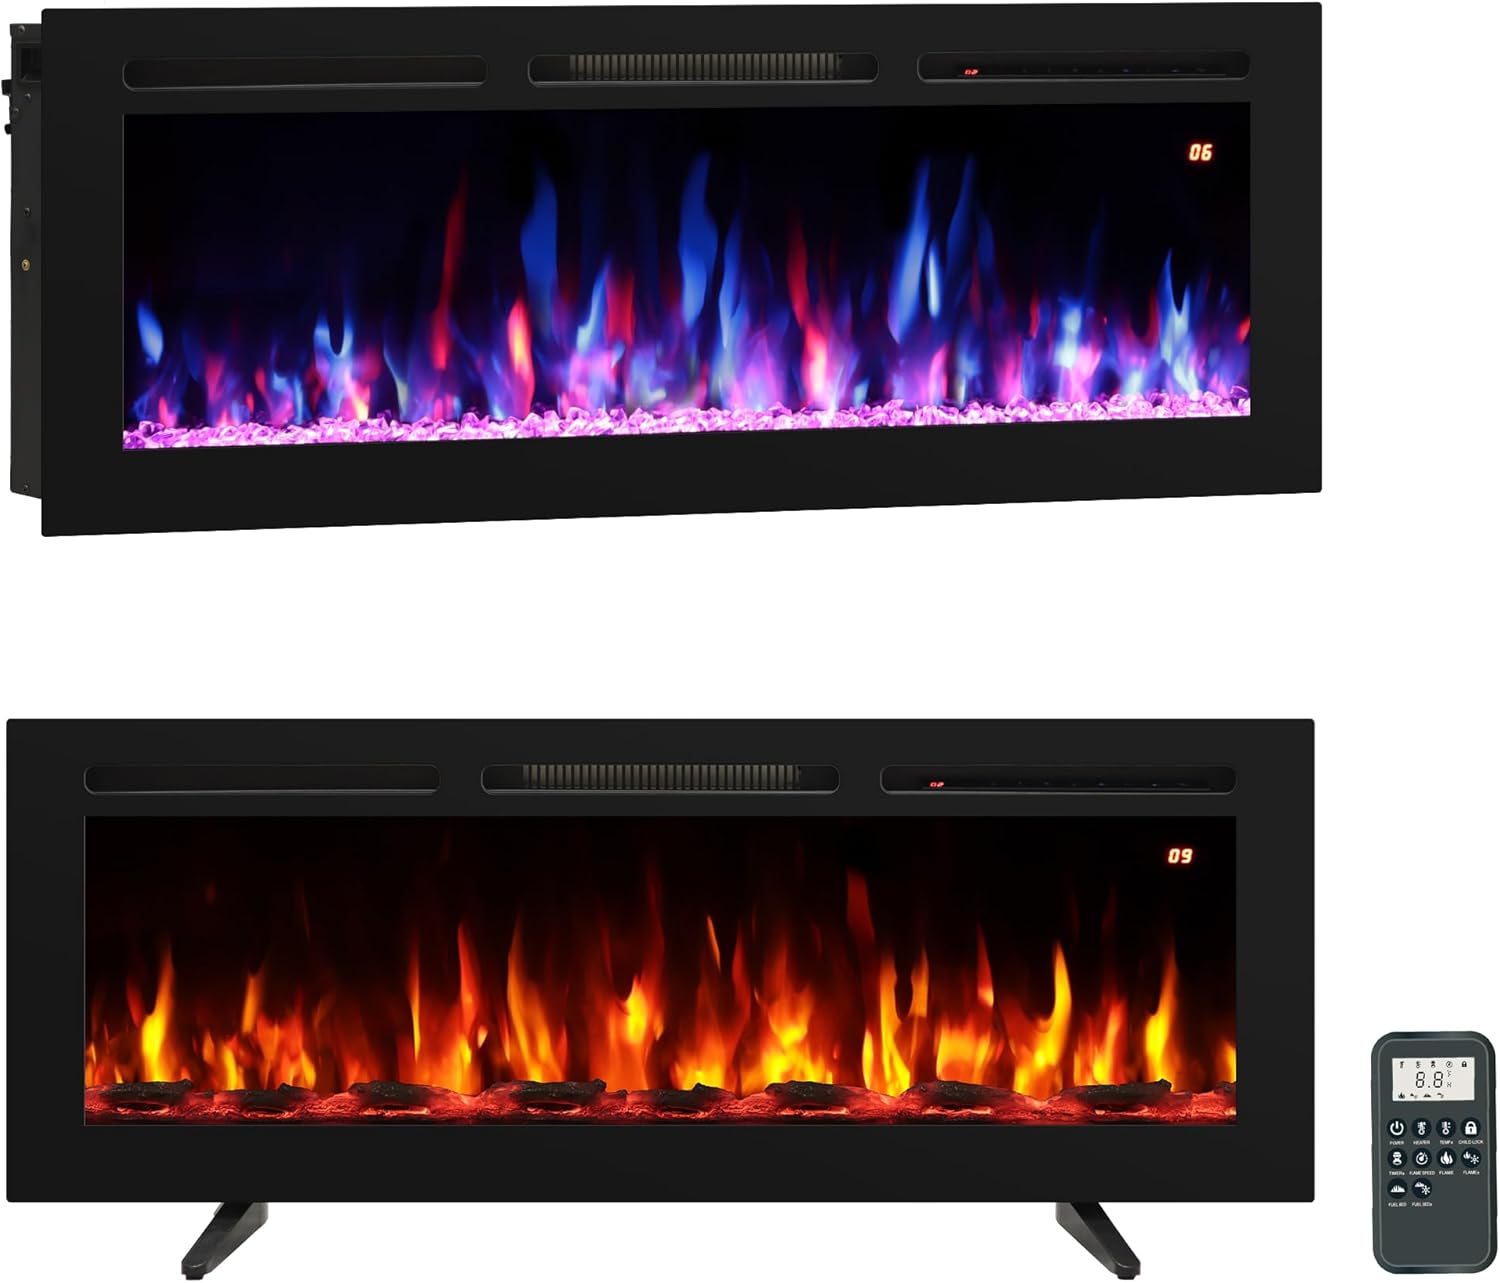
Figure 1: Oxhark Flame 48-inch Electric Fireplace. This image shows the fireplace unit displaying multi-color flames, along with its remote control.
2. Important Safety Information
WARNING: To reduce the risk of fire, electric shock, or injury, read all instructions before using this appliance.
- This appliance is hot when in use. To avoid burns, do not let bare skin touch hot surfaces.
- Keep combustible materials, such as furniture, pillows, bedding, papers, clothes, and curtains at least 3 feet (0.9m) from the front of the fireplace.
- Extreme caution is necessary when any heater is used by or near children or individuals with reduced physical, sensory, or mental capabilities. Never leave the heater operating unattended.
- Do not operate any heater with a damaged cord or plug, or after the heater malfunctions, has been dropped, or damaged in any manner. Contact customer support for repair.
- Do not run the power cord under carpeting. Do not cover the cord with throw rugs, runners, or similar coverings. Arrange the cord away from traffic areas to prevent tripping hazards.
- To disconnect the heater, turn all controls to the OFF position, then remove the plug from the electrical outlet.
- Do not insert or allow foreign objects to enter any ventilation or exhaust opening as this may cause an electric shock, fire, or damage to the heater.
- To prevent a possible fire, do not block air intakes or exhaust openings in any manner. Do not use on soft surfaces, like a bed, where openings may become blocked.
- This electric fireplace has passed ETL safety certification. It includes a built-in overheat protection system that automatically cuts off power if the internal temperature reaches 212°F (100°C).
- The exterior remains cool to touch, making it suitable for families with children and pets. It provides a smoke-free and dust-free warm environment.
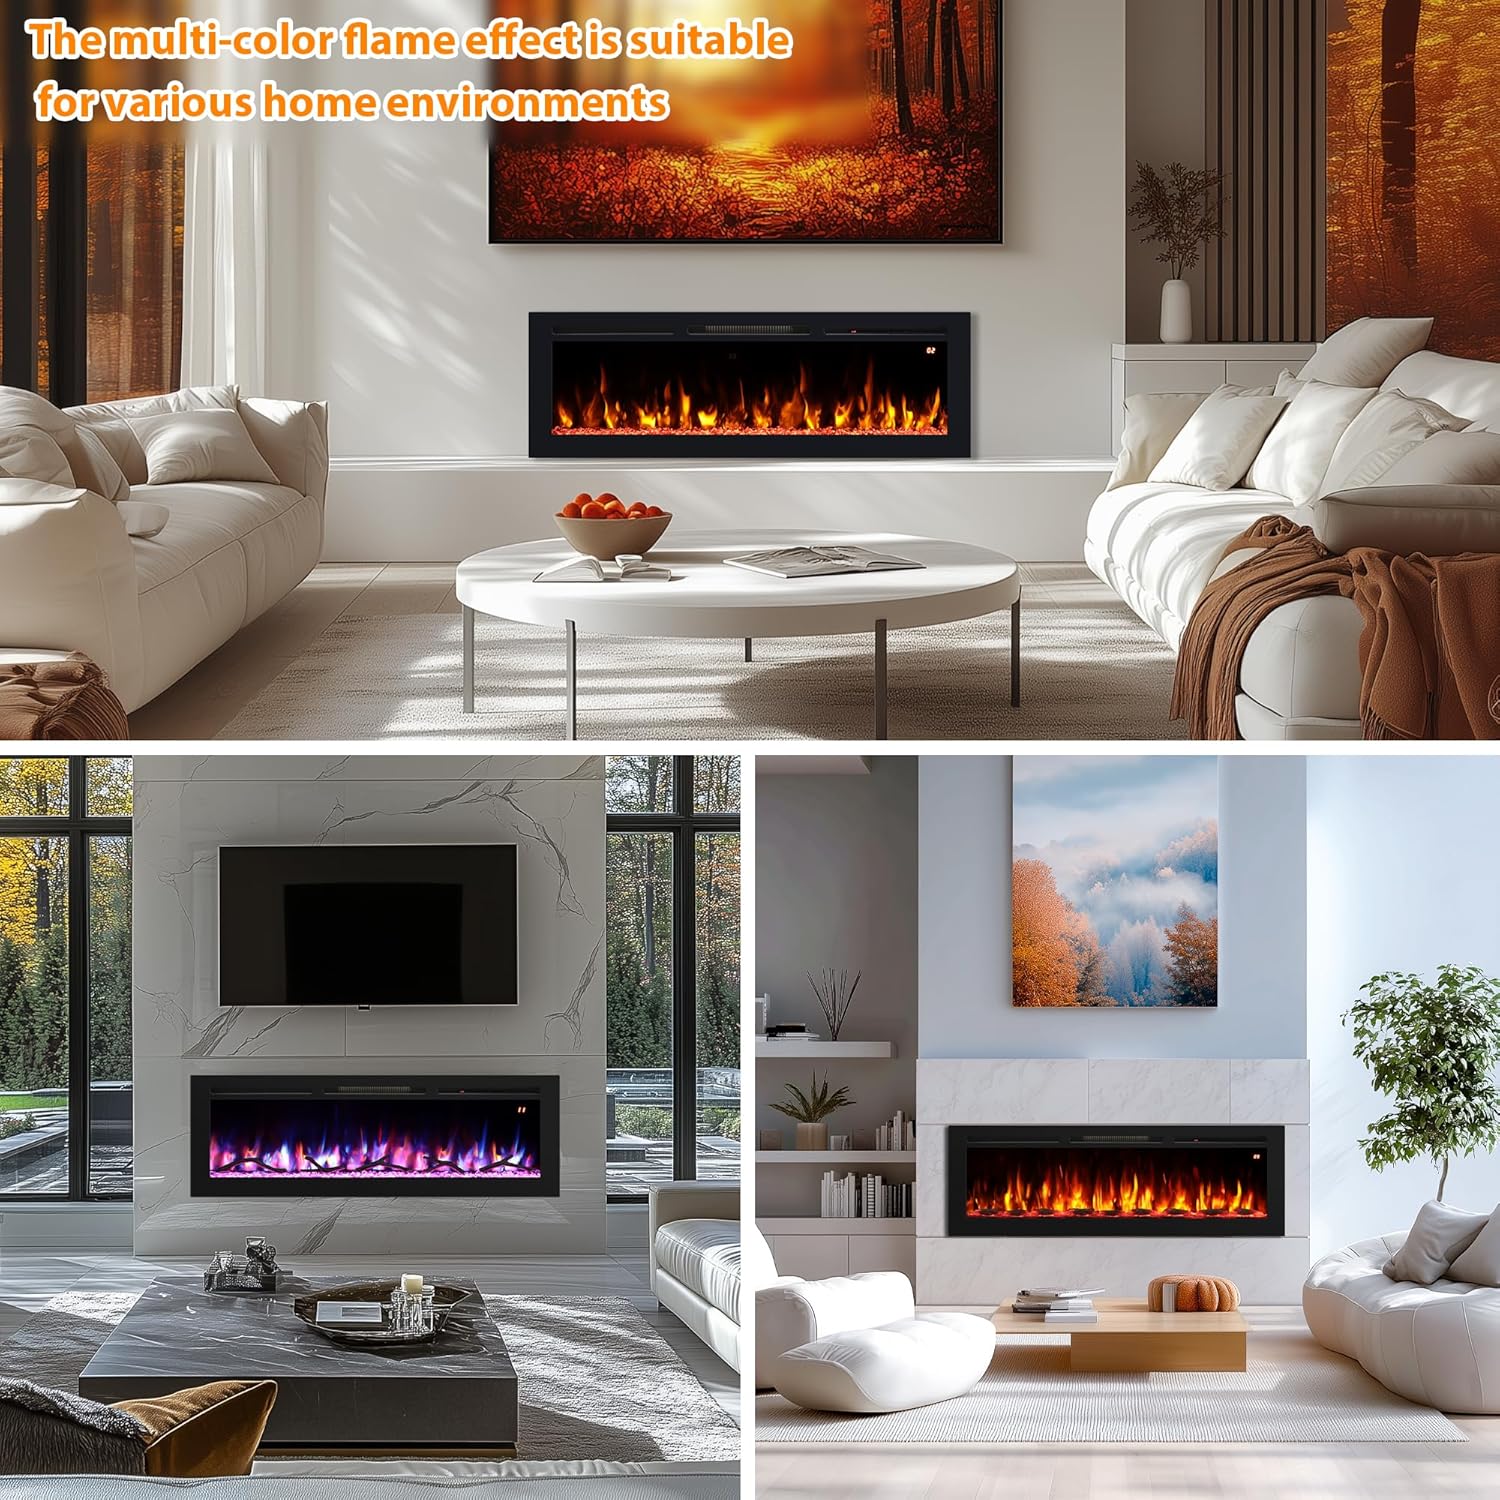
Figure 2: Safety Features. This image emphasizes the safety aspects of the fireplace, including child lock, timer, overheat protection, and its cool-to-touch design, suitable for homes with children.
3. Product Specifications
| Brand | Oxhark Flame |
| Model Name | Flame 48 |
| Overall Dimensions | 48" W x 17.7" H x 5.75" D |
| Insert Dimensions | 43.92" L x 15.7" H x 5.4" D |
| Power Source | AC 120V, 60Hz, 6 ft power cable |
| Material | Metal, Tempered Glass |
| Heat Output | 750W / 1500W (5100 BTU) |
| Heating Coverage | Up to 400 sq ft |
| Thermostat Range | 62°F - 99°F (17°C - 37°C) |
| Flame Colors | 14 options |
| Fuel Bed Colors | 14 options |
| Flame Brightness | 6 levels |
| Flame Speeds | 3 settings |
| Timer Function | 1-9 hours |
| Safety Features | ETL Certified, Overheat Protection |
| Installation Types | Freestanding, Wall Mount, Recessed |
| Item Weight | 53.9 pounds |
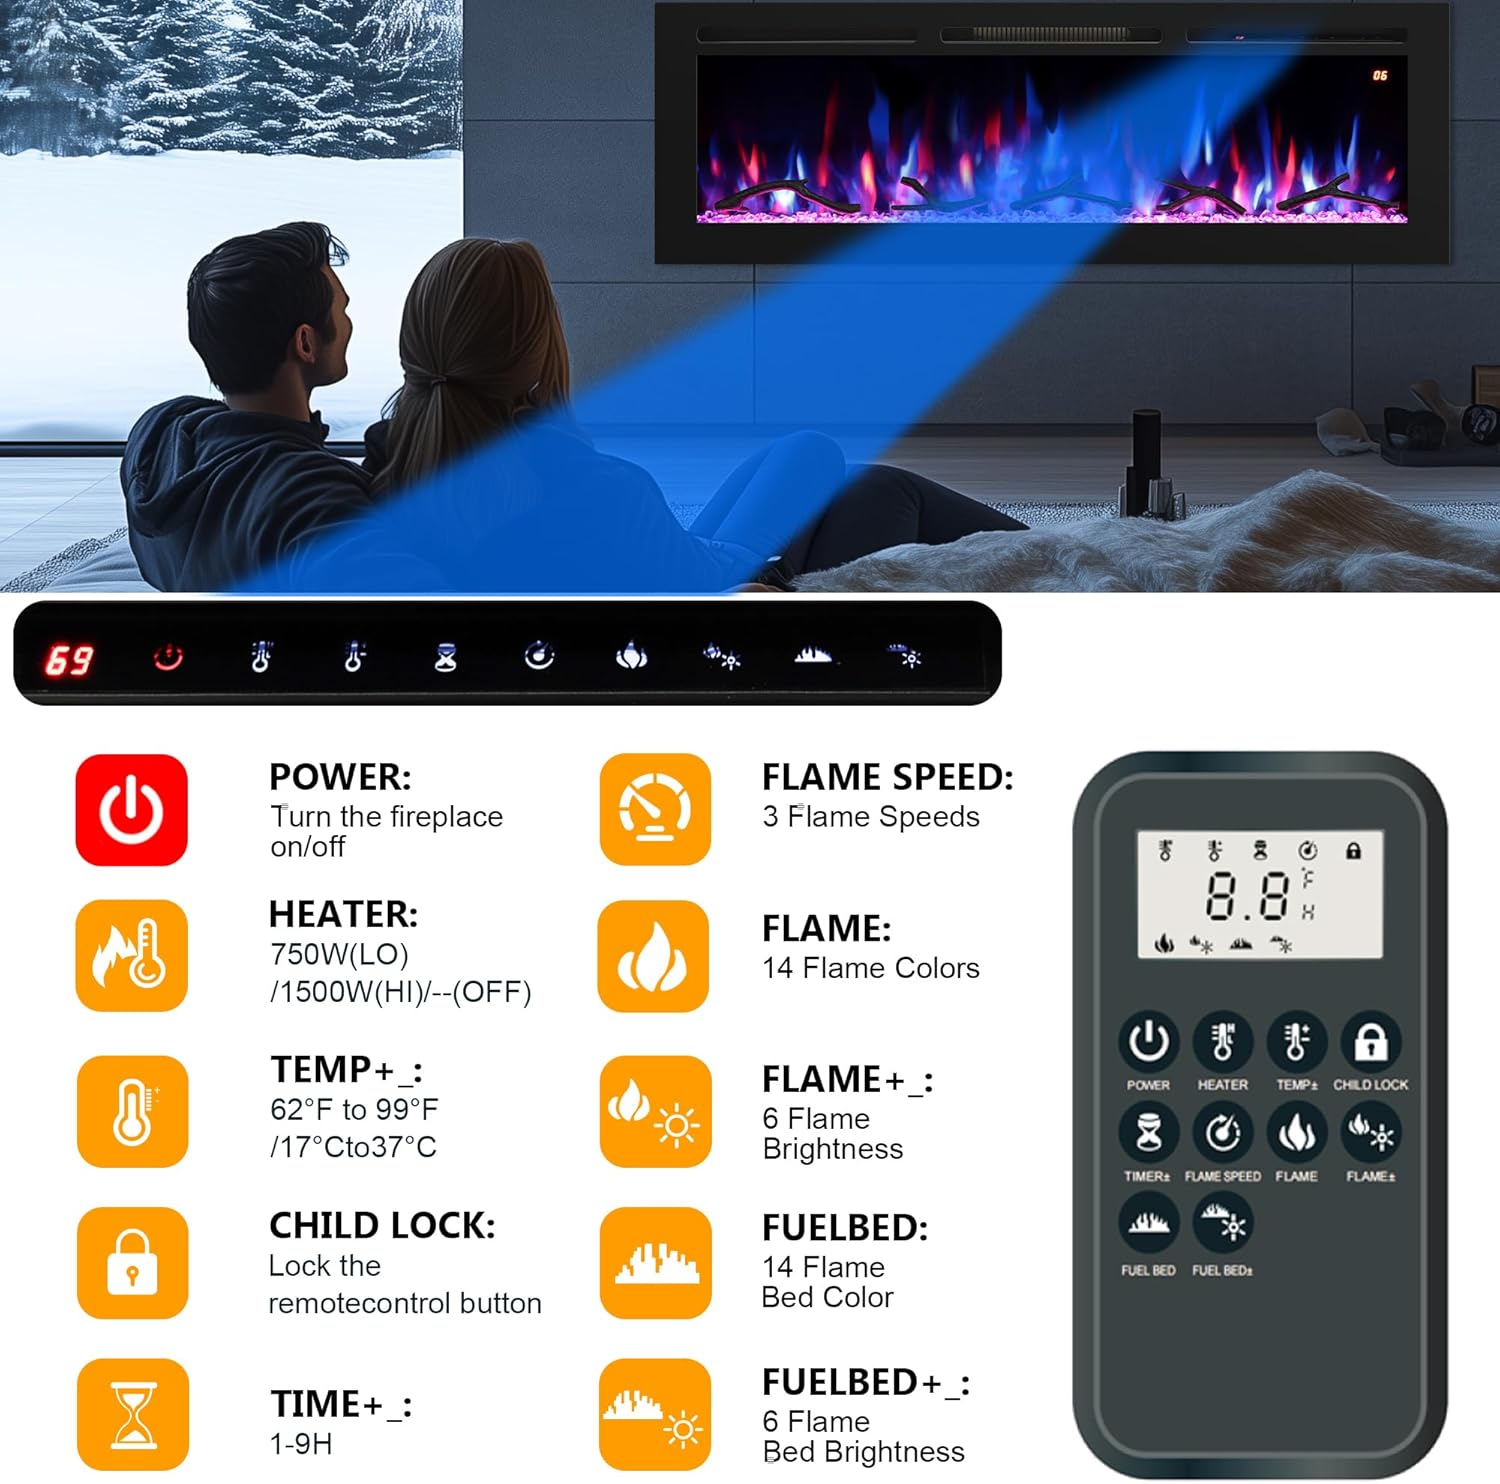
Figure 3: Control Panel and Remote. This image provides a closer look at the fireplace's control panel and the remote, illustrating the various settings for flame effects, heating, and timer functions.
4. Package Contents
Before beginning installation, ensure all parts are present and undamaged. If any parts are missing or damaged, do not proceed with assembly and contact customer support.

Figure 4: Included Components. This image displays the electric fireplace unit, a logset, a plastic tray, decorative crystals, the instruction manual, a remote control, and additional logs.
- Electric Fireplace Unit
- Remote Control
- Logset (decorative media)
- Crystals (decorative media)
- Plastic Tray (for decorative media)
- User Manual
- Mounting Hardware (screws, brackets, anchors - specific to installation type)
5. Installation Instructions
The Oxhark Flame electric fireplace supports three installation methods: freestanding, wall-mounted, and recessed. Choose the method that best suits your space and preferences. Always ensure the fireplace is unplugged before performing any installation or maintenance.
5.1. Freestanding Installation
For freestanding use, attach the provided base brackets to the bottom of the fireplace unit. Ensure the unit is placed on a stable, level surface.

Figure 5: Freestanding Installation Steps. This image illustrates how to attach the two base brackets to the bottom of the fireplace for freestanding use.
- Carefully place the fireplace unit on its back on a soft, protected surface.
- Align the left base bracket with the pre-drilled holes on the bottom left side of the fireplace.
- Secure the bracket using the provided screws and a screwdriver.
- Repeat the process for the right base bracket.
- Carefully lift the fireplace and place it upright on a stable, level surface.
5.2. Wall-Mounted Installation
To mount the fireplace on a wall, use the provided wall bracket and hardware. Ensure the wall can support the weight of the unit and that there are no electrical wires or plumbing in the mounting area.

Figure 6: Wall-Mounted Installation Steps. This image demonstrates how to secure the wall bracket and then hang the fireplace unit onto it.
- Determine the desired mounting location. Use a stud finder to locate wall studs for secure mounting.
- Mark the positions for the wall bracket screws. Use a level to ensure the bracket is straight.
- Drill pilot holes and insert wall anchors if mounting into drywall without studs.
- Attach the wall bracket securely to the wall using the provided screws.
- Carefully lift the fireplace unit and hook it onto the wall bracket.
- Secure the bottom of the fireplace to the wall using additional screws if provided, to prevent accidental dislodgement.
5.3. Recessed Installation
For recessed installation, a custom opening in the wall or TV stand is required. Refer to the dimensions below for the correct hole size. Ensure the opening is structurally sound and has access to a 120V electrical outlet.

Figure 7: Recessed Installation Dimensions. This diagram provides the width (W), height (H), and depth (I) for the wall opening required for recessed installation for various models, including the EFW48.

Figure 8: Recessed Installation Steps. This image illustrates the process of sliding the fireplace unit into a pre-constructed wall opening.
- For Model EFW48 (48-inch): Recommended hole size is approximately 44.88" W x 16.14" H x 5.79" D.
- Construct a sturdy frame within the wall or TV stand according to the recommended dimensions.
- Carefully slide the fireplace unit into the prepared opening.
- Secure the fireplace to the framing of the opening using appropriate screws.
5.4. Changing the Decorative Media (Logset, Crystals, Logs)
Your fireplace comes with options for decorative media. You can choose between a logset, crystals, or a combination of both to customize the appearance of your flame bed.
- Remove the Glass Panel: Locate and remove the two screws at the top of the fireplace unit that secure the glass panel. Carefully lift and remove the glass panel.
- Place Media: Place the desired media (logset, crystals, or logs) onto the plastic tray at the bottom of the fireplace.
- Reinstall Glass Panel: Carefully re-install the glass panel and secure it with the two screws.
Video: Oxhark Flame Electric Fireplace Media Replacement. This video demonstrates how to remove the glass panel, change the decorative media (logset, crystals, or logs), and re-install the glass panel.
6. Operating Instructions
Your Oxhark Flame electric fireplace can be operated using either the touch screen controls on the unit or the included remote control.
6.1. Remote Control and Touch Panel Functions

Figure 9: Remote Control and Touch Panel Functions. This image details the buttons on the remote control and their corresponding functions, which are also available on the fireplace's touch panel.
- Power: Turns the fireplace on/off.
- Heater: Selects heater power (750W/Low, 1500W/High, or Off).
- Temperature (+/-): Adjusts the thermostat from 62°F-99°F (17°C-37°C).
- Child Lock: Locks the remote control buttons to prevent accidental changes.
- Timer: Sets the timer function from 1-9 hours.
- Flame Speed: Adjusts the speed of the flame effect (3 speeds).
- Flame Color: Cycles through 14 different flame colors.
- Flame Brightness: Adjusts flame brightness (6 levels).
- Fuel Bed Color: Cycles through 14 different fuel bed colors.
- Fuel Bed Brightness: Adjusts fuel bed brightness (6 levels).
6.2. Flame and Fuel Bed Customization
The fireplace offers extensive customization for the flame and fuel bed appearance, allowing you to create up to 196 color combinations.

Figure 10: Flame and Fuel Bed Color Options. This image displays the 14 distinct flame colors and 14 fuel bed colors that can be selected.

Figure 11: Flame Brightness and Speed Settings. This image illustrates the 6 levels of flame brightness and 3 flame speed options.
Video: Oxhark Flame Electric Fireplace Flame and Appearance Display. This video showcases the various multi-color flame effects and fuel bed options available, demonstrating how they can create different moods.
Heating and flame effects can operate independently or simultaneously, allowing for year-round ambiance.
7. Maintenance
Regular maintenance ensures the longevity and optimal performance of your electric fireplace. Always ensure the fireplace is turned off and unplugged before performing any cleaning or maintenance.
- Cleaning Exterior: Use a soft, damp cloth to clean the exterior surfaces. Do not use abrasive cleaners, chemical sprays, or harsh solvents, as these may damage the finish.
- Cleaning Air Vents: Periodically check and clean the air inlet and outlet vents to ensure they are free from dust, lint, and debris. Blocked vents can impair heating efficiency and trigger the overheat protection system. Use a vacuum cleaner with a brush attachment to gently remove any build-up.
- Light Bulbs: The flame effect uses durable LED technology, which typically does not require replacement. If any issues arise with the lighting, contact customer support.
- Storage: If storing the fireplace for an extended period, ensure it is clean, dry, and stored in a safe location away from moisture, direct sunlight, and extreme temperatures. It is recommended to store it in its original packaging if possible.
8. Troubleshooting
If you encounter any issues with your electric fireplace, refer to the following common problems and solutions:
- No Power:
- Check if the power cord is securely plugged into a functional 120V electrical outlet.
- Verify that the wall outlet is functional by plugging in another appliance.
- Check the circuit breaker for your home's electrical panel and reset if tripped.
- Ensure the main power switch on the fireplace (if present) is in the "ON" position.
- Heater Not Working:
- Confirm the heater function is activated via the remote or touch panel.
- Check the thermostat setting; ensure it is set higher than the current room temperature.
- The overheat protection system may have activated. Unplug the unit, wait 10-15 minutes for it to cool down, and then plug it back in. Ensure air vents are not blocked.
- Flame Effect Not Working:
- Ensure the flame effect is turned on via the remote or touch panel.
- Check if the brightness setting is too low.
- Remote Control Not Responding:
- Replace the batteries in the remote control.
- Ensure there are no obstructions between the remote and the fireplace's infrared sensor.
- Check if the child lock feature is activated on the remote.
If the problem persists after attempting these solutions, please contact customer support for further assistance.
9. Warranty and Customer Support
Your Oxhark Flame electric fireplace comes with a Limited Warranty. Please refer to the warranty card included in your package for specific terms and conditions regarding coverage, duration, and claims procedures.
For technical assistance, warranty claims, or any other inquiries, please contact Oxhark Flame customer support. Contact information can typically be found on the product packaging, the official Oxhark Flame website, or through your retailer.
When contacting support, please have your model name (Flame 48) and purchase date available to expedite the service process.