1. Introduction
This manual provides essential information for the installation, operation, and maintenance of the Generic 130120-506 Temperature Sensor Phase 7. This component is designed as a replacement part for American Dryer Laundry appliances. Please read this manual thoroughly before attempting any installation or service.
2. Safety Information
WARNING: Disconnect power to the appliance before servicing. Failure to do so can result in electrical shock, personal injury, or death.
- Always wear appropriate personal protective equipment (PPE) such as gloves and eye protection.
- If you are not familiar with appliance repair procedures, it is recommended to seek assistance from a qualified technician.
- Ensure all connections are secure and correctly made before restoring power.
- Keep children and pets away from the work area.
3. Product Overview
The 130120-506 Temperature Sensor is a critical component in your dryer's heating system. It monitors the internal temperature of the dryer drum, sending signals to the control board to regulate the heating element and prevent overheating. Proper functioning of this sensor ensures efficient drying and safety.
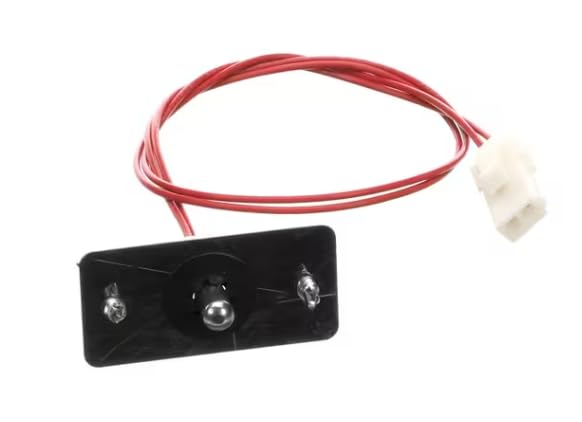
This image displays the Generic 130120-506 Temperature Sensor Phase 7. It features a rectangular metal mounting plate with two screw holes, a central probe, and red wires extending from the probe, terminating in a white electrical connector.
4. Specifications
| Specification | Value |
|---|---|
| Part Number | 130120-506 |
| Product Dimensions | 5.65 x 4.55 x 3.45 inches |
| Compatibility | Fits American Dryer Laundry appliances |
5. Setup and Installation
Installation of a temperature sensor typically involves accessing the dryer's internal components. Due to variations in dryer models, specific steps may differ. Always refer to your appliance's service manual for detailed instructions.
General Installation Steps:
- Disconnect Power: Unplug the dryer from the wall outlet or turn off the circuit breaker.
- Access the Sensor: Depending on your dryer model, you may need to remove the back panel, front panel, or top panel to access the temperature sensor.
- Locate the Old Sensor: Identify the existing temperature sensor. It is typically mounted near the heating element or in the air duct.
- Disconnect Wiring: Carefully disconnect the electrical connector from the old sensor. Note the orientation if necessary.
- Remove Old Sensor: Unscrew or unclip the old sensor from its mounting bracket.
- Install New Sensor: Mount the new Generic 130120-506 Temperature Sensor in the same location, securing it with screws or clips.
- Connect Wiring: Attach the electrical connector to the new sensor, ensuring a firm connection.
- Reassemble Dryer: Reattach any panels removed during the process.
- Restore Power: Plug the dryer back in or turn on the circuit breaker.
- Test Operation: Run a short cycle to confirm proper operation and temperature regulation.
IMPORTANT: If you are unsure about any step, consult a professional appliance technician.
6. Operating Instructions
The 130120-506 Temperature Sensor operates automatically within the dryer's control system. Once installed, it continuously monitors the internal temperature. No direct user interaction is required for its operation. Ensure your dryer is used according to its manufacturer's instructions.
7. Maintenance
The temperature sensor itself typically requires no routine maintenance. However, to ensure its longevity and the overall efficiency of your dryer, consider the following:
- Clean Lint Filter: Clean the lint filter before or after every load to maintain proper airflow and prevent overheating.
- Inspect Venting: Periodically check the dryer's exhaust vent for blockages. A clogged vent can cause the dryer to overheat and potentially damage components, including the sensor.
- Professional Inspection: Consider a professional inspection of your dryer every few years to ensure all components are functioning correctly.
8. Troubleshooting
If your dryer is experiencing temperature-related issues, the sensor might be a contributing factor. Always perform basic troubleshooting before assuming a sensor failure.
Common Issues and Solutions:
- Dryer Not Heating:
- Check power supply and circuit breaker.
- Ensure the lint filter is clean and the exhaust vent is clear.
- Inspect heating element for damage.
- If other components are functional, the temperature sensor or thermal fuse might be faulty.
- Dryer Overheating:
- Clean lint filter and check for vent blockages.
- A faulty temperature sensor or thermostat can cause overheating.
- Clothes Not Drying Properly:
- Ensure proper load size.
- Check for restricted airflow (clogged lint filter or vent).
- A malfunctioning temperature sensor can lead to inconsistent heating.
If troubleshooting does not resolve the issue, professional diagnosis and repair are recommended.
9. Warranty and Support
As a replacement part, warranty coverage for the Generic 130120-506 Temperature Sensor Phase 7 is typically provided by the retailer or the manufacturer of the part. Please refer to your purchase documentation or contact the seller directly for specific warranty terms and support options.


