1. Introduction
The Wevoor A53 1296P HD Mini Pocket Body Camera is a compact and versatile recording device designed for various applications including outdoor activities, law enforcement, and personal security. Featuring a 180° rotatable lens, dual interchangeable batteries for extended recording, IR night vision, and AI motion detection, this body camera is engineered to capture clear video and audio in diverse environments.
2. Package Contents
- 1* A53 body camera
- 2* batteries (One on the camera)
- 1*TF card (64GB)
- 2*back clips
- 1 USB-C cable
- 1*manual
- 1*hand strap

3. Product Overview
The Wevoor A53 features a compact design with clearly labeled buttons and ports for easy operation. The rotatable lens allows for flexible recording angles.
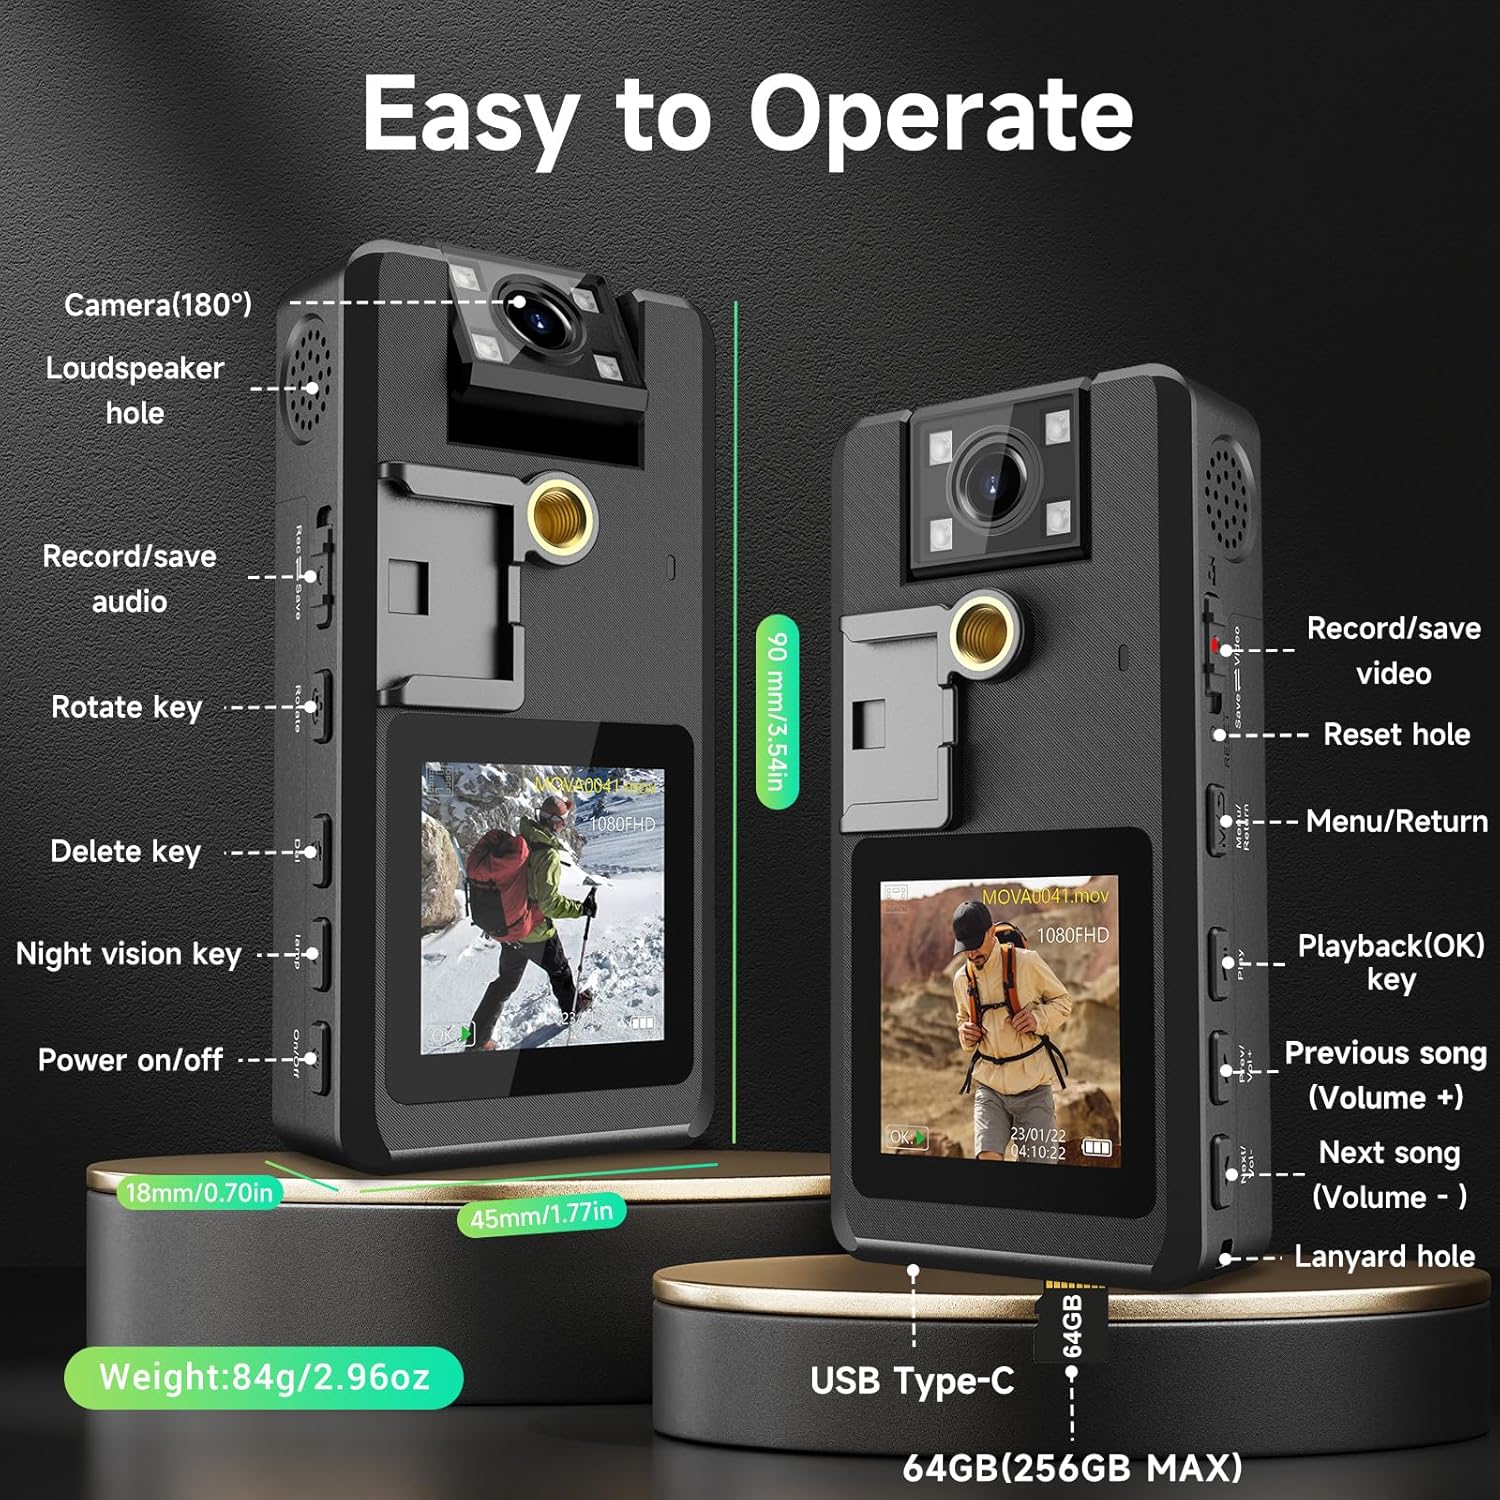
- 180° Rotatable Lens: Adjust the camera angle without repositioning the device.
- 1.54 Inch LCD Display: For live view and playback.
- Power On/Off Button: Controls device power.
- Record/Save Video Slider: Initiates and stops video recording.
- Record/Save Audio Slider: Initiates and stops audio recording.
- Night Vision Key (Volume +): Activates infrared night vision.
- Menu/Return Button: Navigates device settings and menus.
- Playback (OK) Key: Confirms selections and plays media.
- USB Type-C Port: For charging and data transfer.
- Micro SD Card Slot: For memory card insertion.
4. Setup
4.1 Charging the Battery
The Wevoor A53 comes with two 2130mAh interchangeable batteries, providing 16-20 hours of continuous recording. Charge the camera using the provided USB-C cable. Each battery also has a USB-C port for separate charging. A full charge takes approximately 4 hours. It is recommended to discharge and recharge batteries every 3 months if not in regular use.

4.2 Inserting the Micro SD Card
A 64GB TF (Micro SD) card is included and pre-installed. The device supports TF cards from 8GB up to 256GB. Ensure the card is inserted correctly with the black side closest to the monitor and the labeled side nearest the battery. The memory format only supports FAT32; format the card directly on the device if needed (Menu option #10).
4.3 Setting Date and Time
To set the date and time, long-press the Menu button (while in video or camera mode, but not recording). Use the Volume down arrow to navigate to
Ask a question about this manual
Ask about setup, troubleshooting, compatibility, parts, safety, or missing instructions. Manuals+ will review the question and use this page’s manual context to help answer it.