1. Introduction
Thank you for choosing the VASAGLE Console Table with Power Outlet. This manual provides essential information for the safe assembly, proper use, and care of your new furniture. Please read these instructions carefully before beginning assembly and retain them for future reference.
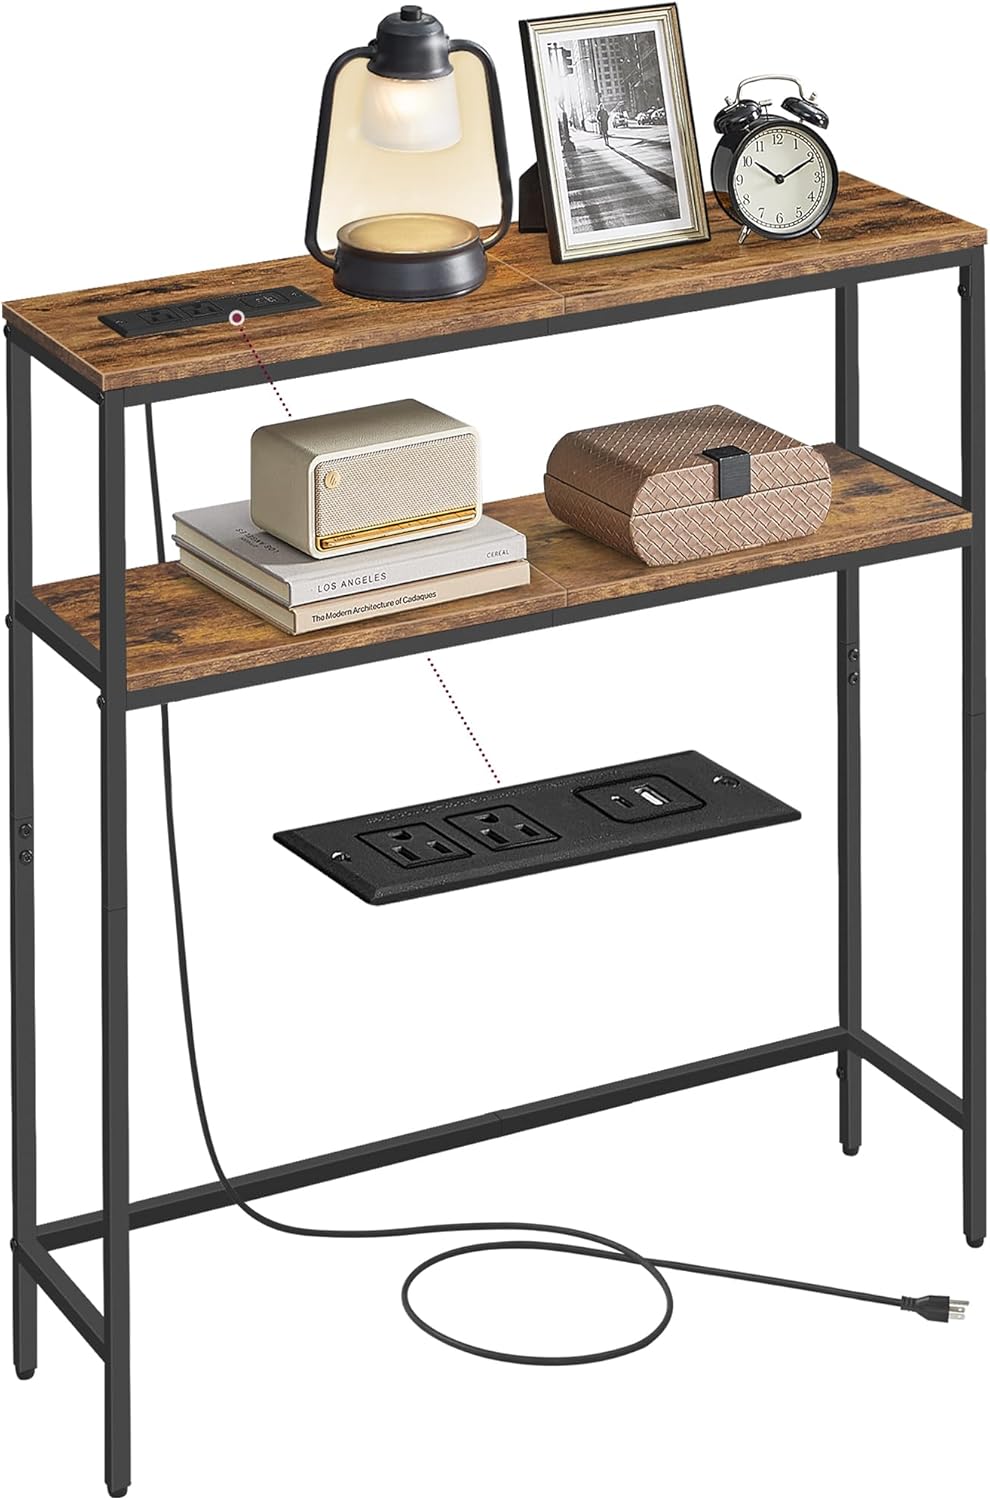
Image 1.1: The VASAGLE Console Table with Power Outlet, featuring its integrated charging capabilities and two-tier design.
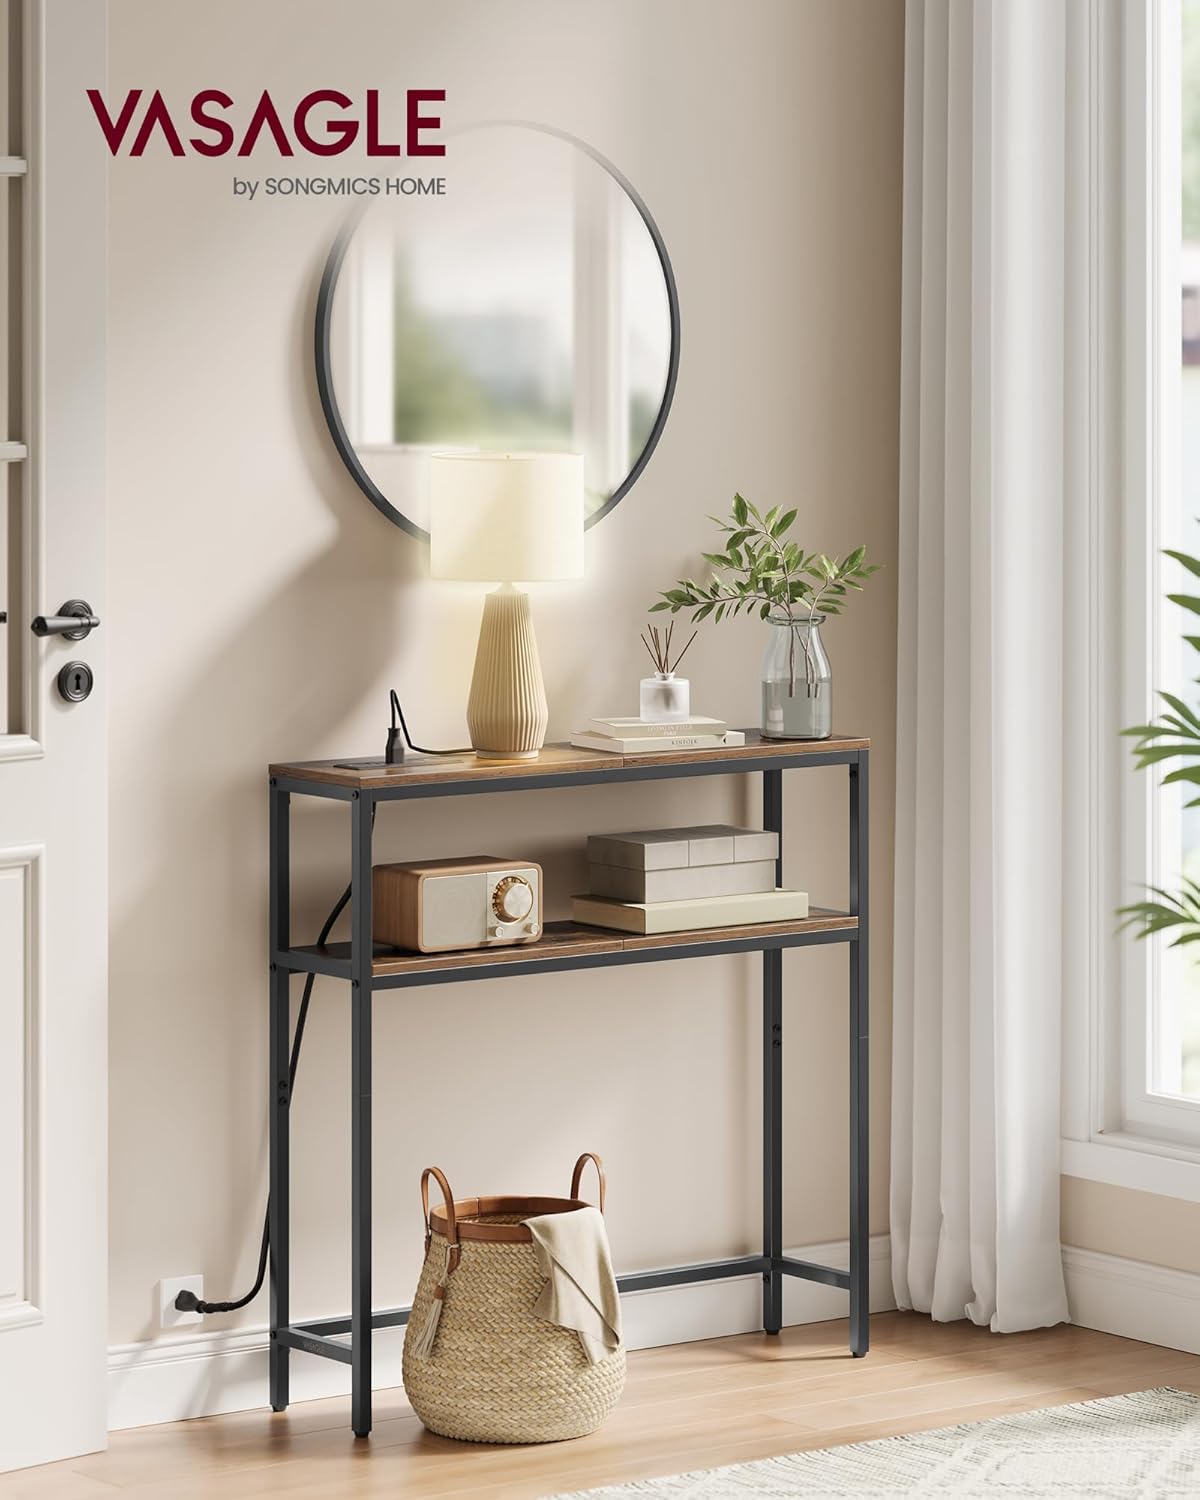
Image 1.2: The console table positioned in an entryway, illustrating its narrow profile and functional design.
2. Safety Information
- Always follow the assembly instructions precisely. Incorrect assembly can lead to instability and potential injury.
- Do not exceed the maximum weight capacities: 66 lb (30 kg) for the tabletop and 44 lb (20 kg) for the lower shelf.
- Ensure all screws and fasteners are securely tightened before use. Periodically check and re-tighten as necessary.
- Install the anti-tip kit provided to prevent the table from tipping over, especially in households with children or pets.
- Keep electrical components (power strip) away from water or excessive moisture.
- Do not overload the power outlets. Refer to the specifications for electrical ratings.
- Place the table on a level surface. Use the adjustable feet to compensate for uneven floors.

Image 2.1: Detail showing the anti-tip kit and adjustable feet for enhanced stability and safety.
3. Package Contents
Before assembly, verify that all components listed below are present and undamaged. If any parts are missing or damaged, please contact customer support.
- Tabletop Panels (2)
- Side Frame Supports (2)
- Crossbars (2-3, depending on design)
- Power Outlet Strip (1) with power cord
- Adjustable Feet (4)
- Anti-Tip Kit (1 set)
- Assembly Hardware (screws, bolts, Allen wrench)
- Instruction Manual (this document)
4. Assembly Instructions
Assembly is designed to be straightforward. It is recommended to assemble the table on a soft, clean surface to prevent scratches. Two people are recommended for easier assembly.
- Unpack and Identify Parts: Carefully remove all components from the packaging. Lay them out and compare them against the parts list to ensure everything is present.
- Assemble the Frame: Attach the crossbars to the side frame supports using the provided hardware. Ensure all connections are finger-tightened initially.
- Attach Shelves: Secure the tabletop and lower shelf panels to the assembled frame. Tighten all screws firmly once all panels are in place.
- Install Power Outlet: Insert the power outlet strip into its designated slot on the tabletop. Secure it with the provided screws.
- Attach Adjustable Feet: Screw the adjustable feet into the bottom of the table legs.
- Position and Level: Move the assembled table to its desired location. Adjust the feet to ensure the table is stable and level on the floor.
- Install Anti-Tip Kit: For safety, attach the anti-tip kit to the back of the table and secure it to a wall stud according to the kit's specific instructions.
5. Operating Instructions (Power Outlet)
The integrated power strip provides convenient access to electrical outlets and USB charging ports.
- Connecting to Power: Plug the table's power cord into a standard 125V AC wall outlet.
- Using AC Outlets: The table features 2 AC outlets (125V/12A). Plug in devices such as lamps, laptops, or other small appliances. Do not exceed the maximum current rating.
- Using USB Ports: The table includes 1 USB-A port (5V/2A) and 1 USB-C port (5V/2A). These ports are suitable for charging smartphones, tablets, and other USB-powered devices.
- Safety Precautions:
- Do not use in wet environments.
- Do not disassemble or modify the power strip.
- Avoid placing liquids directly over the power strip.
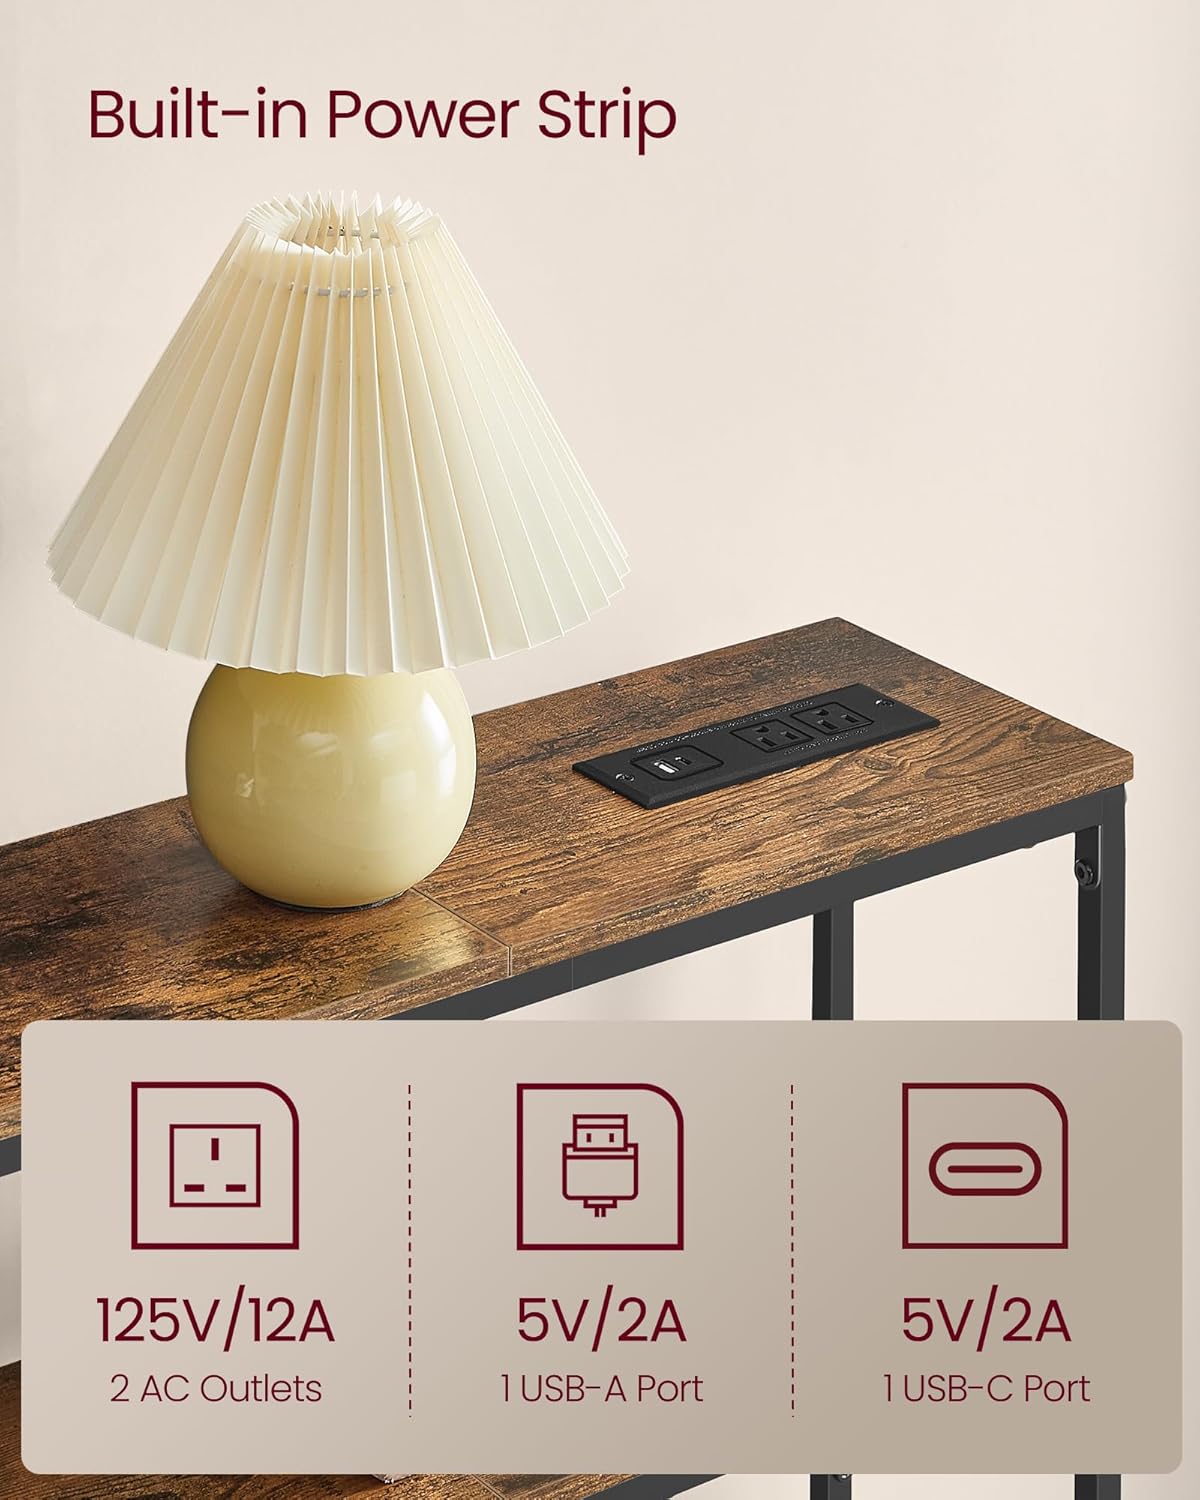
Image 5.1: Detail of the integrated power strip with 2 AC outlets, 1 USB-A port, and 1 USB-C port.
6. Maintenance
Proper care will help maintain the appearance and longevity of your console table.
- Cleaning: Wipe the surfaces with a damp cloth. Avoid harsh chemicals or abrasive cleaners, which can damage the finish.
- Spills: Promptly wipe up any spills to prevent staining or damage to the wood-grain finish.
- Stability Check: Periodically check all screws and connections to ensure they remain tight. Re-tighten if necessary.
- Environmental Conditions: Avoid prolonged exposure to direct sunlight or extreme temperature changes, which can cause warping or fading.
Image 6.1: The table surface is designed for easy cleaning with a damp cloth.
7. Troubleshooting
If you encounter any issues with your console table, refer to the following common solutions:
- Table is Wobbly:
- Ensure all assembly screws are fully tightened.
- Adjust the leveling feet on the bottom of the legs to compensate for uneven flooring.
- Power Outlets Not Working:
- Verify that the table's power cord is securely plugged into a functional wall outlet.
- Check if the wall outlet itself is receiving power (test with another device).
- Ensure the total power draw of connected devices does not exceed the power strip's rating (12A).
- Missing Parts or Damaged Components:
- Review the "Package Contents" section.
- Contact VASAGLE customer support with your purchase details for assistance.
8. Specifications
| Feature | Detail |
|---|---|
| Model Number | ULNT135K01 |
| Brand | VASAGLE |
| Product Dimensions (D x W x H) | 7.9" x 31.5" x 31.5" (20 cm x 80 cm x 80 cm) |
| Tabletop Weight Capacity | 66 lb (30 kg) |
| Lower Shelf Weight Capacity | 44 lb (20 kg) |
| Color | Rustic Brown + Ink Black |
| AC Outlets | 2 (125V/12A) |
| USB-A Port | 1 (5V/2A) |
| USB-C Port | 1 (5V/2A) |
| Power Cord Length | 4.9 ft (1.5 m) |
| Materials | Particleboard, Steel |
| Product Care | Wipe with Damp Cloth |

Image 8.1: Detailed dimensions and weight capacities of the console table.
9. Warranty and Support
For warranty information, replacement parts, or technical support, please contact VASAGLE customer service through your original point of purchase or visit the official VASAGLE website. Please have your model number (ULNT135K01) and purchase date available when contacting support.