1. Introduction
This manual provides essential information for the installation, operation, and troubleshooting of the Kenmore Washer Lid Switch, part number 8318084. This component is crucial for the safe and proper functioning of your washing machine, ensuring the lid is securely closed before agitation or spin cycles begin.
1.1. Product Compatibility
This lid switch is compatible with various Kenmore washing machine models, including but not limited to:
- 11027612600
- 11027632600
- 11027642600
- 11027721600
- 11027731600
- 11027741600
- 11027751700
- 11027761700
- 11027782700
- 11027831600
- 11027841600
- 11027871600
- 11027872600
It directly replaces part numbers AP6012742, ES8084, PS11745957, and TJ90ES8084.
2. Safety Information
WARNING: Before attempting any installation, repair, or maintenance on your washing machine, always disconnect the appliance from its power source by unplugging it or turning off the circuit breaker. Failure to do so can result in serious injury or electrical shock.
- Wear appropriate personal protective equipment, such as gloves, if necessary.
- If you are unsure about any step, consult a qualified appliance technician.
- Keep children and pets away from the work area.
3. Product Overview
The lid switch is a safety device that prevents the washer from operating when the lid is open. It typically consists of a plastic housing with electrical contacts and a lever or plunger that is activated by the washer lid.
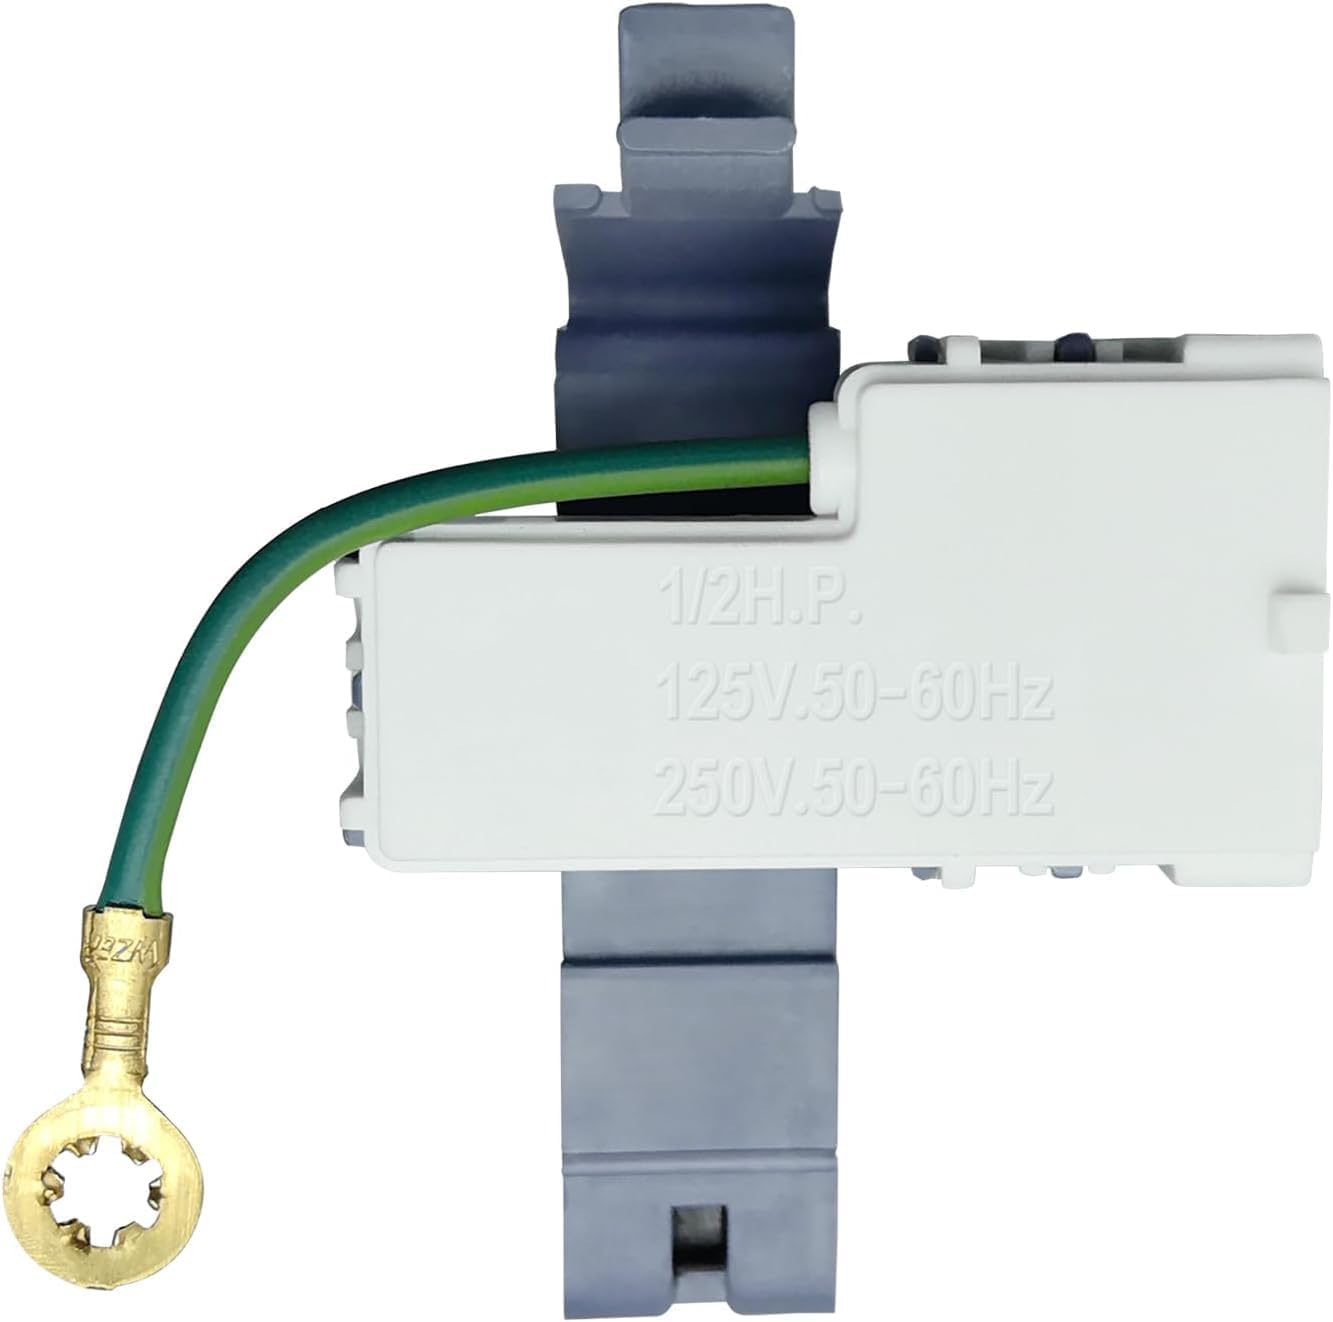
Figure 3.1: Front view of the Kenmore Washer Lid Switch. This image displays the main body of the switch, including the electrical ratings (1/2 H.P., 125V.50-60Hz, 250V.50-60Hz) and the green ground wire with a ring terminal.
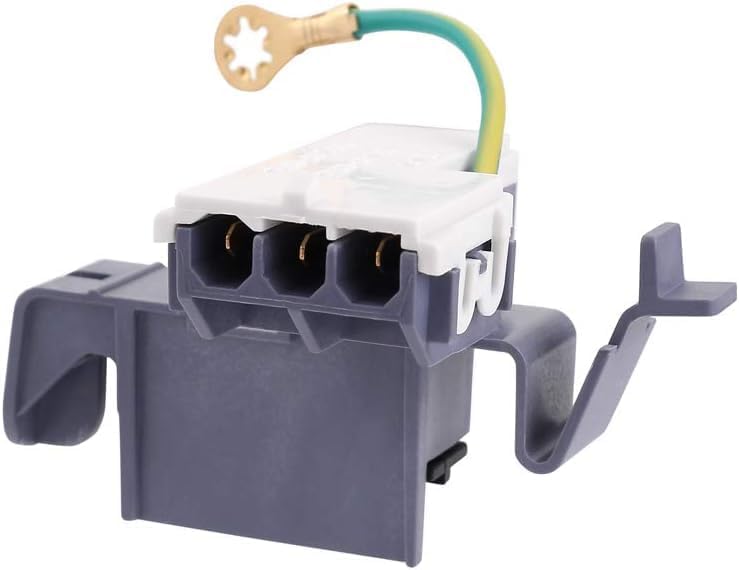
Figure 3.2: Bottom view of the Kenmore Washer Lid Switch. This image highlights the three electrical pin connectors and the mounting bracket, essential for securing the switch within the washer.
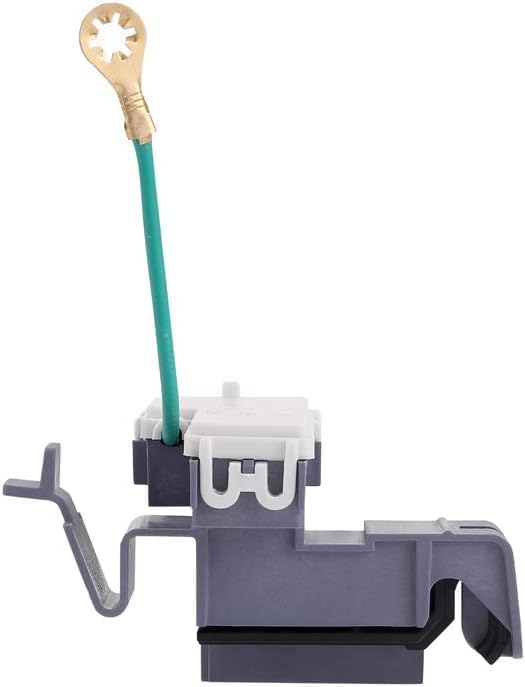
Figure 3.3: Side profile of the Kenmore Washer Lid Switch. This view shows the overall shape and depth of the component, including the lever mechanism that interacts with the washer lid.

Figure 3.4: Dimensions of the Kenmore Washer Lid Switch. This image provides key measurements, indicating a width of approximately 3.1 inches, a height of 0.6 inches for the upper part, and a total height of 1.7 inches for the entire assembly.
4. Installation Instructions
Replacing a washer lid switch typically involves accessing the control panel or the top of the washer. Always refer to your specific washer model's service manual for detailed instructions, as procedures may vary.
4.1. General Installation Steps
- Disconnect Power: Unplug the washer from the electrical outlet or turn off the circuit breaker.
- Access the Switch: Depending on your washer model, you may need to lift the top panel, remove the control panel, or access the switch from the back. This often involves removing screws or clips.
- Locate the Old Switch: Identify the existing lid switch and its wiring connections.
- Disconnect Wiring: Carefully disconnect the electrical wires from the old switch. Note their positions or take a photo for reference.
- Remove Old Switch: Unmount the old lid switch from its housing or bracket.
- Install New Switch: Mount the new lid switch (part number 8318084) into the same position.
- Connect Wiring: Reconnect the electrical wires to the new switch, ensuring they are securely attached to the correct terminals.
- Reassemble Washer: Reattach any panels or components that were removed.
- Restore Power and Test: Plug the washer back in or turn on the circuit breaker. Test the washer to ensure the lid switch functions correctly (e.g., the washer should not start a cycle if the lid is open).
5. Operation
The lid switch is a critical safety and operational component in your washing machine. Its primary function is to detect whether the washer lid is closed. When the lid is open, the switch prevents the washer from entering agitation or spin cycles, thereby protecting users from moving parts and preventing water from splashing out.
For the washer to operate normally, the lid must be fully closed, engaging the lid switch and completing the electrical circuit that allows the motor to run for agitation and spinning.
6. Maintenance
The lid switch is a mechanical and electrical component that generally requires minimal maintenance. However, regular inspection can help prolong its lifespan and ensure safe operation.
- Visual Inspection: Periodically check the lid switch and its surrounding area for any visible damage, loose wires, or debris that might obstruct its operation.
- Cleanliness: Ensure the area where the lid switch plunger or lever engages is free from lint, detergent residue, or other obstructions.
- Gentle Use: Avoid slamming the washer lid, as this can put undue stress on the lid switch mechanism and potentially cause premature failure.
7. Troubleshooting
A malfunctioning lid switch can cause various operational issues with your washing machine. If you experience any of the following symptoms, the lid switch may be the cause:
- Washer will not start: If the lid switch is faulty, the washer may not receive the signal that the lid is closed, preventing it from starting any cycle.
- Washer will not agitate: Even if the washer fills with water, a defective lid switch can prevent the agitation cycle from beginning.
- Pumps but will not spin: The spin cycle, like agitation, requires the lid to be closed for safety. A broken switch will inhibit spinning.
- Washer will not drain: In some models, the lid switch can affect the drain cycle if it's part of the overall safety interlock.
- Washer timer not working: If the washer's control system doesn't detect a closed lid, the timer may not advance or initiate the next cycle.
- Washer has a burning smell: While less common, a shorted or failing electrical component within the switch could potentially cause a burning smell. Discontinue use immediately and disconnect power.
- Washer won't run: This is a general symptom encompassing all the above, indicating a complete failure of the washer to operate due to the lid switch.
- Lid switch broke away from the top: Physical damage to the switch or its mounting can prevent it from engaging properly.
If you identify any of these symptoms and suspect the lid switch is the issue, consider replacing the component following the installation instructions provided.
8. Specifications
| Specification | Detail |
|---|---|
| Part Number | 8318084 |
| Manufacturer | Generic |
| Product Dimensions | 1 x 1 x 1 inches (Approximate) |
| Item Model Number | 11027761700, 11027782700, 11027831600 |
| Replaces Part Numbers | AP6012742, ES8084, PS11745957, TJ90ES8084 |
| Item Package Quantity | 1 |
9. Warranty and Support
9.1. Warranty Information
This product comes with a 60-day warranty. Please retain your proof of purchase for any warranty claims.
9.2. Customer Support
For any questions regarding this product, its compatibility, installation, or troubleshooting, please contact our customer service team. We are committed to assisting you in selecting and utilizing the correct part for your washer.