1. Introduction
This manual provides essential information for the safe and effective operation, setup, and maintenance of your BESTMIG 200A MIG Welder. This multi-process welding machine offers 6 functions in one unit: Gas MIG, Gasless Flux Core, Stick, Lift TIG, Spot Welding, and Spool Gun compatibility. It supports dual 110V/220V voltage input and adjustable 2T/4T modes, making it suitable for various welding applications.

Figure 1.1: BESTMIG 200A MIG Welder and its accessories, including welding machine, helmet, gloves, and cables.
2. Safety Information
Always prioritize safety when operating welding equipment. Failure to follow safety guidelines can result in serious injury or death. Read and understand all safety warnings before use.
General Safety Precautions:
- Electric Shock: Welding current can cause fatal electric shock. Ensure proper grounding, wear dry gloves, and insulate yourself from the workpiece and ground.
- Fumes and Gases: Welding fumes and gases can be hazardous to your health. Work in a well-ventilated area or use an approved respirator.
- Arc Rays: Arc rays can burn eyes and skin. Wear a welding helmet with appropriate shade and protective clothing.
- Fire and Explosion: Welding sparks and hot metal can cause fire or explosions. Keep flammable materials away from the welding area. Have a fire extinguisher readily available.
- Burns: Hot metal and equipment can cause severe burns. Wear protective gloves and clothing.
- Machine Protection: The welder features triple protection (Overheat/Over-Voltage/Over-Current/Overloading) with thermal and current breakers. It automatically triggers at 185°F/85°C, cutting motor power while maintaining fan cooling to safeguard components.
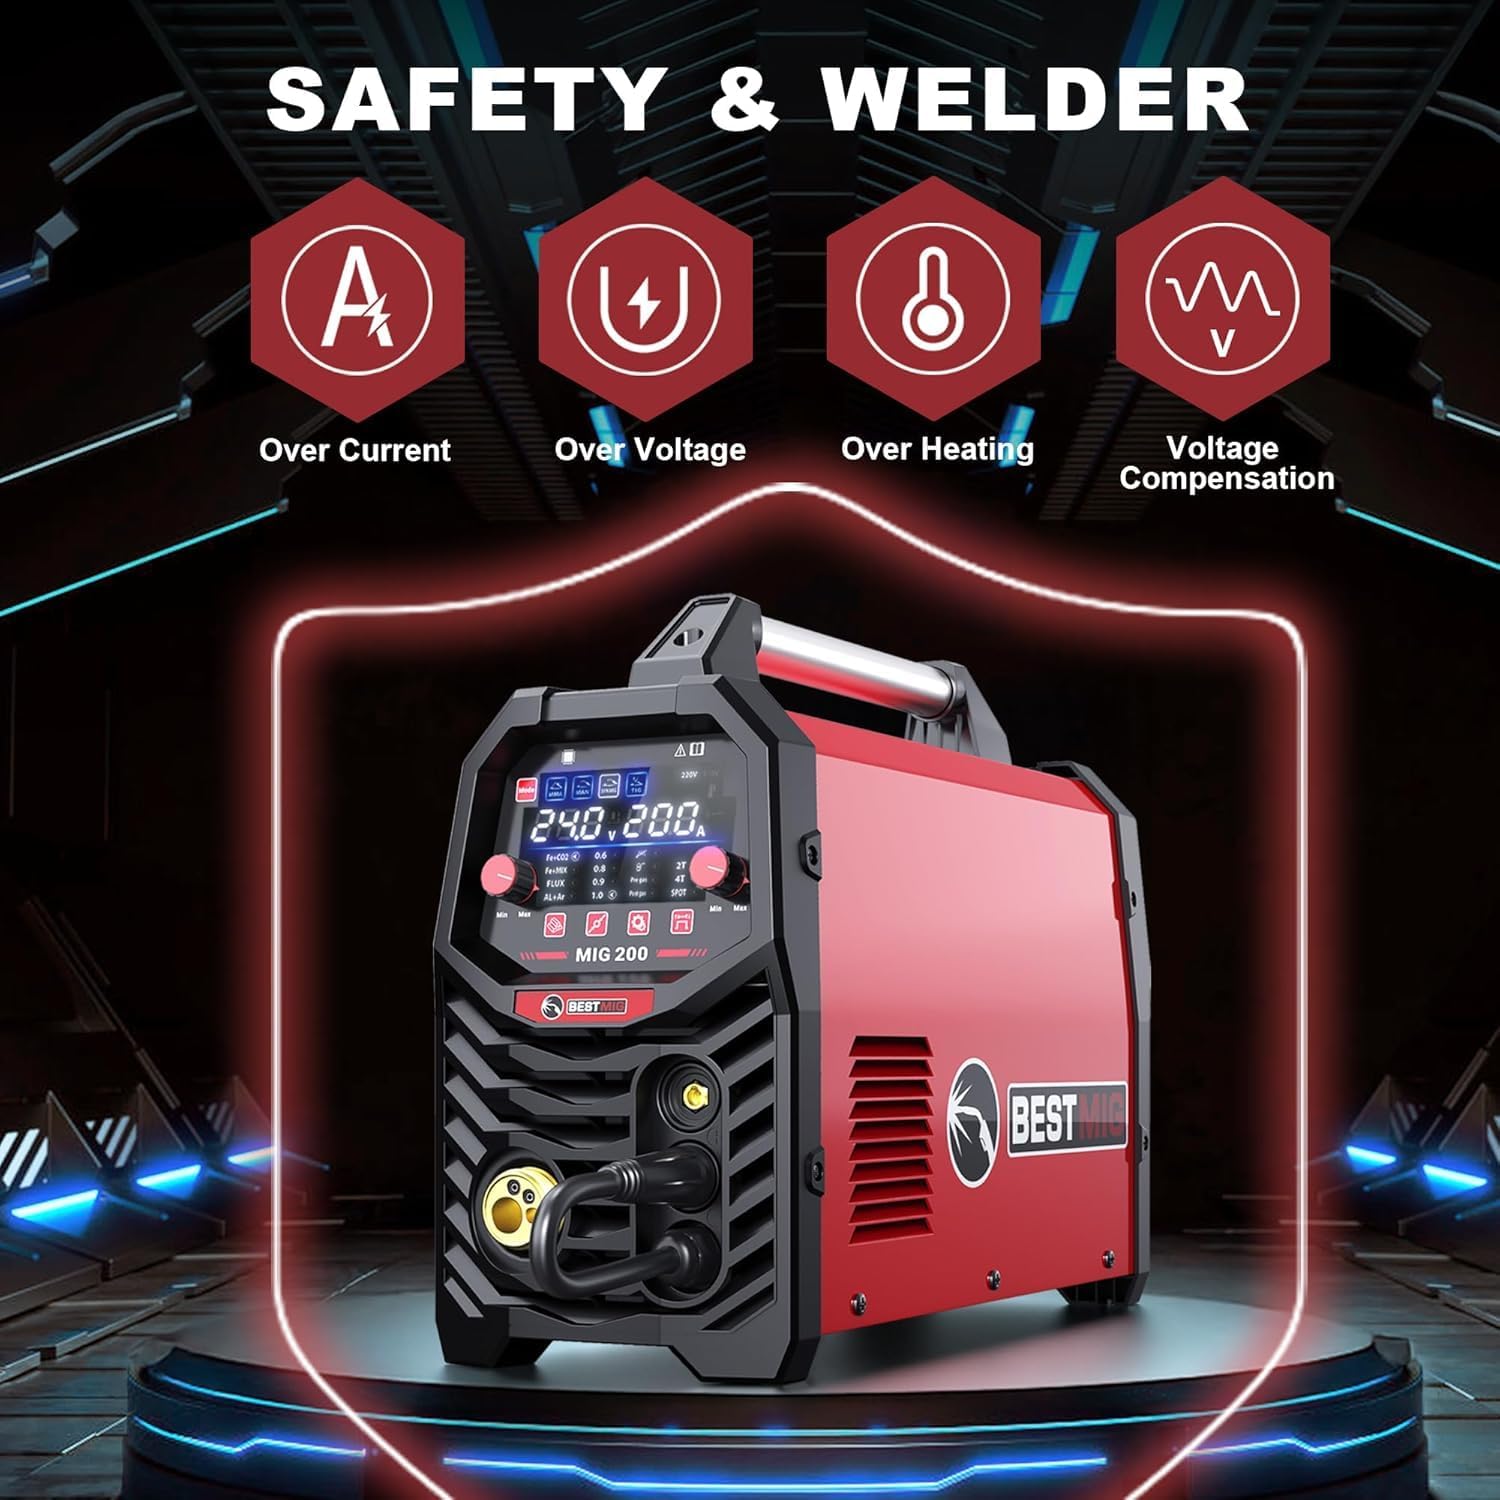
Figure 2.1: The welder's industrial safety shield system, indicating protection against over current, over voltage, over heating, and voltage compensation.
3. Package Contents
Verify that all items listed below are present in your package:
- Welding Machine
- Welding Helmet
- Gloves
- Wire Brush
- Flux Core Welding Wire
- 14AK Torch With Cable
- Electrode Holder With Cable
- Earth Clamp With Cable
- User Manual
- Extension Cord for Spool Gun
- V & W(K) & U Shaped Wire Feed Wheels
- Contact Tips
- 110V-220V Conversion Adapter

Figure 3.1: Overview of all items included in the package.
4. Product Features
The BESTMIG 200A MIG Welder is designed with advanced features for versatile welding applications:
- 6-in-1 Multi-Process Capability: Supports Gas MIG, Gasless Flux Core, Stick, Lift TIG, Spot Welding, and Spool Gun operations.
- Dual Voltage Input: Compatible with both 110V and 220V power sources.
- Adjustable 2T/4T Modes: Provides precision control and reduces operator fatigue during extended use.
- 200A Output Current: Delivers a real 200A output current at a 60% duty cycle for robust performance.
- IGBT Inverter Technology: Ensures stable current and improved durability.
- Digital MCU Control: Equipped with a fully digital MCU and high-integrity circuit design for precise control and stable welding quality across different materials and thicknesses.
- Large LED Display: Provides accurate, real-time data display for easy readability, even with a welding helmet.
- Wide Material Compatibility: Capable of welding carbon steel, stainless steel, and aluminum (with spool gun or MIG gun with graphite wire feed tube).
- Wire Compatibility: Works with .023"/.030"/.035" solid wire, flux-cored wire, and .035" aluminum wire.
- Gas Compatibility: Operates seamlessly with CO2, Ar+CO2 mix, or pure argon gas.
- Industrial Safety Shield System: Includes Overheat, Over-Voltage, Over-Current, and Overloading protection with thermal and current breakers.

Figure 4.1: The welder's multi-process capabilities, including various welding methods.

Figure 4.2: Detailed view of the welder's front and back panels, highlighting key connectors and controls.
5. Setup
5.1 Power Connection
- Ensure the welder's power switch is in the OFF position.
- Connect the input power cable to a suitable 110V or 220V power outlet. Use the provided 110V-220V conversion adapter if necessary.
- Verify that the power source matches the welder's input voltage setting.
5.2 Wire Installation
- Open the wire feed compartment.
- Place the wire spool onto the spindle, ensuring it rotates freely. Secure it with the spool lock.
- Thread the welding wire through the wire feed mechanism, ensuring it passes through the correct groove on the wire feed wheel for the wire size being used.
- Close the wire feed compartment.

Figure 5.1: Wire spool installation and internal wire feed components.
5.3 Gas Connection (for Gas MIG/MAG)
- Connect the gas hose from your gas cylinder (CO2, Ar+CO2 mix, or pure argon) to the gas inlet on the rear panel of the welder.
- Ensure all connections are secure to prevent gas leaks.
5.4 Torch and Clamp Connection
- Connect the MIG torch cable to the European-style gas shielded welding torch connector on the front panel.
- Connect the electrode holder cable to the positive output socket for Stick welding, or the earth clamp cable to the negative output socket.
- For Flux Core welding, ensure the wire feeder polarity wire is correctly configured (usually electrode negative).

Figure 5.2: Visual guide for connecting accessories for different welding modes.
6. Operating Instructions
6.1 Control Panel Overview
The welder features a large LED display and intuitive controls for setting welding parameters.

Figure 6.1: High-definition LED screen for parameter display and adjustment.
- Mode Selection Buttons: Select between MMA (Stick), MAN (Manual MIG), SYN MIG (Synergic MIG), and TIG welding modes.
- Digital Display: Shows real-time voltage, amperage, and wire feed speed.
- Adjustment Knobs: Use to fine-tune welding parameters such as voltage, amperage, and wire feed speed.
- 2T/4T Selector: Toggle between 2-stroke and 4-stroke trigger modes.
6.2 Welding Modes
Select the appropriate welding mode based on your material and application:
- Gas MIG/MAG: For welding with shielding gas (CO2, Ar+CO2 mix, or pure argon) and solid wire. Provides clean welds with minimal spatter.
- Gasless Flux Core: For welding with flux-cored wire without external shielding gas. Suitable for outdoor use or on dirty materials.
- Stick (MMA): For welding with coated electrodes. Versatile for various metals and conditions.
- Lift TIG: For precise welding of thin materials. Requires a TIG torch and shielding gas (pure argon).
- Spot Welding: For joining two overlapping metal sheets at specific points.
- Spool Gun: For welding aluminum or other soft wires, typically used with a dedicated spool gun to ensure consistent wire feeding.
6.3 2T/4T Modes
- 2T (Two-Touch) Mode: Press and hold the trigger to start welding; release to stop. Ideal for short welds.
- 4T (Four-Touch) Mode: Press and release the trigger to start welding; press and release again to stop. Useful for long welds, reducing hand fatigue.

Figure 6.2: Visual representation of weld results from various processes.
7. Maintenance
Regular maintenance ensures the longevity and optimal performance of your welding machine.
- Cleaning: Periodically clean the machine's exterior with a dry cloth. Use compressed air to remove dust and debris from inside the machine, especially around the cooling fan and circuit boards. Ensure the machine is unplugged before cleaning.
- Wire Feed System: Inspect the wire feed rollers and liner for wear or blockages. Clean or replace as needed to ensure smooth wire feeding.
- Cables and Connections: Regularly check all cables, torches, and clamps for damage, fraying, or loose connections. Replace damaged components immediately.
- Contact Tips and Nozzles: Replace worn contact tips and clean or replace clogged nozzles to maintain arc stability and weld quality.
- Storage: Store the welder in a clean, dry environment, away from excessive dust, moisture, and corrosive materials.
8. Troubleshooting
This section addresses common issues you might encounter during operation.
| Problem | Possible Cause | Solution |
|---|---|---|
| No power to the machine | Power switch off; Loose power cable; Circuit breaker tripped; Incorrect voltage input | Turn on power switch; Check power cable connection; Reset circuit breaker; Verify correct 110V/220V input. |
| No arc or weak arc | Poor ground connection; Incorrect welding parameters; Worn contact tip; Wire feed issue; Gas flow issue (for MIG) | Ensure good ground connection to workpiece; Adjust voltage/amperage; Replace contact tip; Check wire feed path; Verify gas flow and connections. |
| Wire not feeding | Wire tangled; Incorrect wire feed roller tension; Clogged liner; Worn wire feed motor | Untangle wire; Adjust roller tension; Clean or replace liner; Contact customer support if motor is faulty. |
| Overheat protection activated | Exceeded duty cycle; Insufficient ventilation; High ambient temperature | Allow machine to cool down; Ensure proper airflow around the machine; Reduce welding time or current. |
| Poor weld quality (porosity, spatter) | Incorrect parameters; Contaminated workpiece; Insufficient shielding gas (MIG); Incorrect stickout | Adjust voltage/amperage/wire speed; Clean workpiece thoroughly; Check gas flow and leaks; Adjust wire stickout. |
9. Technical Specifications
Detailed specifications for the BESTMIG 200A MIG Welder.
| Specification | Value |
|---|---|
| Manufacturer | BESTMIG |
| Item Weight | 22.5 pounds |
| Product Dimensions | 19.5 x 8 x 14.8 inches |
| Model Number | MIG200A-110V/220V |
| Color | Red Black |
| Power Source | AC/DC |
| Item Package Quantity | 1 |
| Batteries Included? | No |
| Date First Available | January 15, 2025 |

Figure 9.1: Physical dimensions and weight of the BESTMIG 200A MIG Welder.
10. Warranty and Customer Support
For warranty information or technical assistance, please refer to the warranty card included with your product or contact BESTMIG customer support. Contact details can typically be found on the manufacturer's official website or through your point of purchase.