
1. Introduction
This manual provides essential information for the safe assembly, operation, and maintenance of your KOTEK Twin Over Queen Bunk Bed. Please read all instructions carefully before assembly and use. Retain this manual for future reference.

Image 1.1: KOTEK Twin Over Queen Bunk Bed (Natural finish) with climbing net and ramp.
2. Safety Information
Adherence to these safety guidelines is crucial to prevent injury and ensure the longevity of your bunk bed.
- Weight Capacity: The upper bunk supports up to 440 lbs. The lower bunk supports up to 440 lbs. The climbing net supports up to 110 lbs. The climbing ramp supports up to 154 lbs. Do not exceed these limits.
- Mattress Thickness: For the upper bunk, the recommended mattress thickness is 6 inches or less. For the lower bunk, the recommended mattress thickness is 8 inches or less. Ensure the mattress does not exceed the guardrail height.
- Guardrails: The upper bunk is equipped with full-length guardrails to prevent accidental falls. Ensure guardrails are always securely in place.
- Age Recommendation: The upper bunk is not suitable for children under 6 years of age.
- Assembly: Ensure all parts are correctly assembled and all fasteners are tightened before use. Periodically check and re-tighten fasteners.
- Climbing Features: The climbing net and ramp are designed for supervised play. Ensure children use these features safely and appropriately.
- Ventilation: Ensure adequate ventilation around the bed.
- Placement: Position the bunk bed away from windows, cords, or other potential hazards.

Image 2.1: Structural and safety features including plywood slats and guardrail height.
3. Package Contents
Your KOTEK Twin Over Queen Bunk Bed package includes the following items. Please verify all components are present and undamaged before beginning assembly. The bunk bed is typically shipped in two separate boxes, which may arrive at different times.
- 1 x Twin Over Queen Bunk Bed Frame (disassembled components)
- 1 x Assembly Instructions Manual
- Necessary Hardware (screws, bolts, Allen wrench, etc.)
4. Setup and Assembly
Assembly of the KOTEK Twin Over Queen Bunk Bed requires careful attention to detail. It is recommended that two adults perform the assembly to ensure safety and efficiency. Clear illustrated instructions and all necessary hardware are included.
- Unpack Components: Carefully remove all parts from the packaging. Lay them out on a clean, soft surface (e.g., a rug or blanket) to prevent scratches.
- Identify Parts: Refer to the included parts list and diagrams to identify each component. Some pieces may be numbered for easier identification.
- Follow Instructions: Assemble the bed frame step-by-step according to the provided instruction manual. Pay close attention to the orientation of each piece.
- Tighten Fasteners: Initially, hand-tighten all screws and bolts. Once the entire structure is assembled, go back and fully tighten all fasteners using the provided Allen wrench or appropriate tools. Do not overtighten.
- Install Guardrails: Ensure all guardrails for the upper bunk are securely attached as per the instructions.
- Attach Climbing Features: Securely attach the climbing net and ramp to the designated areas.
- Final Check: Before use, thoroughly inspect the assembled bunk bed to ensure all connections are secure and stable.
Note: An impact driver or power drill with appropriate bits can expedite assembly, but exercise caution to avoid stripping screws or damaging wood.
5. Operating Instructions
The KOTEK Twin Over Queen Bunk Bed is designed for both sleeping and recreational activities with its integrated climbing features.
- Sleeping: Place appropriate size mattresses on both the upper (Twin) and lower (Queen) bunks, ensuring they meet the recommended thickness guidelines.
- Climbing Net: The climbing net provides an alternative access point to the upper bunk and an engaging play feature. Ensure the net is always taut and securely fastened. Supervise children during use.
- Climbing Ramp: The climbing ramp offers another fun way to access the upper bunk. Ensure the ramp is stable and clear of obstructions before use. Supervise children during use.
- House Design: The unique pitched roof design allows for creative decoration, such as hanging lightweight toys, string lights, or flags, to personalize the space. Ensure any decorations are securely attached and do not pose a choking or entanglement hazard.
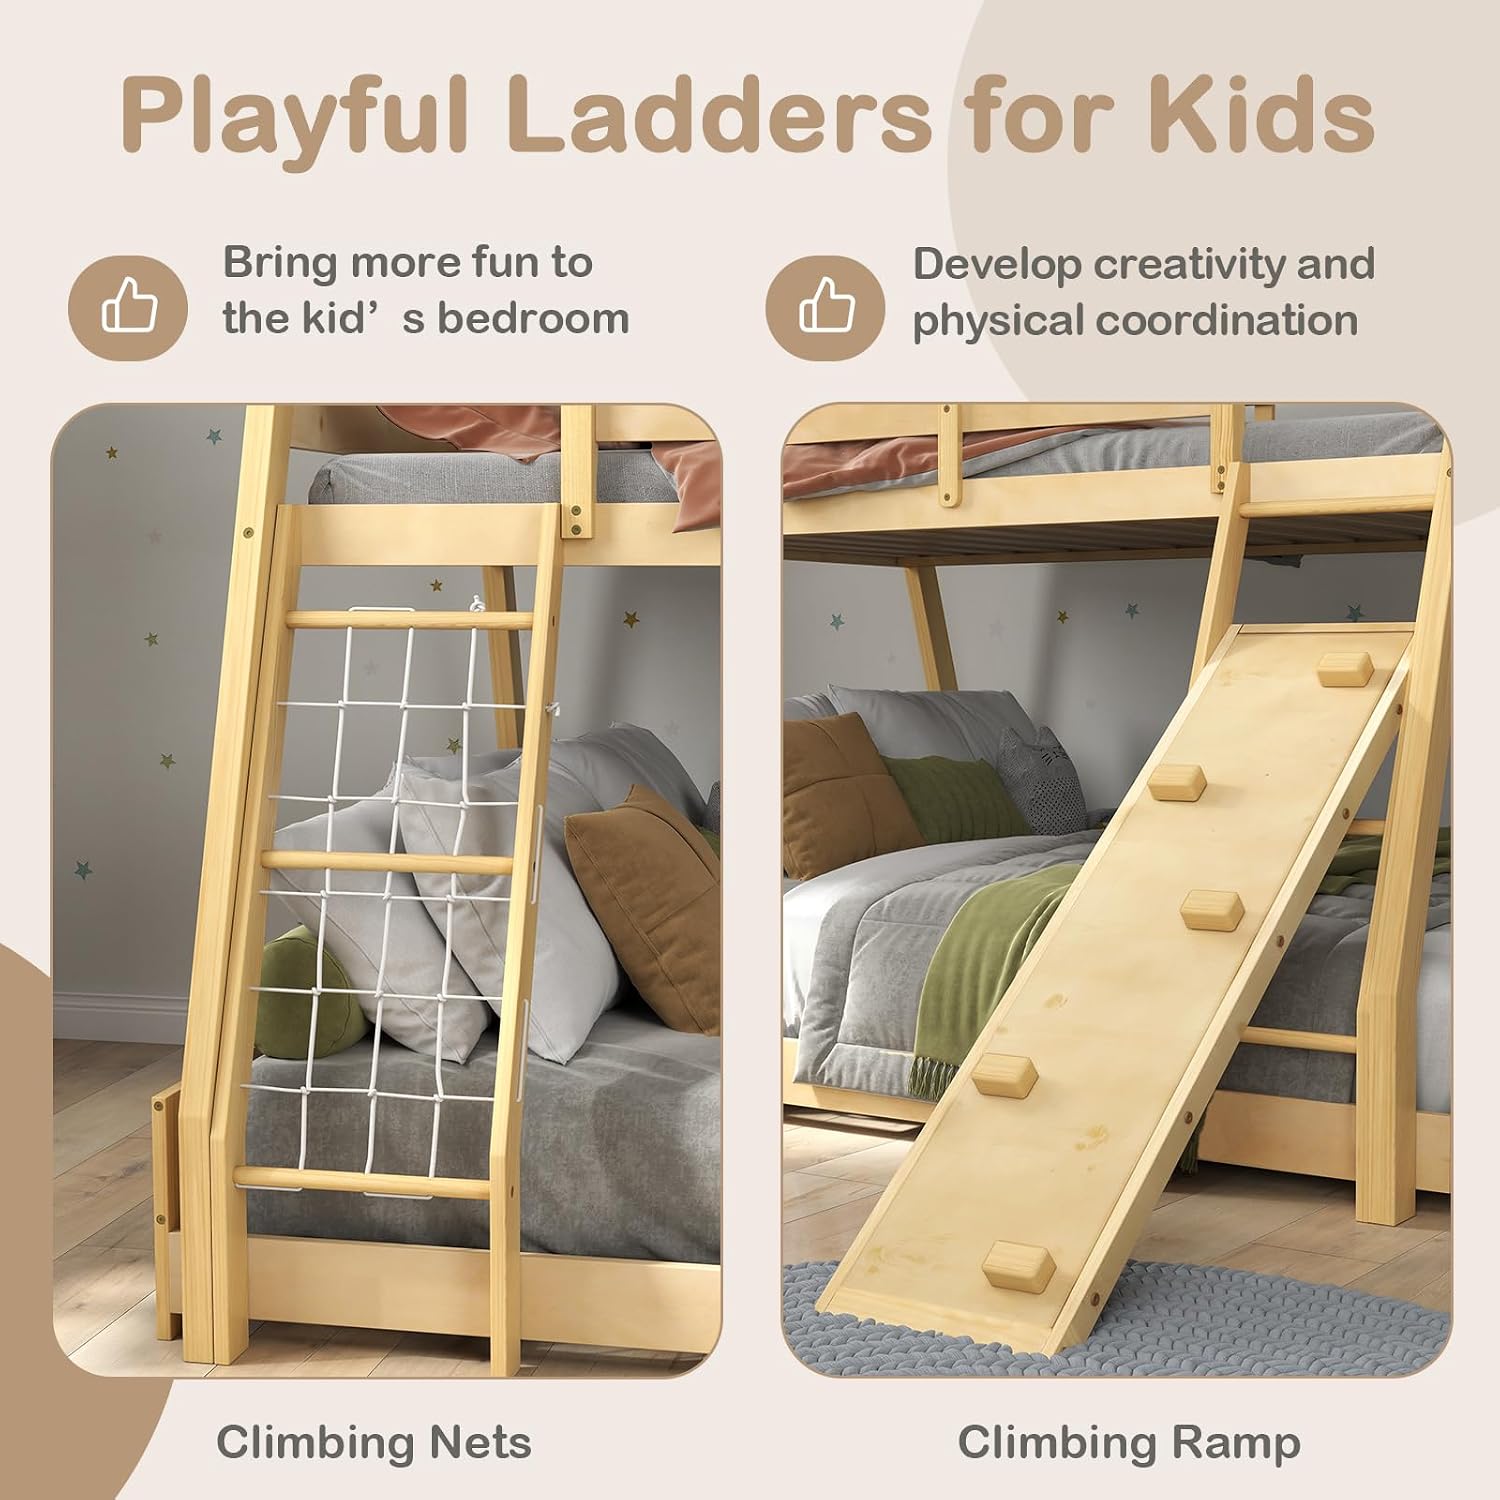
Image 5.1: Detailed view of the climbing net and climbing ramp features.

Image 5.2: Examples of decorating the unique house-shaped roof.
6. Maintenance
Regular maintenance will help preserve the condition and safety of your bunk bed.
- Cleaning: Wipe down the wood surfaces with a soft, damp cloth. Avoid using harsh chemicals or abrasive cleaners, which can damage the finish.
- Fastener Check: Periodically (e.g., monthly) inspect all screws, bolts, and connections. Re-tighten any loose fasteners to maintain structural integrity.
- Wood Care: Protect the wood from extreme temperature changes and direct sunlight to prevent warping or fading.
- Climbing Features: Inspect the climbing net for any tears or damage. Ensure the climbing ramp is free from splinters or loose parts.
7. Troubleshooting
If you encounter issues with your bunk bed, refer to the following common problems and solutions:
- Bed feels wobbly or unstable: Ensure all assembly steps were followed correctly. Check and re-tighten all screws and bolts. Verify that the bed is placed on a flat, even surface.
- Squeaking noises: Squeaking often indicates loose connections. Identify the source of the squeak and tighten the corresponding fasteners. Applying a small amount of furniture wax or silicone spray to joints can also help.
- Missing or damaged parts: If you discover any missing or damaged components upon unpacking, do not proceed with assembly. Contact KOTEK customer support or your retailer immediately for replacement parts.
- Difficulty with assembly: Review the instruction manual carefully. Ensure you have identified all parts correctly. If issues persist, consider seeking assistance from another person.
8. Specifications
Detailed specifications for the KOTEK Twin Over Queen Bunk Bed (Model PI-HY10345):

Image 8.1: Product dimensions diagram.
| Feature | Detail |
|---|---|
| Model Number | PI-HY10345 |
| Overall Dimensions (L x W x H) | 82" x 67" x 82.5" |
| Upper Bed Dimensions (L x W) | 75" x 39.5" (Twin) |
| Lower Bunk Dimensions (L x W) | 80.5" x 61" (Queen) |
| Upper Bed to Roof Height | 35" |
| Guardrail Height | 13.5" |
| Width of Ladder Entrance | 15" |
| Climbing Ramp Dimensions (L x W) | 50" x 13" |
| Frame Material | Pine Wood, MDF, Plywood |
| Upper Bed Weight Capacity | 440 lbs |
| Lower Bed Weight Capacity | 440 lbs |
| Climbing Net Weight Capacity | 110 lbs |
| Climbing Ramp Weight Capacity | 154 lbs |
| Recommended Upper Mattress Thickness | ≤6" |
| Recommended Lower Mattress Thickness | ≤8" |
| Net Weight | 129 lbs |
| Assembly Required | Yes |
9. Warranty Information
Specific warranty details for the KOTEK Twin Over Queen Bunk Bed may vary. Please refer to the warranty card included with your product or contact KOTEK customer service or your retailer for comprehensive warranty information and terms.
10. Customer Support
For any questions, concerns, or assistance with your KOTEK Twin Over Queen Bunk Bed, please contact:
- KOTEK Customer Service: Refer to the contact information provided in your product packaging or visit the official KOTEK website.
- Retailer Support: Contact the retailer from whom you purchased the product for assistance.