Important Safety Information
Please read this manual thoroughly before operating the WANLECY DR4513 Home Coffee Bean Roaster. Retain this manual for future reference. Failure to follow these instructions may result in electric shock, fire, or serious injury.
- Always place the roaster on a stable, heat-resistant surface.
- Ensure the power supply matches the voltage specified on the appliance (110V).
- Do not immerse the appliance, cord, or plug in water or other liquids.
- Keep hands and utensils away from the roasting chamber during operation to prevent injury.
- The appliance becomes hot during use. Allow it to cool completely before cleaning or storing.
- Unplug the roaster from the outlet when not in use and before cleaning.
- Do not operate the appliance with a damaged cord or plug, or after the appliance malfunctions or has been damaged in any manner.
- This appliance is for household use only. Do not use outdoors.
- Keep out of reach of children.
Product Overview
The WANLECY DR4513 is a home coffee bean roaster designed for efficient and controlled roasting. It features a transparent glass chamber, adjustable settings, and both automatic and manual operating modes.
Components

Image: The WANLECY DR4513 coffee roaster shown with its included accessories: a measuring cup, a cleaning brush, and the English instruction manual.
- Coffee Roaster Machine: Main unit with roasting chamber and control panel.
- Measuring Cup: For precise bean measurement.
- Brush: For cleaning the roasting chamber and chaff collection basket.
- English Manual: This instruction guide.
Key Features
- High Efficiency: 1500W power for quick and even roasting.
- Intelligent Control: Adjustable temperature (32-464°F / 0-240°C), time (0-20 minutes), and 3-speed fan.
- Visible Glass Oven Chamber: Borosilicate glass chamber holds up to 100g of coffee beans, allowing visual monitoring of the roasting process.
- Easy Operation: Clear LED display and intuitive control panel with both Auto and Manual modes.
- Safety Features: Swivel lock for the lid and multiple heat dissipation holes.
- Automatic Cooling: Automatically switches to cold air mode after roasting for optimal results.
Setup
- Unpack: Carefully remove all components from the packaging. Retain packaging for future storage or transport.
- Placement: Place the coffee roaster on a flat, stable, and heat-resistant surface. Ensure there is adequate clearance around the unit for ventilation. Do not place near flammable materials.
- Clean: Before first use, wipe the exterior of the unit with a damp cloth. Clean the glass roasting chamber and chaff collection basket with warm, soapy water, then rinse and dry thoroughly. Ensure all parts are completely dry before assembly.
- Assemble: Ensure the glass roasting chamber is securely seated on the base unit and the lid is properly closed and locked using the swivel lock mechanism.
- Power Connection: Plug the power cord into a standard 110V electrical outlet. The LED display should illuminate.
Operating Instructions
The WANLECY DR4513 offers both automatic and manual roasting modes. Always ensure the unit is clean and properly assembled before use.
Control Panel Overview

Image: Close-up view of the control panel on the WANLECY DR4513 coffee roaster, showing the LED display for time and temperature, and buttons for adjusting time, temperature, fan speed, and power.
- LED Display: Shows current time and temperature settings.
- TIME +/- Buttons: Adjust roasting time.
- TEMP +/- Buttons: Adjust roasting temperature.
- Fan Speed Button: Cycles through 3 fan speed gears.
- Power Button: Turns the unit on/off and starts/stops roasting.
- Auto Mode Button: Initiates the automatic roasting program.
Loading Coffee Beans
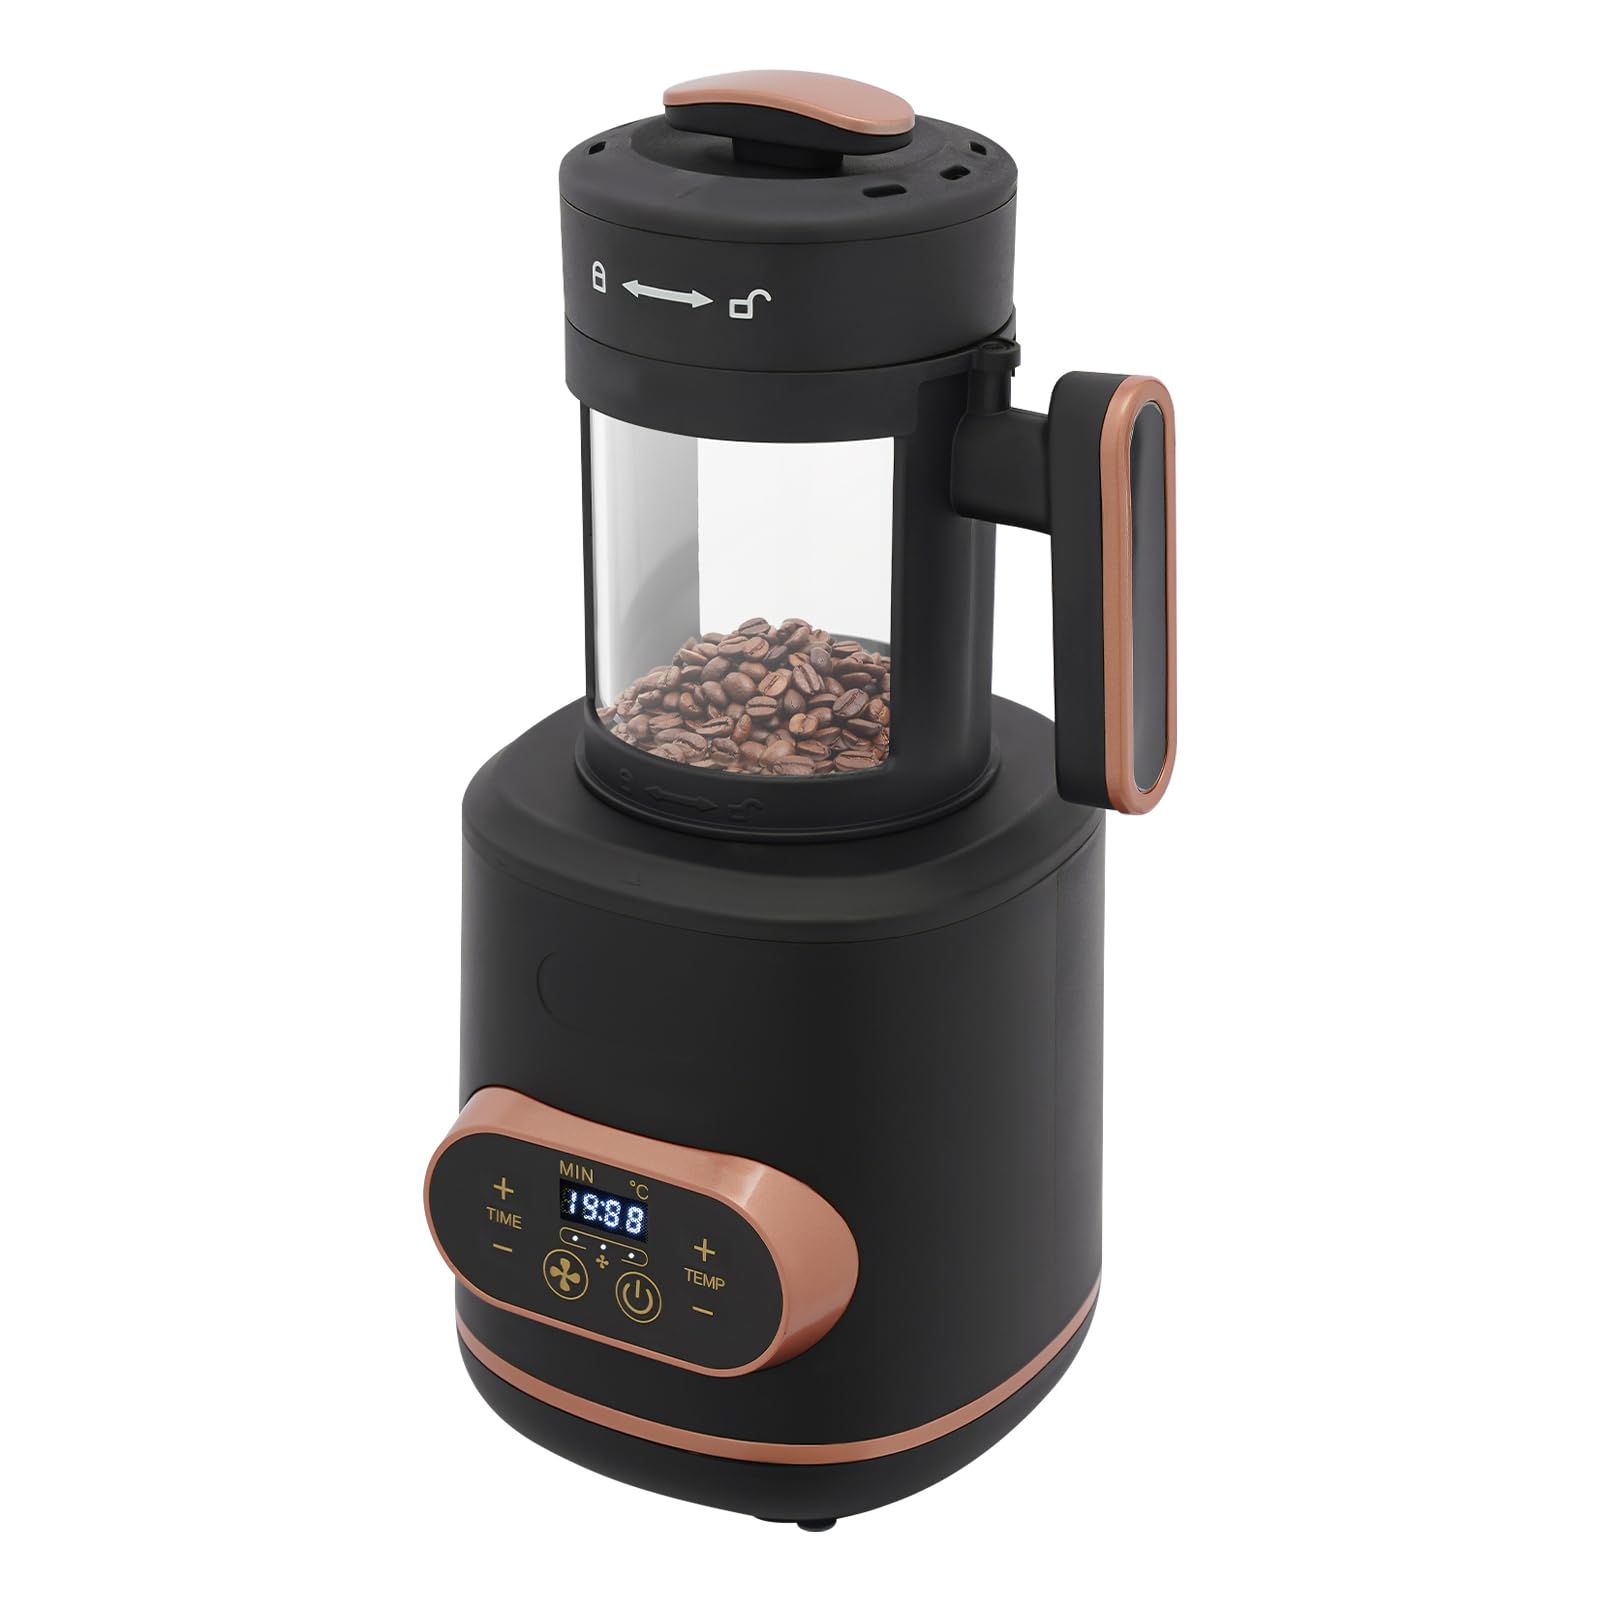
Image: The WANLECY DR4513 coffee roaster with green coffee beans visible inside its transparent glass roasting chamber, ready for the roasting process.
- Unlock and open the lid of the roasting chamber.
- Using the provided measuring cup, add up to 100g (0.22 lbs) of green coffee beans into the glass chamber. Do not overfill.
- Close the lid and secure it with the swivel lock.
Automatic Roasting Mode
This mode is ideal for beginners, providing a consistent roast with minimal input.
- Ensure beans are loaded and the lid is secured.
- Press the "Auto Mode" button. The roaster will automatically set a default time (e.g., 10 minutes) and temperature, and begin the roasting cycle.
- Monitor the roasting process through the glass chamber.
- Once the roasting cycle is complete, the machine will automatically switch to cold air mode to cool the beans.
- After cooling, carefully unlock and open the lid to remove the roasted beans.
Manual Roasting Mode
For experienced users who prefer precise control over the roasting process.
- Ensure beans are loaded and the lid is secured.
- Use the TIME +/- buttons to set your desired roasting duration (0-20 minutes).
- Use the TEMP +/- buttons to set your desired roasting temperature (32-464°F / 0-240°C).
- Press the Fan Speed button to select one of the 3 available fan speeds.
- Press the Power Button to start the roasting process.
- Monitor the beans closely through the glass chamber. Adjust time or temperature as needed during the roast.
- When the desired roast level is achieved, press the Power Button again to stop roasting. The machine will then automatically enter cold air mode.
- After cooling, carefully unlock and open the lid to remove the roasted beans.
Maintenance
Regular cleaning ensures optimal performance and extends the life of your coffee roaster.
- Unplug and Cool: Always unplug the appliance from the power outlet and allow it to cool completely before cleaning.
- Clean Roasting Chamber: Remove the glass roasting chamber. Use the provided brush to remove any residual coffee chaff or bean fragments. Wash the glass chamber with warm, soapy water. Rinse thoroughly and dry completely.
- Clean Chaff Collection Basket: The chaff collection basket (located within the lid assembly) should be cleaned after each use. Remove accumulated chaff and wash the basket with warm, soapy water. Rinse and dry completely.
- Clean Exterior: Wipe the exterior of the main unit with a soft, damp cloth. Do not use abrasive cleaners or scourers. Never immerse the main unit in water.
- Storage: Ensure all parts are clean and dry before storing. Store the roaster in a cool, dry place.
Troubleshooting
If you encounter issues with your WANLECY DR4513, please refer to the following common problems and solutions:
| Problem | Possible Cause | Solution |
|---|---|---|
| Unit does not power on. | Not plugged in; power outlet malfunction; unit malfunction. | Ensure the power cord is securely plugged into a working outlet. Check the circuit breaker. If the issue persists, contact customer support. |
| Beans are not roasting evenly. | Overfilling the chamber; incorrect temperature/fan settings. | Do not exceed the maximum capacity of 100g. Adjust temperature and fan speed settings for optimal circulation. Ensure beans are dry. |
| Excessive smoke during roasting. | Beans are too dark; chaff accumulation. | Reduce roasting time or temperature. Ensure the chaff collection basket is clean before each use. |
| Lid not securing properly. | Lid not aligned; swivel lock not engaged. | Ensure the lid is correctly positioned on the roasting chamber. Firmly engage the swivel lock. |
Specifications

Image: The WANLECY DR4513 coffee roaster with measurements indicating its dimensions: 18cm (7.09 inches) in diameter and 34cm (13.39 inches) in height.
| Brand: | WANLECY |
| Model Number: | DR4513 |
| Color: | Black |
| Material: | Glass, Plastic |
| Product Dimensions (D x W x H): | 7"D x 7"W x 13.4"H (18cm x 18cm x 34cm) |
| Capacity: | 100 Grams (0.22 lbs) |
| Power Source: | Corded Electric (AC) |
| Voltage: | 110V |
| Wattage: | 1500W |
| Temperature Range: | 32-464°F (0-240°C) |
| Time Range: | 0-20 minutes |
| Fan Gears: | 3 |
| Control Type: | Button Control |
| Item Weight: | 4.6 Pounds (2.1 kg) |
Warranty and Support
For warranty information or technical support, please refer to the purchase documentation or contact the retailer where the product was purchased. Keep your proof of purchase for any warranty claims.
For further assistance, please contact WANLECY customer service through their official channels.