Product Overview
This manual provides detailed instructions for the installation, operation, and maintenance of your MH 3.75 inch (95mm) Tachometer. This device is designed to provide real-time engine RPM readings for 12V gasoline engines with 1-8 cylinders. It features a clear display, adjustable backlight, and a programmable shift light alarm.
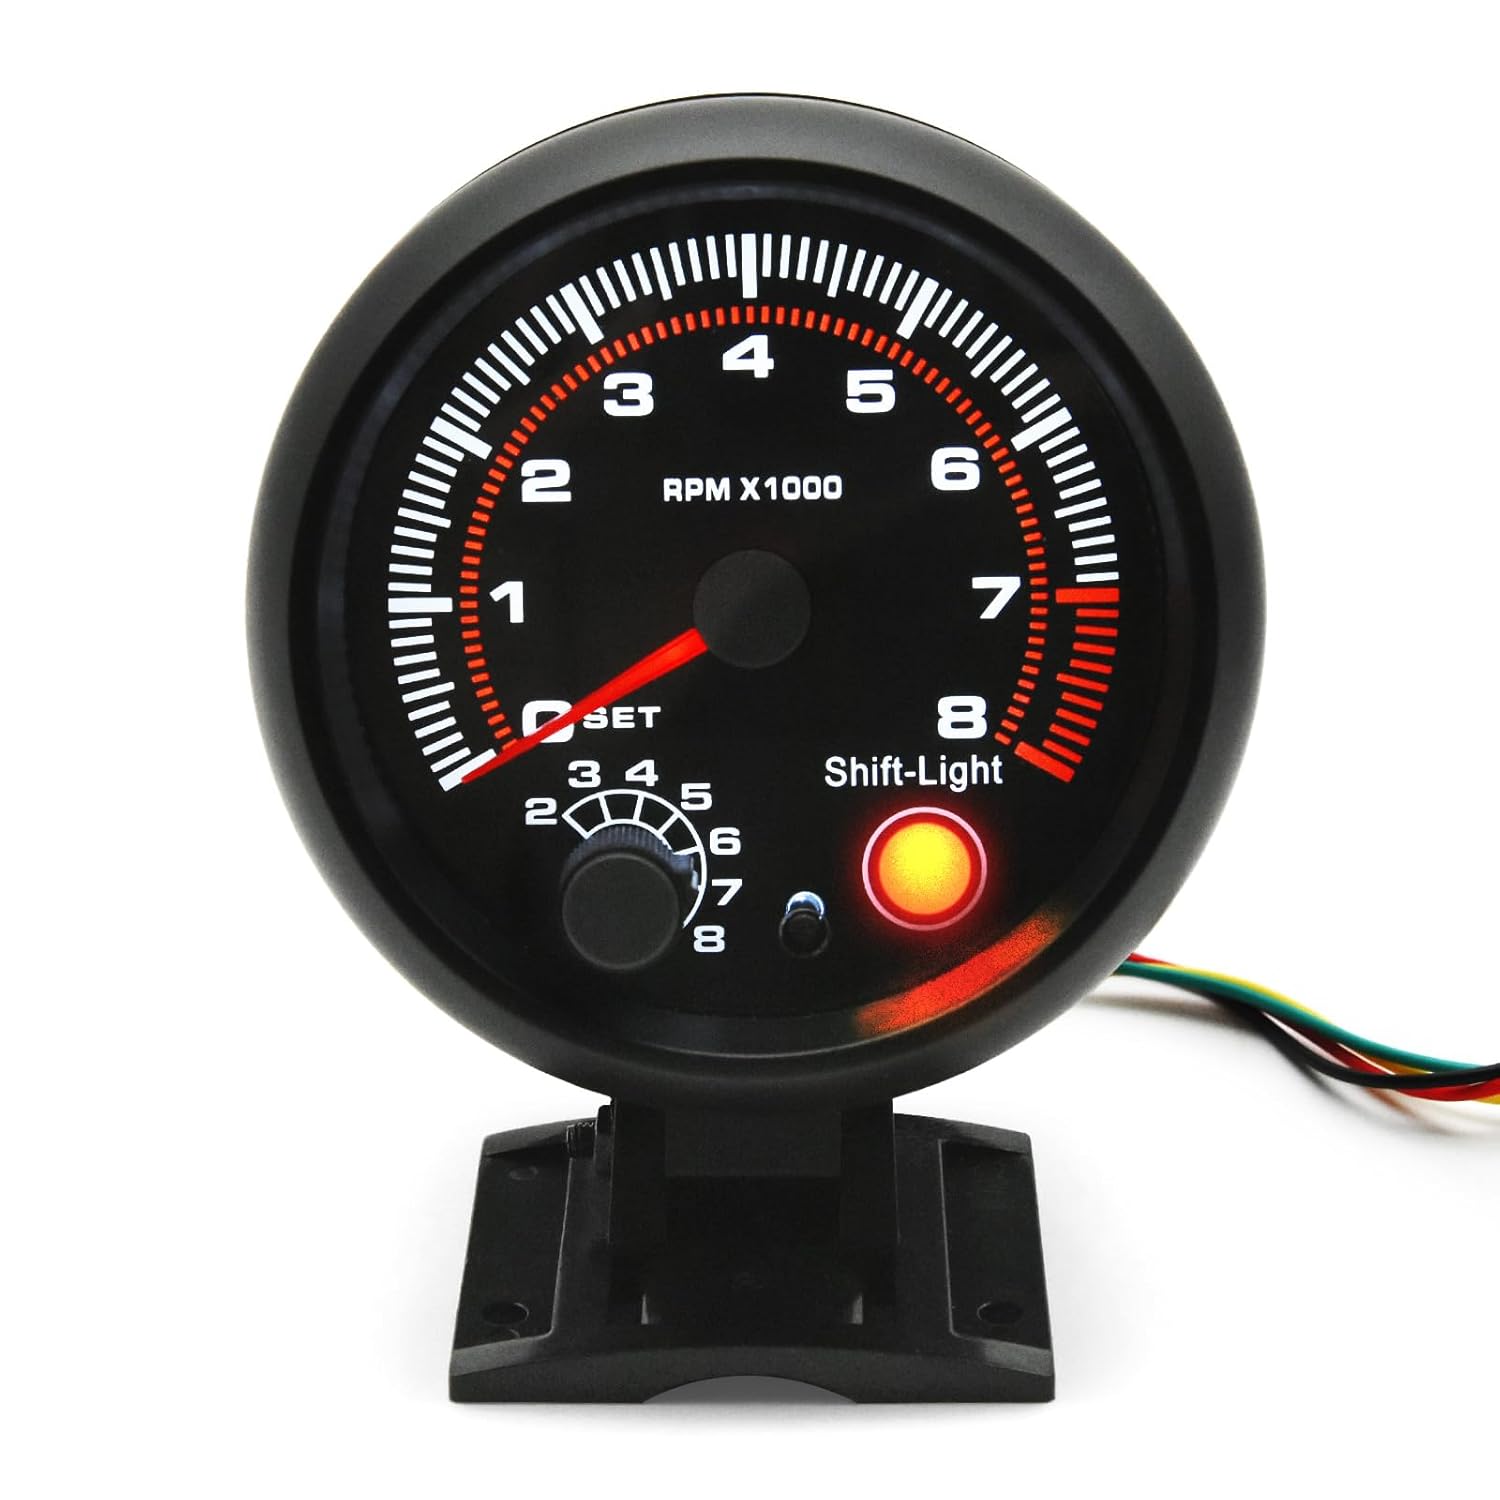
Image: Front view of the MH 3.75 inch Tachometer, showing the RPM dial, red pointer, and shift light.
Key Features:
- Range: 0-8000 RPM readings.
- Display: 95mm (3.75 inch) diameter, black housing, red pointer.
- Backlight: 5-level adjustable brightness for clear visibility day and night.
- Shift Light: Programmable alarm value (2-8 kilo revolutions) with LED indicator.
- Compatibility: Suitable for 1-8 cylinder 12V gasoline engines. Not suitable for diesel vehicles.

Image: Detailed diagram of the tachometer highlighting the tachometer range, red pointer, alarm value setting knob, shift light, and buttons for setting speed ratio and adjusting backlight brightness.
Setup and Installation
Before installation, ensure your vehicle is turned off and the battery is disconnected. Professional installation is recommended.
Package Contents:
- Car Tachometer Gauge
- Mounting Bracket Accessories Kit
- Installation Instructions (this manual)

Image: Contents of the product package, including the tachometer gauge, mounting accessories, and instruction manual.
Wiring Diagram (General):
While specific wiring instructions are typically provided with the product, a general wiring guide for tachometers includes:
- Red Wire: Connect to 12V ignition switched power supply.
- Black Wire: Connect to vehicle ground.
- Green Wire: Connect to engine ignition coil negative terminal (tach signal).
- White Wire: Connect to headlight switch 12V for backlight dimming (optional).
- Yellow Wire: Connect to 12V constant power supply (for memory, if applicable).
Ensure all connections are secure and insulated to prevent short circuits.
Initial Setup Steps:
- Mounting: Securely attach the tachometer to your dashboard or desired location using the provided mounting bracket and accessories. Ensure it does not obstruct your view or interfere with vehicle controls.
- Set Number of Cylinders:
Long press the small black button on the tachometer for 6 seconds to enter the cylinder number setup mode. Rotate the lower left knob to select the appropriate speed ratio according to your engine's cylinder count (1-8 cylinders). Refer to your vehicle's specifications for the correct setting.
- Power On Self-Check:
It is recommended to power on the tachometer and allow it to complete its self-check before starting the vehicle. This ensures correct operation and accurate readings.
Operating Instructions
Reading the Tachometer:
The tachometer displays engine revolutions per minute (RPM) from 0 to 8000. The red pointer indicates the current RPM. The scale is marked in thousands (e.g., '1' represents 1000 RPM).
Adjusting Backlight Brightness:
The tachometer features a 5-level adjustable backlight. To adjust the brightness, short press the central black button. Cycle through the 5 brightness levels to find your preferred setting for optimal visibility in various lighting conditions, from bright daylight to nighttime driving.

Image: Comparison showing the tachometer's clear visibility during both daytime and nighttime driving conditions, demonstrating the 5-level adjustable backlight.
Setting the Shift Light Alarm:
The shift light alerts you when the engine RPM exceeds a preset value. The alarm setting value ranges from 2 to 8 kilo revolutions (2000 to 8000 RPM).
- To adjust the shift alarm value, rotate the lower left knob.
- When the engine speed exceeds the preset value, the SHIFT LED light illuminates to alert the driver.

Image: Diagram illustrating how to set the RPM alarm value using the knob and showing the shift light activation when the set RPM is exceeded.
Maintenance
The MH Tachometer is designed for durability and requires minimal maintenance. Follow these guidelines to ensure its longevity:
- Cleaning: Use a soft, dry cloth to clean the display and housing. Avoid abrasive cleaners or solvents that could damage the surface.
- Environmental Protection: While designed for automotive use, avoid exposing the tachometer to extreme temperatures, direct water spray, or excessive dust.
- Wiring Inspection: Periodically check the wiring connections for any signs of wear, corrosion, or looseness. Ensure all connections remain secure.
Troubleshooting
If you encounter issues with your tachometer, refer to the following common problems and solutions:
| Problem | Possible Cause | Solution |
|---|---|---|
| Tachometer not powering on or no display. | No power supply; incorrect wiring; blown fuse. | Check power and ground connections. Verify fuse in the circuit. Ensure red wire has 12V ignition power. |
| Inaccurate or erratic RPM readings. | Incorrect cylinder setting; poor signal connection; interference. | Verify the cylinder setting is correct for your engine (long press 6s button). Check the green signal wire connection to the ignition coil. Ensure wiring is not near high-voltage sources. |
| Shift light not activating or activating incorrectly. | Incorrect alarm value setting. | Rotate the lower left knob to adjust the shift alarm value. Ensure it is set within the 2-8 kilo revolutions range. |
| Backlight not adjusting or not working. | Button malfunction; wiring issue. | Short press the central black button to cycle through brightness levels. Check the backlight wiring (if applicable). |
| Tachometer "wigs out" or glitches upon power. | Power on sequence; internal malfunction. | Ensure the tachometer is powered on and completes its self-check before starting the vehicle. If the issue persists, contact customer support. |
Specifications
- Product Dimensions: 3.74 x 3.54 x 4.53 inches (95mm x 90mm x 115mm)
- Item Weight: 0.7 Pounds (11.2 ounces)
- Brand: MH
- Material: Acrylonitrile Butadiene Styrene (ABS)
- Tachometer Range: 0-8000 RPM
- Backlight Levels: 5-level adjustable
- Shift Light Alarm Range: 2-8 kilo revolutions
- Compatibility: 1-8 cylinder 12V Car Gasoline Engine (Not suitable for diesel vehicles)
- Model Number (ASIN): B0DSVVDPPJ
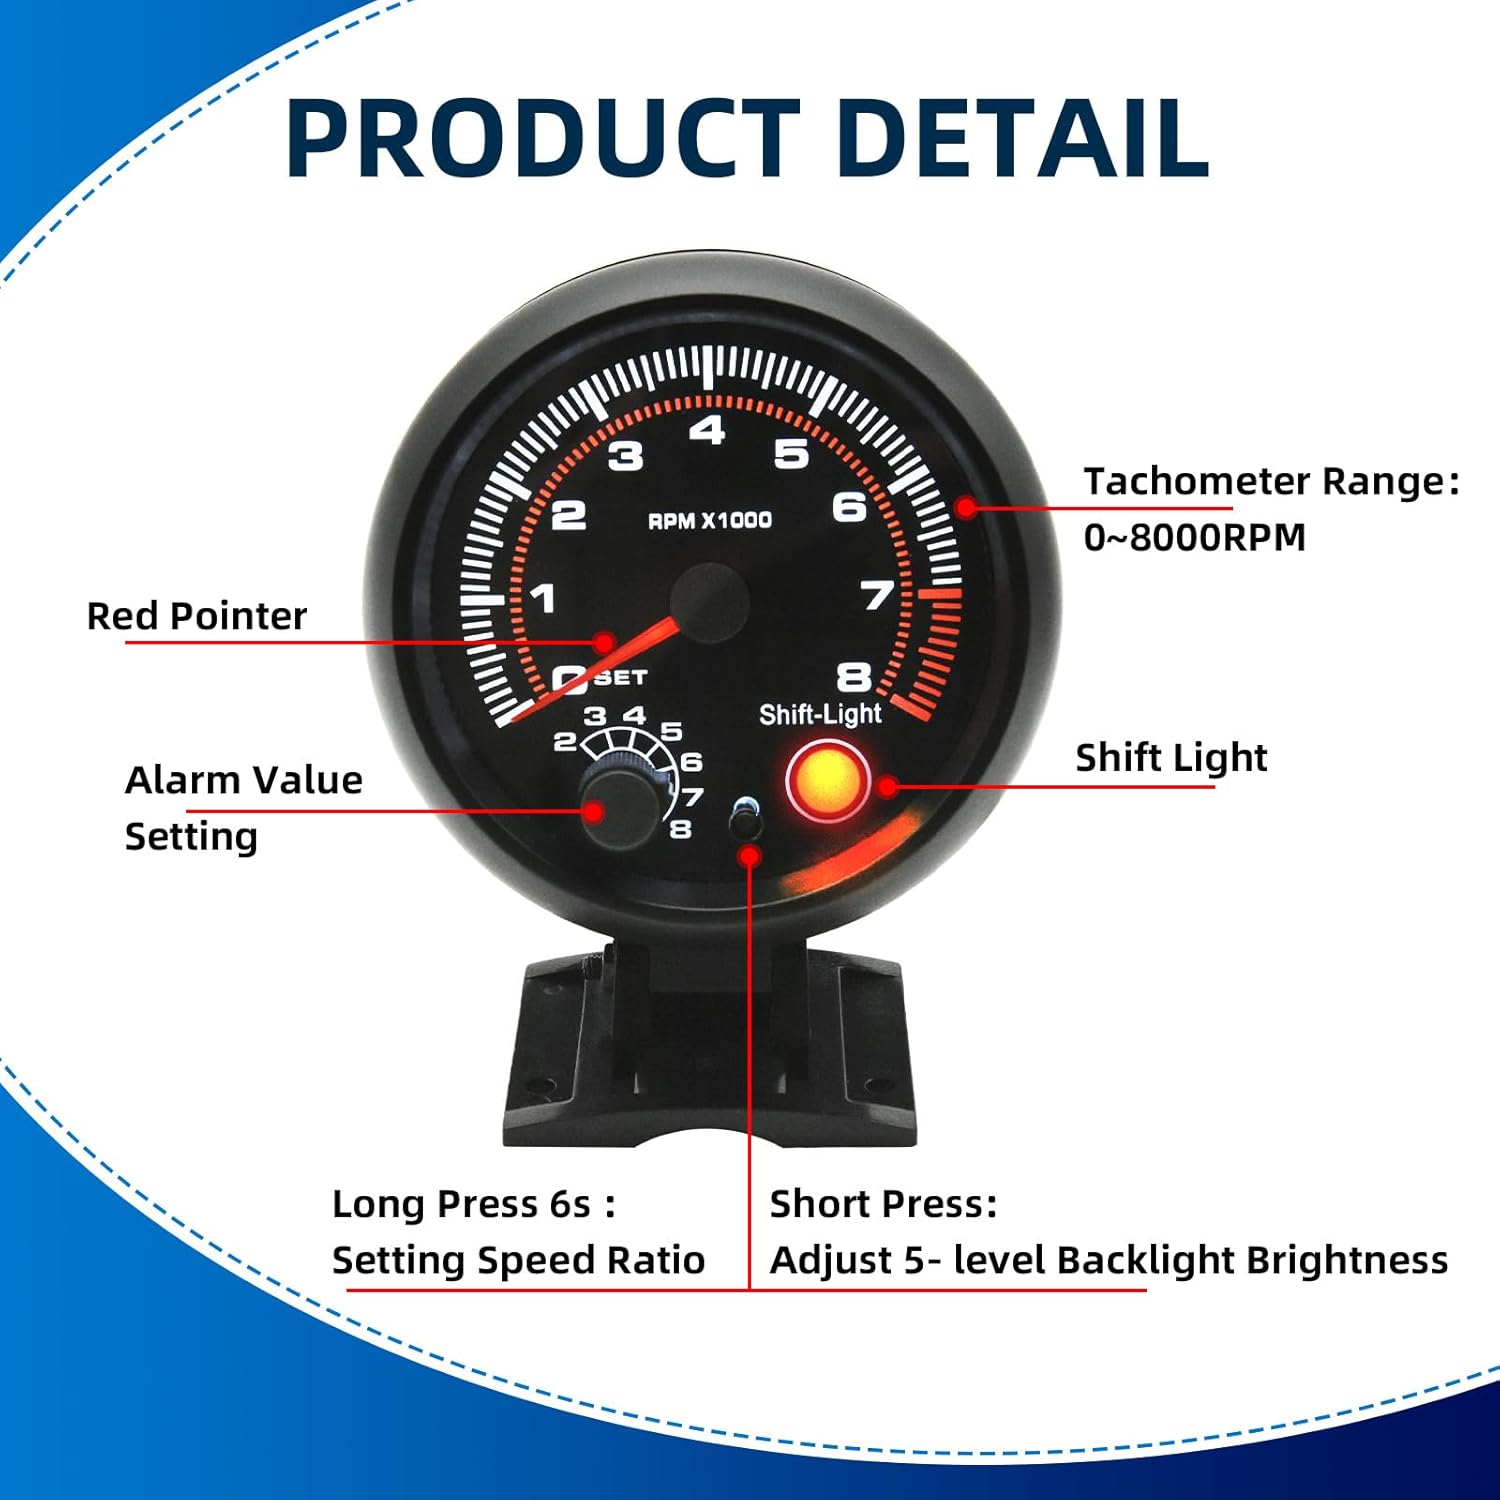
Image: Diagram showing the physical dimensions of the tachometer in millimeters and inches.
Warranty and Support
For any questions, technical assistance, or warranty inquiries regarding your MH Tachometer, please contact the seller or manufacturer directly through the platform where the product was purchased. Keep your purchase receipt as proof of purchase.
Manufacturer: MH


