SohoTeco ST380
SohoTeco WiFi Smart Lock ST380 Instruction Manual
Model: ST380 | Brand: SohoTeco
1. Product Overview
The SohoTeco WiFi Smart Lock ST380 is an advanced keyless entry system designed for enhanced home security and convenience. It offers multiple unlocking methods and smart features for seamless access control.

Figure 1: SohoTeco WiFi Smart Lock ST380 with included lever handles, keys, and fob.
2. Safety Information
Please read and understand all instructions before installing and using this product. Failure to follow instructions may result in product malfunction, property damage, or injury.
- Do not use corrosive cleaners or abrasive materials on the lock.
- Ensure all components are securely fastened during installation.
- Keep traditional keys in a secure location outside the home.
- The emergency charging port is for temporary power only, not for continuous charging.
3. What's in the Box
Verify that all components are present before beginning installation:
- Exterior Assembly (Keypad and Fingerprint Reader)
- Interior Assembly (Thumb-turn and Battery Compartment)
- Lever Handles Set (2 handles)
- Deadbolt Latch
- Strike Plate
- Mounting Plate
- Keys (2)
- Fob Cards (2)
- Installation Screws and Hardware
- User Manual

Figure 2: Contents of the product package.
4. Specifications
| Feature | Detail |
|---|---|
| Brand | SohoTeco |
| Model Name | ST380 |
| Lock Type | Biometric, Deadbolt, Combination Lock |
| Unlock Options | Fingerprint, Password, APP, Alexa Voice Control, Fob, Key |
| Connectivity | Wi-Fi, Bluetooth |
| Material | Aluminum |
| Dimensions (L x W x H) | 6.69 x 2.91 x 1.38 inches |
| Power Source | 8 AA Batteries (not included) |
| Battery Life | Up to 8 months |
| Waterproof Rating | IP54 |
| Operating Temperature | -31°F to 158°F (-35°C to 70°C) |
5. Installation Guide
The SohoTeco Smart Lock is designed for easy installation, typically taking less than 15 minutes. Ensure your door meets the following specifications:
- Cross Bore Diameter: 1-1/2" to 2-1/8" (38mm-54mm)
- Backset Distance: 2-3/8" to 2-3/4" (60mm-70mm)
- Door Thickness: 1-3/8" to 2-1/6" (35mm-55mm)
- Compatible with doors that have a rectangular latch faceplate cutout. Not compatible with round faceplate cutouts.

Figure 3: Door compatibility measurements.
Installation Steps:
- Prepare the Door: Ensure your door is pre-drilled according to the specifications. If replacing an existing lock, remove the old hardware.
- Install the Deadbolt Latch: Insert the deadbolt latch into the door edge. Ensure the "UP" arrow on the deadbolt faces upwards. Secure it with the provided screws.
- Install Exterior Assembly: Pass the connection cable from the exterior assembly through the deadbolt hole. Align the protruding part of the latch with the recessed part of the lock body and insert it.
- Install Mounting Plate: Pass the antenna power cable through the hole at the bottom right of the mounting plate. Secure the mounting plate to the door using the appropriate screws, ensuring the exterior assembly is held firmly.
- Connect Cables: Connect the front and rear power communication link cables.
- Install Interior Assembly: Align the interior assembly with the mounting plate and secure it with screws.
- Install Batteries: Insert 8 AA batteries (not included) into the battery compartment. The lock will automatically identify the unlocking direction.
- Install Lever Handles: Attach the lever handles to both sides of the door.
- Test Operation: Test if the door lock opens and closes properly using the thumb-turn and key.

Figure 4: Installation of the smart lock interior assembly.
Installation Video Guide:
Video 1: Comprehensive installation guide for the ST380 Smart Lock.
6. Setup and Pairing
After physical installation, set up your smart lock and pair it with the Smart Life app for full functionality.
6.1. Reset Settings & Add Administrator:
- Reset Settings: Open the battery cover on the interior assembly. Long press the reset button (usually located near the batteries) for 7 seconds until you hear a voice prompt. Press the unlock button on the keypad to confirm. This will restore default settings.
- Add Administrator Password: After resetting, the lock will prompt you to set an administrator password. Enter a 6-8 digit password on the keypad and press the unlock button. Re-enter the password to confirm. This password will be used for managing lock settings.
Video 2: Guide on resetting settings and adding an administrator password.
6.2. Pairing with Smart Life App:
The lock features built-in Wi-Fi for direct connection to your router (2.4GHz Wi-Fi required), eliminating the need for a separate gateway.

Figure 5: Direct Wi-Fi connection without a gateway.
- Download App: Download the "Smart Life" app from your smartphone's app store.
- Enter Pairing Mode: On the lock's keypad, enter the administrator password, then press the unlock button. Press '5' for network settings, then press the unlock button to confirm. The lock will enter network configuration mode.
- Add Device in App: Open the Smart Life app. Tap the '+' icon to add a device. The app should automatically detect the ST380 lock. If not, manually select "Security & Sensor" > "Smart Lock (Wi-Fi)".
- Connect to Wi-Fi: Enter your 2.4GHz Wi-Fi network password in the app and confirm. The app will connect to the lock.
- Completion: Once connected, the lock will be added to your app, and you can control it remotely.
Video 3: Step-by-step guide to pairing the Smart Lock with the Smart Life App.
6.3. Adding User Credentials (Password, Fingerprint, Fob Card):
Once paired, you can add various user credentials via the app or directly on the lock.
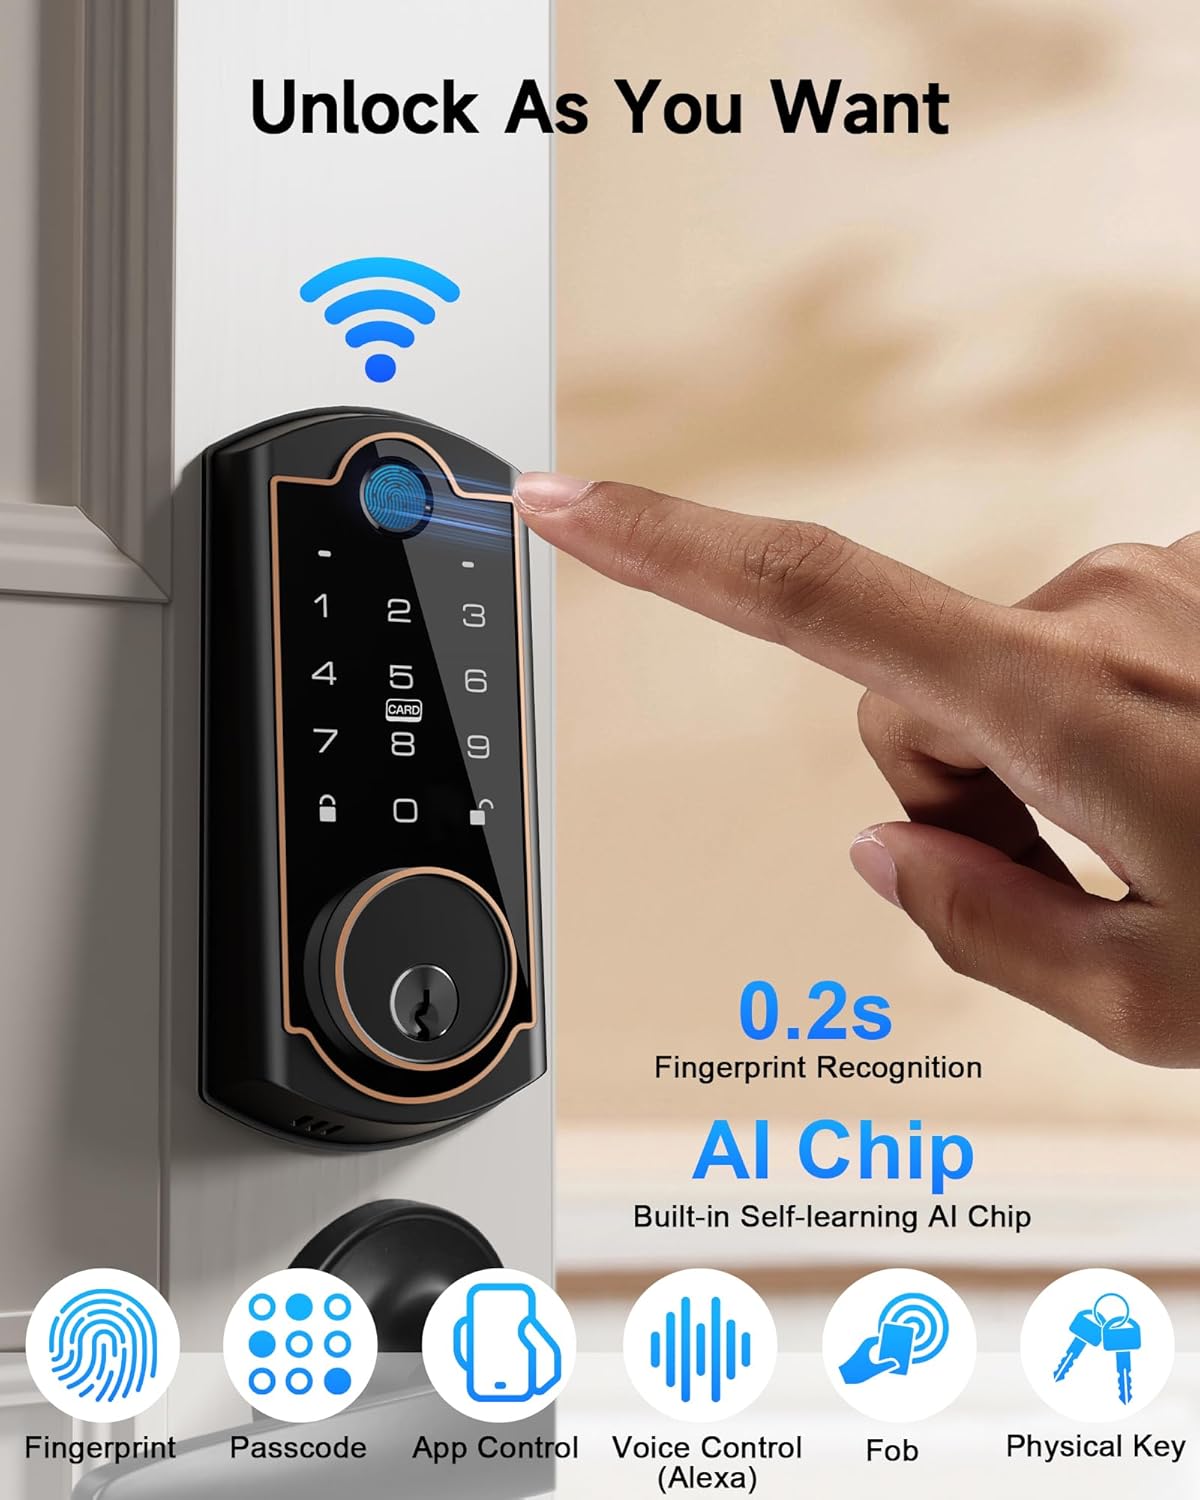
Figure 6: Six diverse unlock options.
- Add Password: In the app, navigate to "Member Management" or "Temporary Password" to add new user passwords. You can also add directly on the lock by entering the administrator password, pressing unlock, then '1' for adding credentials, and following voice prompts.
- Add Fingerprint: In the app, select "Fingerprint" under member management. Follow the on-screen instructions to place and lift your finger multiple times on the fingerprint sensor until successfully added. On the lock, enter administrator password, unlock, then '2' for fingerprint.
- Add Fob Card: In the app, select "Door Card" to add new fob cards. On the lock, enter administrator password, unlock, then '3' for NFC users. Swipe the fob card against the keypad to register it.
Video 4: Detailed instructions for adding passwords, fingerprints, and fob cards.
7. Operating Instructions
7.1. Unlocking and Locking:
- Fingerprint: Place registered finger on the sensor.
- Passcode: Enter registered passcode on the keypad.
- App Control: Use the Smart Life app to remotely unlock/lock.
- Fob Card: Swipe registered fob card against the keypad.
- Physical Key: Use the traditional key as a backup.
- Auto-Lock: The lock can be configured to auto-lock after a set period (5-900 seconds). This feature can be enabled/disabled in the app settings or via the lock's menu (Administrator password > Unlock button > 4 for settings > 1 for auto-lock).

Figure 7: Remote control via the Smart Life App.
7.2. Mute Mode:
To enable or disable sound prompts from the lock, access the settings via the administrator password. This is useful for quiet entry or exit.

Figure 8: Mute Mode for silent operation.
8. Maintenance
- Battery Replacement: The lock is powered by 8 AA batteries. The Smart Life app provides low battery warnings. Replace all 8 batteries when indicated to ensure optimal performance.
- Emergency Power: In case of complete battery depletion, an emergency Type-C port is available on the exterior unit for temporary power using a power bank.
- Cleaning: Use a soft, dry cloth to clean the lock's surface. Avoid harsh chemicals or abrasive materials that could damage the finish or electronic components.

Figure 9: Long-lasting 8-month battery life.

Figure 10: Emergency Type-C port for temporary power.
9. Troubleshooting
- Lock Not Responding: Check battery levels. If low, replace batteries or use the emergency Type-C port.
- Fingerprint Not Recognized: Ensure your finger is clean and dry. Try re-registering your fingerprint if issues persist.
- App Connectivity Issues: Ensure your Wi-Fi network is 2.4GHz and stable. Restart the lock and your router if necessary. Re-pair the device if connection is lost.
- Passcode Entry Problems: Ensure you are entering the correct passcode. Try resetting the administrator password if forgotten.
- Auto-Lock Not Working: Verify the auto-lock setting is enabled and the delay time is configured correctly in the app or lock settings.
10. Warranty and Support
SohoTeco is committed to providing high-quality products and excellent customer service.
- Warranty: 36 Months Warranty.
- Technical Support: 24/7 Online Reply and Lifetime Technical Support.

Figure 11: SohoTeco customer support and warranty details.