
1. Product Overview
This HZ Gas Fuel Tank is designed as a replacement part for various outdoor power equipment. It is specifically compatible with Briggs & Stratton CR950 and CR750 series OHV horizontal engines, including 208cc and 163cc models. This tank is a crucial component for maintaining the fuel supply to your engine, ensuring reliable operation of pressure washers, water pumps, chipper shredders, and other machinery.

Image 1.1: Side view of the HZ Gas Fuel Tank, showcasing its general shape and black finish.
2. What's in the Box
Upon opening the package, please verify that all the following components are present:
- Fuel tank
- Fuel tank cap
- Fuel line
- Clips (for fuel line)
- Mounting bolt
- Mounting nuts
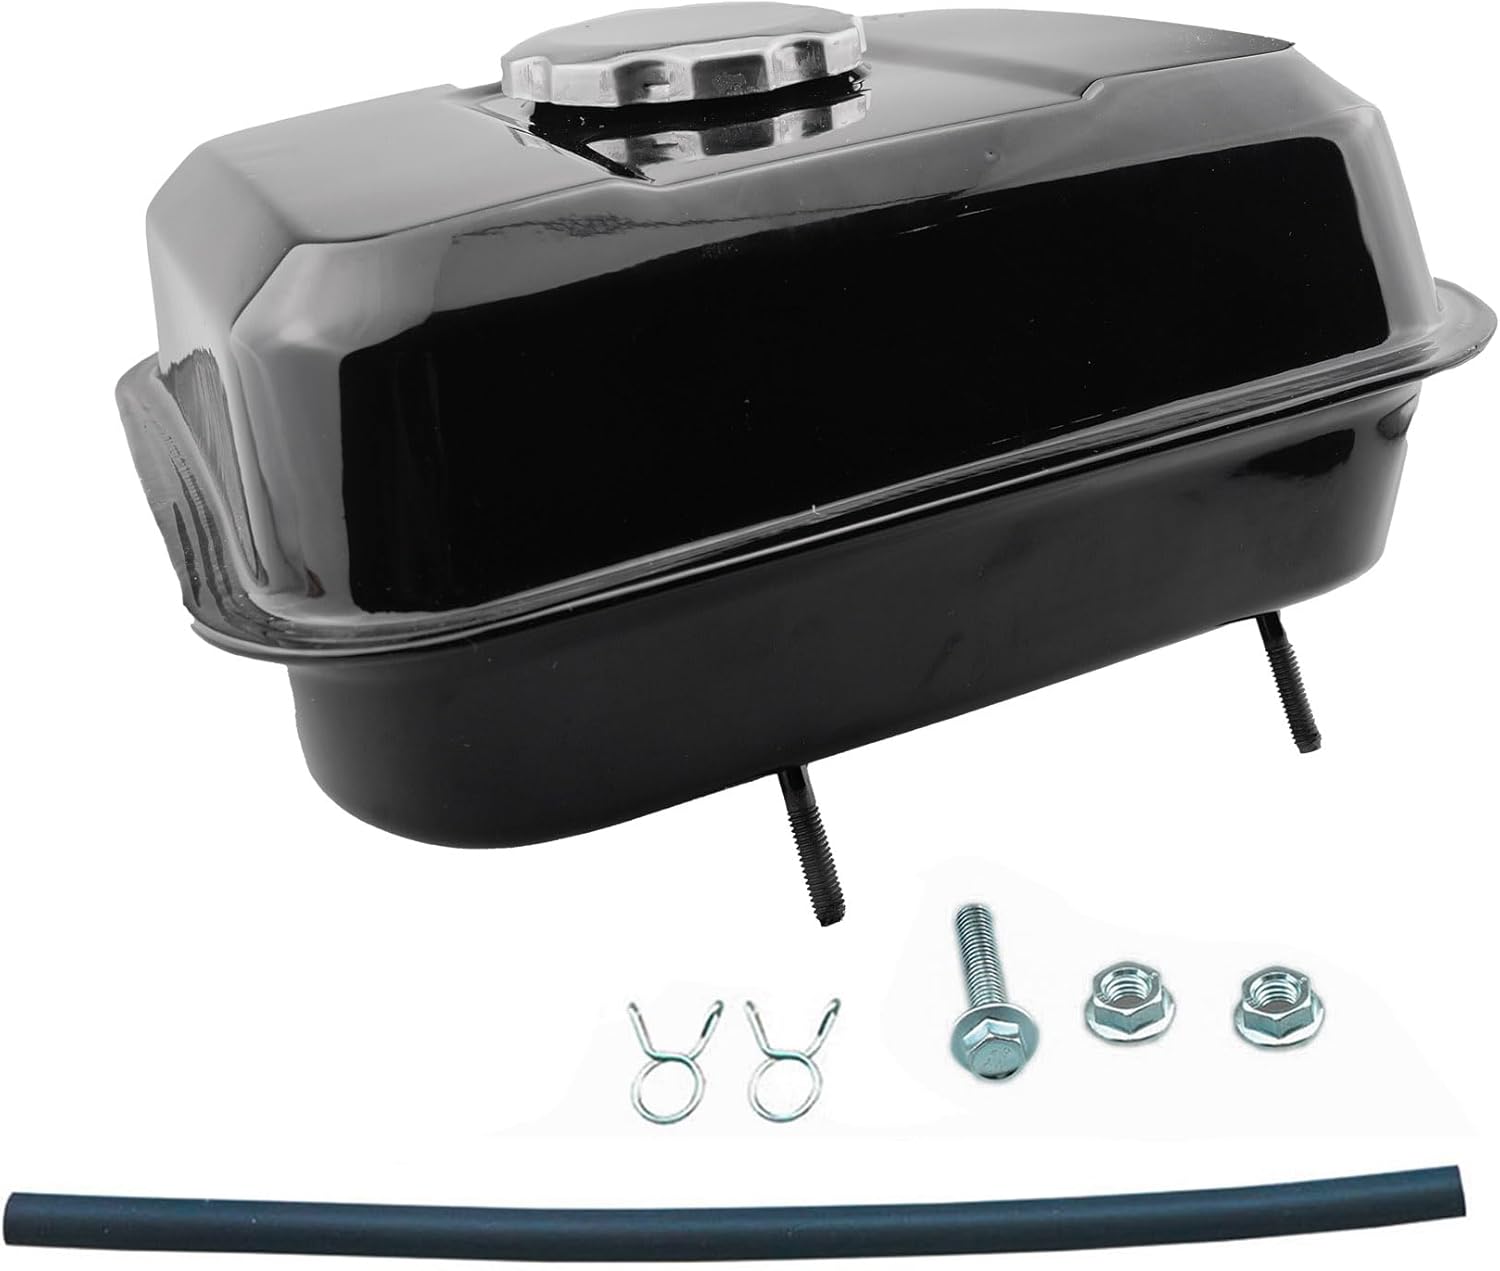
Image 2.1: The HZ Gas Fuel Tank displayed with its accompanying fuel line, clips, mounting bolt, and nuts.
3. Compatibility Information
This fuel tank is designed for specific engine models. Please review the compatibility details carefully before installation.
Compatible Engines:
- Briggs & Stratton CR950 series 208cc OHV horizontal engines (e.g., 13R232-0021-F1, 13R232-0001-F1, 13R232-0160-H5)
- Briggs & Stratton CR750 series 163cc OHV horizontal engines (e.g., 10R232-0009-F1)
Compatible Equipment:
This fuel tank fits power equipment powered by the compatible Briggs CR950 and CR750 engines, including but not limited to:
- Pressure washers (e.g., 3200psi, 3300psi models like 020829)
- Water pumps
- Chipper shredders
- Log splitters
- Other equipment utilizing Briggs CR 950 or CR 750 163cc/208cc Horizontal engines.
Important Incompatibility Note:
This fuel tank is NOT compatible with Briggs fuel tank 592877. The 592877 model has an additional bracket that this HZ fuel tank does not possess. If your current fuel tank has this additional bracket, this product will not fit. It also does not fit XR950, XR750, or any other engine model that requires an additional bracket on the tank to fasten a plastic cover on top of the recoil starter.
4. Safety Information
Always prioritize safety when working with fuel and power equipment. Failure to follow these guidelines may result in serious injury or property damage.
- Fuel is Flammable: Always handle gasoline in a well-ventilated area, away from open flames, sparks, or heat sources.
- No Smoking: Do not smoke while handling or near fuel.
- Eye Protection: Wear appropriate eye protection to prevent fuel splashes.
- Skin Protection: Avoid prolonged skin contact with fuel. Use gloves if necessary.
- Spill Management: Clean up any fuel spills immediately. Dispose of fuel-soaked rags properly.
- Engine Cool Down: Allow the engine to cool completely before refueling or performing any maintenance involving the fuel tank.
- Secure Cap: Ensure the fuel tank cap is securely tightened after refueling to prevent leaks and spills.
5. Setup and Installation
This section provides general steps for replacing your fuel tank. Specific procedures may vary slightly depending on your equipment model. Always refer to your equipment's original manual for detailed instructions.
- Prepare the Area: Work in a well-ventilated area, away from ignition sources. Place absorbent materials under the engine to catch any fuel spills.
- Drain Old Fuel: If the old tank contains fuel, carefully drain it into an approved gasoline container.
- Disconnect Old Tank: Disconnect the fuel line from the old tank and engine. Remove any mounting bolts or straps securing the old tank.
- Remove Old Tank: Carefully lift and remove the old fuel tank.
- Position New Tank: Place the new HZ fuel tank in the designated position on your equipment. Ensure proper alignment with mounting points.
- Secure New Tank: Use the provided mounting bolt and nuts to securely fasten the new fuel tank to the equipment frame. Do not overtighten.
- Connect Fuel Line: Attach the new fuel line (included) to the fuel tank outlet and the engine's fuel inlet. Use the provided clips to secure the fuel line connections. Ensure the fuel line is routed correctly and not pinched.
- Inspect Connections: Double-check all connections for tightness and proper routing.
- Refill Fuel: Carefully fill the new fuel tank with the appropriate type of gasoline for your engine. Do not overfill.
- Check for Leaks: After filling, visually inspect for any fuel leaks around the tank, fuel line, and connections. Address any leaks before starting the engine.

Image 5.1: Top view of the fuel tank, highlighting the mounting studs and fuel cap opening.

Image 5.2: Bottom view of the fuel tank, illustrating the mounting points and the fuel line connection port.
6. Operating the Fuel Tank
The fuel tank itself requires minimal operational steps beyond proper filling and monitoring.
- Filling: Always use fresh, clean gasoline appropriate for your engine. Refer to your engine's manual for fuel type recommendations. Fill the tank slowly to prevent spills.
- Fuel Cap: Ensure the fuel cap is securely tightened after filling to prevent fuel evaporation and spills.
- Fuel Level: Periodically check the fuel level before and during operation to avoid running out of fuel unexpectedly.

Image 6.1: Angled view of the fuel tank, showing the securely fitted fuel cap.
7. Maintenance
Proper maintenance of your fuel tank will extend its lifespan and ensure safe operation.
- Regular Inspection: Periodically inspect the fuel tank for any signs of cracks, dents, rust, or leaks. Check the fuel line for cracks, kinks, or deterioration.
- Cleanliness: Keep the exterior of the fuel tank clean. Avoid allowing dirt or debris to accumulate around the fuel cap or fuel line connections.
- Fuel Quality: Use a fuel stabilizer if storing equipment for extended periods to prevent fuel degradation and gumming inside the tank.
- Storage: When storing equipment, ensure the fuel tank is either full with stabilized fuel or completely empty and dry to prevent condensation and rust. Store in a cool, dry place away from direct sunlight.
8. Troubleshooting
This section addresses common issues related to the fuel tank.
| Problem | Possible Cause | Solution |
|---|---|---|
| Fuel Leak | Loose fuel cap, damaged fuel line, loose connections, cracked tank. | Tighten fuel cap. Inspect and replace damaged fuel line or clips. Tighten connections. If tank is cracked, replace it. |
| Tank Does Not Fit | Incorrect model compatibility. | Refer to Section 3: Compatibility Information. Ensure your engine model is listed as compatible and does not require an additional bracket. |
| Engine Not Getting Fuel | Clogged fuel line, empty tank, fuel filter issues (if applicable). | Check fuel level. Inspect fuel line for kinks or blockages. Clean or replace fuel filter if present. |
9. Specifications
| Attribute | Detail |
|---|---|
| Brand | HZ |
| Model | Fuel tank for Briggs and Stratton CR950 CR750 163cc 208cc engine |
| Vehicle Service Type | Briggs & Stratton CR950 CR750 163cc 208cc engine |
| Item Weight | 2.78 Pounds |
| Fuel Type | Gasoline |
| Product Grade | Replacement Parts |
| Automotive Fit Type | Vehicle Specific Fit |
| Product Dimensions (L x W x H) | 8.7 x 7.9 x 4.9 inches |
| Country of Origin | China |
| Material | Metal |
| Exterior Finish | Metal |
10. Warranty and Support
For warranty information or technical support regarding your HZ Gas Fuel Tank, please contact the manufacturer directly. Keep your purchase receipt as proof of purchase.
Contact Information: Please refer to the packaging or the seller's information on the platform where you purchased this product for the most up-to-date contact details for HZ customer support.