1. Introduction
This manual provides detailed instructions for the installation, operation, and maintenance of your Generic Tuya Smart WiFi Wall Outlet with USB and Type-C ports, Model DS-1450WN. Please read this manual thoroughly before installation and use to ensure safe and optimal performance of the device. Keep this manual for future reference.
2. Safety Information
WARNING: Risk of Electric Shock. Improper installation or use can lead to serious injury or death.
- Installation must be performed by a qualified electrician in accordance with all local and national electrical codes.
- Always turn off power at the circuit breaker before installing or servicing the outlet.
- Do not install in wet locations or where it may be exposed to water.
- Ensure the outlet is properly grounded.
- Do not exceed the maximum load rating of 10A for the AC outlets.
- Do not attempt to disassemble or modify the device.
- Keep children away from electrical outlets. Utilize the child lock feature for added safety.
3. Package Contents
Verify that all items listed below are included in your package:
- 1x Smart WiFi Wall Socket (Model DS-1450WN)
- 1x Instruction Manual
- 2x Mounting Screws

Figure 3.1: Package contents including the Smart WiFi Wall Socket, instruction manual, and mounting screws.
4. Product Overview
The Smart WiFi Wall Outlet (Model DS-1450WN) integrates two universal AC outlets, one USB-A port, and one USB-C port, offering versatile power and charging options. Each AC outlet and the combined USB/Type-C ports can be controlled independently via the mobile application.
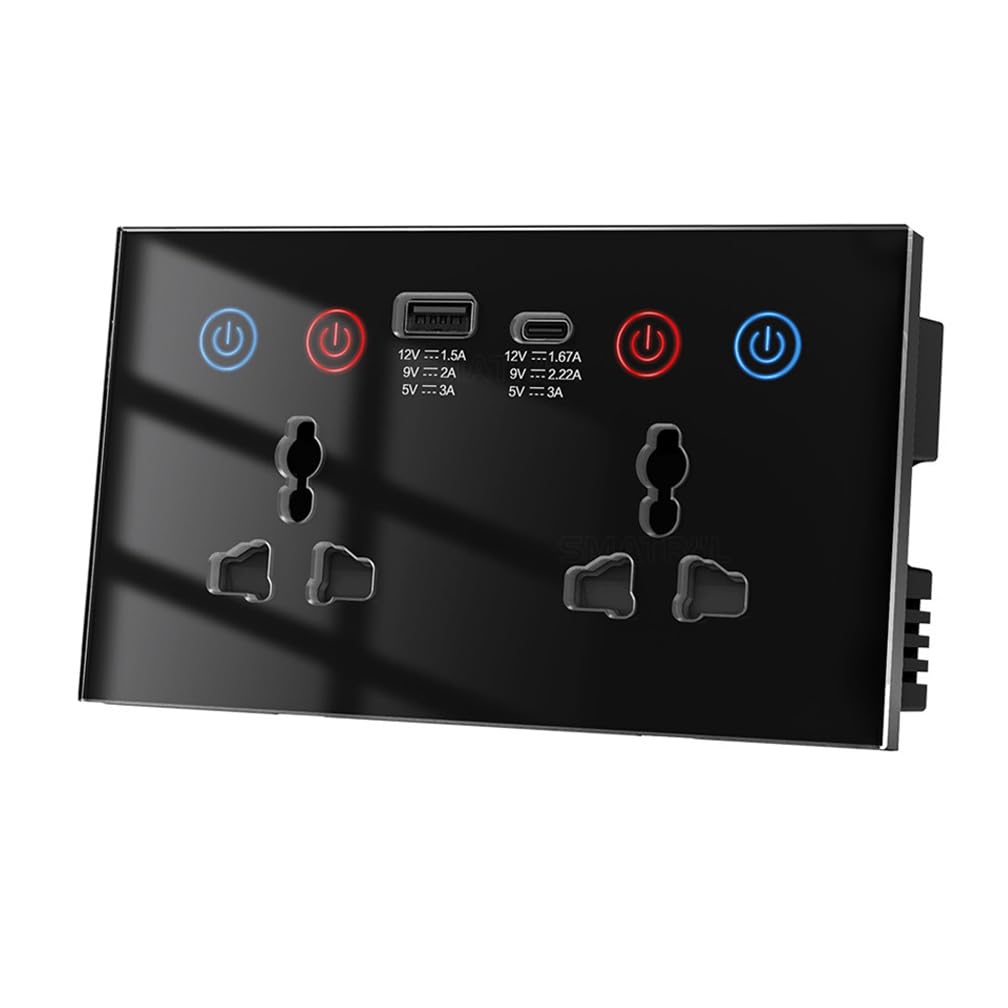
Figure 4.1: Front view of the Smart WiFi Wall Outlet, highlighting the universal AC sockets, USB-A, USB-C ports, and individual power buttons.
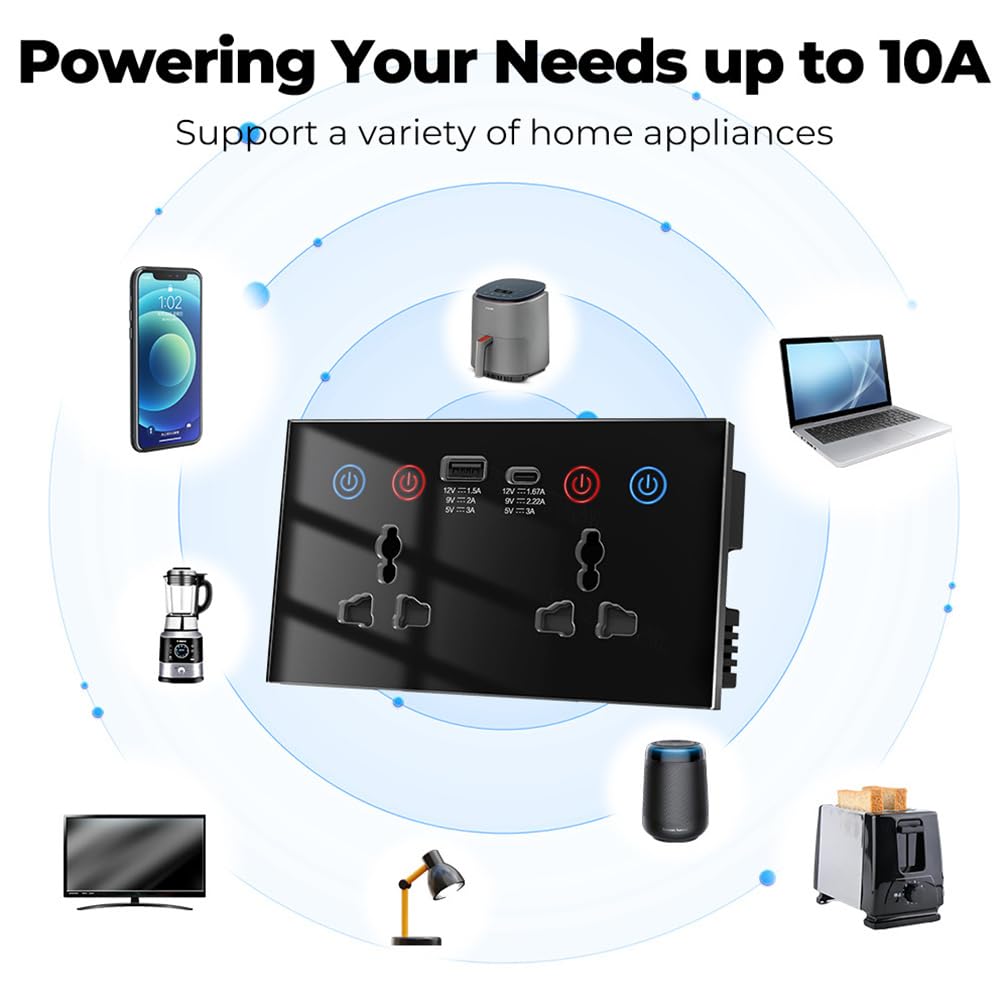
Figure 4.2: Port and control details, showing power ratings for USB-A (15W), USB-C (15W), and AC outlets (2200W MAX), along with backlight switch functionality.
5. Specifications
| Feature | Specification |
|---|---|
| Model Number | DS-1450WN |
| Material | PC+glass (fire rating 94V0) |
| Input Voltage | AC100~240V |
| Input Frequency | 50/60Hz |
| Maximum Load (AC) | 10A (2200W MAX) |
| USB-A Output | 9V 2A & 5V 3A & 12V 1.5A (15W) |
| Type-C Output | 9V 2.22A & 5V 3A & 12V 1.67A (15W) |
| WiFi Standard | WIFI 802.11b/g/n |
| Product Dimensions | 5.78 x 3.38 x 1.57 inches (approximately 14.68 x 8.59 x 3.99 cm) |
6. Installation
6.1 Wiring Diagram
IMPORTANT: Ensure power is OFF at the circuit breaker before proceeding with wiring.
Follow the wiring diagram carefully. Connect the Live, Neutral, and Earth wires to their corresponding terminals on the back of the smart socket. Incorrect wiring can cause damage to the device or pose a safety hazard.

Figure 6.1: Wiring connections for Live, Neutral, and Earth wires.
6.2 Physical Installation
- Turn off power to the circuit at the main electrical panel.
- Remove the existing wall plate and old outlet (if applicable).
- Connect the wires from the wall to the smart socket according to the wiring diagram (Live to Live, Neutral to Neutral, Earth to Earth).
- Carefully push the wired smart socket into the wall box.
- Secure the smart socket to the wall box using the provided mounting screws.
- Install the decorative wall plate (not included, typically uses standard wall plates).
- Restore power at the circuit breaker.
7. Operating Instructions
7.1 Basic On/Off Control
Each AC outlet has an independent power button with an LED indicator. Press the button to toggle power On or Off for the respective outlet. The USB and Type-C ports are controlled together by a single button.
7.2 App Installation and Device Pairing
To utilize smart features, download the "Smart Life" or "Tuya Smart" app from your mobile device's app store (available on Google Play and Apple App Store).
- Download and install the "Smart Life" or "Tuya Smart" app.
- Register or log in to your account.
- Ensure your phone's WiFi and Bluetooth are enabled.
- Open the app. A window may pop up automatically to "Quick add" devices. If not, tap the "+" icon in the top right corner to add a device.
- On the smart socket, press and hold one of the power buttons for approximately 5 seconds until the indicator light starts blinking rapidly, indicating pairing mode.
- The app will search for and detect the device. Confirm the device (e.g., "2Socket+2USB") and follow the on-screen prompts to connect it to your home WiFi network.
- Once connected, you can rename the device and assign it to a room.
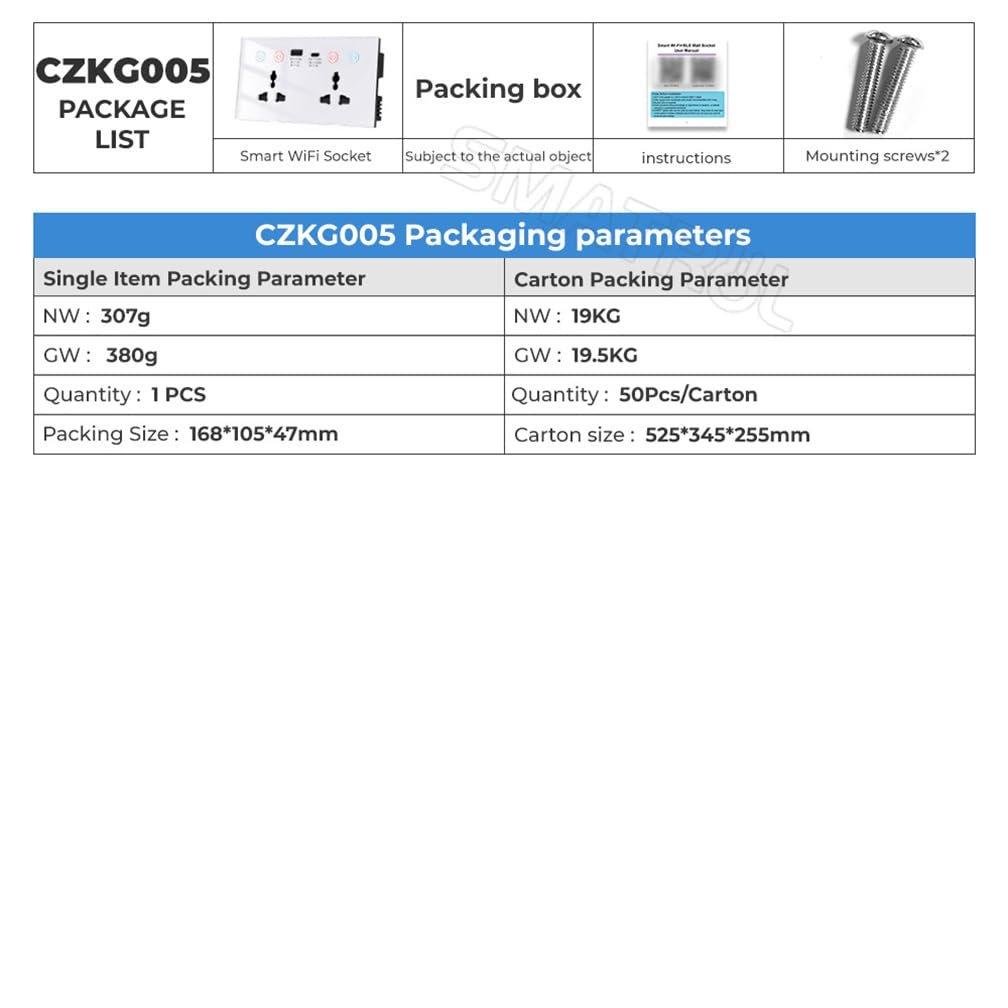
Figure 7.1: Steps for adding the device to the Smart Life application.
7.3 Remote Control and Separate Control
Through the Smart Life/Tuya Smart app, you can remotely control the power of each AC outlet and the combined USB/Type-C ports independently from anywhere with an internet connection. You can also view the current on/off status of each component.
7.4 Voice Control Integration
The smart socket is compatible with Amazon Alexa, Google Home, and Yandex Alice. To enable voice control:
- Link your Smart Life/Tuya Smart account to your voice assistant app (e.g., Alexa app, Google Home app).
- Discover devices within the voice assistant app.
- Once discovered, you can use voice commands such as:
- "Alexa, turn on [Device Name]"
- "Hey Google, turn off [Device Name]"
7.5 Timing and Countdown Functions
Use the app to set schedules, timers, or countdowns for each outlet and the USB/Type-C ports. This allows for automated control of connected devices, such as turning lights on at sunset or charging devices for a specific duration.
7.6 Power Monitoring
The smart socket features a power monitoring function, accessible through the app. This allows you to track the energy consumption of connected devices, helping you understand and manage your electricity usage.

Figure 7.2: Power monitoring interface in the Smart Life app.
7.7 Child Lock Function
Activate the child lock feature via the app to prevent accidental operation of the physical buttons on the wall outlet, enhancing safety in homes with children.

Figure 7.3: Child Lock and other app features.
7.8 Restart Status Memory
The smart socket is designed with a restart status memory function. In regions with unstable voltage or after a power outage, the device can be configured via the app to return to its last known state (ON, OFF, or Memory) once power is restored.

Figure 7.4: Restart Status options for power recovery.
8. Maintenance
- Ensure power is off before cleaning.
- Wipe the surface of the outlet with a soft, dry cloth. Do not use abrasive cleaners or solvents.
- Do not allow liquids to enter the device.
9. Troubleshooting
9.1 Device Not Responding / Offline
- Check Power: Ensure the outlet has power and the circuit breaker is not tripped.
- WiFi Connection: Verify your home WiFi network is active and the router is functioning correctly. The device requires a 2.4GHz WiFi network.
- Router Distance: The outlet might be too far from the WiFi router. Try moving the router closer or using a WiFi extender.
- Re-pair Device: If the issue persists, try re-pairing the device with the app (refer to Section 7.2).
9.2 Voice Control Not Working
- App Link: Ensure your Smart Life/Tuya Smart account is correctly linked to your voice assistant (Alexa/Google Home) app.
- Device Discovery: In your voice assistant app, try "Discover Devices" again.
- Device Name: Use the exact device name configured in the Smart Life/Tuya Smart app when giving voice commands.
9.3 USB/Type-C Ports Not Charging
- Check Power: Ensure the combined USB/Type-C port is turned ON, either via the physical button or the app.
- Cable: Verify the charging cable is functional and properly connected.
- Device Compatibility: Ensure the device being charged is compatible with the USB-A or Type-C output specifications.
10. Warranty and Support
This product comes with a standard return policy of 30 days from the date of purchase. For technical support or warranty inquiries, please contact your retailer or the manufacturer, EndyTech. Please retain your proof of purchase for warranty claims.
Manufacturer: EndyTech