1. Introduction
This manual provides essential information for the installation, operation, and maintenance of the DC36V Controller, Model DQHB2.6_CD3F-6. This controller is designed for use with DC brushless motors in specific electric ride-on vehicles and electric bikes, including the Jetson Bolt Pro, Jetson Bolt Up 14'' Electric Ride-On, and DYU D3F, D1F Electric Bikes.
The DQHB2.6_CD3F-6 is the new model, replacing the discontinued DQHB2.6-CD3F. The primary difference between the new and old models is the brake input level: the new model uses a High-level brake input, while the old model used a Low-level brake input. This difference does not affect general compatibility or functionality when installed correctly.
2. Product Overview
The DC36V Controller is a critical component for managing the electric motor in compatible vehicles. It features a robust aluminum alloy shell for durability and efficient heat dissipation.

Figure 1: Top view of the DC36V Controller with its wiring harness.
The controller is equipped with 13 distinct connectors, each designed to prevent incorrect connections during installation. The main body is constructed from aluminum alloy, while the mounting holes are made of iron for secure attachment.
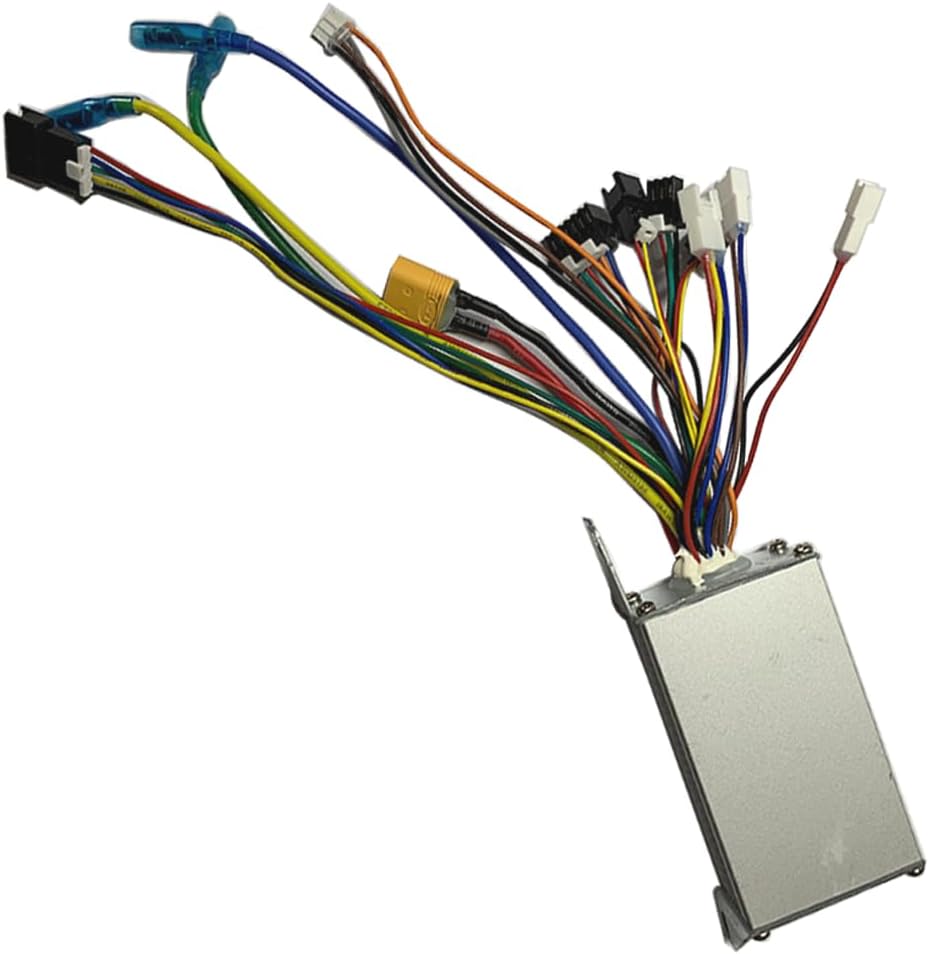
Figure 2: Angled view of the controller, showing the connector types.

Figure 3: Comparison of old and new model labels, highlighting the brake input difference.
3. Specifications
| Feature | Specification |
|---|---|
| Model | DQHB2.6_CD3F-6 |
| Rated Voltage | DC36V |
| Rated Current | 7A |
| Maximum Current | 15A±1A |
| Low Voltage Protection | DC31V±0.5V |
| Brake Input | High-level |
| Speed Set | 1-4.2V |
| Dimensions (LxWxH) | 8.3 x 4.6 x 3.0 cm |
| Mounting Hole Distance | 11 cm |
| Shell Material | Aluminum Alloy |
| Mounting Hole Material | Iron |
| Number of Connectors | 13 |
| Item Weight | 185 Grams |
4. Setup and Installation
Proper installation is crucial for the safe and correct operation of your electric vehicle. If you are unsure about any step, consult a qualified technician.
4.1 Safety Precautions
- Ensure the vehicle's power is completely off and the battery is disconnected before beginning installation.
- Wear appropriate safety gear, including gloves and eye protection.
- Avoid touching exposed wires or terminals while the battery is connected.
4.2 Installation Steps
- Identify the Old Controller: Locate the existing controller on your electric bike or ride-on. Note how each wire is connected. Taking photos before disconnection can be helpful.
- Disconnect Old Controller: Carefully disconnect all 13 connectors from the old controller.
- Mount the New Controller: Secure the new DQHB2.6_CD3F-6 controller in the same location as the old one, using the existing mounting holes. The distance between the two mounting holes is 11 cm.
- Connect Wiring Harness: The new controller has 13 distinct connectors. These plugs are designed to be unique, minimizing the risk of incorrect connections. It is recommended to plug in all other connectors first (e.g., motor, throttle, brake sensors, lights) before connecting the main battery plug.
- Verify Connections: Double-check all connections to ensure they are secure and correctly seated.
- Connect Battery: Finally, connect the battery plug to the controller.
- Test Functionality: Power on the vehicle and test all functions (throttle, brakes, lights, etc.) at a low speed in a safe environment.

Figure 4: Detailed view of the controller's connectors.
5. Operation
Once correctly installed, the DC36V Controller operates automatically to manage the electric motor based on user input (e.g., throttle, brake). There are no user-adjustable settings on the controller itself. Ensure all connected components (throttle, brakes, battery) are functioning correctly for optimal performance.
6. Maintenance
The DC36V Controller is designed for durability and requires minimal maintenance. Follow these guidelines to ensure its longevity:
- Keep Dry: Protect the controller from water and excessive moisture. While the aluminum casing offers some protection, it is not fully waterproof.
- Keep Clean: Periodically inspect the controller and its connections for dirt, dust, or debris. Clean with a dry, soft cloth.
- Inspect Connections: Regularly check all wire connections to ensure they remain secure and free from corrosion or damage. Loose connections can lead to intermittent operation or component failure.
- Avoid Physical Damage: Protect the controller from impacts or excessive vibration.
7. Troubleshooting
If you experience issues with your electric vehicle after installing the controller, consider the following troubleshooting steps:
- No Power/Vehicle Not Turning On:
- Ensure the battery is fully charged and properly connected.
- Check all connections to the controller, especially the main battery plug, for looseness or damage.
- Verify the vehicle's power switch is in the 'ON' position.
- Motor Not Responding to Throttle:
- Check the throttle connection to the controller.
- Ensure the throttle itself is not damaged.
- Brakes Not Functioning Correctly:
- Verify the brake sensor connections.
- Remember that the new DQHB2.6_CD3F-6 model uses a High-level brake input. If you are replacing an older controller, ensure your brake system is compatible or adjusted accordingly.
- Intermittent Operation:
- Inspect all wiring for signs of fraying, cuts, or loose insulation.
- Ensure connectors are fully seated and not corroded.
- Overheating:
- Ensure the controller is mounted in a location with adequate airflow.
- Avoid operating the vehicle beyond its rated capacity or in extreme heat.
If these steps do not resolve the issue, it may indicate a faulty component. Contact the seller or a qualified service technician for further assistance.
8. Warranty and Support
This product comes with a limited warranty. Specific warranty details are not provided in this manual. For information regarding warranty coverage, claims, or technical support, please refer to the purchase documentation or contact the retailer or manufacturer directly.
Manufacturer: DYU