ESXSWYDR OPS1-63P
ESXSWYDR OPS1-63P 3-in-1 Din Rail Over/Under Voltage, Overcurrent, and Power Meter User Manual
Model: OPS1-63P | Brand: ESXSWYDR
1. Introduction
This manual provides detailed instructions for the installation, operation, and maintenance of the ESXSWYDR OPS1-63P 3-in-1 Din Rail device. This unit functions as an over/under voltage protector, overcurrent protector, and a power (kWh) meter, designed to safeguard electrical circuits and appliances.
Please read this manual thoroughly before installation and operation to ensure proper use and to prevent damage to the device or connected equipment.
2. Safety Information
Warning: Electrical work should only be performed by qualified personnel. Failure to follow these safety instructions may result in electric shock, fire, or serious injury.
- Always disconnect power before installing or servicing the device.
- Ensure proper wiring according to local electrical codes and this manual.
- Do not operate the device if it appears damaged.
- The device is designed for indoor use in a dry environment.
3. Product Overview
The ESXSWYDR OPS1-63P is a compact Din Rail mounted device that integrates multiple protective and metering functions:
- Overvoltage Protection: Automatically disconnects power when voltage exceeds a set limit.
- Undervoltage Protection: Automatically disconnects power when voltage drops below a set limit.
- Overcurrent Protection: Automatically disconnects power when current exceeds a set limit.
- Power Meter (kWh): Displays accumulated energy consumption.
- Real-time Display: Shows current voltage (V), current (A), and energy (kWh) readings.

Figure 3.1: Front view of the ESXSWYDR OPS1-63P device. The display shows voltage (V), current (A), and energy (kWh) readings. Below the display are control buttons: Power, SET, Up, and Down.
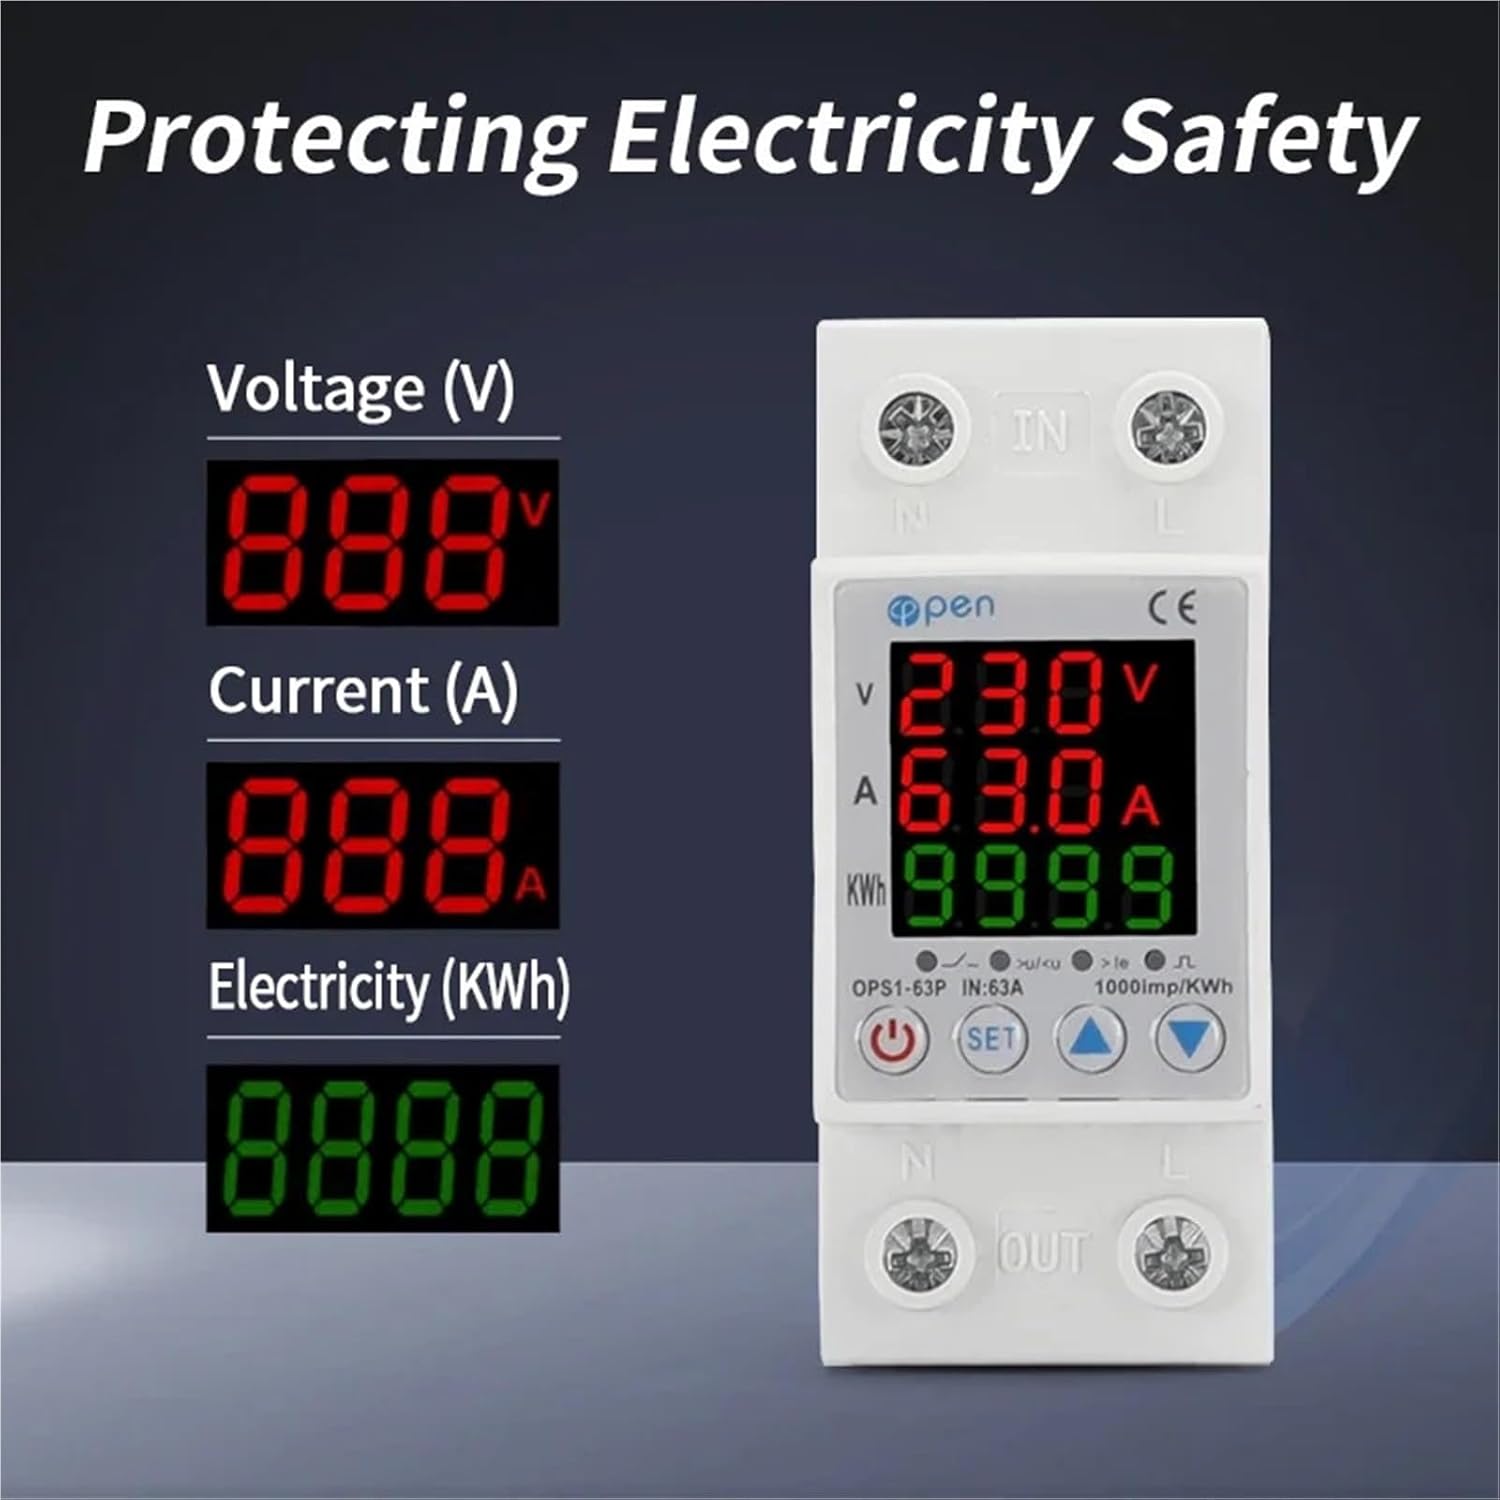
Figure 3.2: Display readings. The device shows Voltage (V), Current (A), and Electricity (kWh) values digitally.
4. Specifications
| Parameter | Value |
|---|---|
| Model Number | OPS1-63P |
| Rated Current | 63A |
| Rated Voltage | 230V AC |
| Overvoltage Protection Range | Adjustable (e.g., 230V~300V) |
| Undervoltage Protection Range | Adjustable (e.g., 135V~210V) |
| Overcurrent Protection Range | Adjustable (up to 63A) |
| Energy Measurement | kWh (up to 9999 kWh) |
| Installation | 35mm Din Rail |
| Phase | Single Phase |
| Dimensions (Approx.) | 1.18 x 0.79 x 0.39 inches (Package Dimensions, actual device may vary slightly) |
| Item Weight (Approx.) | 1.76 ounces |
Note: Specific adjustable ranges for overvoltage, undervoltage, and overcurrent protection should be confirmed with the device's on-screen settings or detailed product documentation. The ranges provided are examples from product images.
5. Setup and Installation
The OPS1-63P is designed for Din Rail mounting. Ensure all power is disconnected before proceeding with installation.
5.1 Mounting on Din Rail
- Locate a standard 35mm Din Rail within your electrical panel.
- Align the device's mounting clips with the Din Rail.
- Press the device firmly onto the rail until it clicks securely into place.

Figure 5.1: Din Rail mounting mechanism. The device is designed to clip onto a standard 35mm Din Rail.
5.2 Wiring Diagram
Connect the device according to the following diagram. Ensure correct polarity (Neutral 'N' and Live 'L') for both input and output terminals.
- Input (IN): Connect the incoming power supply to the 'IN' terminals (N and L).
- Output (OUT): Connect the load (appliances/circuit) to the 'OUT' terminals (N and L).

Figure 5.2: Wiring diagram. The diagram illustrates connecting the device between an incoming power source (left circuit breaker) and the protected load (right circuit breaker). Input terminals are marked 'IN' and output terminals 'OUT'.
After wiring, double-check all connections for tightness and correctness before restoring power.
6. Operating Instructions
Once installed and powered, the device will display real-time voltage, current, and accumulated kWh. Use the control buttons to navigate settings and adjust protection parameters.
6.1 Button Functions
- Power Button (⏻): Typically used to manually turn the output ON/OFF or to confirm settings. A long press might reset kWh or enter/exit settings.
- SET Button: Used to enter the settings menu and cycle through different adjustable parameters (e.g., overvoltage threshold, undervoltage threshold, overcurrent threshold, delay times).
- Up (▲) / Down (▼) Buttons: Used to increase or decrease values when adjusting parameters in the settings menu.
6.2 Adjusting Protection Parameters
To adjust the overvoltage, undervoltage, or overcurrent protection thresholds:
- Press the SET button to enter the parameter setting mode. The display will likely show a flashing parameter (e.g., "OV" for overvoltage).
- Use the Up and Down buttons to adjust the value of the selected parameter.
- Press SET again to move to the next parameter or to confirm the current setting.
- Continue adjusting parameters as needed. Once all desired parameters are set, the device will typically exit the setting mode automatically after a period of inactivity or by a long press of the SET or Power button (refer to specific device behavior).
Important: Set protection values appropriate for your connected load and local electrical standards. Incorrect settings can lead to nuisance tripping or insufficient protection.
6.3 Resetting kWh Meter
To reset the accumulated kWh reading, typically a long press of the Power button or a specific combination of buttons is required while in the main display mode. Refer to the device's on-screen prompts or specific instructions for this function.
7. Maintenance
The ESXSWYDR OPS1-63P is designed for minimal maintenance. However, periodic checks are recommended:
- Visual Inspection: Periodically inspect the device for any signs of physical damage, discoloration, or loose connections.
- Cleaning: If necessary, gently wipe the exterior of the device with a dry, soft cloth. Do not use abrasive cleaners or solvents. Ensure power is disconnected before cleaning.
- Connection Checks: Ensure all wiring terminals remain tight. Loose connections can cause overheating and malfunction.
8. Troubleshooting
If you encounter issues with your OPS1-63P device, refer to the following common problems and solutions:
| Problem | Possible Cause | Solution |
|---|---|---|
| Device does not power on / Display is blank. | No input power; Incorrect wiring; Device malfunction. | Check power supply to 'IN' terminals. Verify wiring. If power is present and wiring is correct, the device may be faulty. |
| Device trips frequently (power disconnects). | Voltage/current exceeds set limits; Incorrect sensitivity settings; Faulty appliance. | Check actual voltage/current with a multimeter. Adjust protection thresholds if they are too low for normal operation. Inspect connected appliances for faults. |
| Display shows "OV" or "UV" or "OC". | Overvoltage, undervoltage, or overcurrent condition detected. | This indicates the device is performing its protective function. Check the incoming power supply or the load for issues. The device should automatically restore power once conditions return to normal, or you may need to manually reset it. |
| Cannot adjust settings. | Not in setting mode; Buttons unresponsive. | Press the SET button to enter setting mode. If buttons are unresponsive, try cycling power to the device. |
If the problem persists after attempting these solutions, contact customer support.
9. Warranty and Support
For warranty information or technical support, please refer to the documentation included with your purchase or contact the manufacturer directly. Keep your purchase receipt as proof of purchase.
Manufacturer: ESXSWYDR
For further assistance, visit the official ESXSWYDR website or contact their customer service department.
Ask a question about this manual
Ask about setup, troubleshooting, compatibility, parts, safety, or missing instructions. Manuals+ will review the question and use this page’s manual context to help answer it.