1. Introduction and Overview
The ciciglow B250M-V3 is an M-ATX form factor motherboard designed for desktop personal computers. It supports LGA 1151 socket processors, specifically 6th and 7th generation Intel Core i7, i5, and i3 CPUs. This motherboard features two DDR4 memory slots, supporting up to 32GB of 2400MHz RAM, and multiple PCI Express slots for expansion. It is equipped with an onboard gigabit network card and an 8-channel sound chip, making it suitable for various applications including home use, design work, and gaming.

Figure 1.1: ciciglow B250M-V3 Motherboard
2. Key Features
- LGA 1151 Socket: Compatible with 7th and 6th generation Intel Core i7, i5, i3 14nm CPU processors.
- DDR4 Memory Support: Two DDR4 memory slots supporting dual-channel DDR4 2400MHz memory, with a maximum capacity of 32GB.
- PCIe 3.0 Expansion: Includes one PCIe x16 slot, one PCIe x4 slot, and one PCIe x1 slot for dedicated graphics cards, sound cards, network cards, and other PCIe devices.
- Integrated Networking: Onboard RTL8111H gigabit network card for efficient internet connectivity.
- High-Quality Audio: Integrated ALC887 8-channel sound chip for immersive audio experiences.
- DVI Output: Equipped with a DVI output interface for high-definition visuals on compatible displays.
- Stable Power Supply: Utilizes all solid capacitors and an 8-pin and 24-pin power connector for stable performance and enhanced system reliability.
- Durable Construction: Constructed from robust PCB and metal materials for a longer lifespan.

Figure 2.1: DDR4 Memory Support
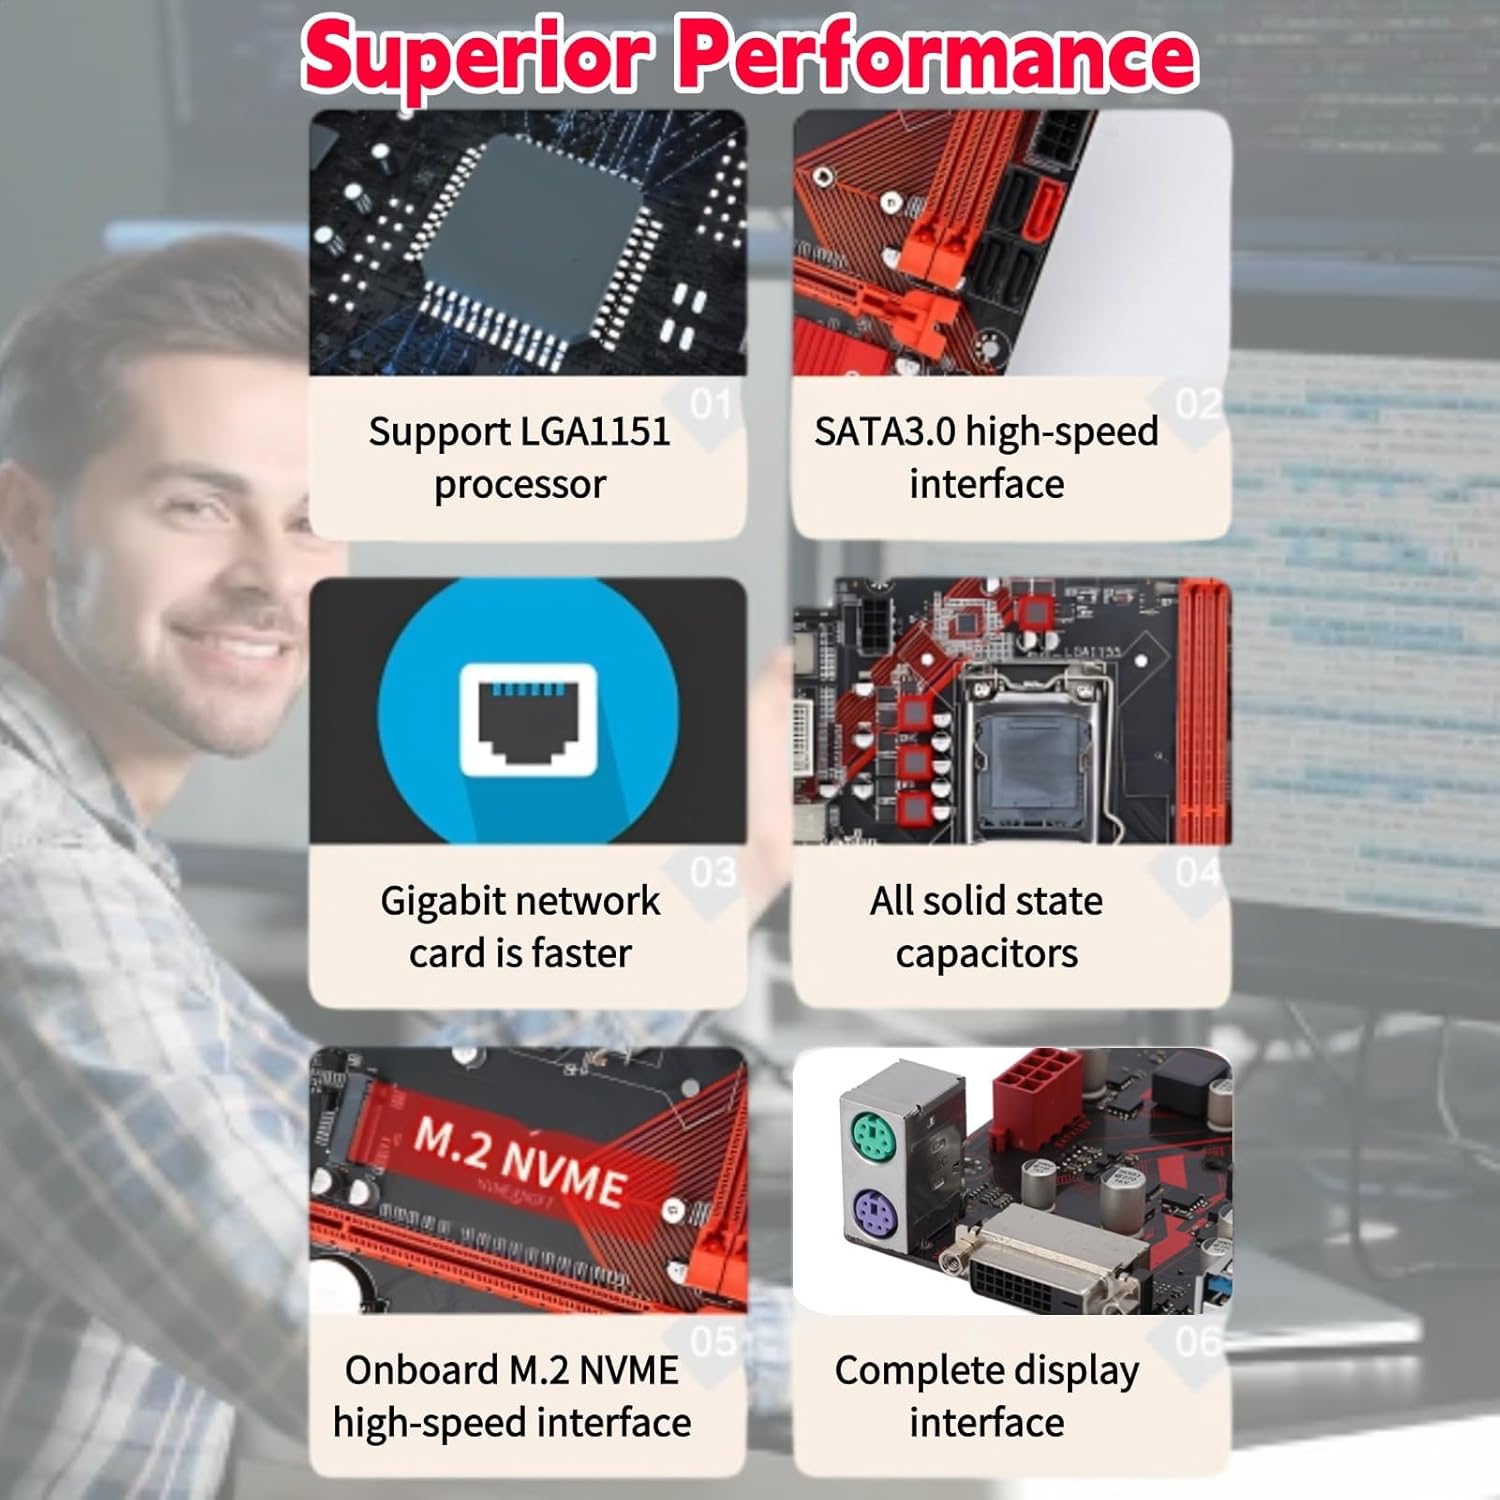
Figure 2.2: Superior Performance Features
3. Interface Layout and Components
The B250M-V3 motherboard provides a comprehensive set of interfaces for connecting various components and peripherals. Familiarize yourself with the layout before installation.

Figure 3.1: Motherboard Interface Layout
Key interfaces include:
- CPU Power: 8-pin connector.
- Motherboard Power: 24-pin connector.
- DDR4 Slots: Two slots for memory modules.
- PS/2 Ports: For keyboard and mouse.
- DVI Port: Video output.
- USB 3.0 Ports: Multiple ports for high-speed peripherals.
- USB 2.0 Ports: Multiple ports for standard peripherals.
- RJ45 Interface: Gigabit Ethernet port.
- Audio Interface: For audio input/output.
- PCIe x16 Slot: For graphics cards.
- PCIe x4 Slot: For expansion cards.
- PCIe x1 Slot: For expansion cards.
- SATA III Interfaces: Multiple ports for storage devices.
- Front COM Pin: For serial port expansion.
- Power LED/HDD LED/Power SW Headers: For front panel connections.

Figure 3.2: Detailed Interface Views
4. Setup and Installation
Proper installation is crucial for the stable operation of your system. Always ensure your power supply is disconnected before handling internal components.
- Prepare the Case: Ensure your computer case is ready for motherboard installation, with standoffs correctly aligned.
- Install the CPU: Carefully open the CPU socket lever, align the CPU with the socket (matching the triangle indicator), gently place the CPU into the socket, and close the lever to secure it.
- Install the CPU Cooler: Apply thermal paste (if not pre-applied) and install the CPU cooler according to its manufacturer's instructions. Connect the CPU fan cable to the “CPU_FAN” header on the motherboard.
- Install RAM: Open the clips on the DDR4 memory slots. Align the memory modules with the slots (notches should match) and press down firmly on both ends until the clips snap into place.
- Mount the Motherboard: Carefully place the motherboard into the case, aligning the screw holes with the standoffs. Secure the motherboard with screws.
- Connect Power Supply: Connect the 24-pin ATX power connector and the 8-pin CPU power connector from your power supply to the corresponding ports on the motherboard.
- Install Storage Devices: Connect SATA data cables from your storage drives (HDDs/SSDs) to the SATA III ports on the motherboard. Connect SATA power cables from your power supply to the drives.
- Install Graphics Card (Optional): If using a dedicated graphics card, insert it into the PCIe x16 slot and secure it. Connect any required PCIe power cables from your power supply to the graphics card.
- Connect Front Panel Cables: Connect the power button, reset button, HDD LED, power LED, and front USB/audio cables from your case to the corresponding headers on the motherboard. Refer to the motherboard's manual for exact pin assignments.
- Connect Peripherals: Connect your monitor, keyboard, mouse, and other peripherals to the appropriate ports on the motherboard's rear I/O panel.
5. Operating Instructions
After successful installation, follow these steps to operate your system:
- Initial Boot: Power on your system. The system should display the BIOS/UEFI splash screen.
- BIOS/UEFI Setup: Press the designated key (usually DEL or F2) during startup to enter the BIOS/UEFI setup utility. Here you can configure boot order, system time, and other hardware settings.
- Operating System Installation: Insert your operating system installation media (USB drive or DVD) and follow the on-screen instructions to install your preferred OS.
- Driver Installation: After OS installation, install the necessary drivers for the motherboard chipset, network, audio, and any dedicated graphics cards. These are typically provided on a CD/DVD with the motherboard or can be downloaded from the manufacturer's website.
- System Updates: Regularly update your operating system and drivers to ensure optimal performance and security.
Video 5.1: Overview of the ciciglow B250M-V3 Motherboard's physical features and design.
6. Specifications
Detailed technical specifications for the ciciglow B250M-V3 Motherboard:
| Feature | Specification |
|---|---|
| Brand | ciciglow |
| Model Name | B250M-V3 |
| CPU Socket | LGA 1151 |
| Compatible Processors | Intel Core i7-6700K, i5-6600K, i3-6100, i7-7700K, i5-7600K, i3-7100 (6th/7th Gen) |
| Chipset Type | Intel B250 |
| RAM Memory Technology | DDR4 |
| Memory Clock Speed | 2400 MHz |
| Memory Slots Available | 2 |
| Maximum RAM Capacity | 32 GB |
| Graphics Card Interface | PCI Express |
| Total PCIe Ports | 3 (1x PCIe x16, 1x PCIe x4, 1x PCIe x1) |
| Total SATA Ports | 4 |
| Total USB Ports | 12 (various USB 3.0 and USB 2.0) |
| Number of Ethernet Ports | 1 (Gigabit) |
| Main Power Connector Type | 24-pin, 8-pin |
| Compatible Devices | Personal Computer |
7. Troubleshooting
If you encounter issues with your ciciglow B250M-V3 Motherboard, consider the following common troubleshooting steps:
- No Power/No Boot:
- Ensure all power cables (24-pin ATX, 8-pin CPU, PCIe for GPU) are securely connected.
- Verify the power supply unit (PSU) is switched on and functioning correctly.
- Check front panel connections (power button header) for correct placement.
- Try booting with only essential components (CPU, one RAM stick, CPU cooler, PSU) to isolate the issue.
- No Display:
- Ensure your monitor is connected to the correct video output (motherboard DVI or dedicated graphics card).
- Reseat the graphics card and RAM modules.
- Test with a different monitor or display cable if possible.
- System Instability/Crashes:
- Check CPU and GPU temperatures to ensure they are not overheating.
- Verify RAM modules are properly seated and compatible. Run a memory diagnostic tool.
- Ensure all drivers are up to date.
- Check for loose cables or connections.
- Network Connectivity Issues:
- Ensure the Ethernet cable is securely connected to the RJ45 port and your router/modem.
- Install or update the network adapter drivers.
- Check network settings in your operating system.
- Peripheral Not Detected:
- Try connecting the peripheral to a different USB port.
- Ensure the peripheral has its own power supply if required.
- Install necessary drivers for the peripheral.
8. Warranty and Support
For warranty information and technical support, please refer to the official ciciglow website or contact your retailer. The product is typically covered by a manufacturer's warranty against defects in materials and workmanship.
For returns or exchanges, please consult the return policy of the platform where the product was purchased. For example, Amazon typically offers a 30-day return window for most electronics.
For further assistance, you may visit the ciciglow Store on Amazon.