E ENERGETIC LIGHTING MXL1217
Energetic MXL1217 5CCT Flush Mount LED Ceiling Light Fixture Instruction Manual
Model: MXL1217
Introduction
This manual provides detailed instructions for the safe installation, operation, and maintenance of your Energetic 5CCT Flush Mount LED Ceiling Light Fixture. Please read this manual thoroughly before installation and retain it for future reference. This fixture offers five selectable color temperatures (2700K, 3000K, 3500K, 4000K, 5000K) and an ultra-slim design, making it suitable for various indoor applications.
Important Safety Information
WARNING: Risk of electric shock. Disconnect power at the circuit breaker or fuse box before installation or servicing.
- Always turn off the main power supply before beginning any electrical work.
- Installation must be performed by a qualified electrician or a person familiar with the construction and operation of the product and the hazards involved.
- Ensure all electrical connections are made in accordance with local codes and ordinances, as well as the National Electric Code (NEC).
- Do not install this fixture with wet hands or while standing on wet or damp surfaces.
- This fixture is designed for indoor use only and is suitable for damp locations. Do not expose to direct water spray.
- Verify that the supply voltage is compatible with the fixture (120 Volts AC).
Package Contents
Carefully unpack your new light fixture and ensure all components are present and undamaged. If any parts are missing or broken, please contact customer support.

Image: Package contents including three LED ceiling lights, various colored metal rings, mounting hardware, and wire connectors.
Typically included in a 3-pack:
- 3 x LED Ceiling Light Fixtures
- 3 x Metal Rings (Brushed Black, Brown, Silver - Note: White ceiling light purchases may not include metal rings.)
- 3 x Mounting Plates
- Wire Nuts and Screws
- Instruction Manual
Specifications
| Feature | Specification |
|---|---|
| Brand | E ENERGETIC LIGHTING |
| Model Number | MXL1217 |
| Power Source | AC |
| Voltage | 120 Volts |
| Wattage | 26 watts |
| Brightness | 2000 Lumens |
| Color Temperature (CCT) | 2700K, 3000K, 3500K, 4000K, 5000K (Selectable) |
| Light Source Type | LED |
| Material | Aluminum, Metal |
| Finish Type | Brushed |
| Product Dimensions | 11.8"L x 11.8"W x 4.3"H |
| Installation Type | Flush Mount |
| Indoor/Outdoor Usage | Indoor use only (Suitable for damp locations) |
| Special Feature | Adjustable Color Temperature, Energy Efficient |
| Life Hours | Approximately 50,000 hours |
| Certifications | ETL, FCC |
Setup and Installation
Follow these steps for proper installation of your LED ceiling light fixture. It is recommended to have a second person assist during installation.

Image: Visual guide for the 6-step installation process.
1. Pre-Installation
- Turn off Power: Before starting, ensure the power to the light fixture is turned off at the circuit breaker.
- Remove Old Fixture: Carefully remove your existing ceiling light fixture. Disconnect all wiring and remove the mounting hardware.
- Prepare Fixture: If your fixture includes a separate metal ring (for colored models), snap it into the lamp base. Press any small metal pieces inward to secure it. (Note: If you purchased a white ceiling light, you may not have a separate metal ring.)
2. Select Color Temperature (CCT)
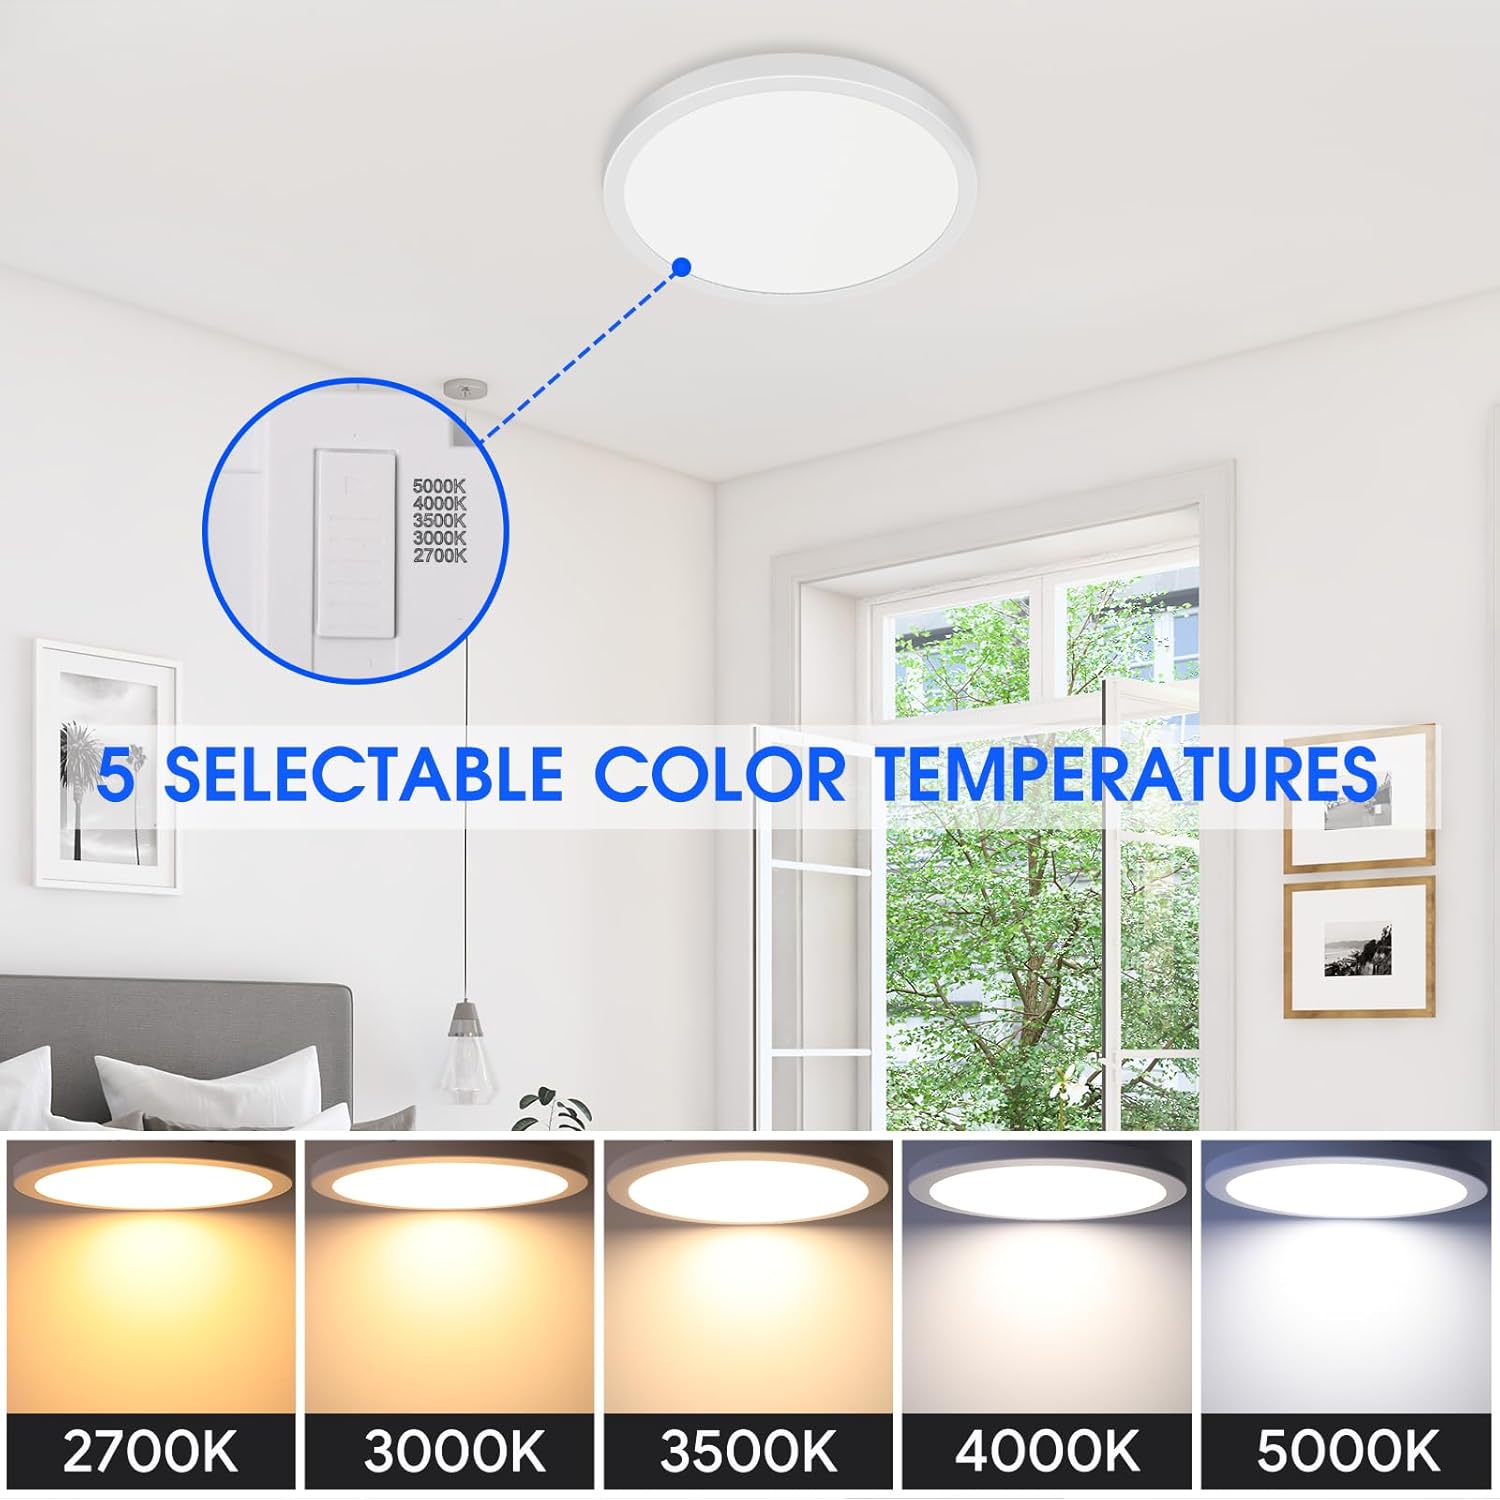
Image: Examples of the five selectable color temperatures.
- Locate CCT Switch: On the back of the LED light fixture, locate the small switch for color temperature selection.
- Choose Setting: Slide the switch to your desired color temperature: 2700K (Warm White), 3000K (Soft White), 3500K (Neutral White), 4000K (Cool White), or 5000K (Daylight). This selection must be made before final installation.
3. Mounting and Wiring
- Secure Mounting Plate: Secure the fixture's mounting plate into the existing electrical junction box in your ceiling using the provided screws. Ensure it is firmly attached.
- Connect Wires: Connect the fixture wires to the supply wires from the ceiling. Match black to black (live), white to white (neutral), and green/bare copper to green/bare copper (ground). Use the included wire nuts or, for easier installation, consider using WAGO lever nuts (not included).
- Attach Fixture: Once wiring is complete, carefully push the fixture up towards the ceiling, aligning the tabs on the fixture with the slots on the mounting plate. Twist the fixture clockwise to lock it into place.
Operating Instructions
Once installed, operating your Energetic LED Ceiling Light Fixture is straightforward:
- Power On: Restore power to the circuit at the breaker.
- Switch On/Off: Use your standard wall switch to turn the light fixture on or off.
- Color Temperature: The color temperature is set during installation via the switch on the fixture. It cannot be changed via the wall switch after installation.
Maintenance
Your LED ceiling light fixture requires minimal maintenance to ensure long-lasting performance.
- Cleaning: To clean the fixture, first ensure the power is turned off. Use a soft, dry, or slightly damp cloth to wipe the surface. Avoid using harsh chemicals, abrasive cleaners, or solvents, as these can damage the finish or electrical components.
- Bulb Replacement: This fixture uses integrated LED technology, meaning there are no bulbs to replace. The LEDs are designed for a long lifespan of approximately 50,000 hours.
Troubleshooting
If you encounter any issues with your light fixture, please refer to the following common problems and solutions:
- Light does not turn on:
- Check if the power is on at the circuit breaker.
- Ensure all wire connections are secure and correctly matched (black to black, white to white, ground to ground).
- Verify that the wall switch is in the 'ON' position.
- Light flickers or dims unexpectedly:
- Check for loose wire connections.
- Ensure the fixture is compatible with your dimmer switch if one is installed.
- Incorrect color temperature:
- The color temperature is set via a switch on the fixture itself during installation. If you wish to change it, you will need to remove the fixture, adjust the switch, and reinstall.
If these steps do not resolve the issue, please contact customer support.
Warranty and Support
This Energetic LED Ceiling Light Fixture comes with a 5-year manufacturer's warranty. This warranty covers defects in materials and workmanship under normal use.
For warranty claims, technical support, or any questions regarding your product, please contact E Energetic Lighting customer service. Refer to the contact information provided in your product packaging or visit the official E Energetic Lighting website for assistance.