Introduction
This manual provides detailed instructions for the setup, operation, and maintenance of your Andonstar AD115-Arm Digital Microscope. Please read this manual thoroughly before using the device to ensure proper function and longevity. This microscope is designed for detailed observation of various objects, including coins, PCBs, plants, and more.
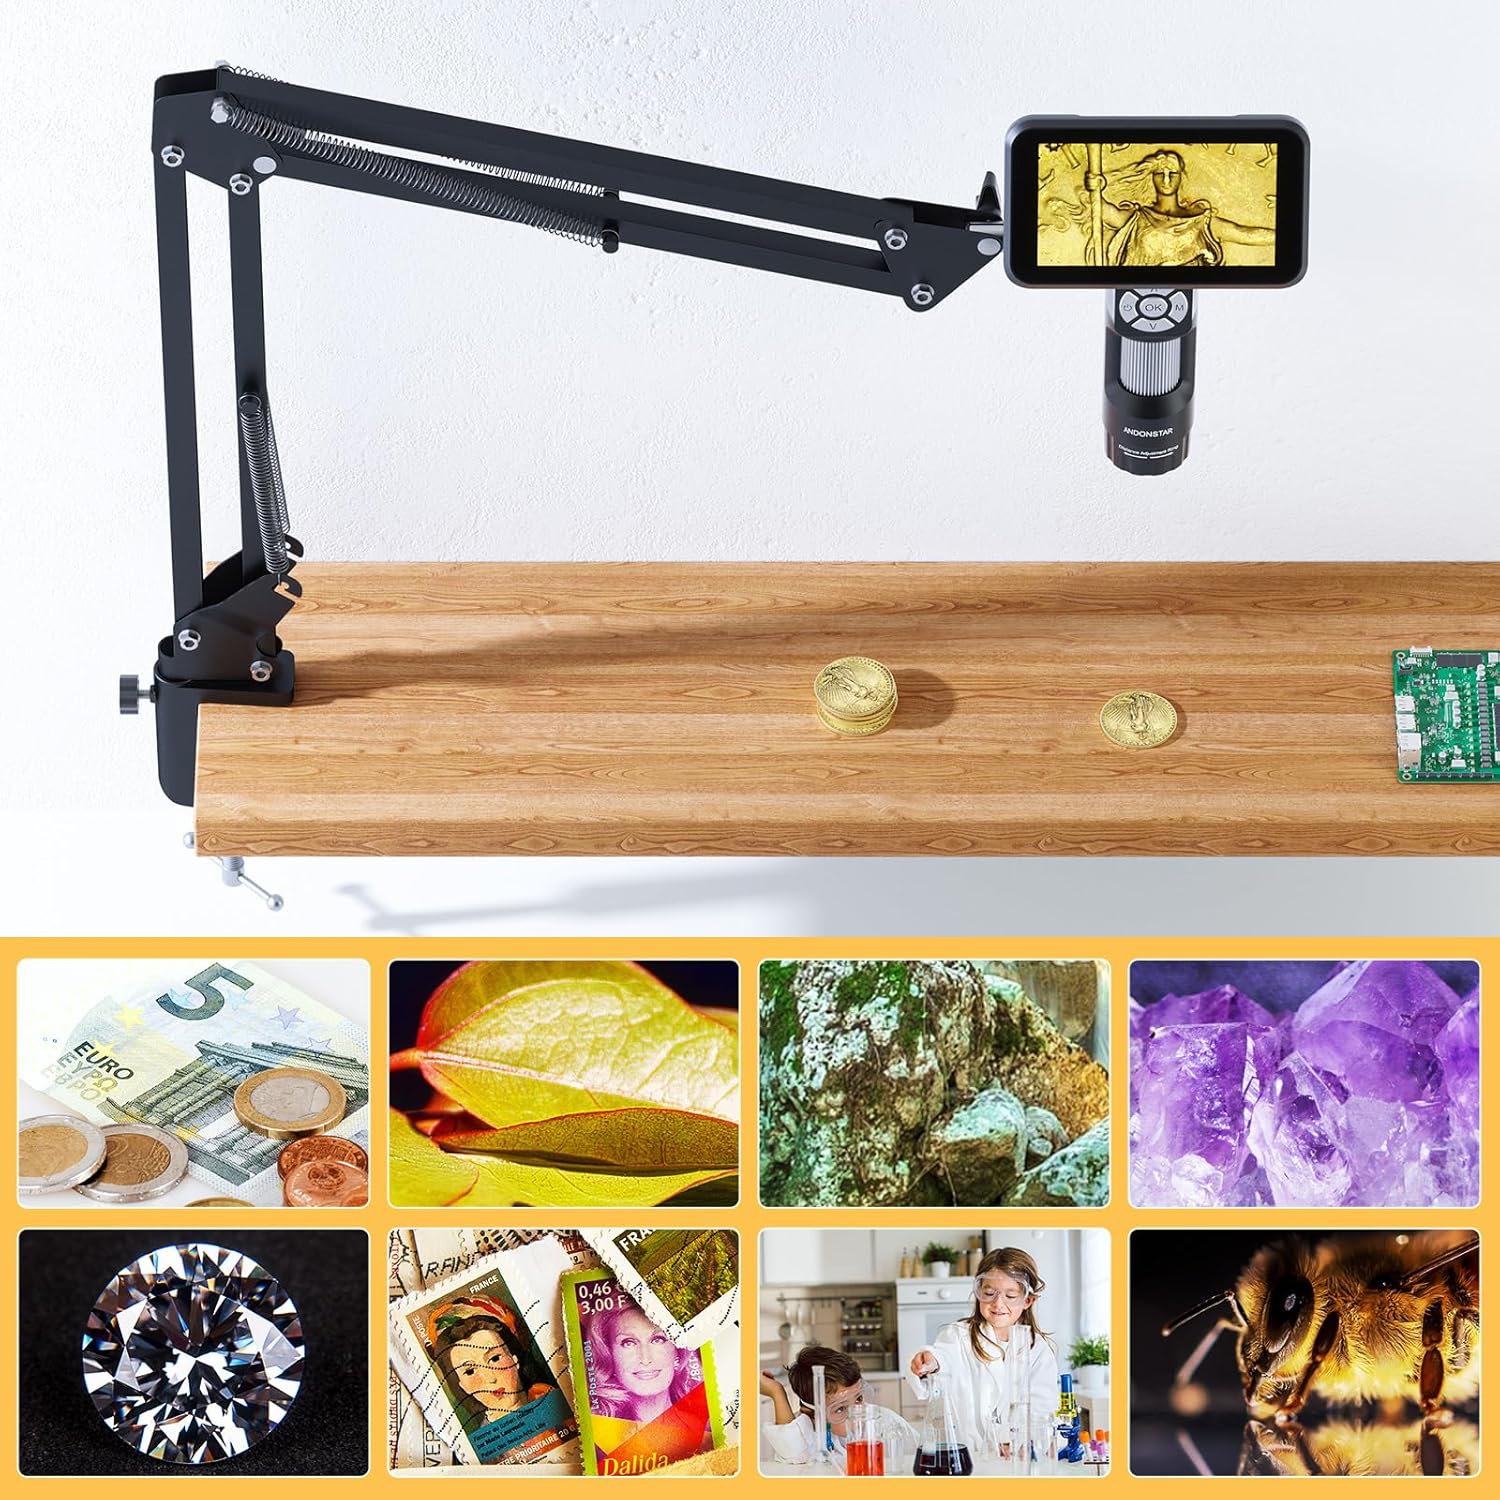
Image: The Andonstar AD115-Arm Digital Microscope with its flexible boom arm stand, demonstrating its versatility in observing various items such as coins, circuit boards, and biological samples.
Package Contents
Verify that all items listed below are included in your package:
- Digital Microscope Unit
- Flexible Boom Arm Stand
- USB-C Cable
- User Manual (this document)

Image: Contents of the Andonstar AD115-Arm Digital Microscope package, including the microscope, flexible boom arm stand, USB-C cable, and user manual.
Product Features Overview
The Andonstar AD115-Arm Digital Microscope is equipped with several key features to enhance your observation experience:
- 5-inch IPS LCD Screen: Provides clear, real-time viewing of magnified objects.
- Flexible Boom Arm Stand: Features a C-clamp for easy desk-edge mounting and flexible positioning with a maximum extension of 27.5 inches.
- 8 Adjustable LED Lights: Built-in illumination with adjustable brightness to reduce shadows and glare.
- Anti-Shake Design: Ensures stable observation for clear photos and videos of fine details.
- Windows Compatibility: Supports USB connection to Windows XP/7/8/10/11 for real-time viewing and recording on a computer.
5-inch LCD Screen
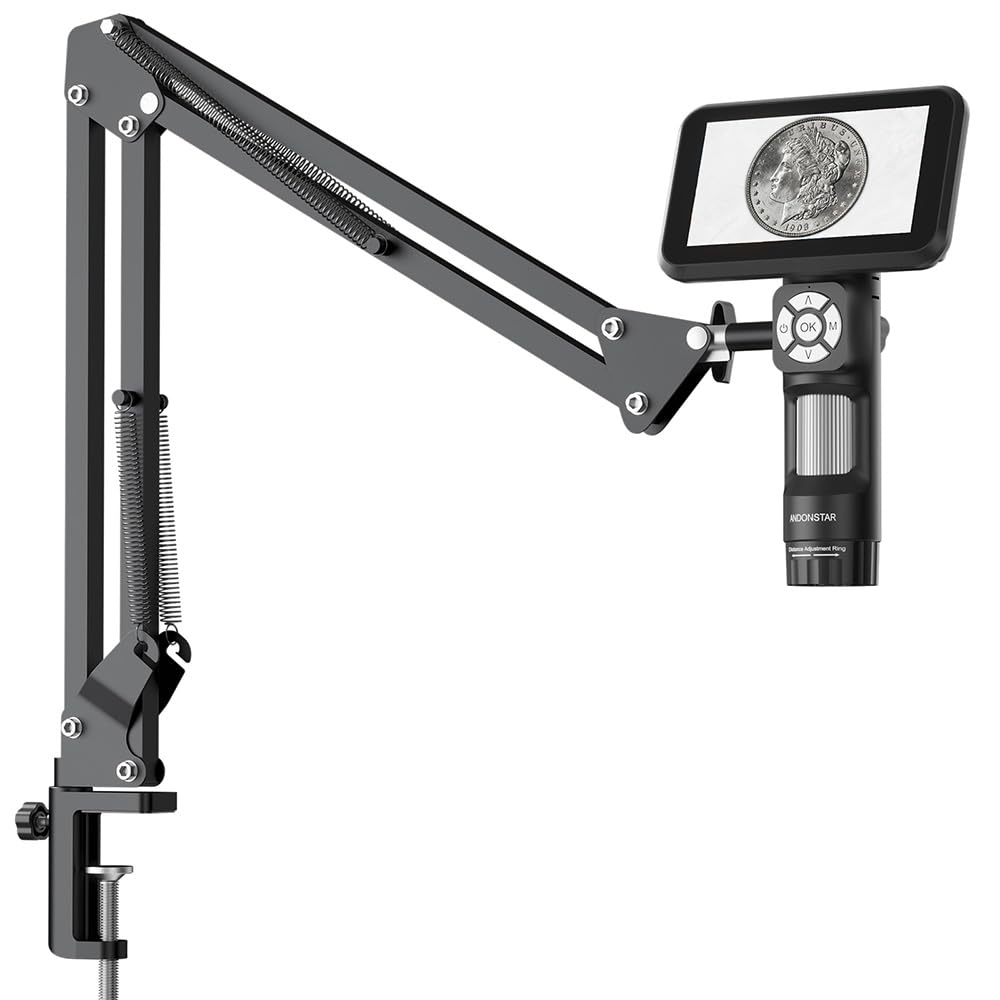
Image: The 5-inch IPS LCD screen of the AD115-Arm microscope displaying a magnified coin, highlighting its real-time viewing capability and image clarity compared to other models.
Flexible Boom Arm Stand

Image: The flexible boom arm stand securely clamped to a desk, holding the AD115-Arm microscope over coins, demonstrating its adjustable positioning for full coin views or detailed examination.
Adjustable LED Illumination

Image: A close-up view of the microscope's base showing the eight adjustable LED lights, illustrating their illumination capabilities from off to 100% brightness.
Setup Instructions
Assembling the Flexible Boom Arm Stand
- Attach the C-clamp to the edge of a stable desk or workbench. Ensure it is securely tightened.
- Insert the base of the flexible boom arm into the C-clamp and secure it.
- Adjust the arm's position to your desired height and angle. The maximum extension length is 27.5 inches.
- Mount the digital microscope onto the 1/4-inch screw hole at the end of the boom arm.
Image: The flexible boom arm stand securely clamped to a desk, with the microscope attached, illustrating the assembly process and readiness for use.
Powering On the Microscope
- Connect the provided USB-C cable to the microscope's power port.
- Connect the other end of the USB-C cable to a suitable USB power adapter (not included) or a computer.
- Press and hold the Power On/Off button on the microscope to turn it on. The 5-inch LCD screen will illuminate.
Operating Instructions
Basic Operation
- Power On/Off: Press and hold the power button (labeled with a power icon) to turn the device on or off.
- Focus Adjustment: Rotate the adjustment ring on the microscope body to achieve a clear image on the screen.
- Magnification Adjustment: Use the "Up" (∧) and "Down" (∨) buttons to digitally zoom in or out. The microscope offers 80-200X magnification.
- LED Light Adjustment: The microscope has 8 built-in adjustable LED lights. Use the dedicated light control button (if available, or through the menu) to adjust brightness.

Image: Close-up of the microscope's control panel, showing the power button, OK button, mode button, and up/down buttons for digital zoom, along with the focus adjustment ring.
Capturing Images and Videos
- Mode Selection: Short press the "M" (Mode) button to switch between Photo, Video, and Playback modes.
- Capture/Record: In Photo mode, short press the "OK" button to take a picture. In Video mode, short press "OK" to start recording, and press again to stop.
- Playback: In Playback mode, use the Up/Down buttons to navigate through captured media.
Connecting to a Computer (Windows)
The AD115-Arm supports USB connection to Windows XP/7/8/10/11.
- Ensure the microscope is powered on.
- Connect the microscope to your computer using the USB-C cable.
- The computer should recognize the device as a webcam or imaging device.
- Open a compatible camera application or software on your computer to view the real-time feed and record.
Maintenance
Cleaning
- Use a soft, dry cloth to clean the microscope body and screen.
- For the lens, use a specialized lens cleaning cloth and solution. Avoid abrasive materials.
- Do not use harsh chemicals or solvents.
Storage
- Store the microscope in a cool, dry place away from direct sunlight and extreme temperatures.
- When not in use for extended periods, disconnect the power cable.
Troubleshooting
- No Power / Screen is Blank
- Ensure the USB-C cable is securely connected to both the microscope and a power source.
- Verify the power source is active.
- Press and hold the power button for a few seconds to ensure it's fully powered on.
- Image is Blurry
- Adjust the focus ring on the microscope body.
- Ensure the object is within the microscope's working distance.
- Clean the lens if there are smudges.
- Cannot Connect to Computer
- Ensure the USB-C cable is properly connected.
- Try a different USB port on your computer.
- Verify your computer's operating system (Windows XP/7/8/10/11) is supported.
- Check your computer's device manager to see if the microscope is recognized.
- LED Lights Not Working
- Check if the LED brightness is set to maximum.
- Ensure the microscope is powered on.
Specifications
| Feature | Detail |
|---|---|
| Model Name | SXWL-AD115Arm-US |
| Magnification | 80-200X (Digital) |
| Screen Size | 5 inch IPS LCD |
| Sensor | 2 Mega Pixels HD |
| Resolution | 1920x1080 |
| Light Source | 8 Adjustable LED Lights |
| Stand Type | Flexible Boom Arm Stand with C-clamp |
| Arm Extension | Max 27.5 inches |
| Compatibility | Windows XP/7/8/10/11 |
| Power Source | Battery Powered (more than 2.5 hours operation) / USB-C |
| Material | Metal, Plastic |
| Item Weight | 0.5 Kilograms |
| UPC | 616361266056 |
Warranty and Support
Warranty Information
This Andonstar AD115-Arm Digital Microscope comes with a 1-Year Manufacturer Warranty. Please retain your proof of purchase for warranty claims. The warranty covers manufacturing defects under normal use. It does not cover damage caused by misuse, accidents, or unauthorized modifications.
Customer Support
For technical assistance, troubleshooting beyond this manual, or warranty inquiries, please contact Andonstar customer support. Refer to the product packaging or the official Andonstar website for the most current contact information.