1. Product Overview
This manual provides instructions for the assembly, operation, and maintenance of your Cozy Castle 71-inch Tall Kitchen Hutch Cabinet, Model CWD-019. This versatile storage unit features a farmhouse design, ample storage space with adjustable shelves, two drawers, and an integrated power outlet for convenience. It is designed for use in kitchens, dining rooms, living rooms, or entryways.

Image 1.1: The Cozy Castle 71-inch Tall Kitchen Hutch Cabinet, featuring a black finish with woodgrain tops and countertops, and metal handles. It is displayed in a room with a plant and decorative items.
2. Safety Information
Please read and understand all safety instructions before assembly and use. Failure to follow these instructions may result in injury or damage to the product.
- Always ensure the cabinet is securely wall-mounted using the provided toppling prevention kit to prevent accidental tipping.
- Do not overload the cabinet. The maximum weight capacity is 141 pounds (64 kg). Distribute weight evenly.
- Keep the area around the cabinet clear to prevent obstructions and potential accidents.
- Ensure all screws and fasteners are tightened securely during assembly and periodically check for tightness during use.
- Keep small parts away from children during assembly to prevent choking hazards.
3. Package Contents
Verify that all components and hardware are present before beginning assembly. If any parts are missing or damaged, please contact customer support.
- Cabinet panels (top, bottom, sides, back, shelves, doors, drawer components)
- Hardware pack (screws, dowels, cam locks, hinges, drawer slides, handles)
- Power outlet unit with power cord
- Anti-tipping prevention kit
- Illustrated instruction manual
4. Setup and Assembly
Assembly typically takes approximately 60 minutes with two people. Follow the included illustrated instruction manual for detailed step-by-step guidance.
- Unpack and Identify Parts: Lay out all components on a clean, soft surface to prevent scratches. Identify each part using the provided diagrams.
- Assemble Base Structure: Follow the instructions to connect the base panels and side panels.
- Install Shelves and Dividers: Insert fixed shelves and any internal dividers as indicated.
- Assemble Drawers: Construct the two sliding drawers and install the drawer slides onto the cabinet frame.
- Attach Doors: Mount the six doors using the soft-close hinges. Adjust hinges as needed for proper alignment.
- Install Power Outlet: Secure the power outlet unit into the designated cutout on the countertop.
- Attach Back Panels: Secure the independent back panels using the provided nails for reinforcement.
- Install Handles: Attach the retro metal door and drawer handles.
- Secure Anti-Tipping Kit: Crucially, attach the anti-tipping prevention kit to the cabinet and securely fasten it to a wall stud. This step is essential for safety.

Image 4.1: Dimensional view of the cabinet, illustrating overall measurements and internal compartment sizes for planning placement and storage.
5. Operating Instructions
The Cozy Castle Kitchen Hutch Cabinet is designed for versatile storage and functionality.
5.1 Adjustable Shelves
The cabinet features four removable shelves with 2.5 inches (6.35 cm) of height adjustment. This allows you to customize the storage space to accommodate items of various sizes.
- To adjust a shelf, carefully remove all items from the shelf.
- Lift the shelf and reposition the shelf pins to the desired height.
- Ensure all four shelf pins are securely in place before placing the shelf back and loading items.

Image 5.1: Demonstration of the adjustable shelves, highlighting the flexibility to change shelf heights.
5.2 Drawers
The two sliding drawers provide enclosed storage for smaller items. They operate on smooth metal rails for easy access.
- Pull the handle to open the drawer.
- Push the drawer firmly to close it completely.
- Avoid placing excessive weight in the drawers to ensure smooth operation and prevent damage to the slides.

Image 5.2: An open drawer with an organizer, demonstrating its capacity for small items.
5.3 Integrated Power Outlet
The countertop features an integrated power outlet with three 125V/12A AC outlets and a 6.56-foot power cord. This is ideal for small kitchen appliances like coffee makers, toasters, or microwaves.
- Plug the cabinet's power cord into a standard wall outlet.
- Connect your appliances to the outlets on the cabinet's countertop.
- Do not exceed the maximum electrical load of 12A.
- Ensure the power cord is not pinched or damaged.
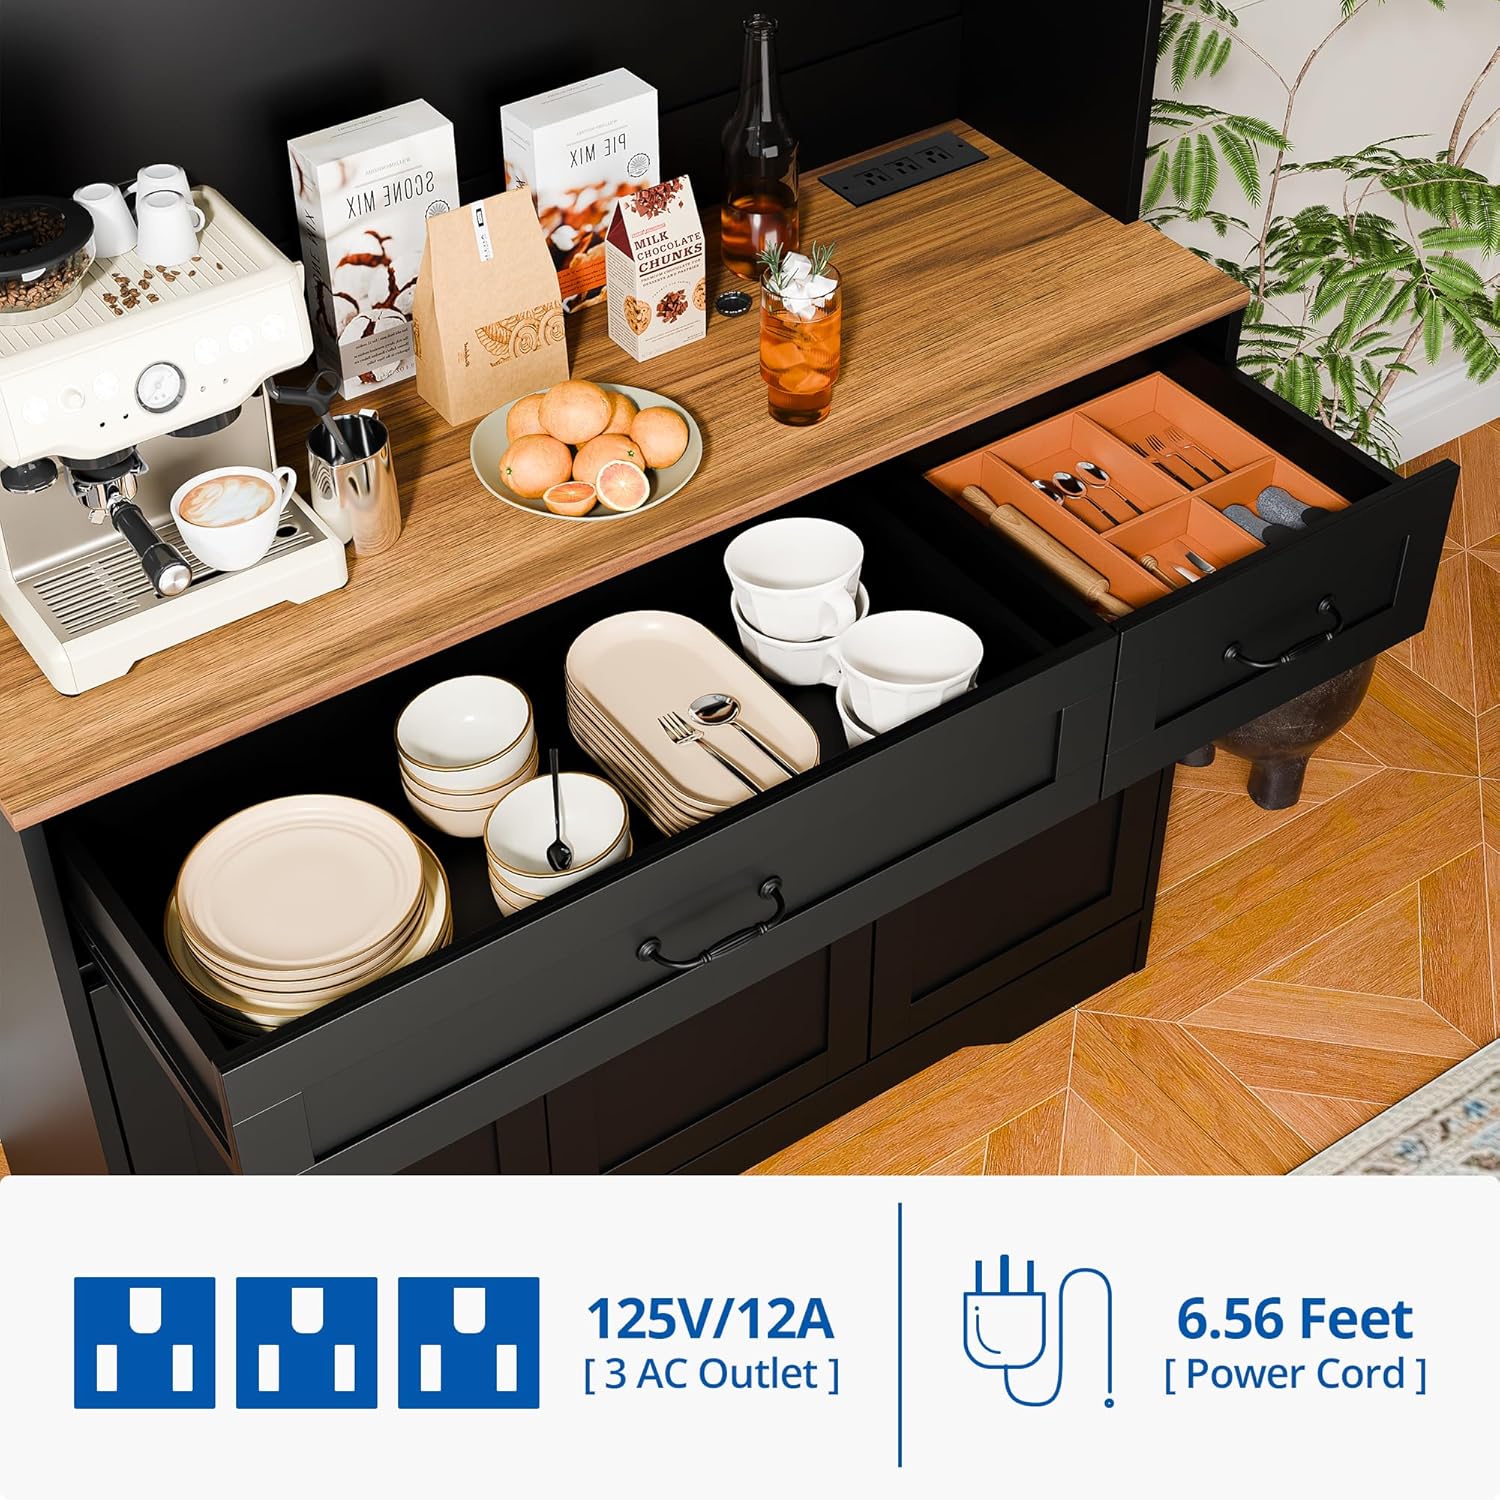
Image 5.3: Detail of the integrated power outlet on the cabinet's countertop, indicating its specifications.
6. Maintenance and Care
Proper care will ensure the longevity and appearance of your cabinet.
- Cleaning: The surface of the board is scratch-resistant and water-resistant. Wipe clean with a soft, damp cloth. Avoid harsh chemicals or abrasive cleaners.
- Spills: Promptly wipe up any spills to prevent moisture damage.
- Hardware: Periodically check all screws and fasteners to ensure they remain tight. Retighten if necessary.
- Placement: Avoid placing the cabinet in direct sunlight or near heat sources to prevent warping or discoloration.
7. Troubleshooting
If you encounter any issues with your cabinet, refer to the following common solutions:
- Wobbly Cabinet: Ensure the cabinet is placed on a level surface. Check that all assembly screws are tightened. Verify the anti-tipping kit is securely installed.
- Doors Not Aligning: Adjust the hinges on the inside of the cabinet doors. Most hinges allow for minor adjustments in multiple directions. Refer to the assembly manual for specific hinge adjustment instructions.
- Drawers Sticking: Ensure the drawer slides are clean and free of debris. Check that the drawer is assembled correctly and not overloaded.
- Power Outlet Not Working: Verify the cabinet's power cord is securely plugged into a functional wall outlet. Check if the wall outlet itself is working by plugging in another device. Do not attempt to repair the power outlet unit yourself; contact a qualified electrician or customer support.
8. Product Specifications
| Brand | Cozy Castle |
| Model Name | CWD-019 |
| Color | Black |
| Product Dimensions | 14.9"D x 41.3"W x 70.9"H (37.8 cm D x 105 cm W x 180 cm H) |
| Item Weight | 141.1 Pounds (64 kg) |
| Weight Limit | 141 Pounds (64 kg) |
| Material | Engineered Wood (MDF Board) |
| Number of Shelves | 4 (Adjustable) |
| Number of Drawers | 2 |
| Power Outlet | 3 x 125V/12A AC Outlets, 6.56 ft Power Cord |
| Mounting Type | Wall Mount (Anti-Tipping Kit Included) |
| Assembly Required | Yes |
9. Warranty and Support
For warranty information, product support, or to report missing/damaged parts, please contact Cozy Castle customer service. Refer to your purchase documentation or the Cozy Castle official website for contact details.
Online Support: Visit the Cozy Castle Store on Amazon


