1. Introduction
This manual provides detailed instructions for the installation, setup, operation, and maintenance of your AINAVI Android Car Stereo. Designed for Ford F150 models from 2009-2012 and 2013-2014 STX XL, this QLED touch screen radio offers advanced features including Android Auto, CarPlay, GPS navigation, 5G WiFi, and DSP sound processing. Please read this manual thoroughly before use to ensure proper functionality and safety.
2. What's in the Box
Verify that all components are present before beginning installation:
- Head Unit (1280*720) x 1
- User Manual x 1
- Power Cable x 1
- AHD 1080P Rear View Camera x 1
- Microphone x 1
- Blue Tool (Pry Tool) x 1
- GPS Antenna x 1
- USB Cables (4Pin & 6Pin)
- RCA Cable
- Frame + Screen
- Reversing Control Cable
- Frame Removal Tool

Image: All components included in the AINAVI Android Car Stereo package.
Video: An unboxing video demonstrating the contents of the AINAVI Android Car Stereo package.
3. Installation Guide
This section provides a general guide for installing the AINAVI Android Car Stereo. Professional installation is recommended. Ensure the vehicle's battery is disconnected before starting.
3.1 Disassembly of Original Radio
Remove the rubber mat and screws: Use a pry tool to remove the rubber mat above the original car radio. Then, use a 7mm socket tool to unscrew the two fixing screws located under the rubber pad.

Image: Comparison of the Ford F150 dashboard before and after the AINAVI Android Car Stereo installation.
Remove USB port panel: Use a pry tool to remove the USB port panel and unplug the cable behind it. Similarly, unscrew the fixing screws under the USB panel.
Remove air vent panels: Use a pry tool to carefully remove the air vent panels on both sides of the radio, prying along the panel's seam.
Remove center radio unit: Take out the center radio unit and unplug all connecting cables from behind it. Use a 7mm socket to unscrew the four fixing screws of the OEM radio.
Access glove box: Move to the passenger side and open the glove box. Push inward and then lower the glove box. Use a 10mm socket to unscrew the three hidden fixing screws.
Remove passenger airbag trim panel: Pry out the passenger airbag trim panel. Remove the screws holding the air vent panel. Unscrew the four fixing screws of the OEM screen trim frame.
Remove AC and hazard light control panels: Remove the AC control panel and the hazard light control panel. Detach and install the OEM electronic stability control switch. The cigarette lighter port also needs to be removed; press the two fixing slots inside the cigarette lighter port outwards to push it out. Don't forget to take out the gasket from the cigarette lighter port.
3.2 Wiring and Assembly
Install control panels onto new faceplate: Install the hazard light control panel, the AC control panel, and the cigarette lighter port onto the new radio faceplate. When installing the AC control panel, align it correctly and secure it with the four screws. For the cigarette lighter port, put the gasket in first, then the port.
Connect power cables: Connect the wires from the new unit to the original car's power cables. Connect the AC control cable and the cigarette lighter cable. The hazard light cable may need to be moved to the far left before connecting if it's not long enough.
Connect unit cables: Connect the cables to the back of the new head unit according to the wiring diagram provided in the manual.
Video: Detailed installation guide for the AINAVI Android Car Stereo in a Ford F150, including wiring and panel reassembly.
Video: A quick overview of the Ford F150 radio upgrade process.
Video: Installation steps for upgrading the car radio stereo in a 2009-2012 Ford F150.
Install new unit: Put the new unit into the dashboard and press down to snap it into place.
4. Initial Setup
After installation, perform the following initial setup steps:
Power On: Power on your car. The new unit should power on, and the screen should light up.
GPS Signal Check: Check if the GPS can receive a signal. Place the GPS antenna in the glove box instead of behind the dashboard for better signal reception. Use the new supplied GPS antenna, not the original stereo's antenna.
CarPlay & Android Auto Connection: The unit supports wireless/wired CarPlay and Android Auto. Connect your smartphone for seamless integration.

Image: Apple CarPlay interface displayed on the stereo.
Video: Instructions on how to connect CarPlay via Bluetooth and Tlink.
5G WiFi Connection: Connect to a 5G WiFi hotspot for faster network speed and accurate real-time information. This allows for downloading apps and online navigation.

Image: The stereo displaying options for WiFi connection and Bluetooth music playback.
5. Operating Instructions
5.1 Navigation
The unit features a powerful Android navigation service with 5G WiFi for accurate real-time navigation. It supports most satellite services and Google Maps, offering 2D/3D perspectives, various routes, and voice functions.
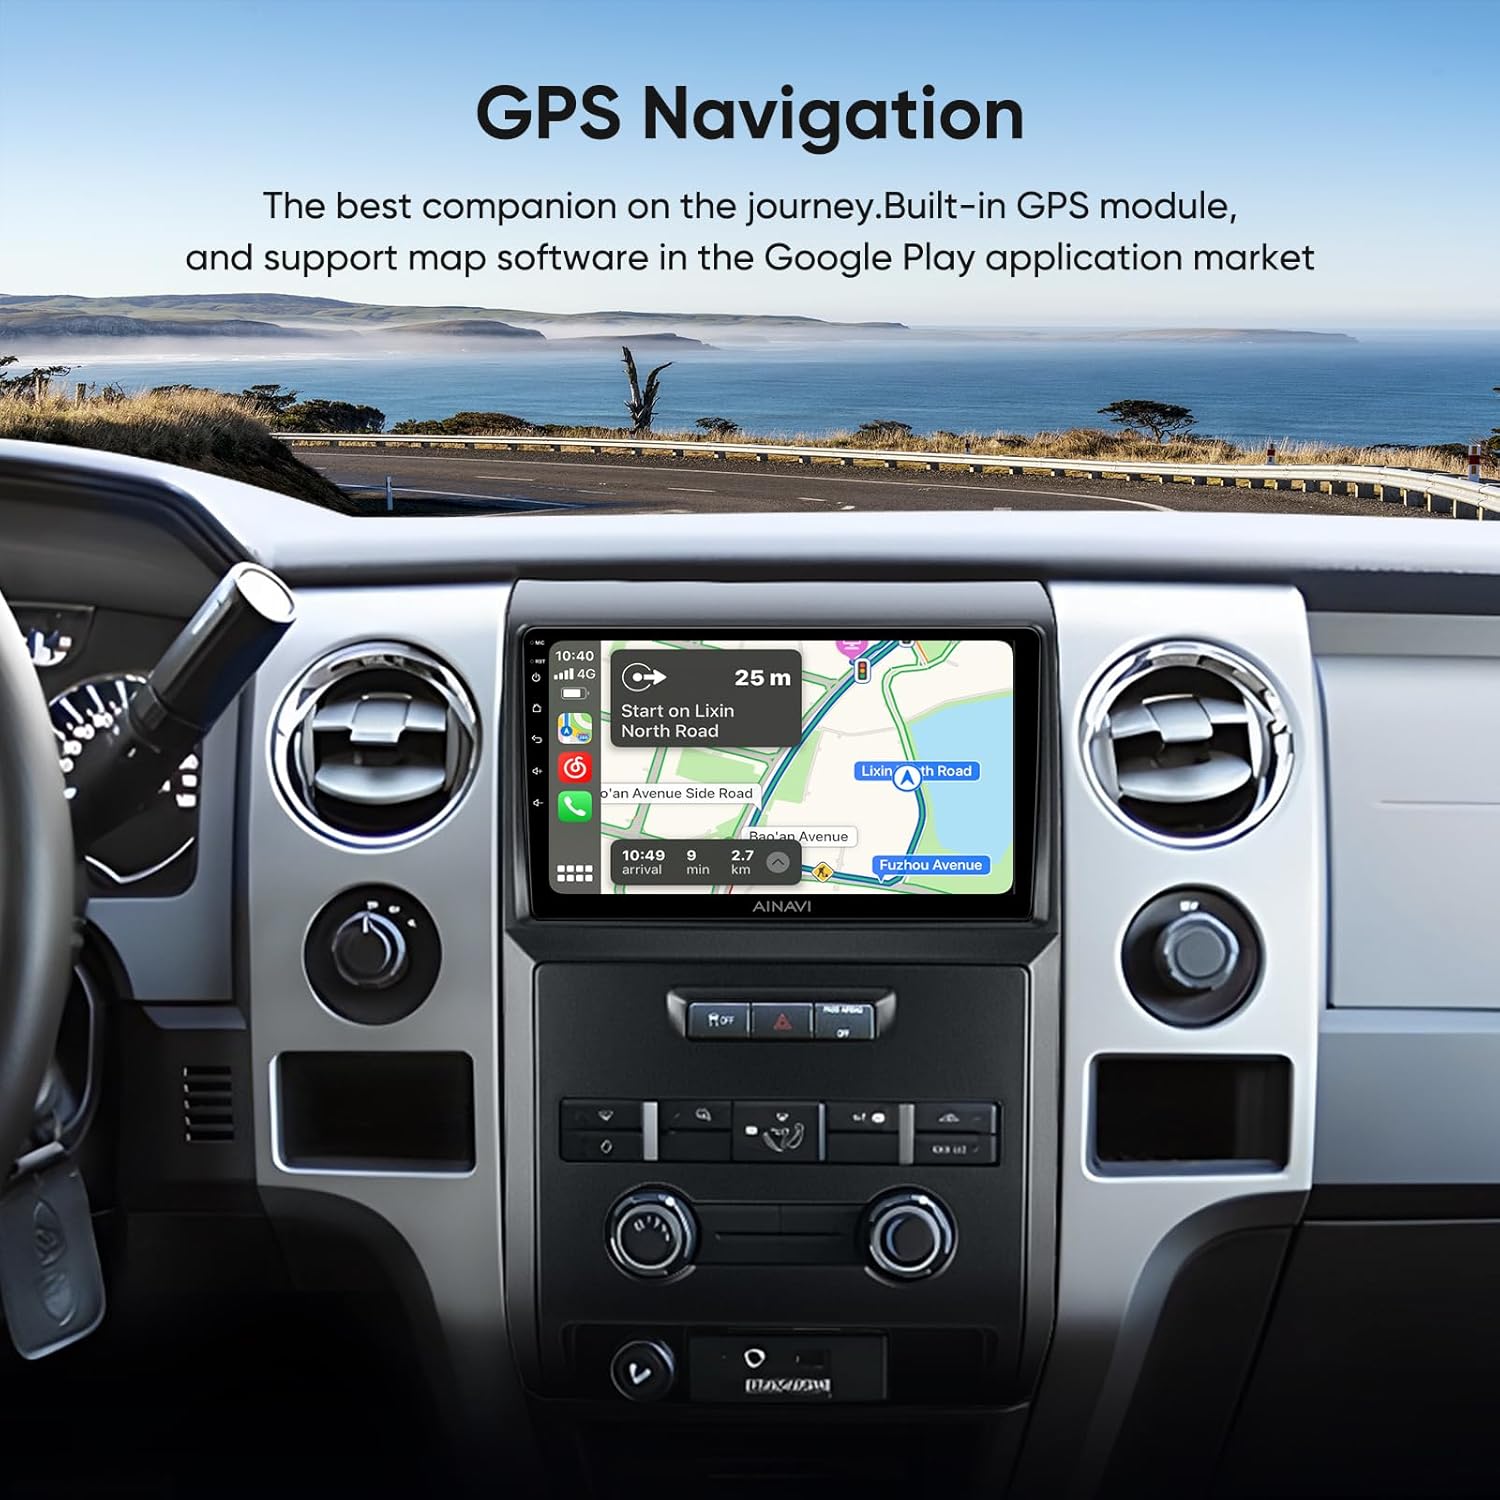
Image: GPS navigation display on the car stereo, showing a map and route details.
5.2 Audio and DSP
Experience superior sound quality with the professional DSP (Digital Sound Processor). Adjust the voice point position, choose from 7 sound modes (Normal, Jazz, Pop, Classical, Heavy Metal, Vocal, Soft), 6 surround sound patterns, Bass Boost, and individual speaker volume control.
Video: Demonstration of DSP sound settings and customization options on the car radio.
5.3 Split Screen and Mirroring
The unit supports split-screen functionality, allowing you to run multiple applications simultaneously. Wired/wireless mirroring (Airplay + Android) transmits signals with 1280x720 resolution for HD display.
Image: The stereo displaying two applications simultaneously in split-screen mode.

Image: Demonstration of split-screen and phone mirroring features on the car stereo.
5.4 Steering Wheel Control
Maintain control with existing steering wheel controls. The unit is designed to integrate with your vehicle's steering wheel functions.
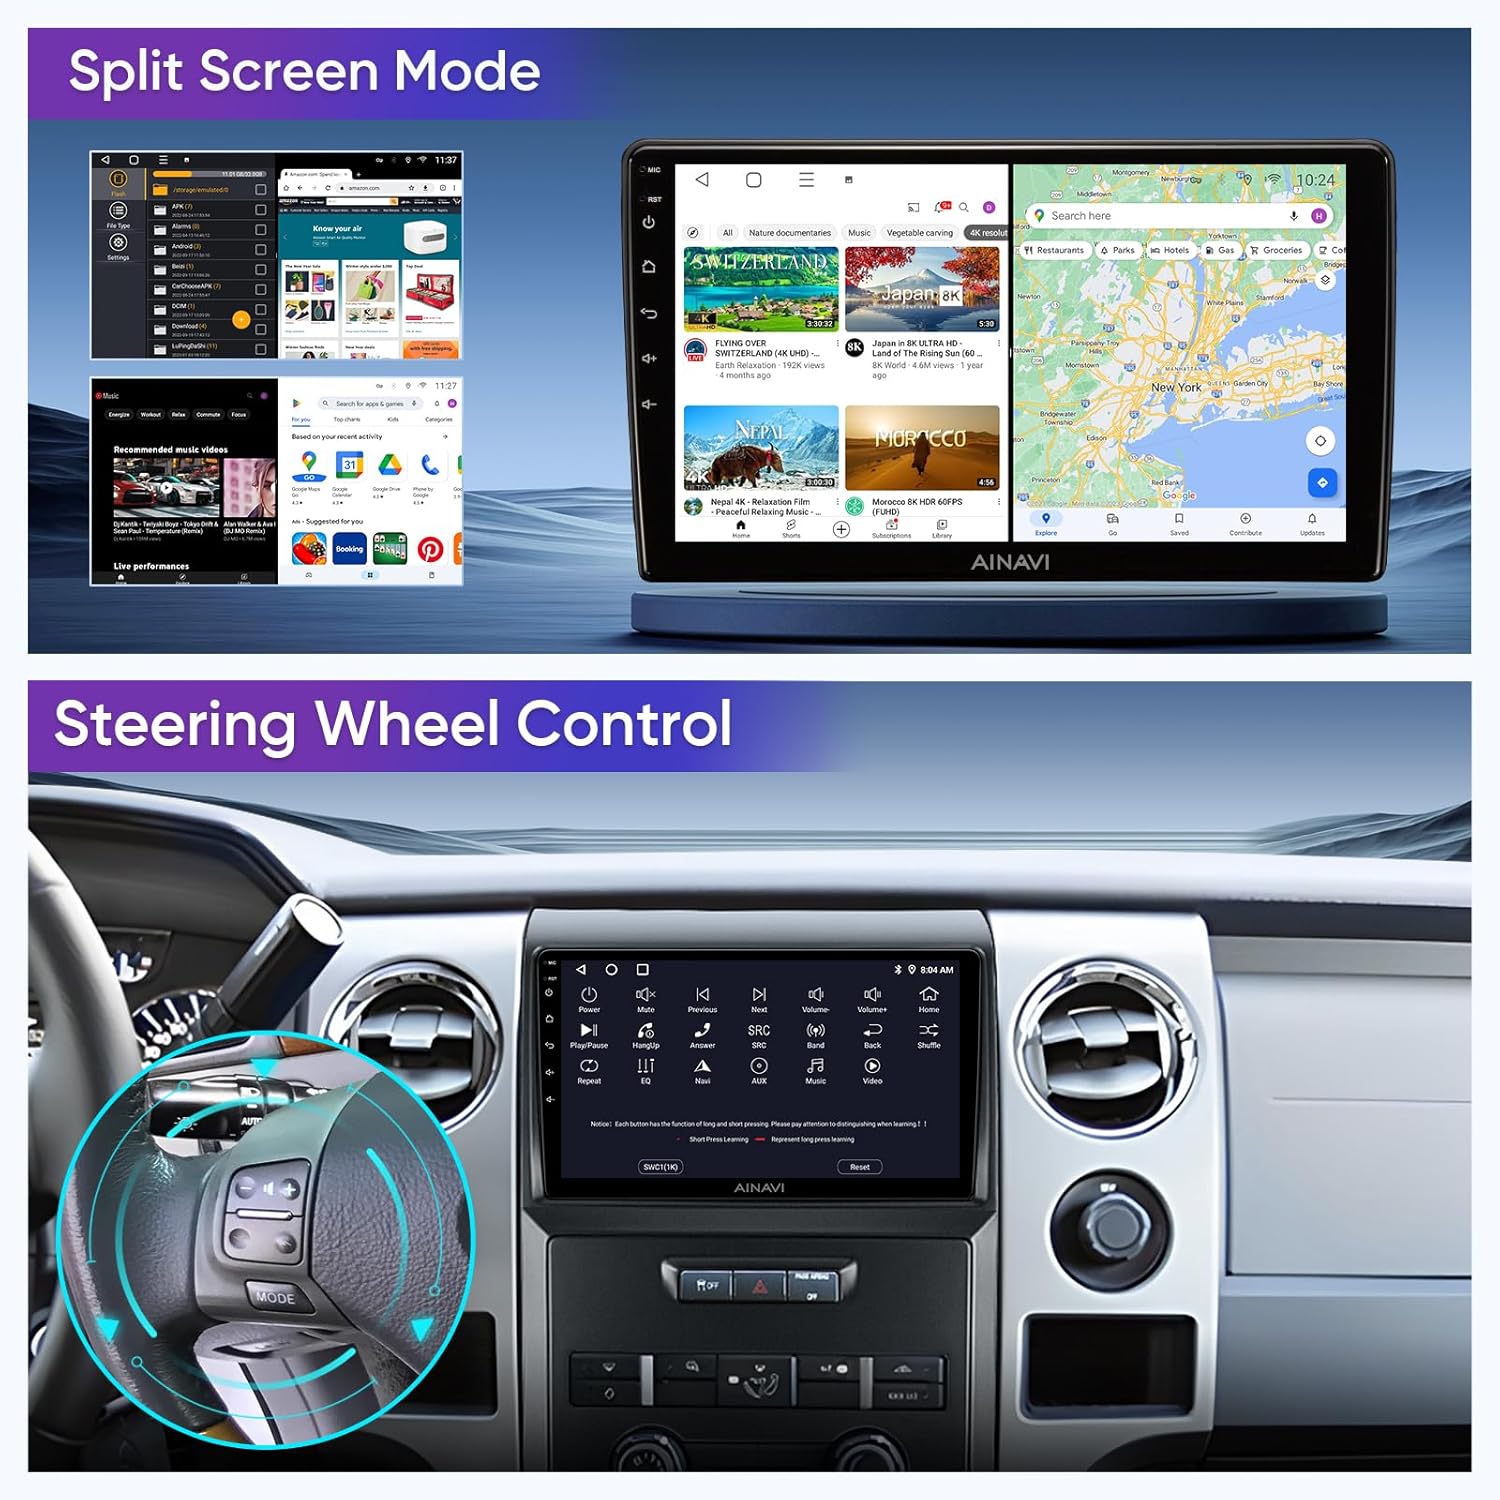
Image: The car stereo interface highlighting compatibility with steering wheel controls.
Video: Guide on how to customize single key button shortcut functions on the car stereo.
5.5 Rear View Camera
The included 1080P AHD rear view camera provides a clear reversing scene with a 170-degree wide angle and waterproof design. It displays astern ruler lines and supports car astern trajectory if your vehicle is equipped.

Image: The 1080P rearview camera and its clear display on the car stereo screen.
6. Troubleshooting
6.1 Backup Camera Image Not Displaying
If the backup camera image is not displaying, follow these steps:
Check Camera Cable Connection: Ensure the camera extension cable is connected to the Backup Camera Video Input cable, not the CVBS cable in the RCA harness. The correct method is to connect the camera extension cable to the Backup Camera Video Input cable.
Check Reverse Signal Wire: Find the third wire in the power harness (counting from the black ground wire) and connect it to the reverse control wire. Use a "T" splice; do not cut off, just peel and connect. Ensure the signal wire is connected to the third brown wire in the power harness, not the second red wire.
Connect Extension Cable to Camera: Connect the extension cable to the camera and ensure it is plugged in tightly.
Power and Ground Wires on Extension Cable: For the power and ground wires on the extension cable (red and black cables), do not connect them to any other wires. Separate them and insulate them individually to prevent them from touching metal and causing a short circuit.
Check Settings: Enter "Car Settings" and then "Reverse Mode Selection." Select "AUTO."
After completing these steps, the image should display normally when reversing. If the image still does not appear, please contact customer service.
Video: Detailed troubleshooting steps for backup camera issues, including wiring checks and settings adjustments.
7. Specifications
| Feature | Detail |
|---|---|
| Brand | AINAVI |
| Vehicle Service Type | Truck (Ford F150 2009-2014 STX XL) |
| Screen Size | 9 Inches |
| Display Type | QLED, Capacitive Touch Screen |
| Operating System | Android |
| Processor | 4-Core CPU, Dual-Core GPU |
| Memory/Storage | 2GB RAM + 64GB ROM |
| Connectivity | Android Mirroring + Airplay, Bluetooth, FM + AUX, Wi-Fi (2.4GHz & 5GHz), Wireless/Wire (CarPlay & Android Auto) |
| Navigation | Built-in GPS, Supports BeiDou, GPS, Galileo, Google Maps (2D/3D) |
| Audio Output Mode | Surround Sound Stereo, Premium DSP |
| Rear View Camera | AHD 1080P, 170-degree wide angle, Waterproof |
| Special Features | Panel light, Multiple Themes, Split Screen Function |
8. Warranty and Support
Your AINAVI Android Car Stereo comes with a 12 Months Manufacturer Guarantee. For any installation technical support, missing wiring harnesses, or other issues, please contact our professional technical support team. We are committed to providing excellent customer service.
- Customer Service Phone: +1 (833) 858-5016
- Working Hours: 01:00 PM to 00:00 AM PST
- Email: info@ainavi.com
You can also reach out via your Amazon order center by clicking "Ask a question" to contact the seller, HomeCar.

Image: Customer support details for installation assistance.

Image: Steps to contact customer support for assistance.


