
Goimu XB01-Pro
Goimu 5-in-1 Foldable Stationary Exercise Bike XB01-Pro Instruction Manual
Model: XB01-Pro (G0605)
1. Introduction and Overview
The Goimu 5-in-1 Foldable Stationary Exercise Bike XB01-Pro is designed to provide a versatile home fitness solution. This exercise bike offers multiple workout modes to support cardiovascular health, strength training, and overall fitness. Its foldable design allows for convenient storage in various living spaces.
Key features include 16 levels of adjustable magnetic resistance, a comfortable seat with backrest, and a sturdy X-shaped reinforced steel frame supporting users up to 330 lbs. The bike operates quietly, making it suitable for use without disturbing others.
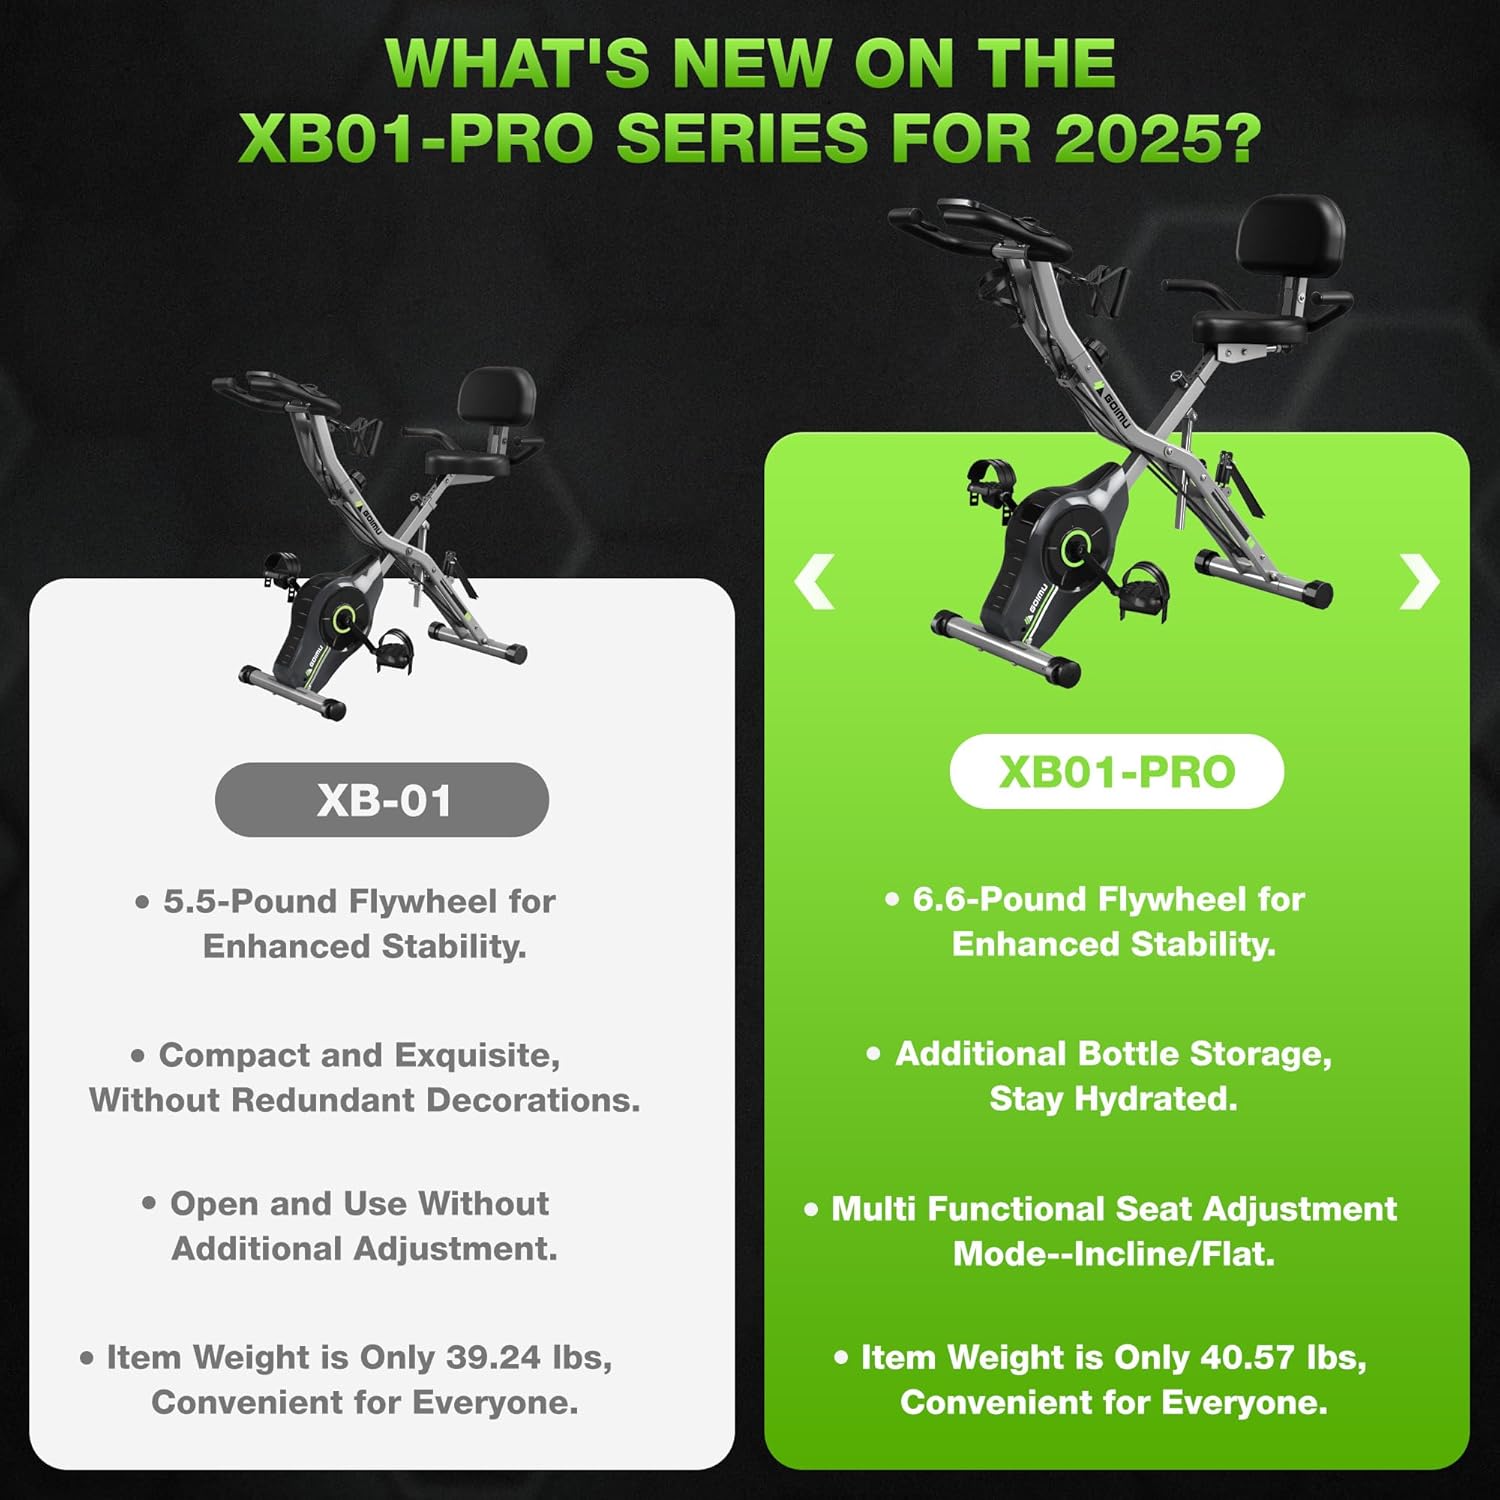
Image 1: Goimu 5-in-1 Foldable Stationary Exercise Bike XB01-Pro in its upright position.
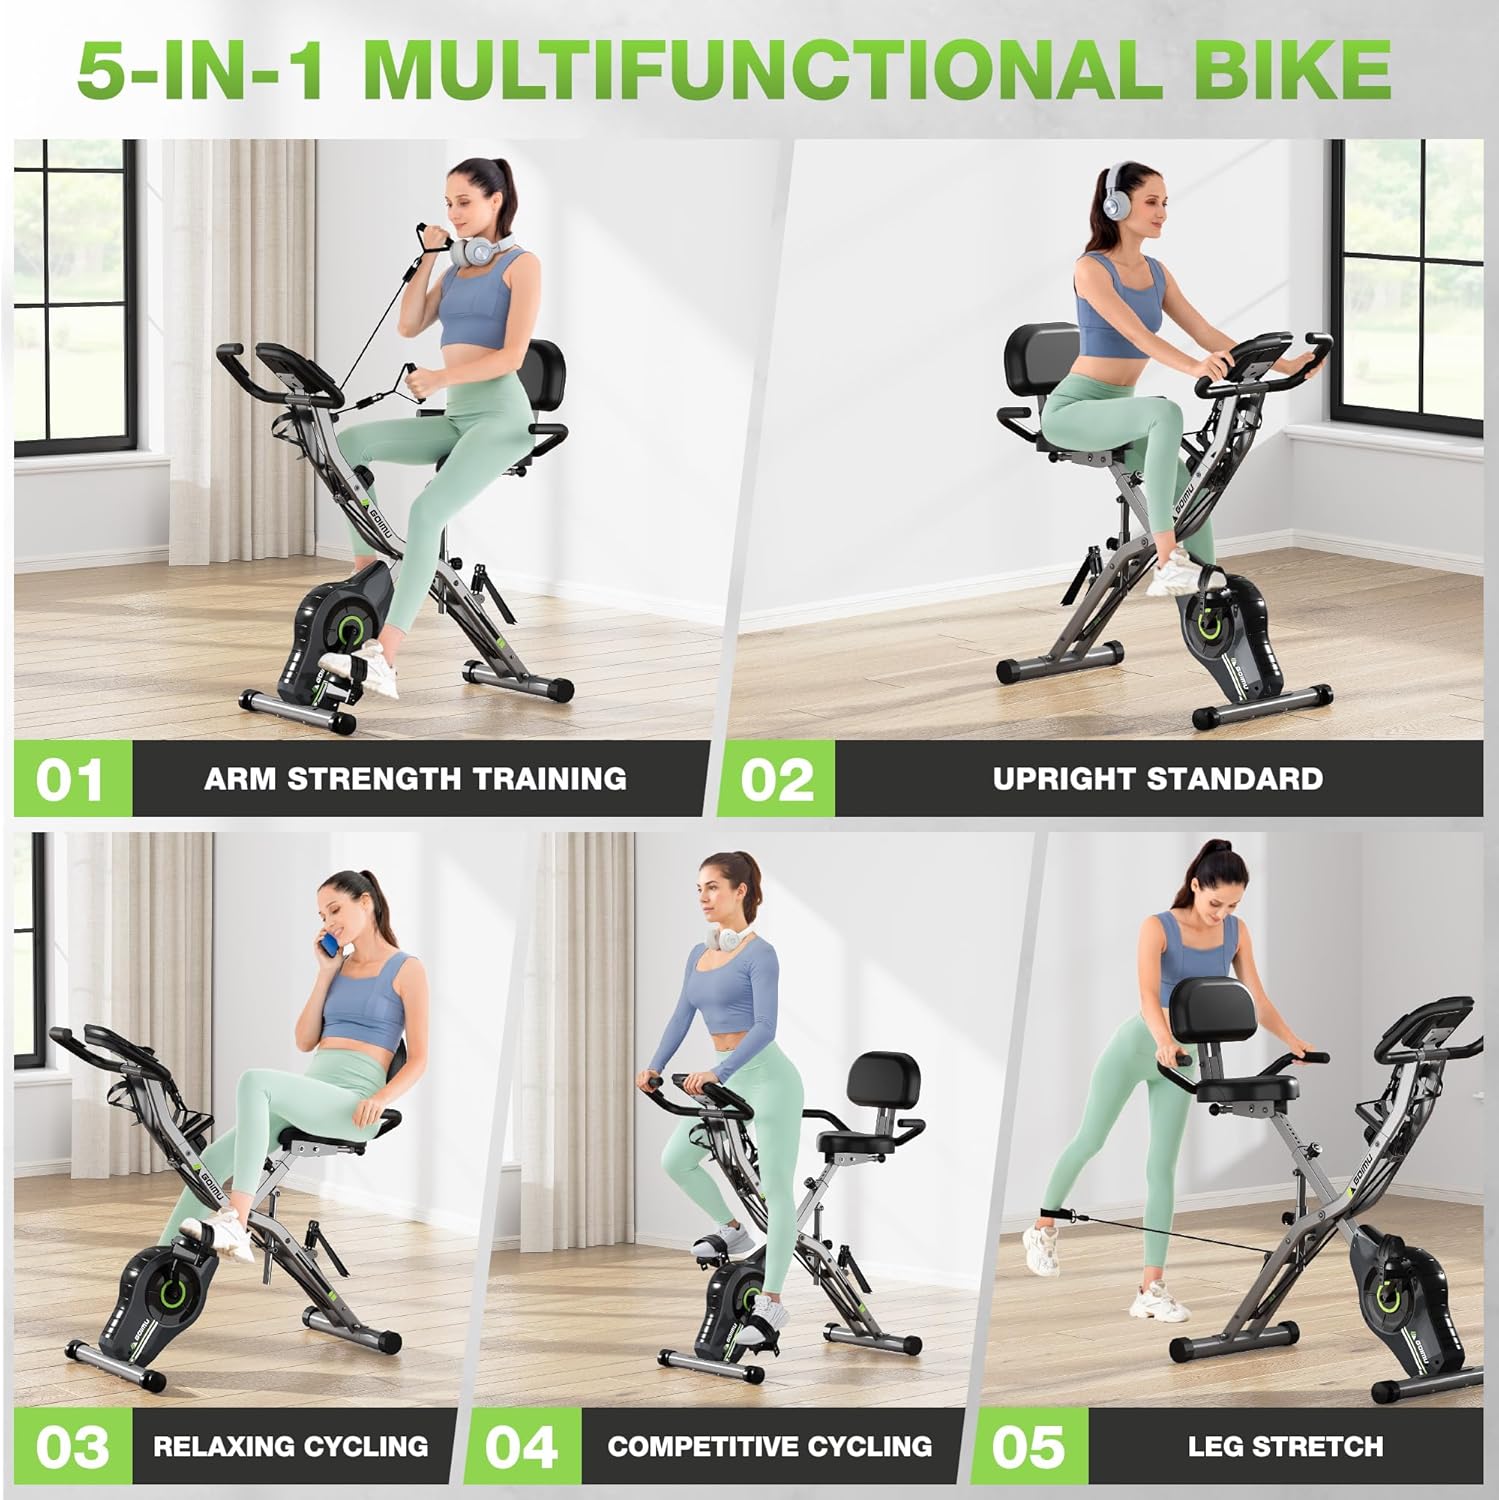
Image 2: Illustration of the five multifunctional workout modes: Arm Strength Training, Upright Standard, Relaxing Cycling, Competitive Cycling, and Leg Stretch.
Video 1: Overview of the Goimu 5-in-1 Exercise Bike features and functionality.
2. Safety Information
- Read all instructions before using the exercise bike.
- Consult a physician before starting any new exercise program.
- Keep children and pets away from the equipment during use.
- Place the bike on a flat, stable surface. Ensure adequate space around the bike.
- Inspect the bike for loose parts or damage before each use. Do not use if damaged.
- Wear appropriate exercise attire and footwear.
- Do not exceed the maximum user weight capacity of 330 lbs.
- Stop exercising immediately if you feel faint, dizzy, or experience pain.
3. Setup and Assembly
The Goimu XB01-Pro exercise bike comes partially pre-assembled. Follow the included assembly guide for detailed step-by-step instructions. Ensure all bolts and nuts are securely tightened before first use.
3.1 Pedal Installation
Proper installation of the pedals is crucial for safe operation. The left pedal (L) and right pedal (R) are distinct and must be installed on their respective cranks. Turn the left pedal counter-clockwise and the right pedal clockwise to tighten.
Video 2: Detailed video tutorial on installing the exercise bike pedals.
3.2 Initial Adjustments
- Seat Height: Adjust the seat to a comfortable height where your knee has a slight bend at the bottom of the pedal stroke.
- Backrest: The backrest can be adjusted for optimal lumbar support.
- Pedal Straps: Secure your feet in the pedal straps to prevent slipping during exercise.

Image 3: Details on the adjustable seat height and backrest for user comfort.
4. Operating Instructions
4.1 Powering On the Monitor
The multifunction monitor is powered by 2 AAA batteries (not included). Insert the batteries into the compartment on the back of the monitor. The monitor will automatically turn on when you begin pedaling or press the "MODE" button.
4.2 Using the Multifunction Monitor
The monitor displays various workout metrics:
- SCAN: Cycles through all metrics automatically.
- TIME: Duration of your workout.
- KCAL: Estimated calories burned.
- ODO: Odometer (total distance).
- DIS: Distance for the current workout.
- SPEED: Current speed.
- PULSE: Heart rate (if equipped with pulse sensors on handlebars).
Use the "MODE" button to select a specific display metric or to activate the SCAN function. Press "RESET" to clear current workout data.

Image 4: Close-up of the multifunction monitor displaying various workout metrics.
4.3 Adjusting Magnetic Resistance
The bike features 16 levels of magnetic resistance. Turn the tension control knob located below the handlebars clockwise to increase resistance (for a more challenging workout) and counter-clockwise to decrease resistance (for an easier workout).

Image 5: Diagram illustrating the magnetic resistance system and tension control knob.
4.4 Utilizing 5-in-1 Workout Modes
The XB01-Pro offers five distinct workout configurations:
- Upright Standard: Traditional cycling position for cardio.
- Relaxing Cycling (Recumbent): Adjust the frame to a recumbent position for a more relaxed, back-supported workout.
- Competitive Cycling: A more aggressive upright position for intense cycling.
- Arm Strength Training: Use the integrated resistance bands for upper body exercises while cycling or stationary.
- Leg Stretch (Loop Band Kickback): Utilize the loop band for lower body stretches and exercises.
Switching between upright and recumbent modes is achieved via a one-touch mechanism. The bike also folds for storage.

Image 6: Visual representation of the recumbent (Type R), upright (Type X), and folded states of the bike.
Video 3: Demonstration of the quiet operation of the Goimu exercise bike.
5. Maintenance
- Cleaning: Wipe down the bike with a damp cloth after each use to remove sweat and dust. Avoid abrasive cleaners.
- Inspections: Regularly check all bolts, nuts, and moving parts for tightness and wear. Tighten any loose fasteners.
- Lubrication: The magnetic resistance system is generally maintenance-free. Do not apply lubricants to the flywheel or belt system.
- Storage: When not in use, fold the bike and store it in a dry, cool place away from direct sunlight and moisture.
6. Troubleshooting
| Problem | Possible Cause | Solution |
|---|---|---|
| Monitor not displaying data | Dead batteries; Loose connection; Sensor issue | Replace AAA batteries. Check all cable connections to the monitor. Ensure the speed sensor is properly aligned. |
| Bike is unstable or wobbles | Uneven surface; Loose bolts; Damaged frame | Ensure the bike is on a flat surface. Adjust leveling feet if present. Tighten all assembly bolts. If the frame is damaged, discontinue use and contact customer service. |
| Pedals feel loose or fall off | Incorrect pedal installation; Loose pedal bolt | Ensure pedals are installed on the correct side (L for left, R for right) and tightened securely. Remember the left pedal tightens counter-clockwise. Refer to the pedal installation video in Section 3.1. |
| Unusual noise during operation | Loose components; Friction from moving parts | Check and tighten all bolts and connections. Ensure no foreign objects are caught in the flywheel or belt area. |
7. Specifications
- Brand: Goimu
- Model Name: G0605 (XB01-Pro)
- Resistance Mechanism: Magnetic
- Number of Resistance Levels: 16
- Maximum Weight Recommendation: 330 pounds
- Item Weight: 50.6 pounds
- Product Dimensions (D x W x H): 27.56" x 15.95" x 43.7"
- Minimum User Height: 4.4 feet
- Maximum User Height: 7 feet
- Drive System: Belt
- Special Features: Adjustable Pedal, Adjustable Resistance Level, Adjustable Seat, Calories Monitor, Portable, Foldable Design
- Material: Alloy Steel (Frame), Rubber (Handle)
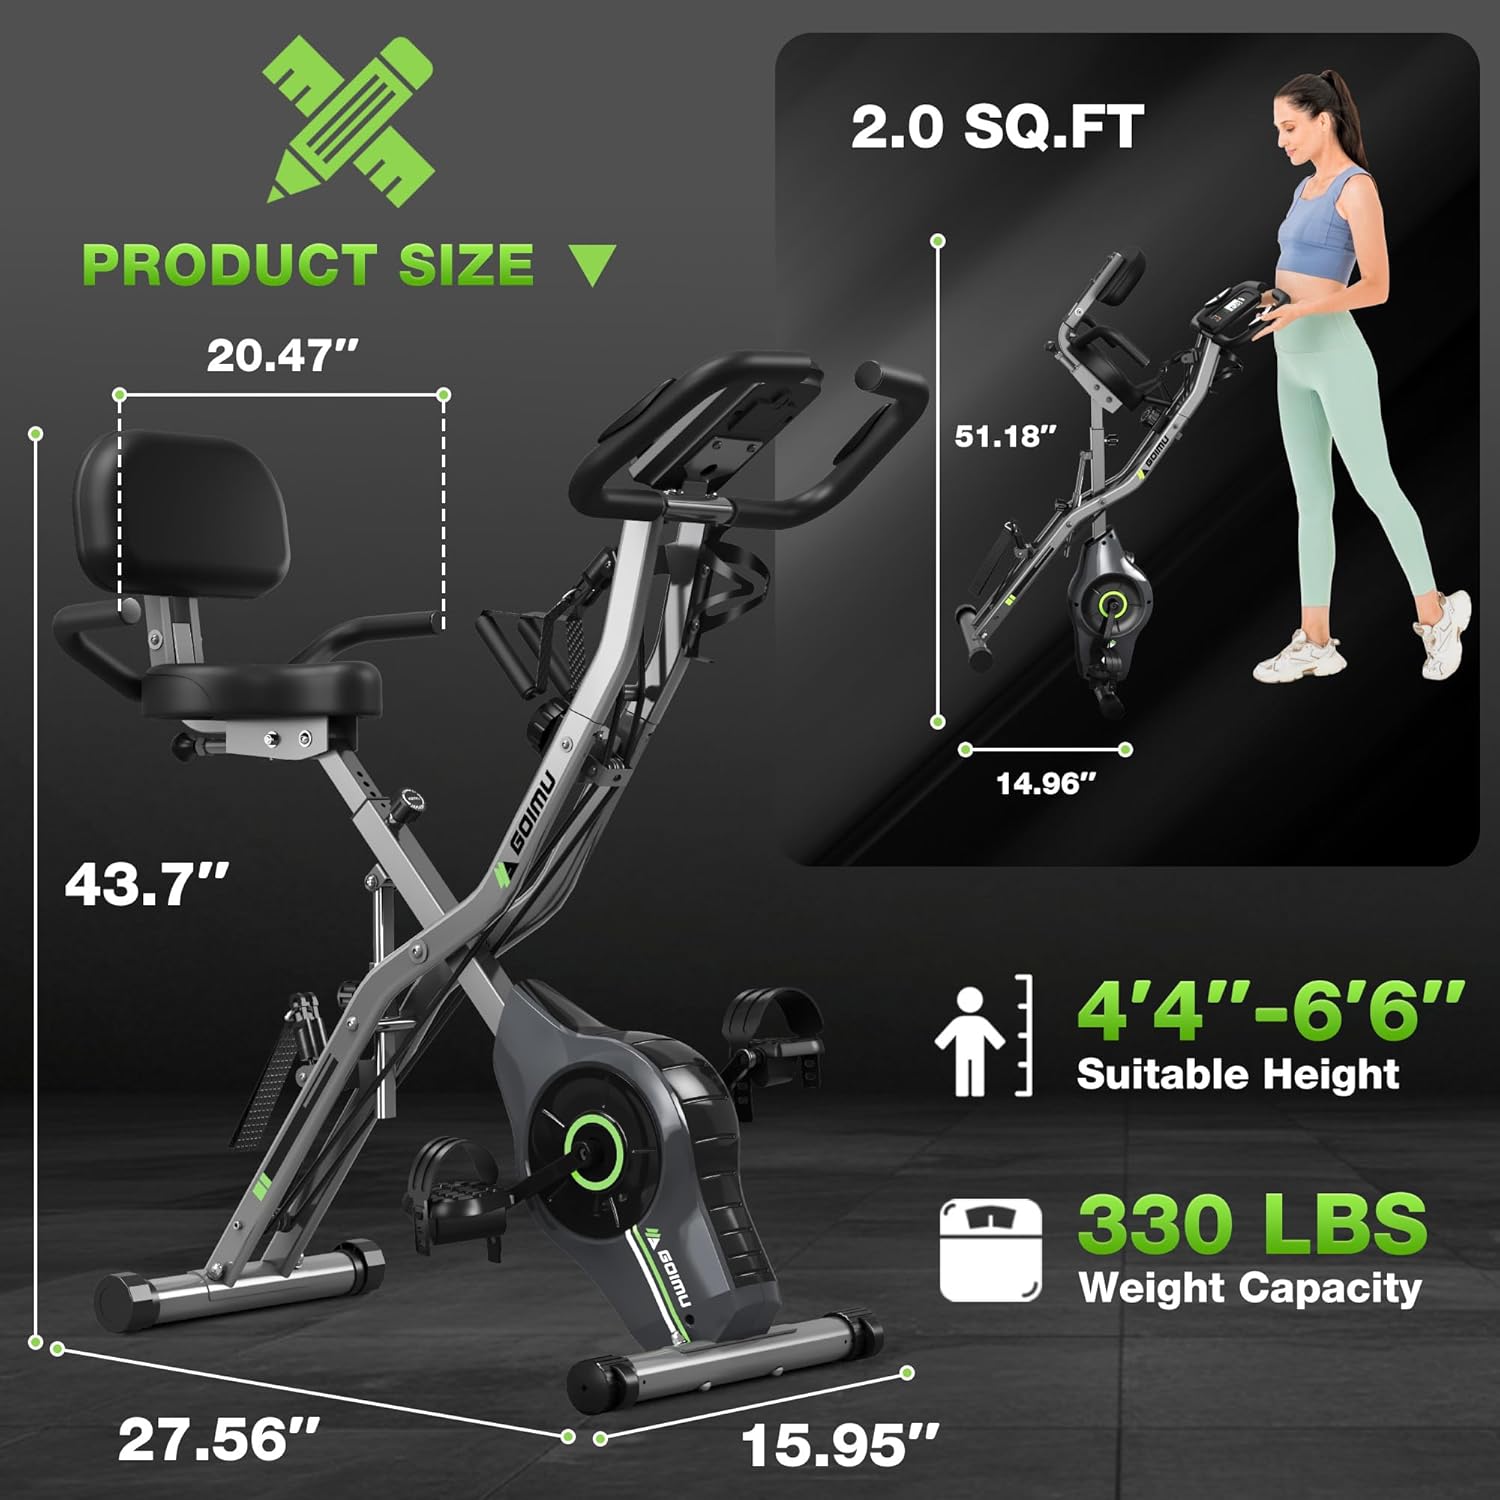
Image 7: Visual representation of the product dimensions and suitable user height range.
8. Warranty and Support
Goimu stands behind the quality of its products. Your purchase includes:
- 12-Month Free Replacement Service: For any manufacturing defects or issues within 12 months of purchase.
- Lifetime Technical Support: Access to technical assistance for the lifespan of your product.
- US-Based Customer Service: Our customer service team is available to assist with any questions or concerns.
For support, please refer to the contact information provided with your product packaging or visit the official Goimu website.
Ask a question about this manual
Ask about setup, troubleshooting, compatibility, parts, safety, or missing instructions. Manuals+ will review the question and use this page’s manual context to help answer it.