
iabifo B0DSJ2PJQD
iabifo L-Shaped Bakers Rack with Power Outlet Instruction Manual
Model: B0DSJ2PJQD
1. Introduction
Thank you for choosing the iabifo L-Shaped Bakers Rack. This versatile storage unit is designed to enhance your kitchen or living space with its multi-tier shelving, integrated power outlet, and adaptable configuration. This manual provides comprehensive instructions for assembly, operation, and maintenance to ensure safe and efficient use of your new bakers rack.

Image: Fully assembled iabifo L-Shaped Bakers Rack in a kitchen environment, showcasing its storage capabilities.
2. Safety Information
- Read all instructions carefully before assembly and use.
- Keep all packaging materials away from children and pets to prevent choking hazards.
- Ensure all screws and fasteners are securely tightened before use. Periodically check and re-tighten as needed.
- Do not overload shelves. Refer to specifications for weight limits.
- Place the unit on a level and stable surface to prevent tipping.
- Use the included anti-tip hardware to secure the rack to a wall, especially in households with children or pets.
- The integrated power strip is UL-certified. Do not exceed the maximum wattage (1800W). Avoid using damaged cords or plugs.
- Keep liquids away from the power strip to prevent electrical hazards.
- Do not climb on the rack or allow children to play on or around it.
3. Package Contents
Please verify that all components listed below are present before beginning assembly. If any parts are missing or damaged, please contact customer support.
3.1. Parts List (Refer to assembly video for visual identification)
- Metal Frames (various sizes and shapes for vertical supports, horizontal connectors, and corner sections)
- Wooden Shelves (various sizes for different tiers)
- Mesh Shelves (for lower storage)
- Wire Basket
- Mesh Grid (for hanging hooks)
- Power Strip (UL-certified with 3 AC outlets and 2 USB ports)
- S-shaped Hooks
- Adjustable Feet
- X-shaped Crossbars (for stability)
3.2. Hardware List
- Screws (various types, e.g., for frame assembly, shelf attachment)
- Allen Wrench (for tightening screws)
- Anti-tip Kit (straps and wall anchors)
4. Assembly Instructions
Follow these steps carefully for proper assembly. It is recommended to assemble the unit on a soft, clean surface to prevent scratches. A power drill with appropriate bits can expedite the process, but manual tools are sufficient.
4.1. Assembly Video Guide
For a visual guide, please refer to the official installation video below. The video demonstrates the complete assembly process.
Video: Official iabifo Baker Rack Installation Guide. This video provides a step-by-step visual demonstration of how to assemble the bakers rack, including identifying parts and securing connections.
4.2. Step-by-Step Assembly
- Step 1: Assemble the Base Frames and Adjustable Feet.
Attach the adjustable feet to the bottom of the vertical base frames. Ensure they are securely threaded to allow for leveling the rack later.

Image: Detail of adjustable feet for leveling the rack.
- Step 2: Attach Mesh Shelves to Base Frames.
Secure the mesh shelves to the lower sections of the assembled base frames using the provided screws. These form the bottom tiers of the rack.
- Step 3: Install Crossbars for Stability.
Attach the X-shaped crossbars to the back of the vertical frames. These provide essential structural stability to the unit.

Image: X-shaped crossbar providing structural support.
- Step 4: Assemble and Connect Corner Sections.
Connect the various frame pieces to form the L-shaped structure. Pay attention to the orientation of each piece as shown in the diagrams or video.

Image: Three possible configurations for the L-shaped bakers rack, highlighting its versatility.
- Step 5: Install Wooden Shelves.
Place the wooden shelves onto the designated frame sections and secure them with the appropriate screws. Ensure all shelves are level and firmly attached.

Image: Multiple open shelves providing diverse storage options.
- Step 6: Integrate the Power Outlet.
Carefully insert the UL-certified power strip into its designated slot on one of the wooden shelves. Secure it with screws. Route the power cord safely to an accessible outlet.
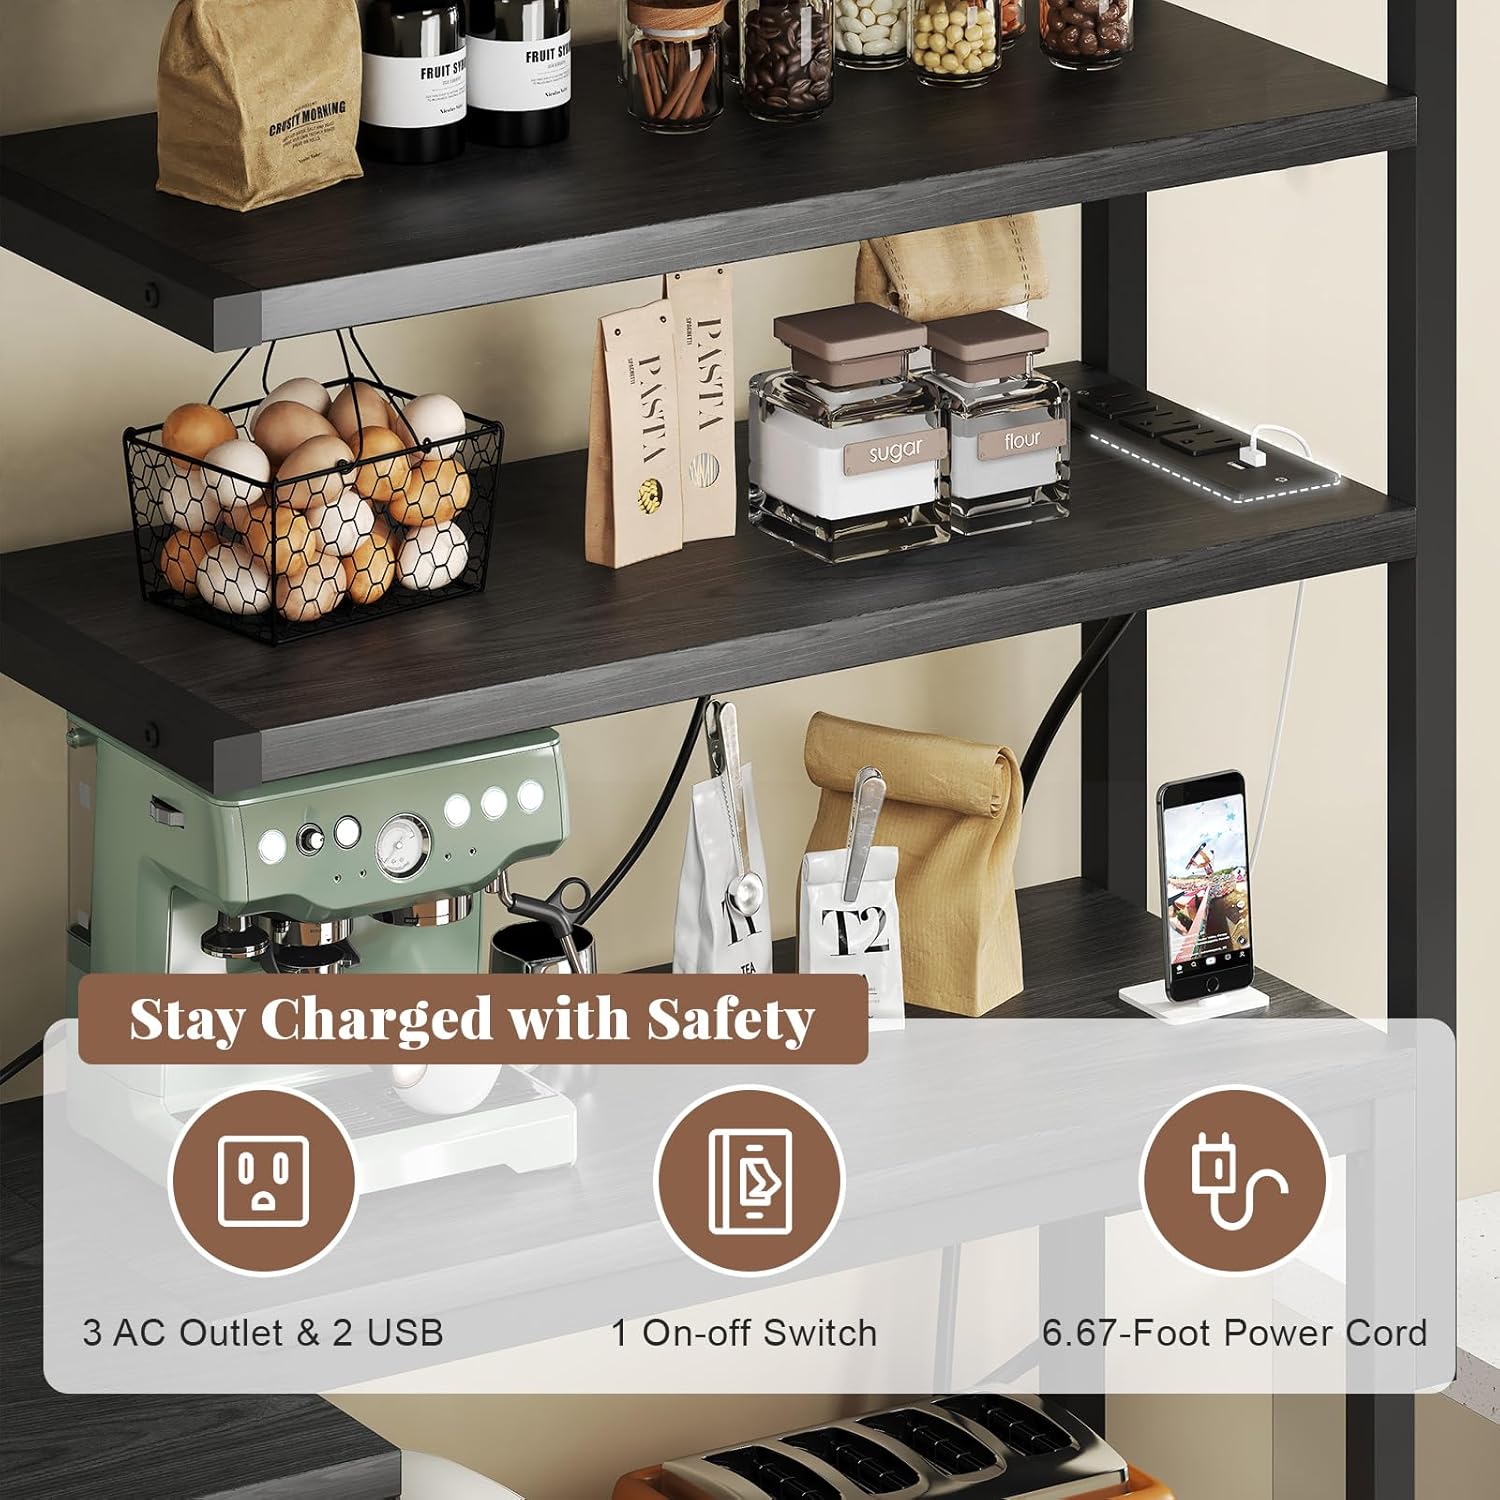
Image: Integrated power strip with 3 AC outlets and 2 USB ports.
- Step 7: Attach Wire Basket and Mesh Grid.
Install the wire basket beneath a shelf as desired. Attach the mesh grid to the upper frame, providing a convenient area for hanging accessories.

Image: Wire basket for additional storage.

Image: Metal mesh grid with S-shaped hooks for hanging items.
- Step 8: Attach S-shaped Hooks.
Hang the S-shaped hooks onto the mesh grid for convenient storage of utensils, mugs, or other kitchen tools.
- Step 9: Final Inspection and Stabilization.
Once assembly is complete, double-check all screws and connections to ensure they are tight. Adjust the leveling feet to ensure the rack is stable and does not wobble. Install the anti-tip hardware by securing the rack to a wall.
5. Operating Instructions
5.1. Using the Power Outlet
- Plug the bakers rack's power cord into a standard wall outlet.
- Use the on/off switch on the power strip to control power to the AC and USB outlets.
- Connect kitchen appliances (e.g., microwave, coffee maker, toaster) to the 3 AC outlets.
- Charge mobile devices or other USB-powered gadgets using the 2 USB ports.
- Do not exceed the maximum power rating of 1800W for the power strip.
5.2. Utilizing Storage Features
- The multiple tiers provide ample space for various kitchen items, including appliances, cookware, spices, and pantry staples.
- The wire basket is suitable for storing fruits, vegetables, or other small items.
- The S-shaped hooks on the mesh grid are ideal for hanging towels, oven mitts, or frequently used utensils.
6. Maintenance
- Cleaning: Wipe down the metal frame and wooden shelves with a soft, damp cloth. Avoid harsh chemicals or abrasive cleaners that could damage the finish.
- Dusting: Regularly dust all surfaces to prevent buildup.
- Tightening: Periodically check all screws and connections and re-tighten them to maintain stability and safety.
- Power Strip Care: Keep the power strip clean and dry. Disconnect from the wall outlet before cleaning.
7. Troubleshooting
| Problem | Possible Cause | Solution |
|---|---|---|
| Rack is wobbly/unstable. | Uneven floor; loose screws. | Adjust the leveling feet until stable. Tighten all assembly screws. Ensure the anti-tip kit is properly installed. |
| Power strip not working. | Not plugged in; switch off; overloaded circuit. | Ensure the power cord is securely plugged into a working wall outlet. Turn the power strip's on/off switch to 'on'. Check if the circuit breaker has tripped. Reduce the number of devices plugged in if exceeding 1800W. |
| Parts do not align during assembly. | Incorrect orientation of parts; screws not fully loosened. | Review the assembly video and diagrams to confirm part orientation. Loosen all screws slightly before attempting to align and tighten. Do not force parts. |
8. Specifications
- Brand: iabifo
- Model: B0DSJ2PJQD
- Dimensions: 24.41"D x 32.28"W x 59.84"H
- Item Weight: 45.5 pounds
- Color: Black
- Number of Shelves: 8
- Room Type: Kitchen, Living Room
- Special Feature: Integrated Power Strip (3 AC outlets, 2 USB ports, 1800W max)
- Assembly Required: Yes

Image: Product dimensions for planning placement.
9. Warranty and Support
For warranty information, technical support, or to report missing/damaged parts, please contact iabifo customer service through the retailer's platform or the official iabifo website. Please have your model number (B0DSJ2PJQD) and purchase date available when contacting support.
Ask a question about this manual
Ask about setup, troubleshooting, compatibility, parts, safety, or missing instructions. Manuals+ will review the question and use this page’s manual context to help answer it.