1. Introduction
This manual provides detailed instructions for the safe and efficient operation, installation, and maintenance of your LEMOISTAR FW3 12-inch wall mounted fan. Please read this manual thoroughly before using the product and retain it for future reference.
2. Product Overview
The LEMOISTAR FW3 is a 12-inch wall mounted fan designed for air circulation in various indoor and outdoor settings. It features multiple speed settings, oscillation, adjustable tilt, and a remote control for convenient operation.
Key Features:
- 12-Inch Fan Blades: Designed for strong and broad airflow.
- 90° Oscillation: Automatic side-to-side movement for wide area coverage.
- 125° Vertical Tilt: Manual adjustment (75° up, 50° down) for directed airflow.
- 4 Speed Settings: Low, Middle, High, and Super for varied airflow intensity.
- Ultra-Quiet Operation: Equipped with a 100% pure copper brushless motor for minimal noise.
- Remote Control: Allows adjustment of speed and timer settings from a distance. Features magnetic attachment to the fan head.
- Timer Function: Selectable settings for 0.5, 1.5, 4, or 8 hours.
- Long Power Cord: An 8.2ft (2.5m) cord provides flexible placement options.
- Easy Installation: Supports both screw-in and nail-free adhesive mounting.

Figure 2.1: The LEMOISTAR FW3 12-inch wall mounted fan with its remote control.

Figure 2.2: Illustration of the fan's 125° vertical tilt and 90° horizontal oscillation capabilities for efficient cooling.
3. Safety Instructions
- Always ensure the fan is unplugged before cleaning or performing any maintenance.
- Do not insert fingers or any objects into the fan grille when it is operating.
- Keep the fan away from water or other liquids to prevent electric shock.
- Do not use the fan if the power cord or plug is damaged.
- Ensure the fan is securely mounted before operation.
- This appliance is not intended for use by persons (including children) with reduced physical, sensory or mental capabilities, or lack of experience and knowledge, unless they have been given supervision or instruction concerning use of the appliance by a person responsible for their safety.
- Children should be supervised to ensure that they do not play with the appliance.
4. Setup and Installation
The LEMOISTAR FW3 fan offers two primary installation methods: screw-in for non-glass surfaces and nail-free adhesive for smooth surfaces.
4.1 Package Contents:
- 1x Fan Unit
- 1x Holder
- 1x Base
- 1x Wall Bracket
- 1x Knob
- 1x Adapter (8.2ft/2.5m cable)
- 1x Remote Control
- 2x Screws
- 2x Auxiliary Stickers
- 1x Color Box
- 1x Instructions Manual
4.2 Assembling the Fan:
- Align the positioning post on the fan with the positioning slot on the holder.
- Put the holder onto the nut and tighten it by rotating the knob clockwise.
- Pass the Type-C cable through the base.
- Embed the motor body into the base. First, insert the slot on the base, then embed it completely.
- Press down the fixing buckle at the back of the base to lock it.
- Insert the cable into the Type-C port on the fan. Ensure the cylindrical ball is placed into the wire slot to leave enough space for auto oscillation.
4.3 Mounting the Fan:
Choose the appropriate mounting method for your surface.
Method 1: For Non-Glass Surfaces (Screws)
Fix the wall bracket to the wall using the two provided screws. Ensure the bracket is securely fastened to a stud or with appropriate wall anchors for stability.

Figure 4.1: Screw installation for non-glass surfaces. Use the provided screws to secure the bracket.
Method 2: For Smooth Glass Surfaces (Nail-Free Adhesive)
Apply the included nail-free adhesive to the back of the wall bracket. Place the bracket on the clean, smooth wall. Allow 24 hours for the adhesive to cure before hanging the fan on the wall bracket.

Figure 4.2: Adhesive application for smooth surfaces. Ensure the surface is clean and dry before application.
Video 4.1: This video demonstrates the installation process for the LEMOISTAR 12-inch wall mounted fan, including assembly and mounting options.
4.4 Power Connection:
Connect the 8.2ft (2.5m) power adapter to the fan's Type-C port and plug it into a standard electrical outlet.

Figure 4.3: The fan comes with an 8.2ft (2.5m) long power cable for flexible placement.
5. Operating Instructions
The fan can be operated using the integrated buttons on the unit or the included remote control.
5.1 Controls:
- Power Button: Turns the fan on/off and cycles through speed settings.
- Timer Button: Sets the operating duration (0.5h, 1.5h, 4h, 8h).
- Oscillation Button: Activates or deactivates the 90° horizontal auto-oscillation.

Figure 5.1: Remote control and manual button layout for fan operation.
5.2 Remote Control:
The remote control allows convenient operation from a distance. It can be magnetically attached to the center of the fan head when not in use to prevent loss.
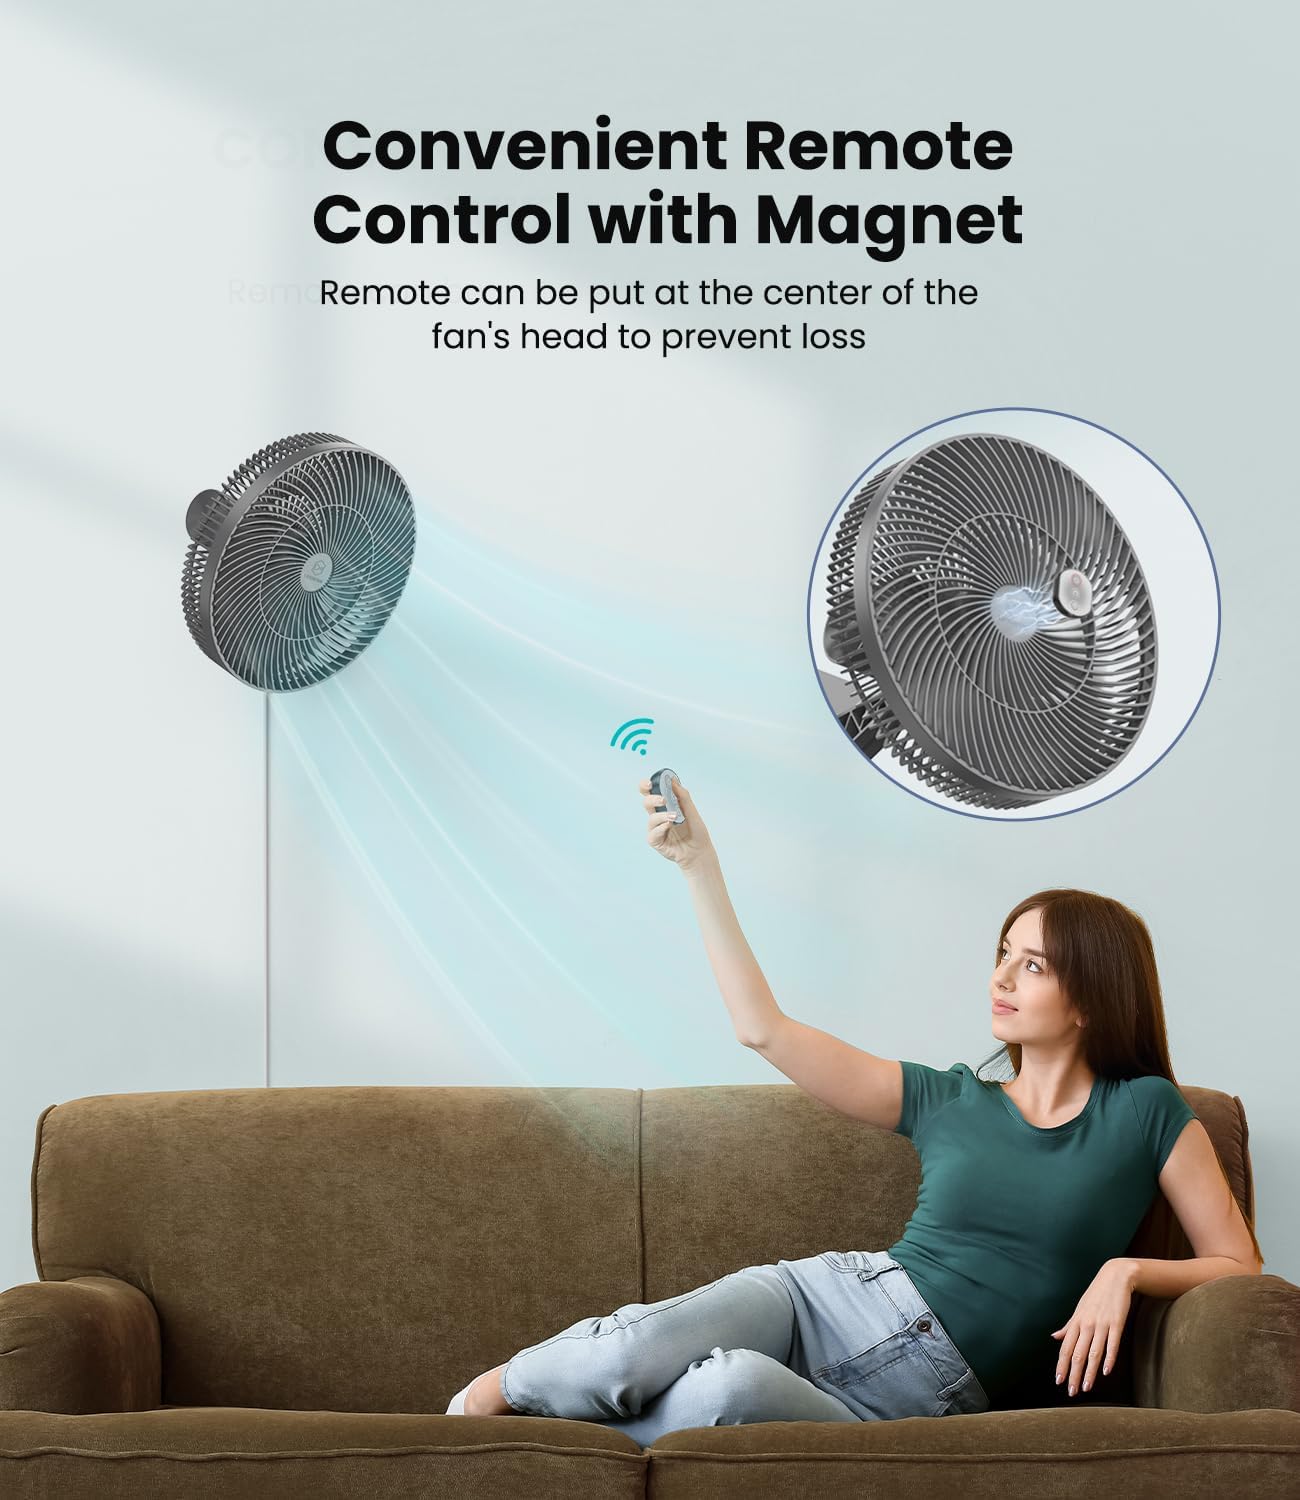
Figure 5.2: The fan's remote control for convenient operation.
5.3 Speed Settings:
Press the power button to cycle through the 4 speed settings (Low, Middle, High, Super). The indicator lights on the fan will show the current speed.
5.4 Timer Function:
Press the timer button to select a desired operating duration: 0.5 hours, 1.5 hours, 4 hours, or 8 hours. The fan will automatically turn off after the selected time.

Figure 5.3: The fan's timer settings allow for scheduled operation.
5.5 Oscillation and Tilt:
- Oscillation: Press the oscillation button to activate the 90° horizontal auto-oscillation. Press again to stop.
- Tilt: Manually adjust the fan head up to 75° upwards and 50° downwards for a total of 125° vertical tilt.
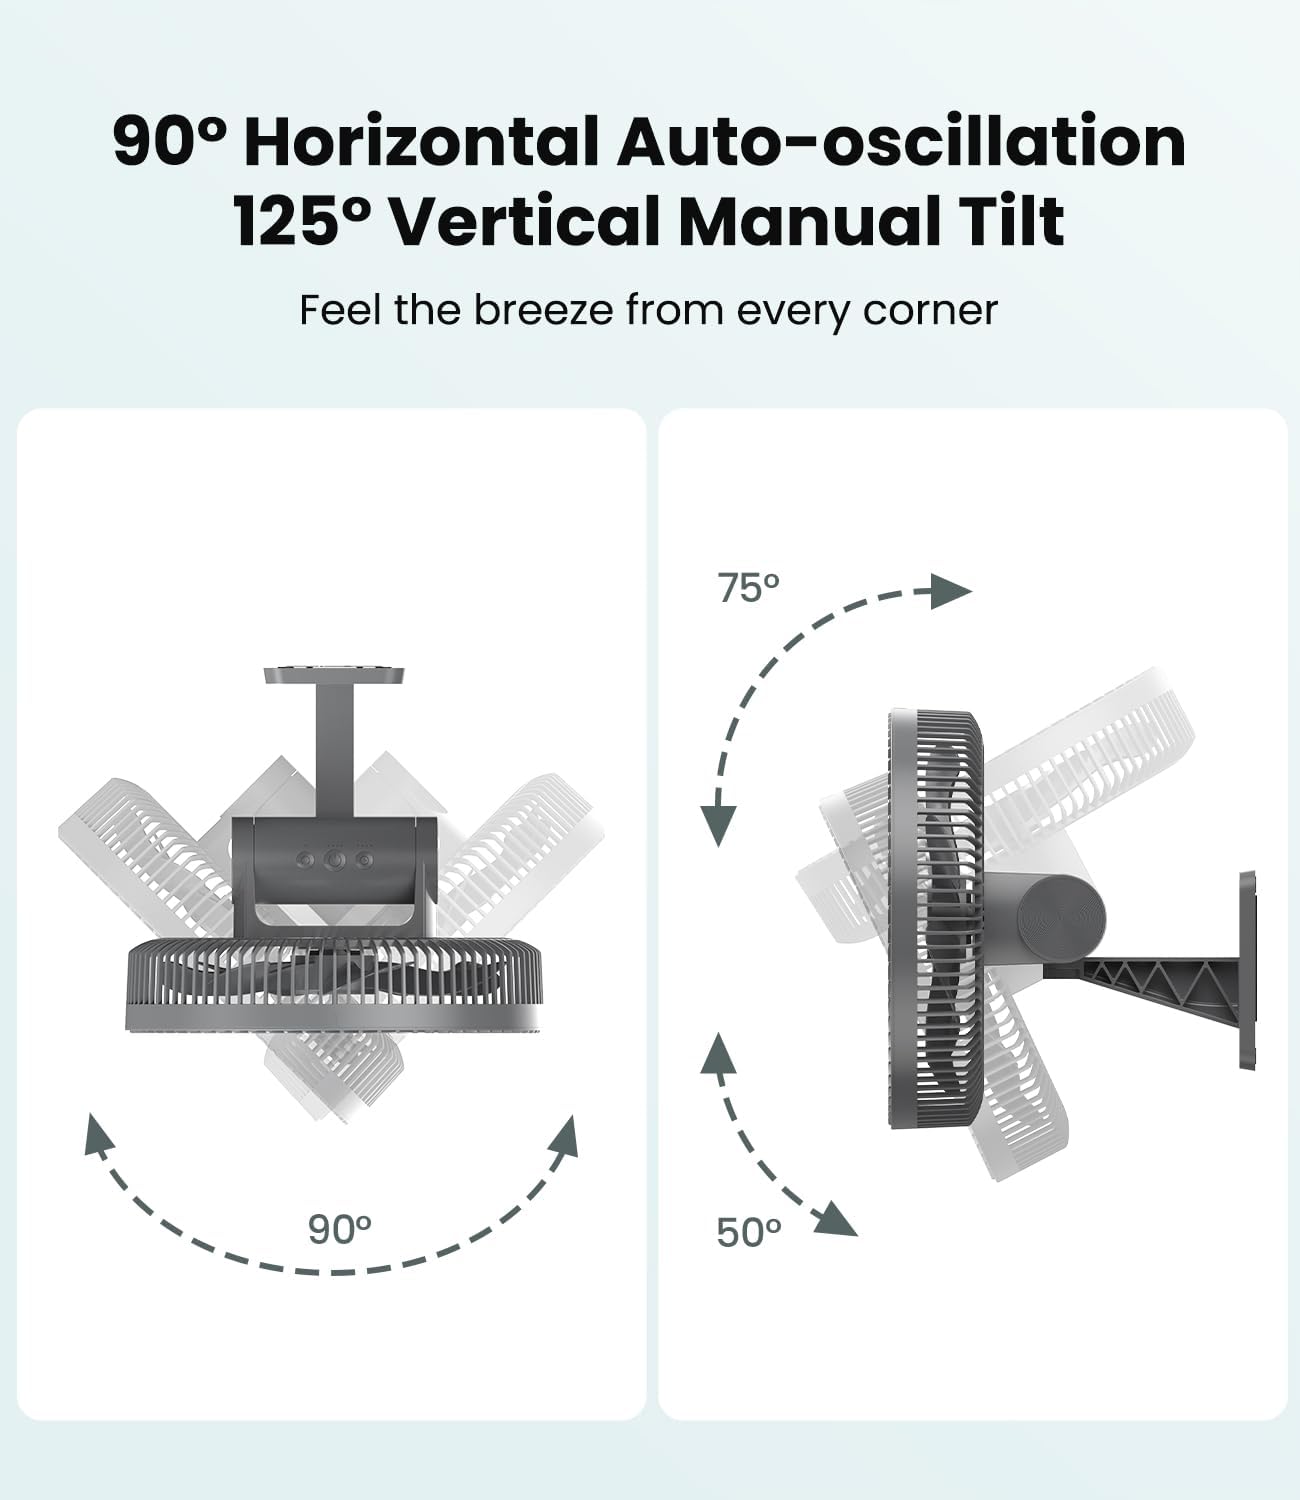
Figure 5.4: The fan offers both automatic horizontal oscillation and manual vertical tilt.
Video 5.1: This video demonstrates the operation of the LEMOISTAR 12-inch wall mounted fan, including speed settings, timer, and oscillation.
6. Maintenance and Cleaning
Regular cleaning ensures optimal performance and extends the lifespan of your fan.
6.1 Cleaning the Fan:
- Unplug the fan: Always disconnect the power before cleaning.
- Disassemble the grille: Use a screwdriver (not included) to remove the 4 screws securing the front grille.
- Clean blades and grille: Wipe the fan blades and both grilles with a dry, clean cloth. Do not use water or harsh chemicals.
- Reassemble: Once clean and dry, reattach the front grille and secure it with the screws.

Figure 6.1: Cleaning the fan blades with a dry cloth.
7. Troubleshooting
If you encounter issues with your fan, refer to the following common problems and solutions:
| Problem | Possible Cause | Solution |
|---|---|---|
| Fan does not turn on | No power supply Power button not pressed | Check if the power adapter is securely plugged into the fan and the outlet. Press the power button on the fan or remote. |
| Remote control not working | Remote battery depleted Obstruction between remote and fan | Replace the remote control battery (1 P76 battery included). Ensure a clear line of sight between the remote and the fan's sensor. |
| Fan is noisy | Loose parts Dust accumulation | Check if the fan grille and holder are securely fastened. Clean the fan blades and grille as per maintenance instructions. |
| Oscillation not working | Oscillation function not activated Cable obstruction | Press the oscillation button on the fan or remote. Ensure the power cable is correctly placed in the wire slot to allow free movement. |
8. Specifications
| Feature | Specification |
|---|---|
| Brand | LEMOISTAR |
| Model Name | FW3-A1 |
| Size | 12 inch |
| Product Dimensions | 11.02"D x 6.3"W x 8.27"H |
| Item Weight | 3.67 pounds (1.67 Kilograms) |
| Color | Grey |
| Power Source | DC |
| Wattage | 12 watts |
| Voltage | 12 Volts |
| Number of Power Levels | 4 |
| Control Method | Remote, Touch |
| Special Features | Adjustable Tilt, Oscillating, Quiet Operation, Remote Controlled, Timer |
| Motor Type | Brushless |
| Installation Type | Wall Mount |
| Included Components | Wall Fan |
| Batteries | 1 P76 battery required (included for remote) |
9. Warranty and Support
For warranty information or technical support, please refer to the product packaging or contact LEMOISTAR customer service directly. Keep your purchase receipt as proof of purchase.