
Introduction
This manual provides essential instructions for the safe and efficient operation, installation, and maintenance of your Primecom Tesla (NACS) EV Charger Mobile Connector. Please read this manual thoroughly before using the product and retain it for future reference.
The Primecom EV Charger is designed to provide Level 2 charging for Tesla vehicles, offering a maximum output of 40 Amps. This model features a 6-50 plug and a 50-foot cable for flexible placement.
Safety Information
Always observe the following safety precautions to prevent injury or damage to the product and property:
- Ensure the electrical outlet is properly grounded and rated for 240V, 50A (for 6-50 plug).
- Do not use the charger if the cable or connector is damaged.
- Keep the charging unit and cables away from water and moisture.
- Do not attempt to open, disassemble, or modify the charger.
- Supervise children around the charging equipment.
- Always unplug the charger from the wall outlet before cleaning or maintenance.
Package Contents
Verify that all items are present in the package:
- EV Charger Unit
- Power Cable (50 Feet with 6-50 Plug)
- Tesla (NACS) Charging Connector
- Carrying Bag
- Wall Hanger

Image: Overview of the Primecom Tesla (NACS) EV Charger Mobile Connector, showing the main unit, 6-50 plug, NACS connector, and carrying bag.
Setup
- Electrical Outlet Verification: Ensure you have a dedicated 240V NEMA 6-50 outlet installed by a qualified electrician. The circuit must be rated for at least 50 Amps to support the charger's maximum output.
- Mounting (Optional): Use the provided wall hanger to secure the charger unit to a wall near your charging location. Ensure the mounting surface is sturdy enough to support the unit's weight.
- Connect to Power: Insert the 6-50 plug of the power cable firmly into the NEMA 6-50 wall outlet.
- Initial Check: The charger's LED indicators should illuminate, indicating it is powered on and ready.

Image: The Primecom EV Charger connected to a wall outlet and a Tesla vehicle, illustrating a typical setup for charging.

Image: Close-up of the NEMA 6-50 plug, which connects the charger to the wall outlet.
Operating Instructions
- Connect to Vehicle: Open your Tesla vehicle's charging port and firmly insert the NACS charging connector. Ensure it clicks into place.
- Adjust Charging Current (Optional): The charger allows adjustment of the charging current. Press the touch sensor on the charger unit to cycle through available current settings: 15A, 23A, 32A, and 40A. Select the appropriate current based on your vehicle's requirements and your electrical circuit's capacity. The selected current will be indicated by an illuminated LED.
- Monitor Charging: The LED indicators on the charger unit will show the active charging current. Your vehicle's dashboard or mobile app will also display charging status.
- Charging Completion: Once charging is complete, unlock the charging port from your vehicle (usually via the vehicle's touchscreen or mobile app) and remove the NACS connector.
- Storage: Disconnect the charger from the wall outlet when not in use. Store the cable neatly using the provided carrying bag or by wrapping it around the wall hanger.
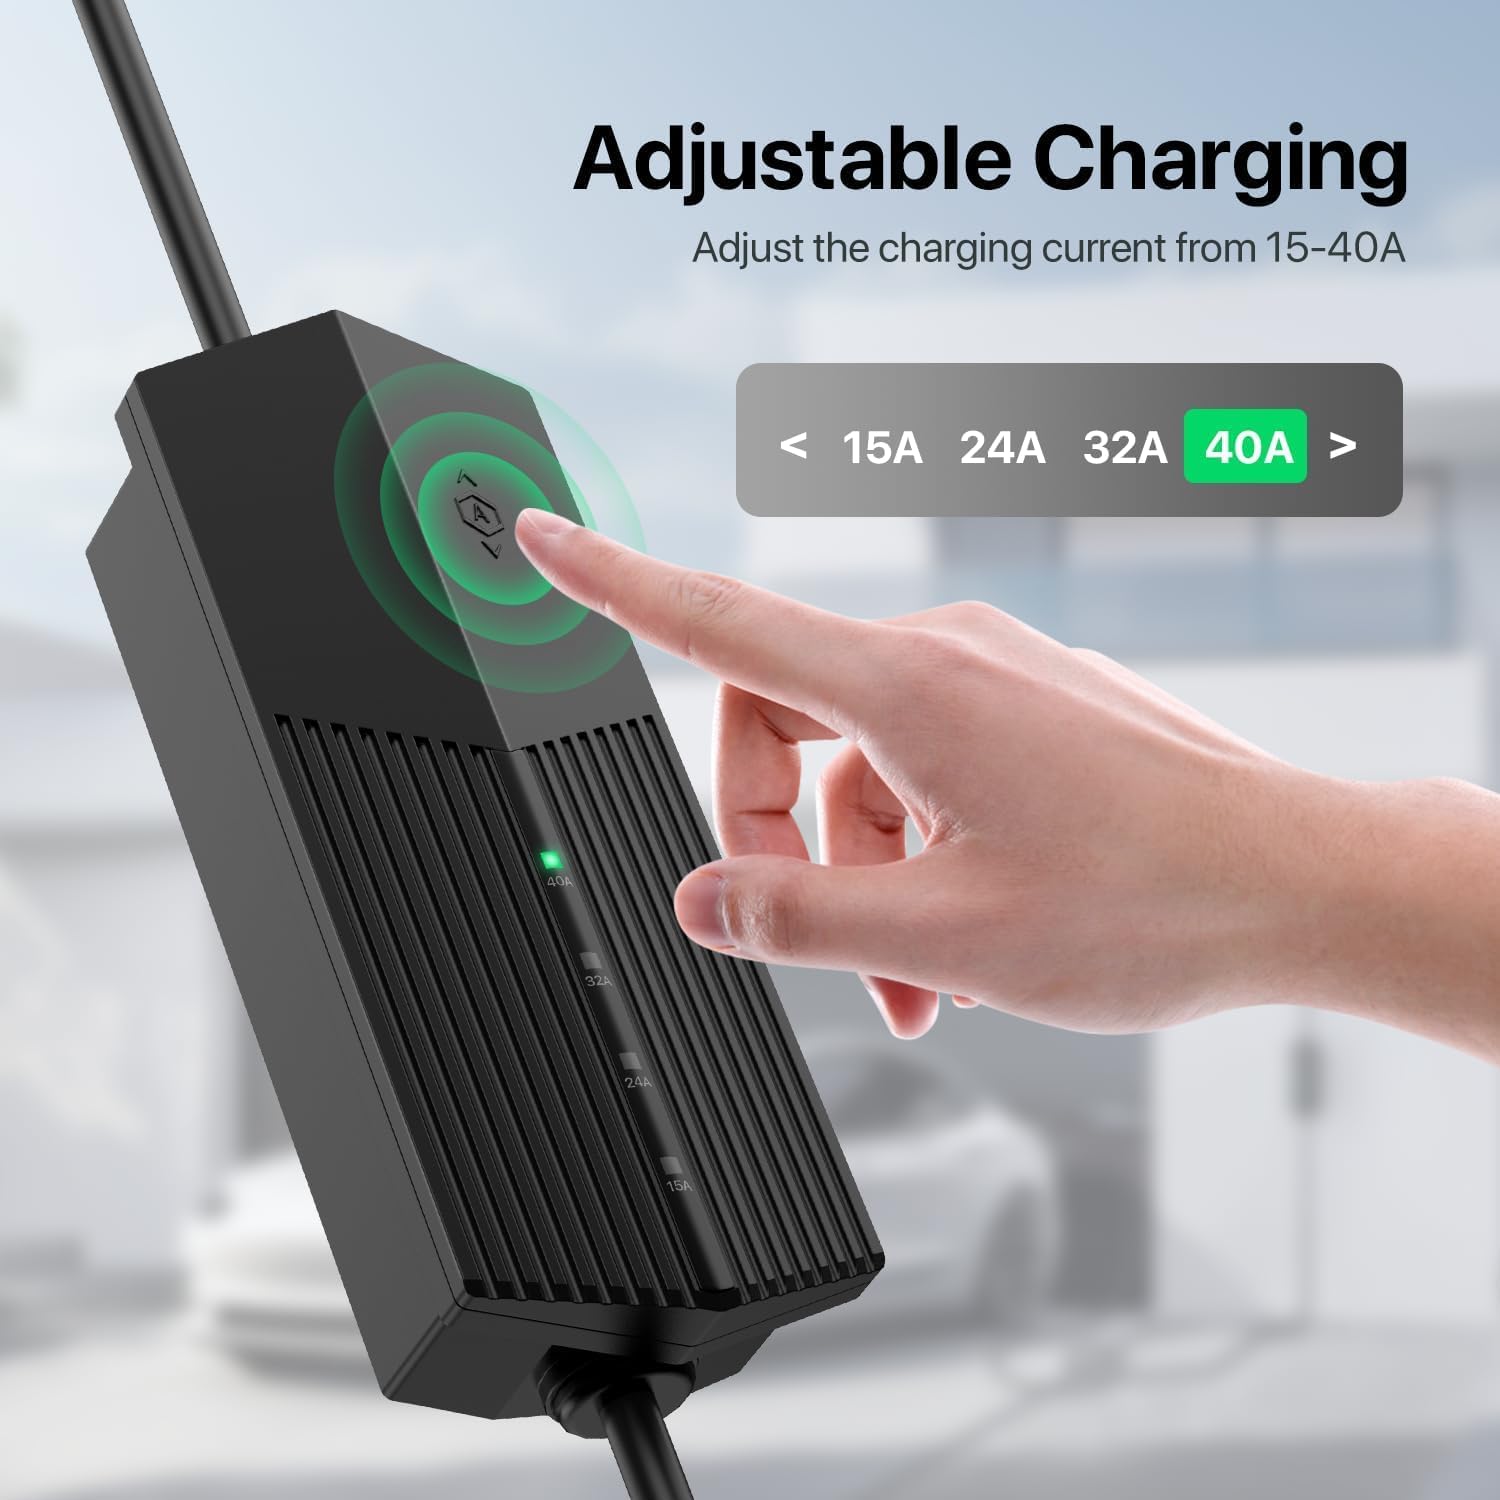
Image: A hand interacting with the touch sensor on the charger unit to adjust the charging current, with LED indicators showing 15A, 24A, 32A, and 40A options.
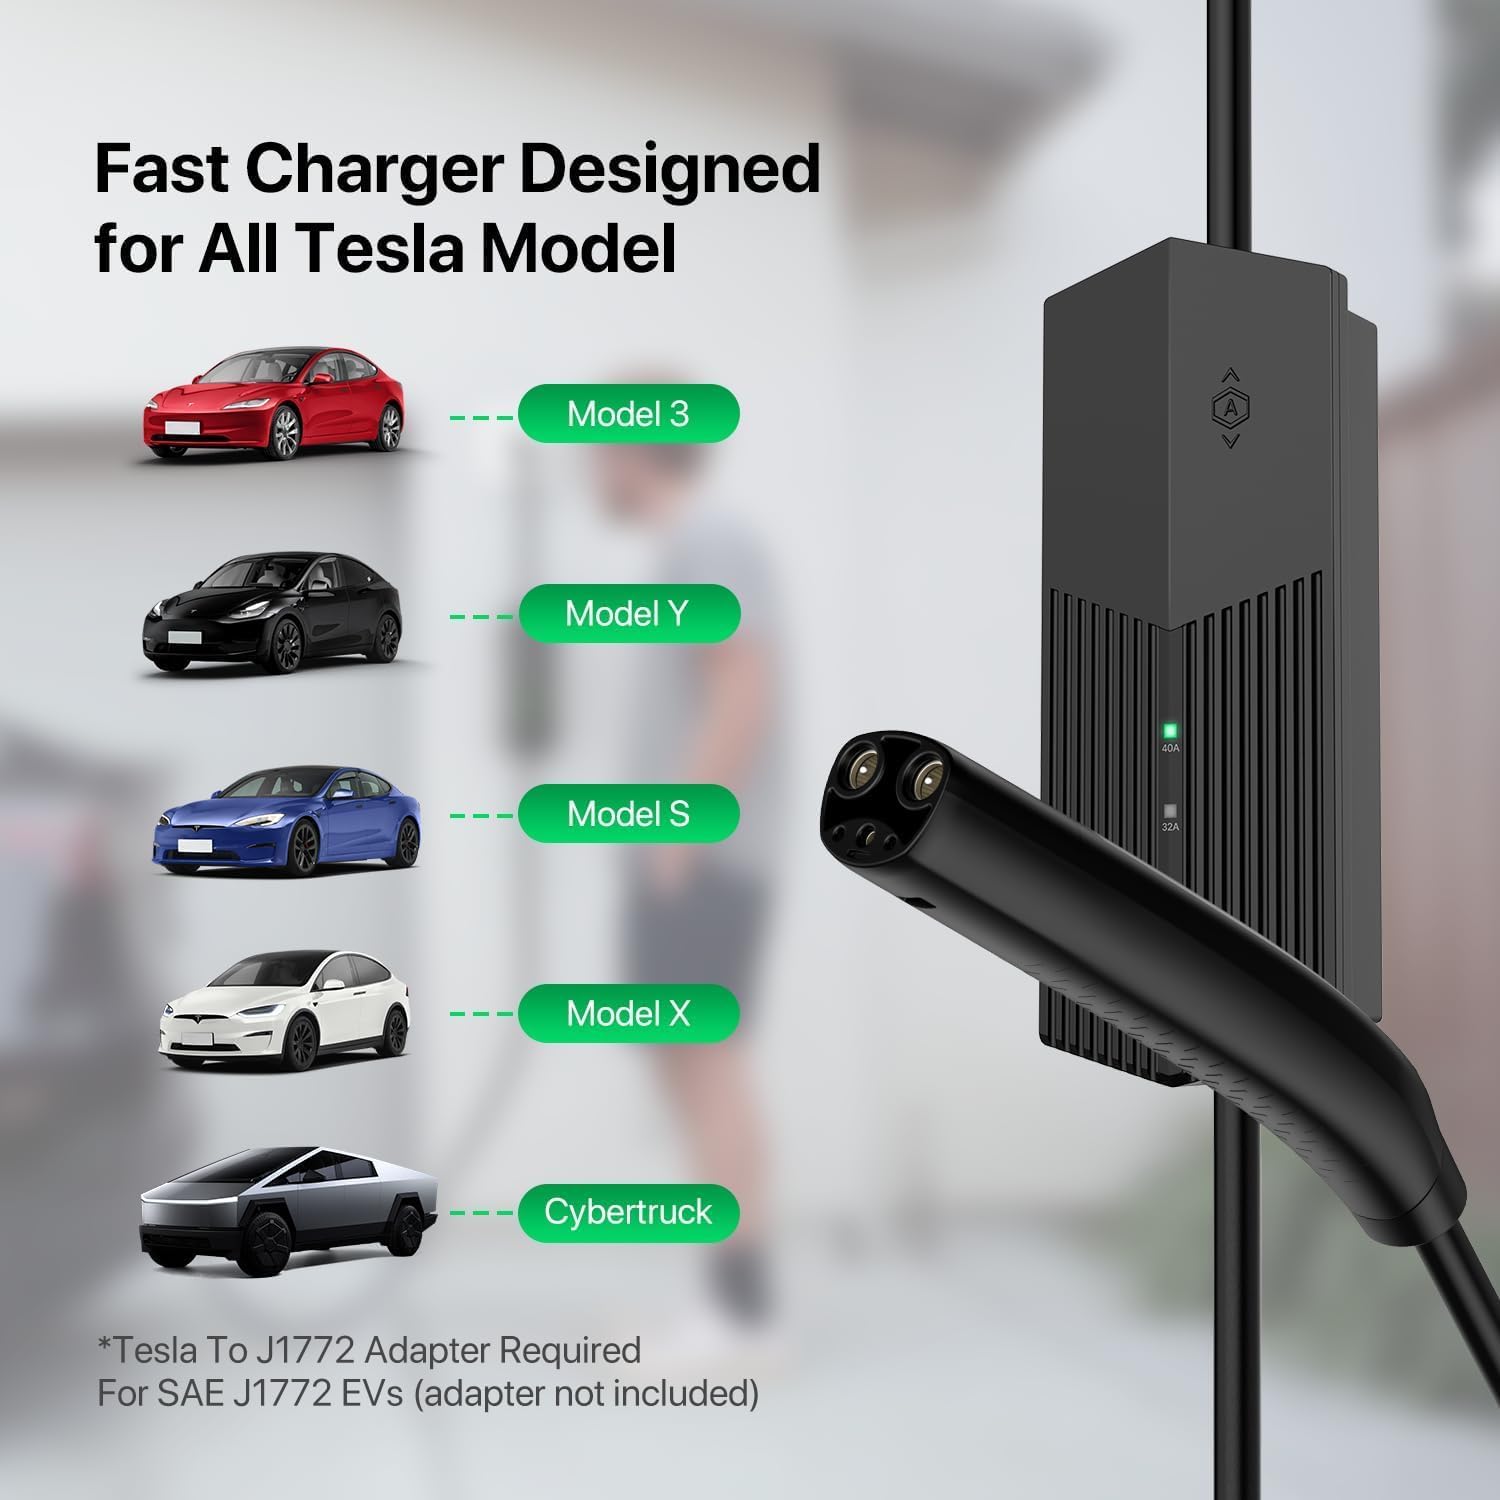
Image: Illustration showing the NACS connector and various Tesla models (Model 3, Y, S, X, Cybertruck), indicating compatibility. Note: A Tesla to J1772 adapter is required for SAE J1772 EVs (adapter not included).
Maintenance
- Cleaning: Disconnect the charger from the power source before cleaning. Use a soft, dry cloth to wipe the exterior of the charger unit and cables. Do not use abrasive cleaners or solvents.
- Cable Inspection: Regularly inspect the charging cable and connector for any signs of wear, cuts, or damage. If any damage is observed, discontinue use immediately and contact customer support.
- Storage: Store the charger in a dry, cool place, away from direct sunlight and extreme temperatures. Avoid kinking or bending the cable sharply.
Troubleshooting
| Problem | Possible Cause | Solution |
|---|---|---|
| Charger not powering on. | No power from outlet; faulty outlet; charger malfunction. | Check the wall outlet with another appliance. Ensure the plug is fully inserted. If the issue persists, contact a qualified electrician or customer support. |
| Vehicle not charging. | Connector not fully inserted; vehicle charging schedule; charger fault. | Ensure the NACS connector is securely latched into the vehicle's charging port. Check your vehicle's charging settings. Verify the charger's LED indicators are active. |
| Charging stops unexpectedly. | Overheating; power fluctuation; vehicle fault. | Allow the charger to cool down. Check for stable power supply. Consult your vehicle's manual for error codes. |
| LED indicators not responding to touch. | Temporary software glitch; sensor issue. | Unplug the charger from the wall outlet for 30 seconds, then plug it back in. If the problem continues, contact customer support. |
Specifications
- Model: PT-40A-TP
- Input Voltage: 240V AC
- Output Current: Adjustable (15A, 23A, 32A, 40A)
- Plug Type: NEMA 6-50P
- Connector Type: Tesla (NACS)
- Cable Length: 50 Feet
- Product Dimensions: 12 x 4 x 2.7 inches
- Item Weight: 17.5 pounds
- Operating Temperature: Consult manufacturer for specific range.
- Certifications: UL Listed Cable (as indicated by image)

Image: The Primecom EV Charger unit and cable, highlighting the UL Listed Cable certification mark.
Warranty and Support
For warranty information and technical support, please refer to the official PRIMECOMTECH website or contact their customer service directly. Keep your purchase receipt as proof of purchase for warranty claims.
Manufacturer: Primecom
Brand: PRIMECOMTECH
UPC: 680283737543