Introduction
The Thames & Kosmos Green Engineering STEM Kit provides a hands-on experience for building and experimenting with an energy-efficient model home. This kit is designed to introduce concepts of green architecture, sustainable building design, and clean energy technologies. Through construction and experimentation, users will explore how solar panels, LED lights, water pumps, and other components contribute to a sustainable living environment.
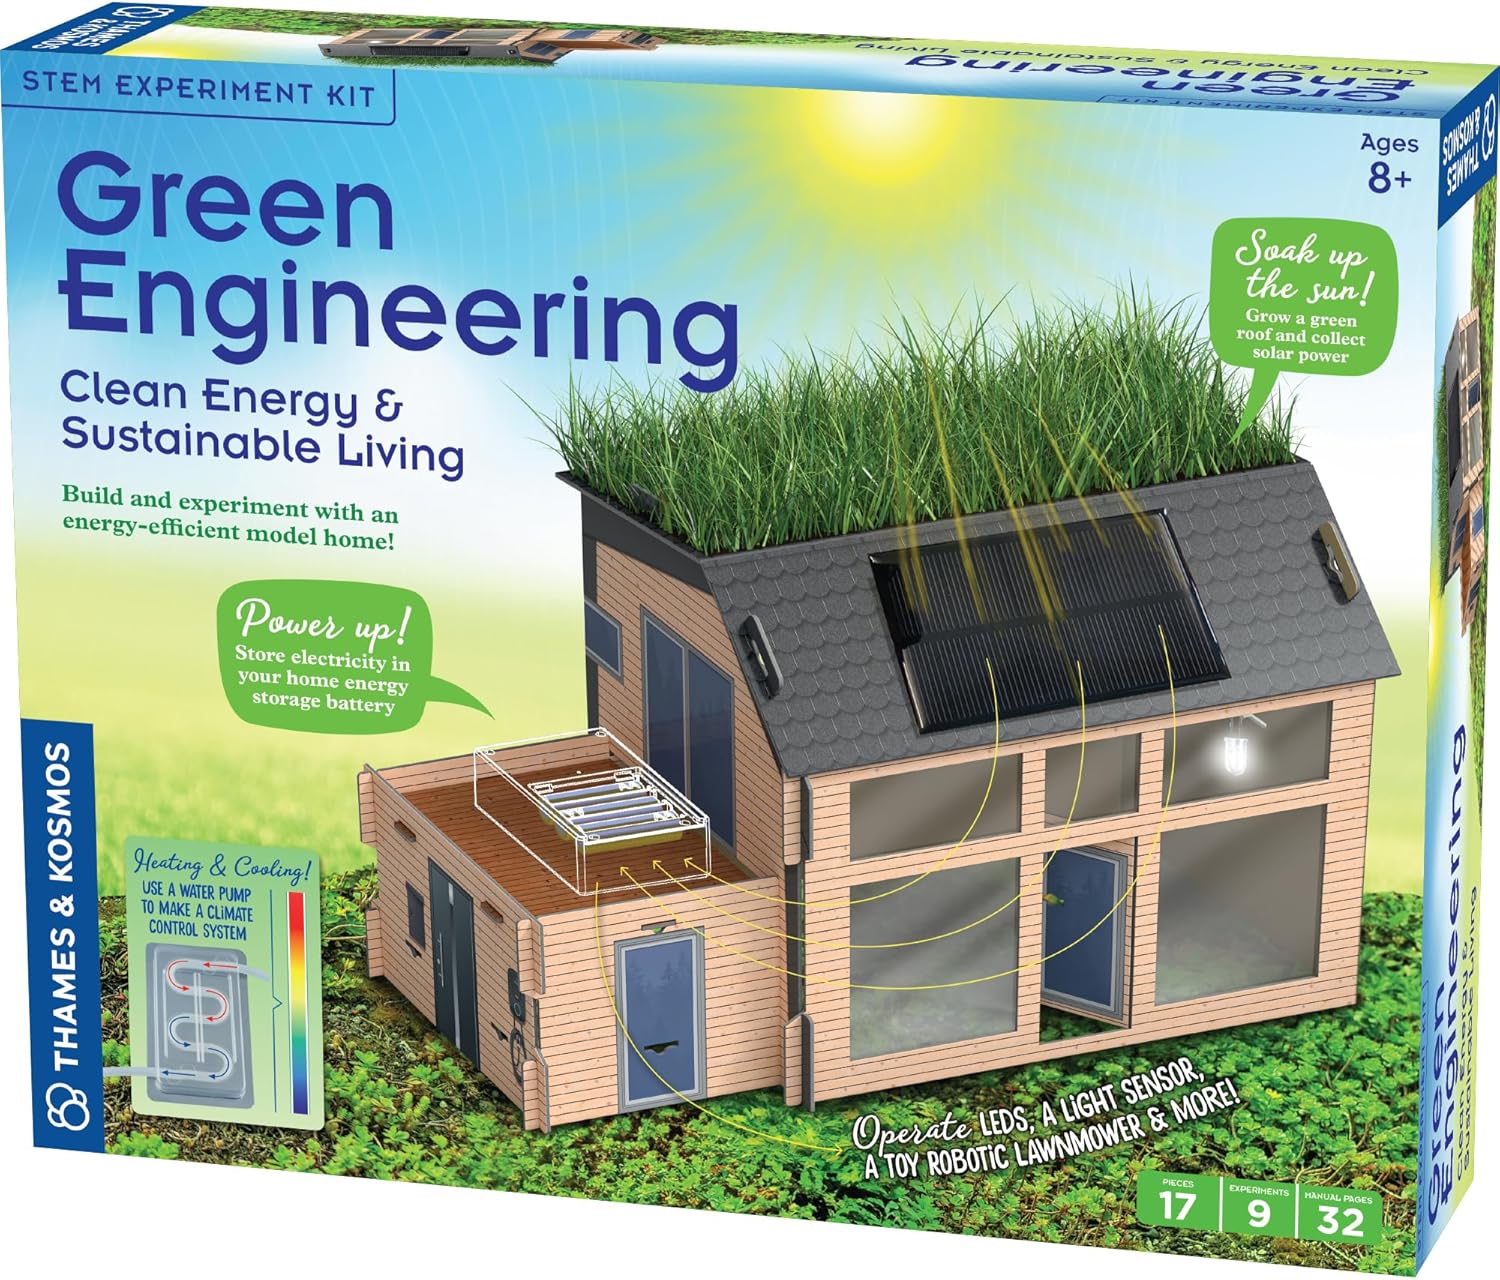
Image: The product box displaying the assembled model house with a green roof and solar panel, highlighting its features.
Safety Information
WARNING: This toy is intended for use by children over the age of 8 years due to accessible electronic components. Adult supervision is required. Please follow all instructions carefully.
- Not suitable for children under 3 years. Choking hazard due to small parts.
- Strangulation hazard due to long cords and tubes. Keep away from neck.
- Retain packaging and instructions for important information.
- Do not mix old and new batteries.
- Do not mix alkaline, standard (carbon-zinc), or rechargeable (nickel-cadmium) batteries.
What's Included
Before beginning assembly, verify that all components listed below are present in your kit. Refer to the full-color manual for a detailed inventory and visual guide.
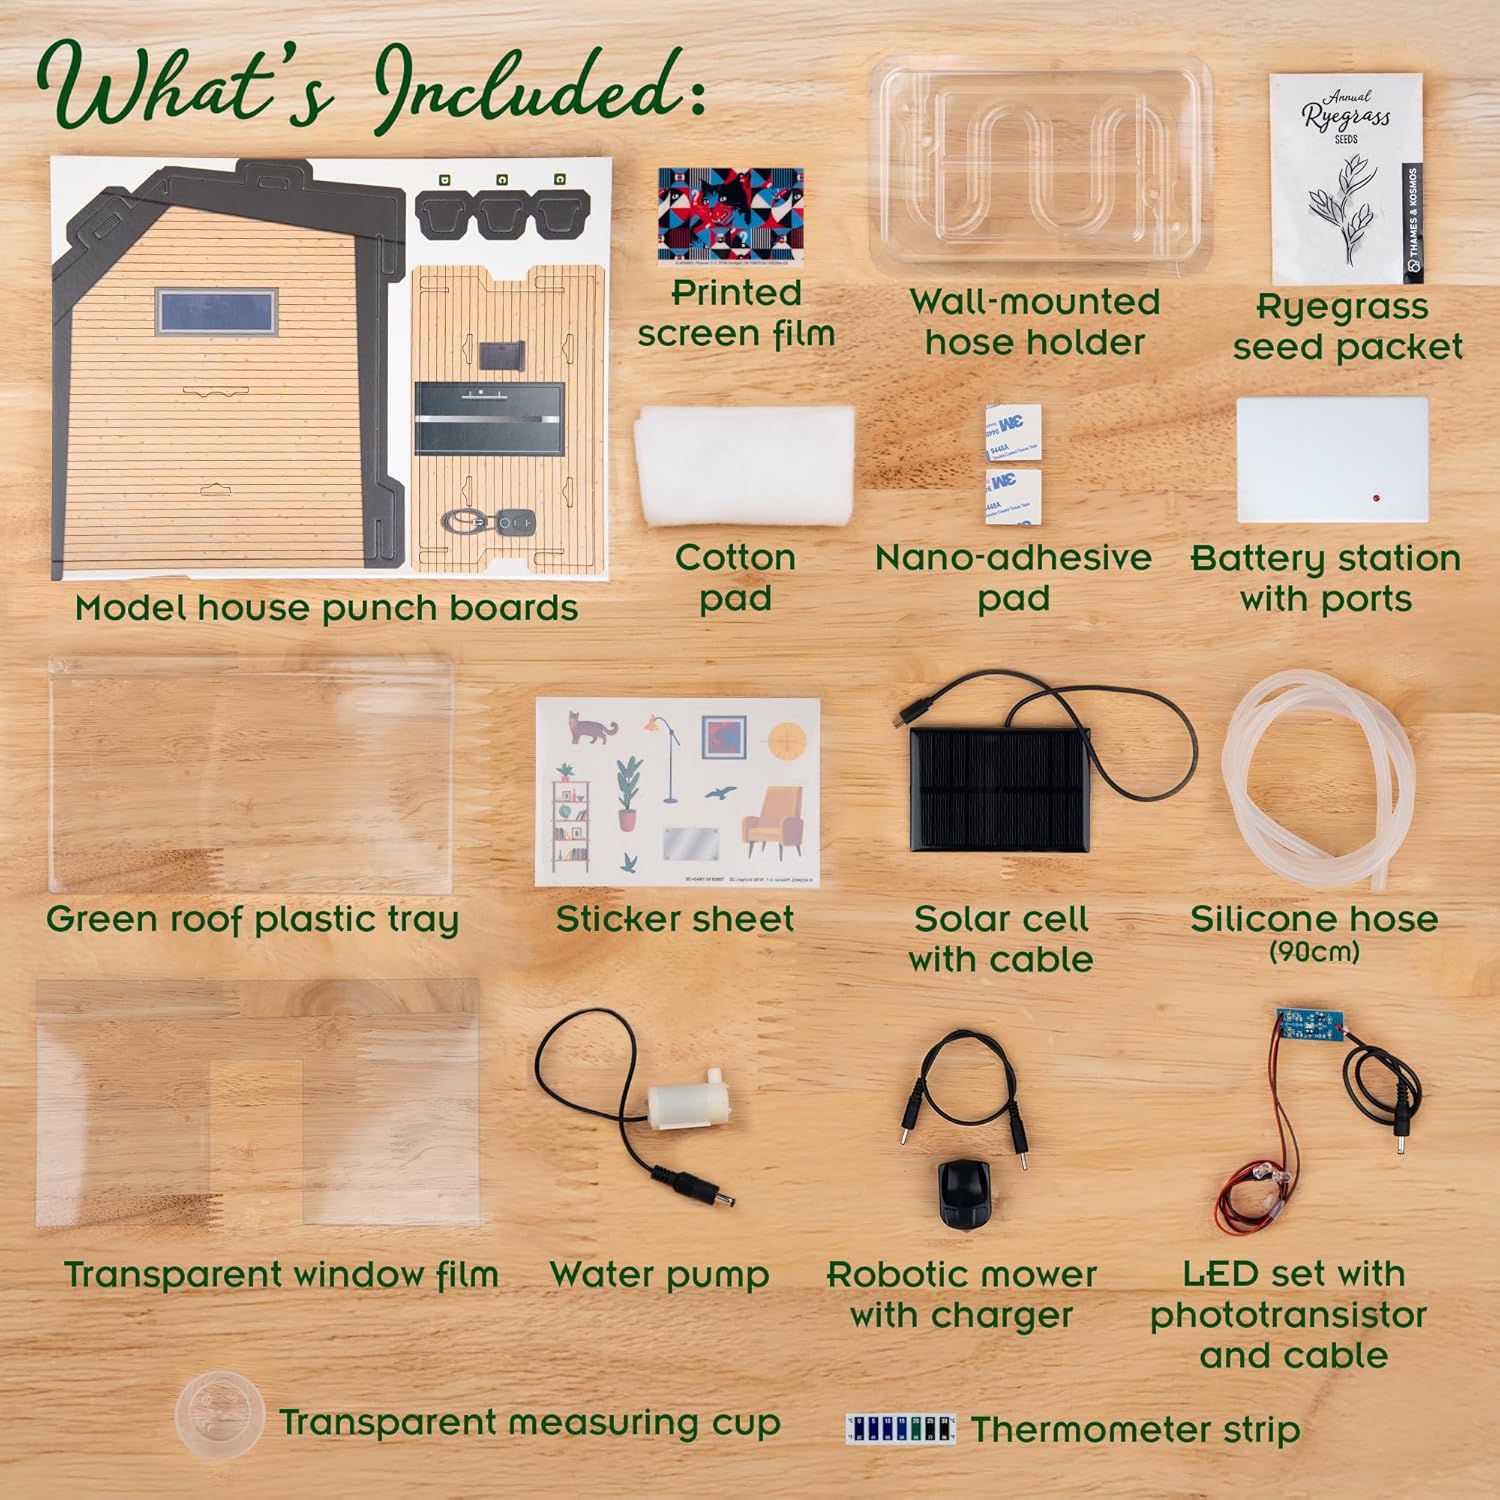
Image: A visual representation of all individual components included in the kit, such as cardboard house parts, solar panel, water pump, seeds, and electronic modules.
- Durable cardboard house parts
- Motor, solar panel, water pump
- Phototransistor and cable, thermometer
- Plastic sheets, plastic tray, grass seeds
- Printed screen film, wall-mounted hose holder
- Cotton pad, nano-adhesive pad, battery station with ports
- Green roof plastic tray, sticker sheet
- Solar cell with cable, silicone hose (90cm)
- Transparent window film, water pump
- Robotic mower with charger, LED set with phototransistor and cable
- Transparent measuring cup
Note: Three rechargeable NiMH batteries (AA size) are required for operation and are NOT included in the kit. Please acquire these before starting assembly.
Setup and Assembly
The assembly process involves constructing the model house from cardboard parts and integrating the various electronic and mechanical components. Follow the detailed, full-color, 32-page manual provided with the kit for step-by-step instructions.
- Prepare Components: Carefully punch out all cardboard parts. Organize electronic components and small parts.
- House Construction: Assemble the cardboard walls and roof according to the manual. Pay close attention to the orientation of decorated sides. Some steps may require glue; allow adequate drying time.
- Install Window Film and Stickers: Apply transparent window film and decorative stickers as indicated in the manual to customize your model home.
- Integrate Systems: Install the solar panel, LED lights, water pump, and other devices into their designated positions within the house structure.
- Battery Installation: Insert the three rechargeable NiMH batteries (not included) into the battery station. Ensure correct polarity.

Image: The fully assembled model house, illustrating its approximate dimensions of 14 inches long, 8 inches tall, and 7 inches wide.
Operating the Model Home
Once assembled, you can begin experimenting with the various green energy features of your model home.
Solar Power System
- Charging: Place the solar panel in direct sunlight. Connect the solar panel cable to the battery station's input port. The battery station will charge the installed rechargeable batteries. A red LED on the battery station indicates charging.
- Powering Devices: To power the house's devices (LEDs, water pump, robotic mower), disconnect the solar panel from the battery station and connect the devices to the output ports of the battery station. The solar panel cannot power devices directly while simultaneously charging the battery station.
LED Lighting System
The LED lights are controlled by a phototransistor, meaning they will automatically turn on when the ambient light level drops (e.g., at night or in a dark room) and turn off when it is bright. There is no manual on/off switch for the lights.
Water Pump and Climate Control System
The kit includes a water pump to simulate a climate control system. Follow the manual's instructions to set up the tubing and water reservoir. Ensure the water tube is securely positioned in the bowl to prevent spills during operation.

Image: A detailed view of the water pump system, demonstrating how water circulates through a clear panel on the side of the house to simulate heating and cooling.
Green Roof
The green roof allows you to grow plants, demonstrating the ecological benefits of such a design. Follow the instructions for planting the provided ryegrass seeds in the plastic tray on the roof.

Image: Children interacting with the model house, specifically watering the green roof, which highlights the sustainable living aspect of the kit.
Maintenance
- Green Roof: Water the plants on the green roof regularly as instructed in the manual to ensure growth.
- Batteries: Recharge the NiMH batteries as needed using the solar panel or an appropriate external charger. Remove batteries if the kit will not be used for an extended period.
- Cleaning: Wipe down the model house and components with a dry or slightly damp cloth. Avoid using harsh chemicals.
- Storage: Store the kit in a dry, cool place away from direct sunlight to preserve the cardboard components.
Troubleshooting
| Problem | Possible Cause | Solution |
|---|---|---|
| LED lights do not turn on. | Sufficient ambient light; batteries not charged; incorrect connection. | Ensure the room is dark enough for the phototransistor to activate. Check battery charge and connections to the battery station. |
| Solar panel not charging batteries. | Insufficient sunlight; incorrect connection; batteries not NiMH. | Place solar panel in direct, strong sunlight. Ensure the solar panel is connected to the correct input port on the battery station. Confirm batteries are rechargeable NiMH type. |
| Water pump not working or leaking. | Incorrect connection; air in tubing; unsecured tubing. | Check pump connection to battery station. Ensure tubing is fully submerged in water and free of air bubbles. Securely fasten tubing ends to prevent leaks. |
| Model house parts do not fit correctly. | Incorrect orientation of cardboard pieces. | Refer to the manual's diagrams and ensure each piece is oriented as shown. Some pieces may have a specific front/back or top/bottom. |
| Devices not working after charging. | Solar panel still connected to battery station. | Remember to disconnect the solar panel from the battery station before connecting other devices to the output ports. The system is designed for charging OR powering, not both simultaneously. |
Specifications
- Product Dimensions: 14.6 x 3.1 x 11.5 inches (Box)
- Assembled Model Dimensions: Approximately 14 inches (L) x 7 inches (W) x 8 inches (H)
- Item Weight: 2.89 pounds
- Model Number: 627931
- Manufacturer Recommended Age: 8 years and up
- Power Source: Solar panel, 3x AA NiMH rechargeable batteries (not included)
- Manual: 32-page full-color experiment manual
Warranty and Support
For information regarding product warranty, replacement parts, or technical support, please visit the official Thames & Kosmos website or contact their customer service department. Keep your purchase receipt and model number (627931) handy when seeking support.


