1. Introduction
Welcome to the user manual for your Raynic Digital Calendar Clock. This versatile device combines time-telling with advanced calendar and reminder functions, designed for clear visibility and ease of use. Please read this manual thoroughly to understand all features and ensure optimal performance.

Figure 1: Raynic Digital Calendar Clock (White, 10.1 Inches)
2. Setup
2.1 Unboxing and Components
Carefully remove all components from the packaging. Ensure you have the following items:
- Raynic Digital Calendar Clock (10.1-inch display)
- Power Adapter
- USB-C to USB-A Cable
- User Manual (this document)
- Wall Mounting Hardware (screws, anchors)

Figure 2: Packaging List
2.2 Powering On
- Connect the USB-C end of the cable to the clock's power port.
- Connect the USB-A end of the cable to the provided power adapter.
- Plug the power adapter into a standard electrical outlet.
- The clock will automatically power on and display the default time and date.
Note: The clock requires continuous power via the AC adapter. It has an internal battery for settings backup during power outages, but it is not designed for portable use.
2.3 Initial Time and Date Setting
The clock typically syncs time automatically. If manual adjustment is needed:
- Press the Menu button on the side of the clock to access the main menu.
- Navigate to Date & Time using the Up/Down arrow buttons. Press Select.
- Adjust the time, date, time format (12/24 hours), date format (Month-Day-Year, Day-Month-Year, Year-Month-Day), and Daylight Saving Time settings using the arrow buttons and Select.
Video 1: Overview of the Raynic Digital Calendar Clock's features, including setting time and date, and navigating menus.
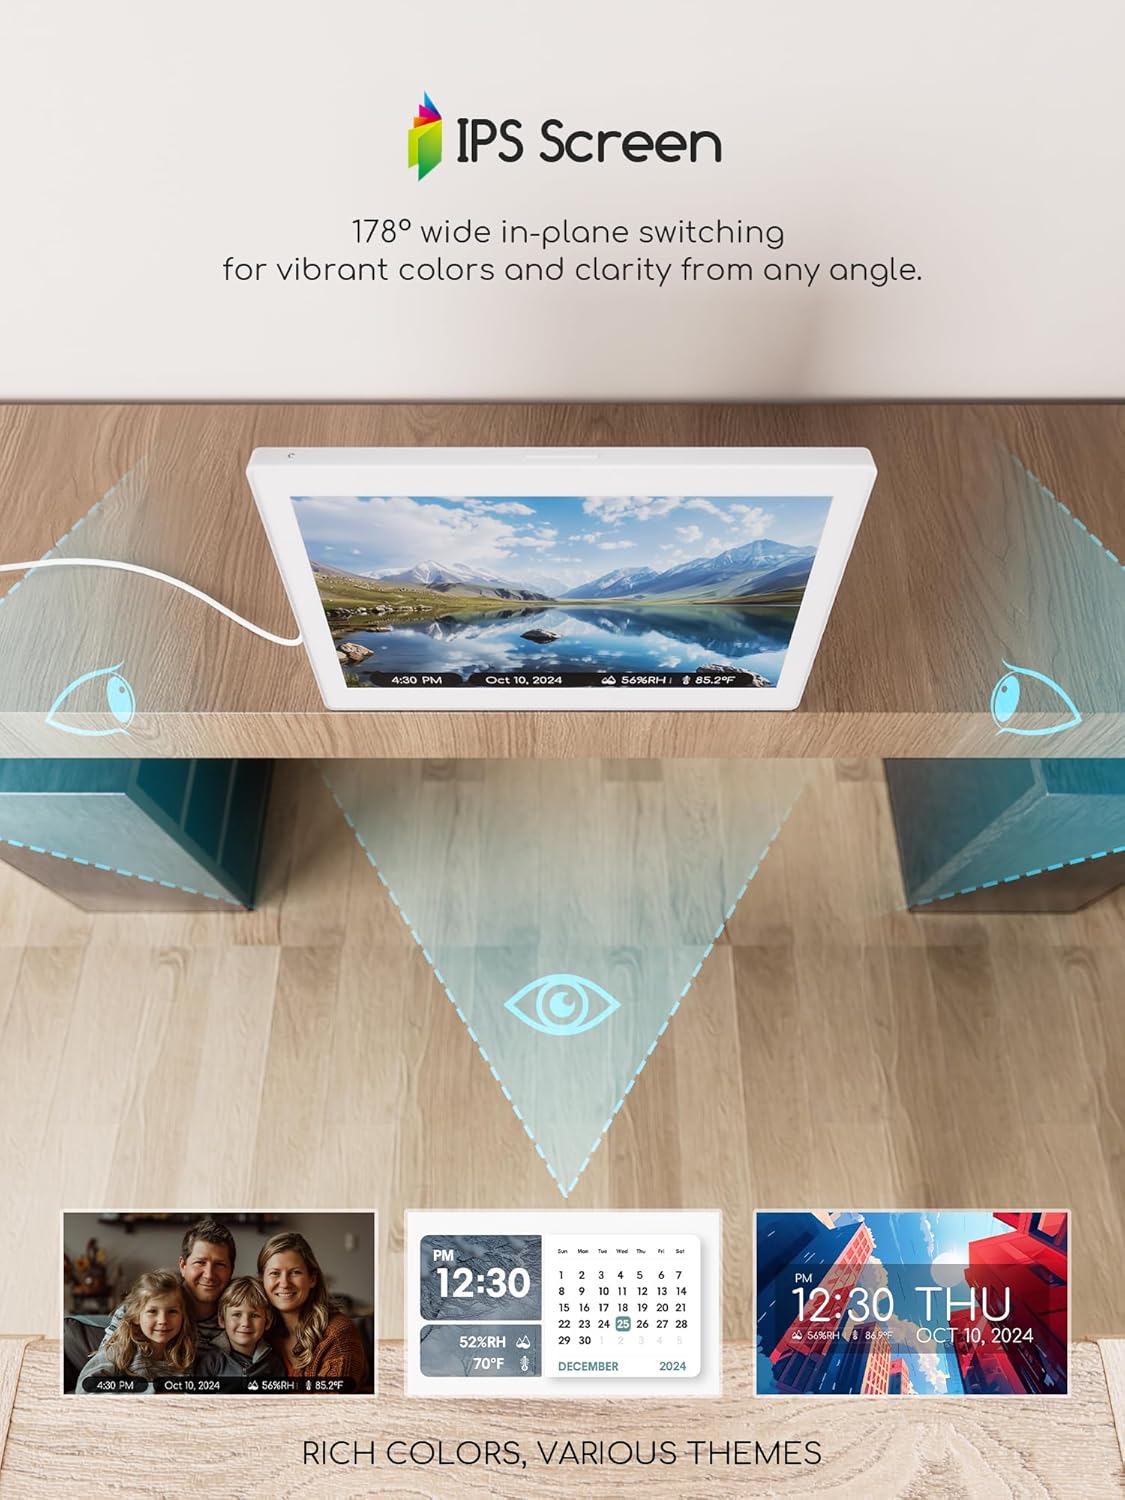
Figure 3: Brightness Settings Menu
3. Operating Instructions
3.1 Navigating the Menu
The clock features intuitive side buttons for navigation:
- Up/Down Arrows: Scroll through menu options or adjust values.
- Left/Right Arrows: Change specific settings within an option (e.g., language, theme).
- Select Button: Confirm a selection or enter a sub-menu.
- Back Button: Return to the previous menu or exit a setting.

Figure 4: Main Menu Interface
3.2 Display Themes
The clock offers 12 distinct display themes to suit your preference:
- From the main menu, select Themes.
- Browse through the 12 available themes using the Left/Right arrow buttons.
- Press Select to apply your chosen theme.

Figure 5: Available Display Themes
Some themes allow for custom colors and time formats, enhancing personalization.
3.3 Setting Alarms and Reminders
The clock supports up to 20 alarms and 20 reminders for various events:
- From the main menu, select Alarms or Schedule.
- To add a new alarm/reminder, select Add new alarm/event.
- Configure the time, repeat frequency (e.g., daily, specific days), label (e.g., Medication, Birthday), ringtone (18 options), and volume.
- For reminders, choose from predefined types (Medication, Daily activity, Visit, Entertainment, Birthday/Holiday) or customize your own.

Figure 6: Reminder Display
3.4 Brightness Adjustment
Adjust the display brightness for optimal viewing in any environment:
- From the main menu, select Brightness.
- Choose from:
- Manual Settings: Set a fixed brightness level (10% to 100%).
- Auto Dimming: The clock automatically adjusts brightness based on ambient light.
- Time Period: Set different brightness levels for day and night periods.

Figure 7: Brightness Adjustment Options
3.5 Language Selection
The clock supports multiple languages for its interface:
- From the main menu, select Settings, then Language.
- Use the Left/Right arrow buttons to select your preferred language (e.g., English, French, Italian, German, Spanish, Japanese).
- Press Select to confirm.

Figure 8: Supported Languages
3.6 Photo Album Functionality
Transform your clock into a digital photo frame:
- Insert a USB flash drive or TF card (up to 64GB, not included) containing your photos into the designated port on the side of the clock.
- From the main menu, navigate to Album.
- The clock will display your photos in a slideshow.
Figure 9: IPS Screen for Photo Display
4. Maintenance
- Cleaning: Use a soft, dry cloth to clean the display and casing. Avoid abrasive cleaners or solvents.
- Placement: Place the clock on a stable, flat surface or mount it securely to a wall. Avoid direct sunlight or extreme temperatures.
- Power: Always use the provided power adapter. Disconnect power during extended periods of non-use.
5. Troubleshooting
| Problem | Possible Cause | Solution |
|---|---|---|
| Clock does not power on. | No power connection or faulty adapter. | Ensure power adapter is securely plugged into the clock and a working outlet. Try a different outlet. |
| Display is too dim or too bright. | Brightness settings are incorrect. | Adjust brightness settings in the menu (Manual, Auto Dimming, or Time Period). |
| Time/Date is incorrect. | Manual setting error or Daylight Saving Time issue. | Go to Date & Time settings to manually correct or verify Daylight Saving Time region. |
| Alarms/Reminders not sounding. | Alarm/Reminder is off or volume is too low. | Check alarm/reminder settings to ensure they are activated and volume is adequate. |
6. Specifications
- Model: CR1026
- Screen Size: 10.1 Inches
- Display Type: IPS Screen
- Product Dimensions: 14.01 x 1.5 x 7.4 inches
- Item Weight: 1.46 pounds
- Power Source: AC Adapter Powered (5V 2A recommended)
- Battery Backup: Internal battery for settings retention (not for portable use)
- Storage Support: USB Flash Drive, TF Card (up to 64GB)
- Languages: English, French, Italian, German, Spanish, Japanese
- Alarms: Up to 20 settings
- Reminders: Up to 20 settings
- Themes: 12 customizable display themes
- Temperature/Humidity: Built-in sensors for display
- Manufacturer: Raynic Electronics
- Country of Origin: China
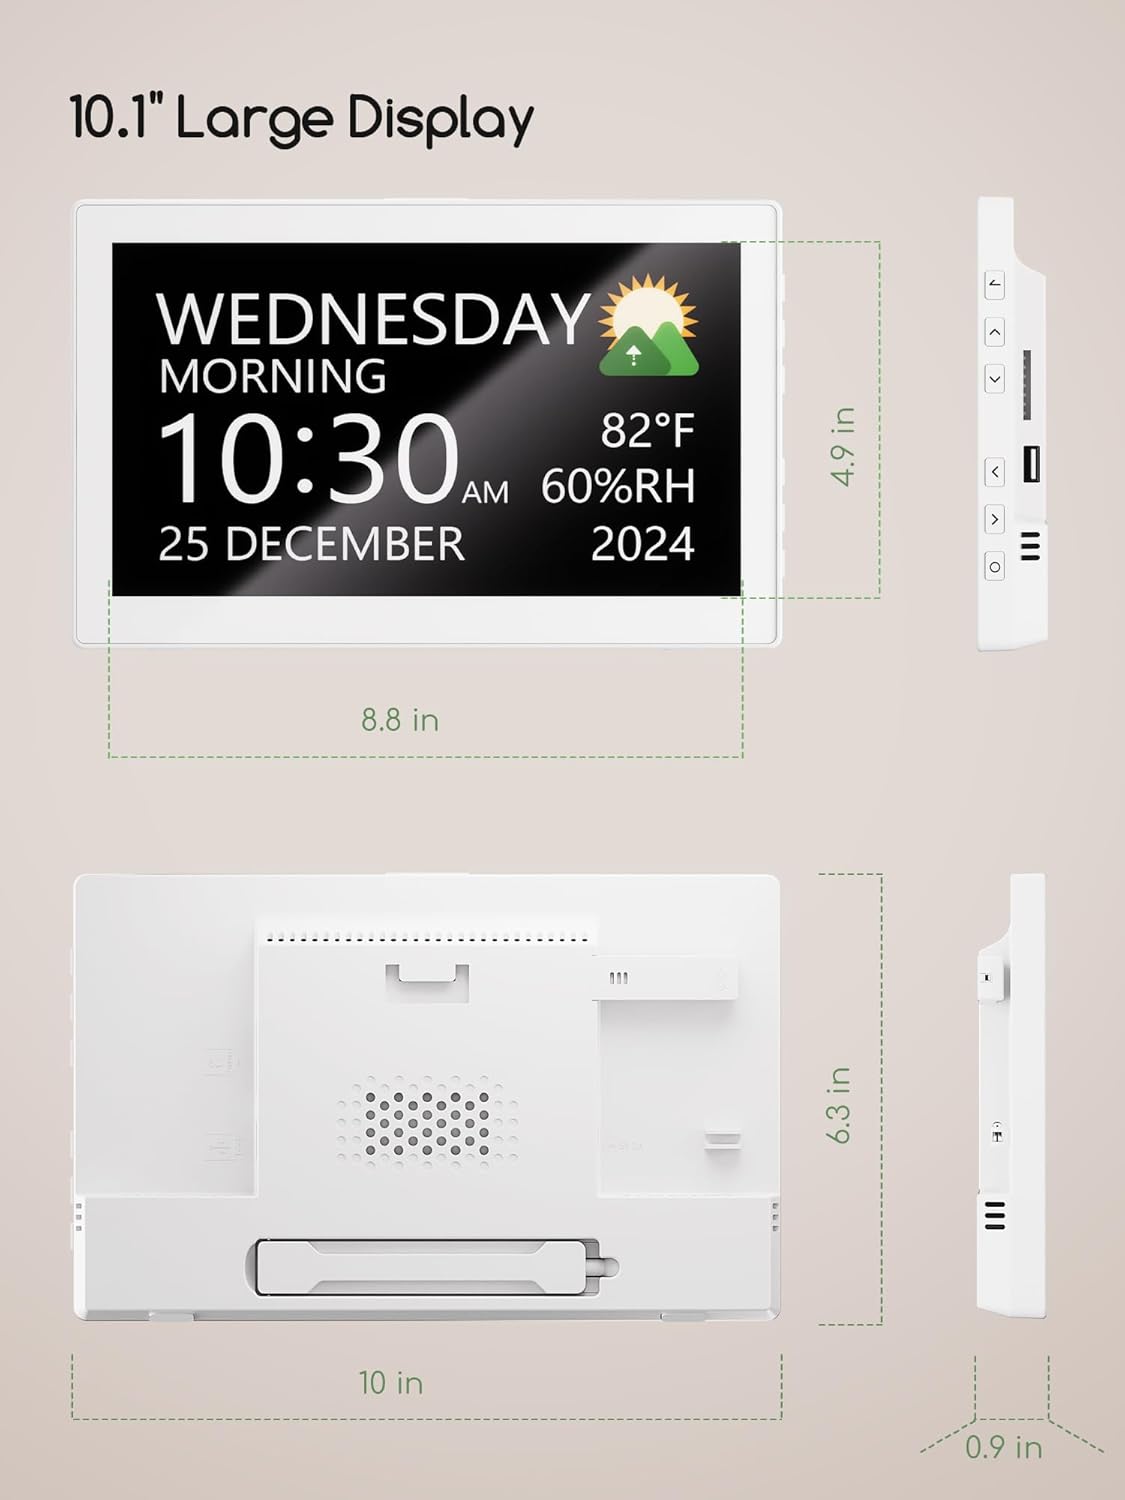
Figure 10: Product Dimensions
7. Warranty and Support
7.1 Return Policy
This product is subject to a 30-day refund/replacement policy from the date of purchase. Please refer to your retailer's specific return guidelines for detailed instructions.
7.2 Customer Support
For any questions, technical assistance, or warranty claims, please contact Raynic customer support through their official website or the retailer where the product was purchased. Keep your purchase receipt as proof of purchase.
For more information, visit the official Raynic Store: Raynic Store on Amazon
