1. Introduction
Welcome to the user manual for your MOTOQUEEN Pinch Rollers Assembly, designed specifically for Pioneer RT-909 and RT-901 Reel to Reel Tape Decks. This manual provides essential information on the product's features, installation, maintenance, and specifications to ensure optimal performance and longevity of your tape deck's transport mechanism.
2. Safety Information
Please read and understand the following safety guidelines before handling or installing the pinch rollers. Improper handling can lead to damage to the product or your equipment.
- Always disconnect power to your Pioneer RT-909/901 tape deck before attempting any installation or maintenance.
- Handle components with care to avoid damage to delicate parts.
- Keep small parts away from children.
- If you are unsure about any step, consult a qualified technician.
3. Product Overview
The MOTOQUEEN Pinch Rollers Assembly is a high-quality replacement part designed to restore the precise tape handling of your Pioneer RT-909 or RT-901 reel to reel tape deck. The pinch rollers are crucial for maintaining consistent tape speed and tension, ensuring optimal audio playback and recording.
Key Features:
- Improved Performance: Each roller is precisely ground on a pulley for excellent impact and float, contributing to stable tape movement.
- High-Quality Materials: Features a durable bronze core made of copper and a wear-resistant rubber cap, enhancing service life and stability.
- Direct Fitment: Specifically designed for Pioneer RT-909 and RT-901 Reel to Reel Tape Decks.
- Easy Installation: Engineered for straightforward replacement of old or worn-out pinch rollers.

Figure 3.1: MOTOQUEEN Pinch Rollers Assembly with included hex wrench.

Figure 3.2: Detailed view of the high-quality materials used in the pinch rollers, highlighting the copper bronze core and rubber cap.
4. Installation Guide
This section provides step-by-step instructions for replacing the pinch rollers on your Pioneer RT-909 or RT-901 tape deck. It is recommended to refer to your tape deck's service manual for specific disassembly procedures if needed.
Tools Required:
- Small Phillips head screwdriver (if required for cover removal)
- Included L-shaped hex wrench
- Clean cloth
Installation Steps:
- Prepare the Tape Deck: Ensure the tape deck is powered off and unplugged from the electrical outlet.
- Access the Pinch Rollers: Carefully open the tape deck's front panel or remove any covers necessary to gain access to the existing pinch rollers. Refer to your tape deck's service manual for precise instructions on accessing the transport mechanism.
- Remove Old Pinch Rollers: Locate the current pinch rollers. They are typically held in place by a retaining clip or screw. Use the appropriate tool (possibly the included hex wrench or a small screwdriver) to carefully remove the old rollers. Note their orientation for correct installation of the new ones.
- Clean the Area: Before installing the new rollers, gently clean any dust, debris, or old lubricant from the shafts and surrounding areas where the pinch rollers sit. Use a clean, lint-free cloth.
- Install New Pinch Rollers: Carefully place the new MOTOQUEEN pinch rollers onto their respective shafts. Ensure they are seated correctly and rotate freely. Secure them using the original retaining clips or screws. The included L-shaped hex wrench may be used for tightening if applicable.
- Verify Installation: Gently rotate the pinch rollers by hand to ensure they move smoothly and are properly aligned.
- Reassemble: Replace any covers or panels that were removed during the process.
- Test Functionality: Plug in and power on your tape deck. Load a tape and test playback and fast-forward/rewind functions to ensure the new pinch rollers are operating correctly.
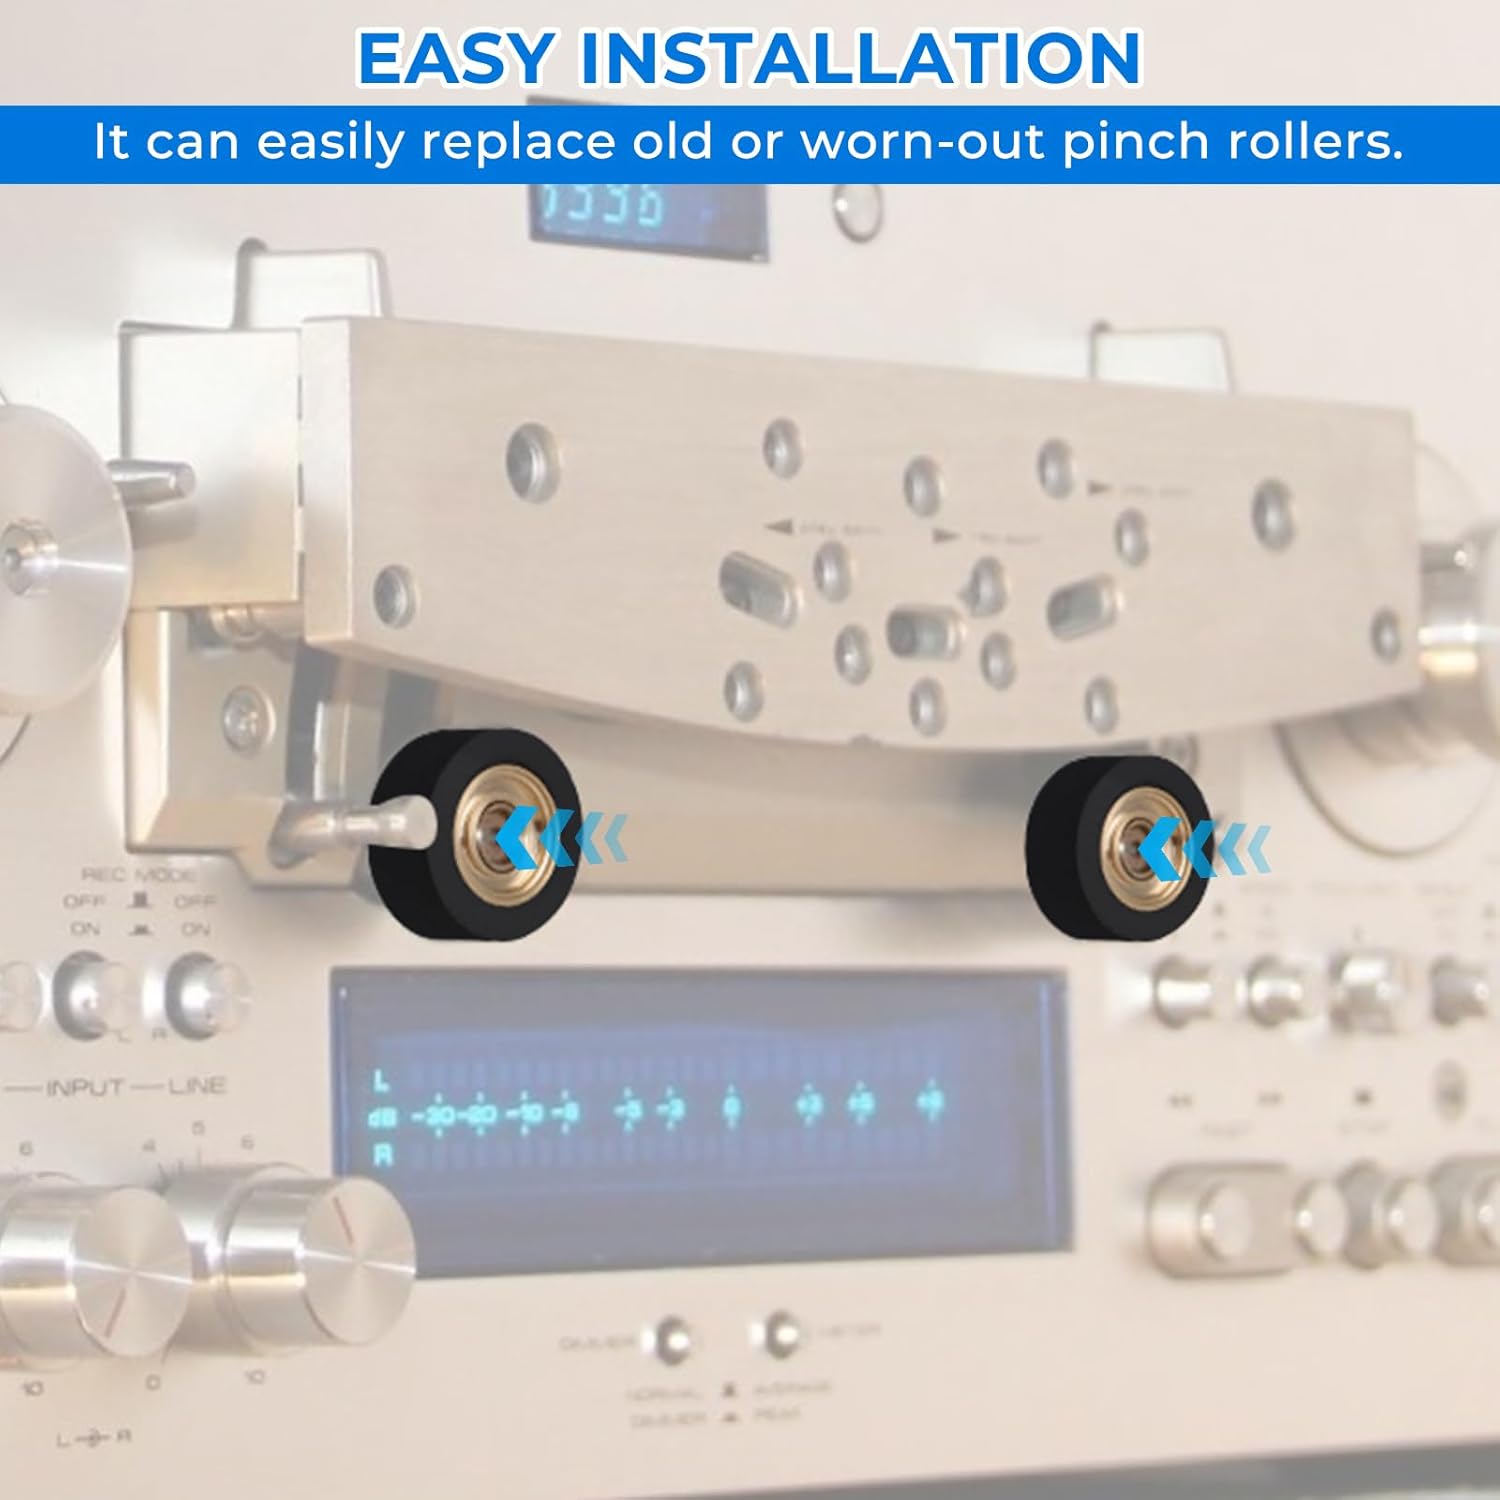
Figure 4.1: Visual representation of the straightforward installation process for the pinch rollers.

Figure 4.2: The pinch rollers are designed for precise fitment in Pioneer RT-909 and RT-901 tape decks, as indicated by the highlighted areas.
5. Operation (Functionality)
Once installed, the MOTOQUEEN Pinch Rollers Assembly will work in conjunction with your tape deck's capstan to accurately pull the magnetic tape across the tape heads. Proper functioning of the pinch rollers is critical for:
- Stable Tape Speed: Ensuring consistent playback and recording speed, preventing wow and flutter.
- Optimal Tape Path: Guiding the tape smoothly and precisely over the heads, reducing wear and improving audio quality.
- Reduced Tape Slippage: The high-quality rubber provides excellent grip, preventing tape slippage during operation.
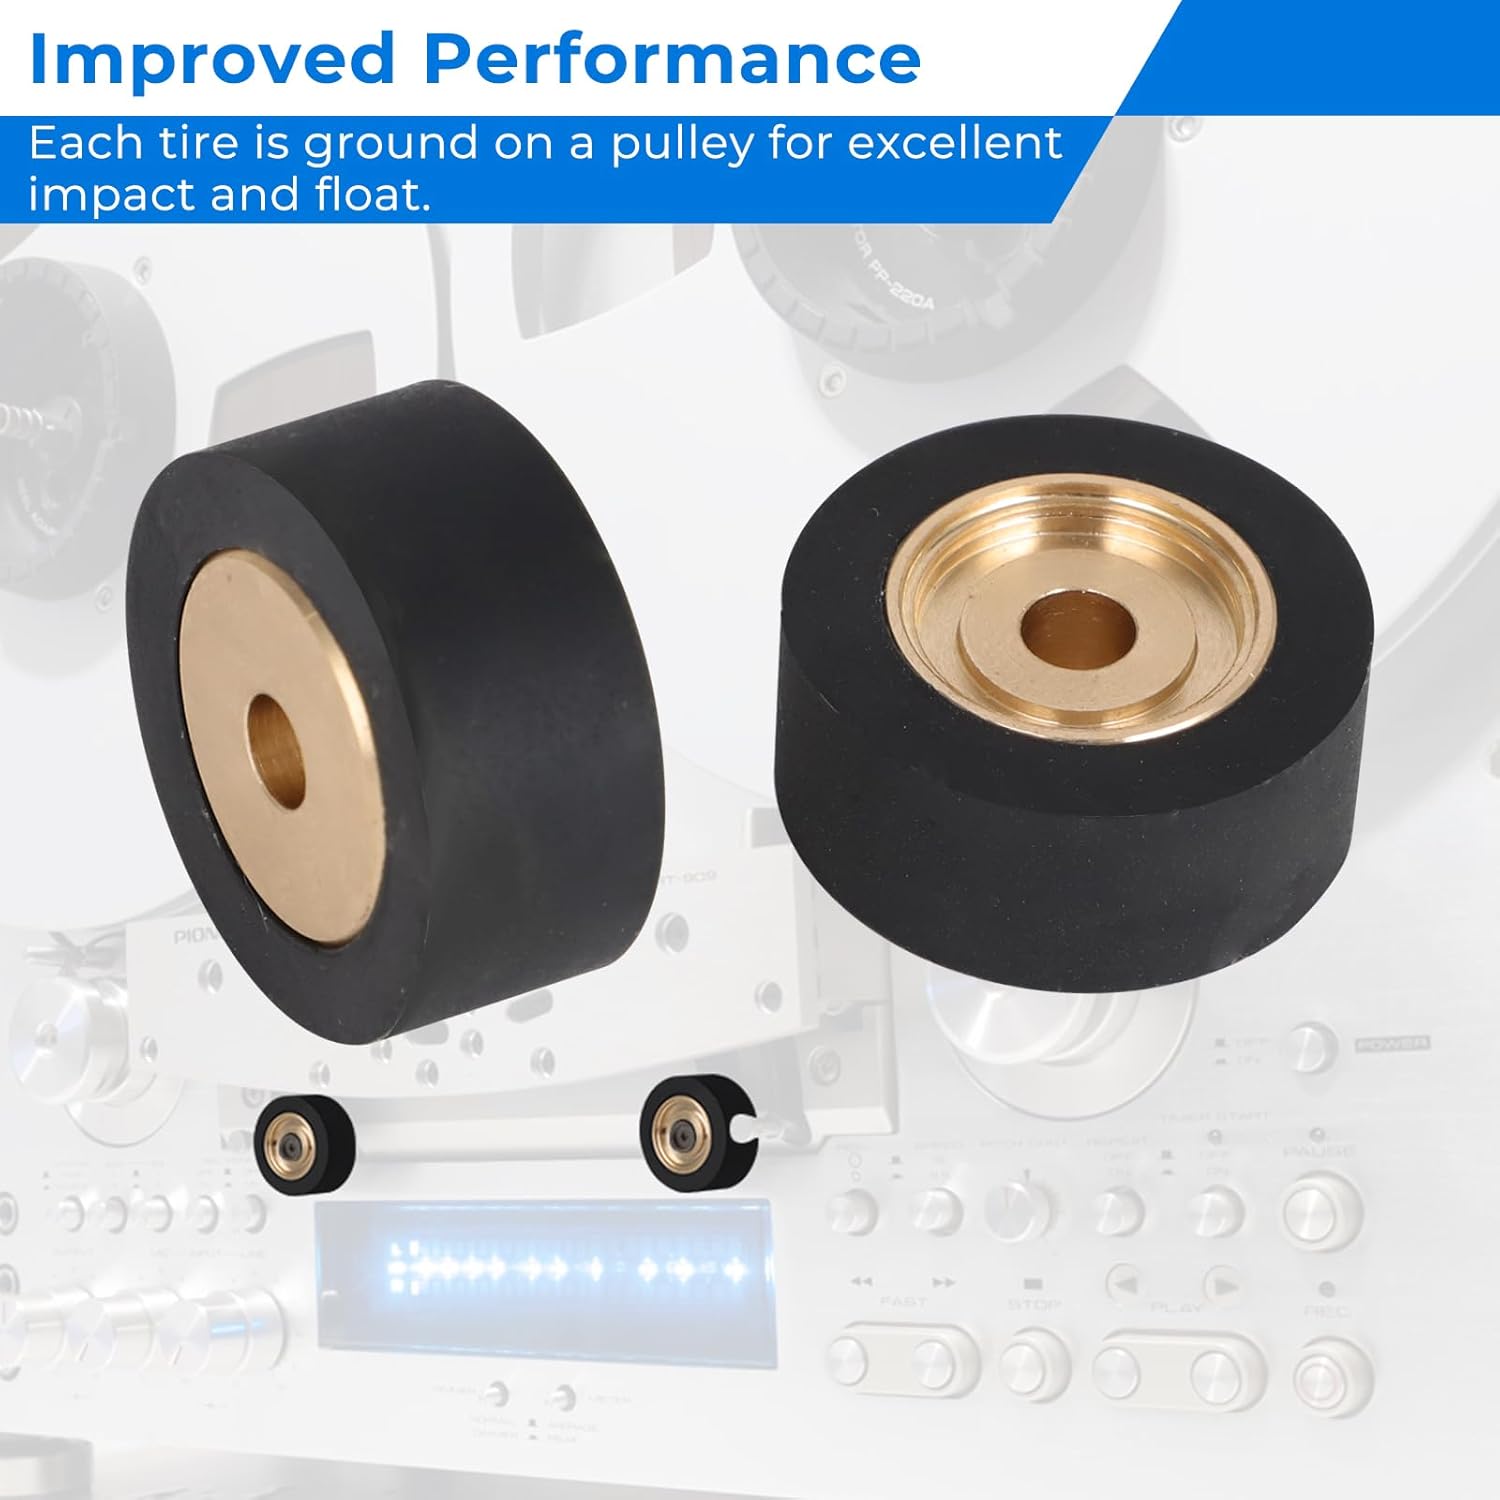
Figure 5.1: The new pinch rollers contribute to improved performance and stability of your tape deck's transport system.
6. Maintenance
To ensure the longevity and continued performance of your MOTOQUEEN Pinch Rollers Assembly, consider the following maintenance tips:
- Regular Cleaning: Periodically clean the rubber surface of the pinch rollers with a cotton swab lightly dampened with isopropyl alcohol. This removes tape residue and dust that can accumulate and affect grip.
- Avoid Harsh Chemicals: Do not use abrasive cleaners or solvents on the rubber, as this can degrade the material.
- Inspect for Wear: Over time, rubber can harden or crack. Regularly inspect the rollers for signs of wear, such as flattening, cracking, or excessive shine, which may indicate a need for replacement.
- Proper Storage: If the tape deck is to be stored for an extended period, ensure the tape path is clean and free of tape.
7. Troubleshooting
If you experience issues with tape transport after installing the new pinch rollers, consider the following common troubleshooting steps:
- Tape Slippage/Poor Grip: Ensure the rollers are clean. If the issue persists, verify they are correctly seated and secured.
- Tape Wrinkling/Jamming: Check for proper alignment of the rollers. Ensure no other components in the tape path are obstructing the tape.
- Incorrect Speed: While pinch rollers contribute to speed stability, incorrect speed can also be due to capstan motor issues or belt wear. Ensure the capstan shaft is clean.
- Unusual Noise: Check for any foreign objects near the rollers or if the rollers are rubbing against other components.
If problems persist, it is advisable to consult a qualified audio technician or refer to the detailed service manual for your Pioneer RT-909/901 tape deck.
8. Specifications
| Attribute | Value |
|---|---|
| Product Name | Pinch Rollers Assembly |
| Brand | MOTOQUEEN |
| Compatibility | Pioneer RT-909 / RT-901 Reel to Reel Tape Deck |
| Materials | Bronze (Copper Core), Rubber (Cap) |
| Package Dimensions | 3.15 x 1.97 x 1.18 inches |
| Item Weight | 1.76 ounces |
| Manufacturer | MOTOQUEEN |
| Country of Origin | China |
| ASIN | B0DSBC493X |
9. Warranty and Support
Warranty Information:
MOTOQUEEN products are manufactured to high standards. For specific warranty details regarding your Pinch Rollers Assembly, please refer to the product packaging or contact the seller/manufacturer directly. Keep your proof of purchase for any warranty claims.
Customer Support:
If you have any questions, require technical assistance, or encounter issues not covered in this manual, please contact MOTOQUEEN customer support through the retailer where you purchased the product or visit the official MOTOQUEEN brand store online.