
1. Introduction
Thank you for choosing the P.I.T. PHP170-C1 High Pressure Washer. This manual provides essential information for the safe and efficient operation, maintenance, and troubleshooting of your new pressure washer. Please read this manual thoroughly before first use and keep it for future reference. Proper use and maintenance will ensure a long and reliable service life for your appliance.
2. Safety Instructions
WARNING: When using this product, basic precautions should always be followed to reduce the risk of injury, electric shock, and fire.
- Always wear appropriate personal protective equipment, including safety glasses, hearing protection, and protective footwear.
- Never direct the water jet at people, pets, electrical devices, or the appliance itself. High-pressure jets can be dangerous if misused.
- Ensure the power supply voltage matches the rating plate on the pressure washer. Use a properly grounded outlet.
- Do not operate the pressure washer if the power cord or other essential parts are damaged.
- Keep children and pets away from the operating area.
- Always disconnect the power supply before performing any maintenance or cleaning.
- Do not use the pressure washer in explosive atmospheres, such as in the presence of flammable liquids, gases, or dust.
- Ensure all connections are secure and leak-free before starting the unit.
3. Package Contents
Carefully unpack all items and ensure you have received all components. If any parts are missing or damaged, contact your retailer immediately.

Figure 3.1: All components included with the P.I.T. PHP170-C1 High Pressure Washer. This image shows the main unit, high-pressure hose, spray gun, various nozzles, detergent tank, and other accessories.
- P.I.T. PHP170-C1 High Pressure Washer Unit
- High-Pressure Hose
- Spray Gun with Lance
- Adjustable Nozzle
- Detergent Tank
- Water Inlet Connector
- Nozzle Cleaning Pin
- User Manual
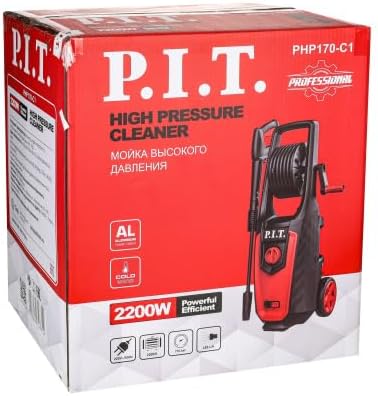
Figure 3.2: The packaging box for the P.I.T. PHP170-C1 High Pressure Washer, indicating key features and model number.
4. Product Overview
Familiarize yourself with the main parts of your pressure washer before operation.

Figure 4.1: Detail view of the water inlet connection point and the main power switch on the pressure washer unit.
- Main Unit: Houses the motor and pump.
- High-Pressure Outlet: Connection point for the high-pressure hose.
- Water Inlet: Connection point for the garden hose.
- ON/OFF Switch: Controls the power to the unit.
- Detergent Tank: For applying cleaning solutions.
- Hose Reel: For convenient storage of the high-pressure hose.
- Wheels and Handle: For easy portability.
5. Setup
5.1 Assembly
- Attach the Handle: Slide the handle into the designated slots on the main unit until it clicks into place.
- Attach the Wheels: Secure the wheels to the axle using the provided pins or fasteners.
- Mount the Hose Reel: If not pre-assembled, attach the hose reel to the unit according to the instructions in the separate assembly diagram (if provided).
5.2 Water Connection
- Connect a standard garden hose (not supplied) to the water inlet connector on the pressure washer. Ensure the connection is tight to prevent leaks.
- Connect the other end of the garden hose to a water tap.
- Turn on the water tap completely to ensure a steady water supply to the pressure washer.
- Connect the high-pressure hose to the high-pressure outlet on the unit and to the spray gun. Ensure all connections are secure.
5.3 Power Connection
Ensure the ON/OFF switch is in the "OFF" position before plugging in the unit.
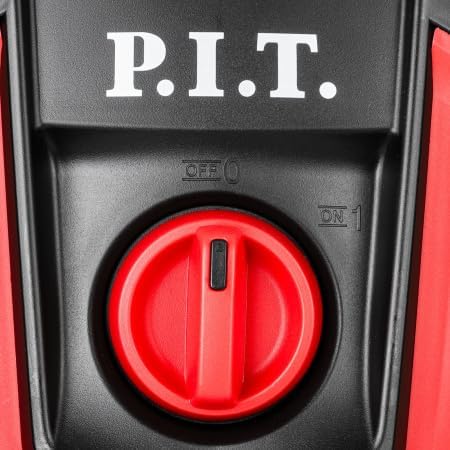
Figure 5.1: The main power switch with "OFF" and "ON" positions clearly marked.
Plug the power cord into a grounded electrical outlet. Do not use extension cords unless absolutely necessary, and if so, ensure it is rated for outdoor use and the correct gauge for the power requirements of the pressure washer.
6. Operating Instructions
6.1 Starting the Pressure Washer
- Ensure all water and power connections are secure.
- Turn on the water supply completely.
- Squeeze the trigger on the spray gun to purge air from the system until a steady stream of water emerges. This prevents air pockets from damaging the pump.
- Turn the ON/OFF switch to the "ON" position. The motor will start.
- Release the trigger to allow the motor to build pressure.
6.2 Using Detergent (if applicable)

Figure 6.1: The transparent detergent tank, showing its placement on the unit.
- Fill the integrated detergent tank with a pressure washer safe detergent. Do not use bleach or abrasive cleaners.
- Attach the appropriate low-pressure nozzle (often a black or wide-spray nozzle) to the spray gun. High-pressure nozzles will not draw detergent.
- Operate the pressure washer. The detergent will be mixed with the water at a low pressure.
- After applying detergent, switch to a high-pressure nozzle and rinse the surface thoroughly.
6.3 Shutting Down and Storage
- Turn the ON/OFF switch to the "OFF" position.
- Turn off the water supply.
- Squeeze the trigger on the spray gun to release any remaining pressure in the system.
- Disconnect the garden hose and high-pressure hose.
- Drain all water from the pump and hoses to prevent freezing damage.
- Store the pressure washer in a dry, frost-free location.
7. Maintenance
Regular maintenance ensures optimal performance and extends the life of your pressure washer.
- Nozzle Cleaning: Use the provided nozzle cleaning pin to clear any blockages from the nozzle tips.
- Water Inlet Filter: Regularly check and clean the water inlet filter to prevent debris from entering the pump. Remove the filter, rinse it under running water, and reinsert.
- Hose and Cord Inspection: Periodically inspect the high-pressure hose, power cord, and water supply hose for any signs of damage, cuts, or leaks. Replace damaged parts immediately.
- Winterization: If storing the unit in an area where temperatures may drop below freezing, use a pump protector or antifreeze solution to prevent damage to the pump. Follow the instructions on the pump protector product.
8. Troubleshooting
| Problem | Possible Cause | Solution |
|---|---|---|
| Motor does not start | No power supply; ON/OFF switch in OFF position; Thermal overload activated. | Check power connection and outlet; Turn switch to ON; Allow motor to cool down. |
| Low pressure | Insufficient water supply; Clogged nozzle; Air in pump; Leaks in hose connections. | Ensure full water supply; Clean nozzle; Purge air from system; Tighten connections. |
| Water leaks | Loose connections; Damaged O-rings or seals; Cracked hose. | Tighten all connections; Replace damaged O-rings/seals; Replace hose. |
| Detergent not drawing | Wrong nozzle used; Detergent tank empty; Clogged detergent intake. | Use low-pressure nozzle; Refill tank; Clean detergent intake. |
9. Specifications
- Model: PHP170-C1
- Power Source: Electric
- Maximum Pressure: 170 Bar
- Flow Rate: 450 Liters/Hour
- Power Consumption: 2200 Watts
- Item Weight: 7.5 kg
10. Warranty and Support
This P.I.T. product is covered by a manufacturer's warranty. Please refer to the warranty card included in your package for specific terms and conditions. For technical support, spare parts, or warranty claims, please contact your retailer or the authorized service center. Keep your purchase receipt as proof of purchase.
For further assistance, please visit the official P.I.T. website or contact customer service.