Introduction
Thank you for choosing the Towallmark Portable Countertop Dishwasher. This manual provides essential information for the safe and efficient operation, maintenance, and troubleshooting of your appliance. Please read it thoroughly before use and keep it for future reference.
Safety Information
- Always ensure the dishwasher is placed on a stable, level surface.
- Do not operate the dishwasher if the power cord or plug is damaged.
- Keep children and pets away from the dishwasher during operation.
- Use only dishwasher-safe detergents.
- Do not open the door during a wash cycle, especially during hot water phases.
- Unplug the appliance from the power outlet when not in use or before cleaning.
What's in the Box
Your Towallmark Portable Countertop Dishwasher package includes the following items:
- Portable Countertop Dishwasher Unit
- Cutlery Basket
- Basket (main dish rack)
- Pipe Hoop (clamp for drain hose)
- Inlet Hose
- Drain Hose
- User Manual
- Cover (for top inlet when using faucet mode)

Setup
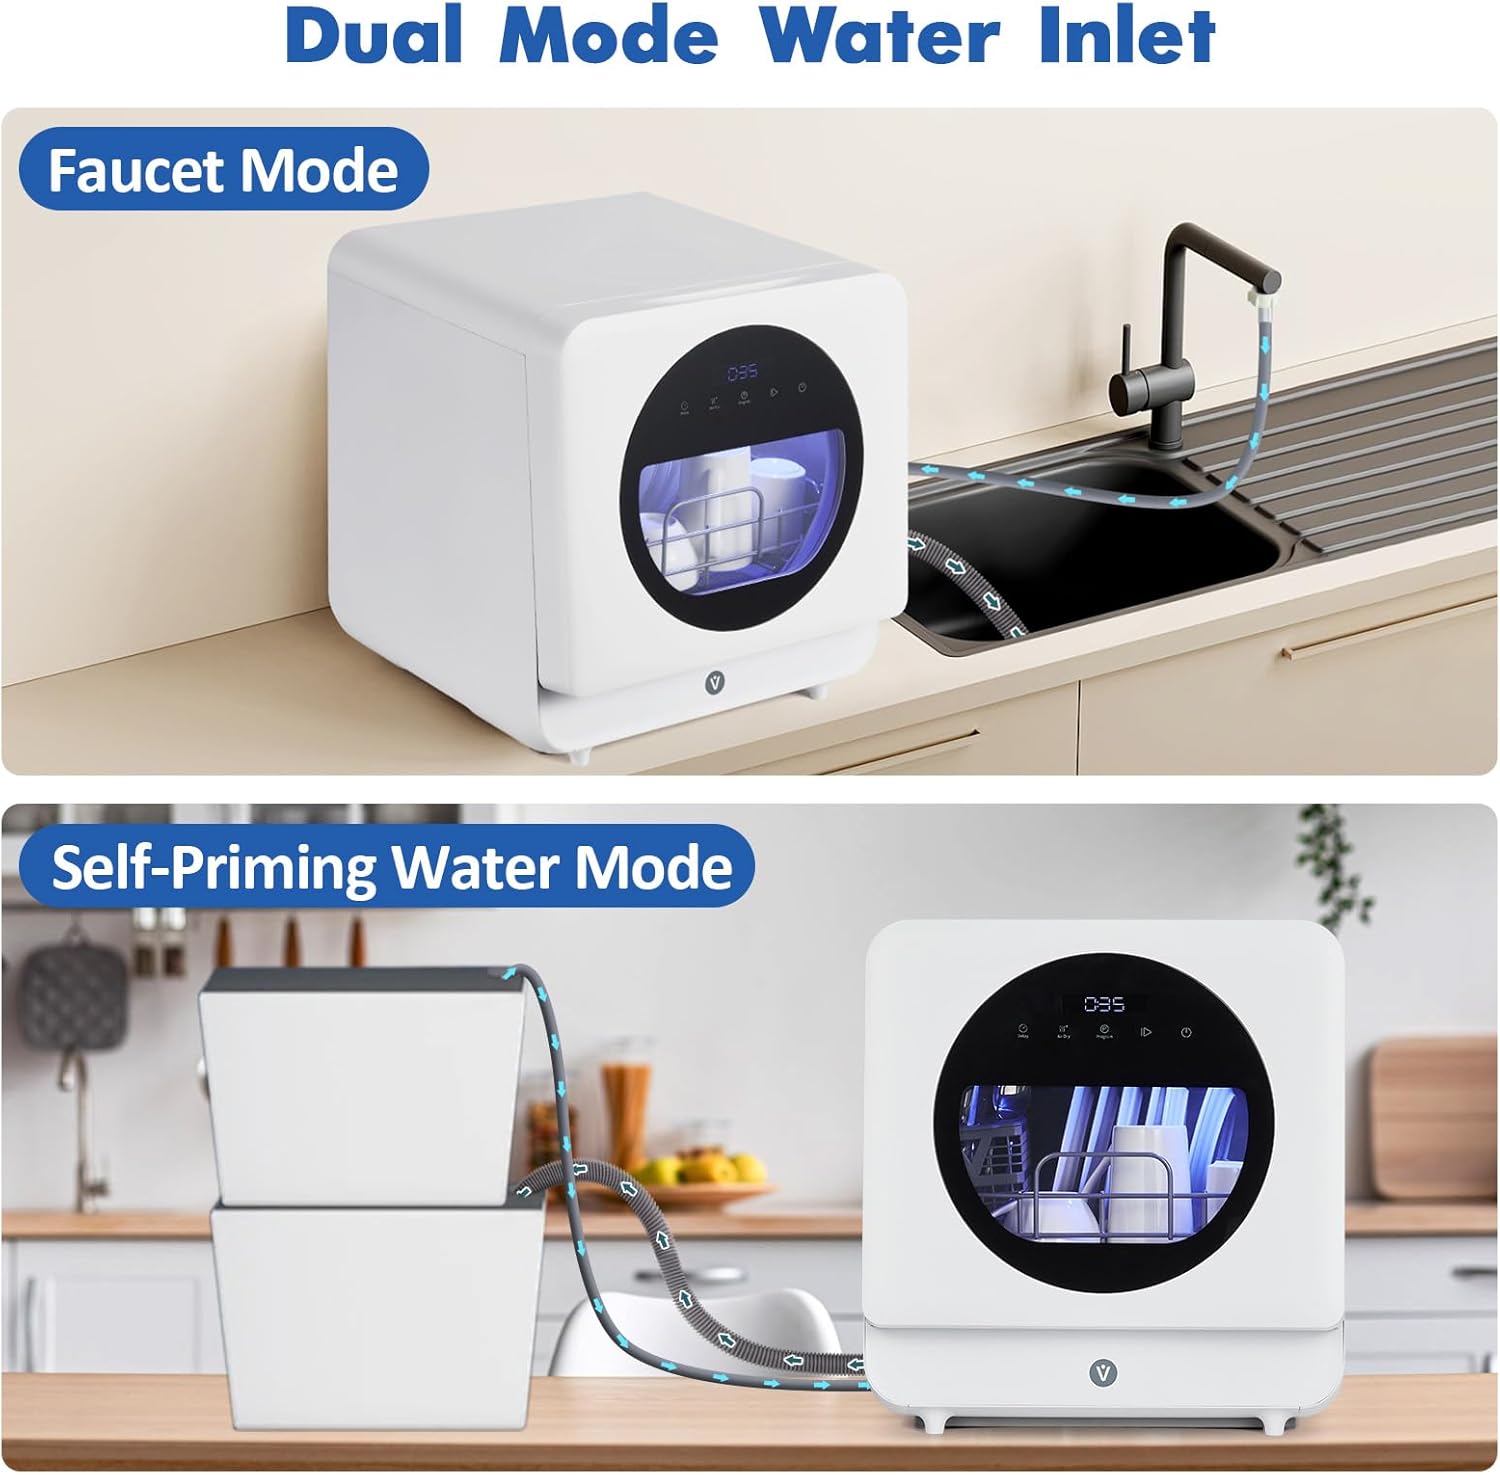
Your dishwasher offers two convenient water supply options: Faucet Mode and Self-Priming Water Mode.
1. Faucet Mode Setup
- Connect the Inlet Hose to the designated inlet port at the back of the dishwasher.
- Attach the other end of the Inlet Hose to your kitchen faucet. Ensure a secure connection to prevent leaks.
- Place the Drain Hose into your sink to allow wastewater to discharge. Use the provided pipe hoop to secure the hose.
- Turn on your faucet to supply water to the dishwasher.
2. Self-Priming Water Mode Setup (5.3L Built-in Water Tank)
- Ensure the top inlet cover is removed.
- Pour water into the top filling port using a pitcher or jug until the automatic water level indicator signals that the tank is full (usually indicated by a light or beep). The tank capacity is 5.3 liters.
- Place the Drain Hose into your sink or a suitable bucket to collect wastewater. Use the provided pipe hoop to secure the hose.
Video: Demonstration of the Towallmark Portable Dishwasher's no-plumbing setup and water filling process, highlighting its portability and ease of use.
Video: Overview of the AIRMSEN Countertop Dishwasher, showcasing its compact design, internal components, water tank filling, and various wash modes.
Operating Instructions
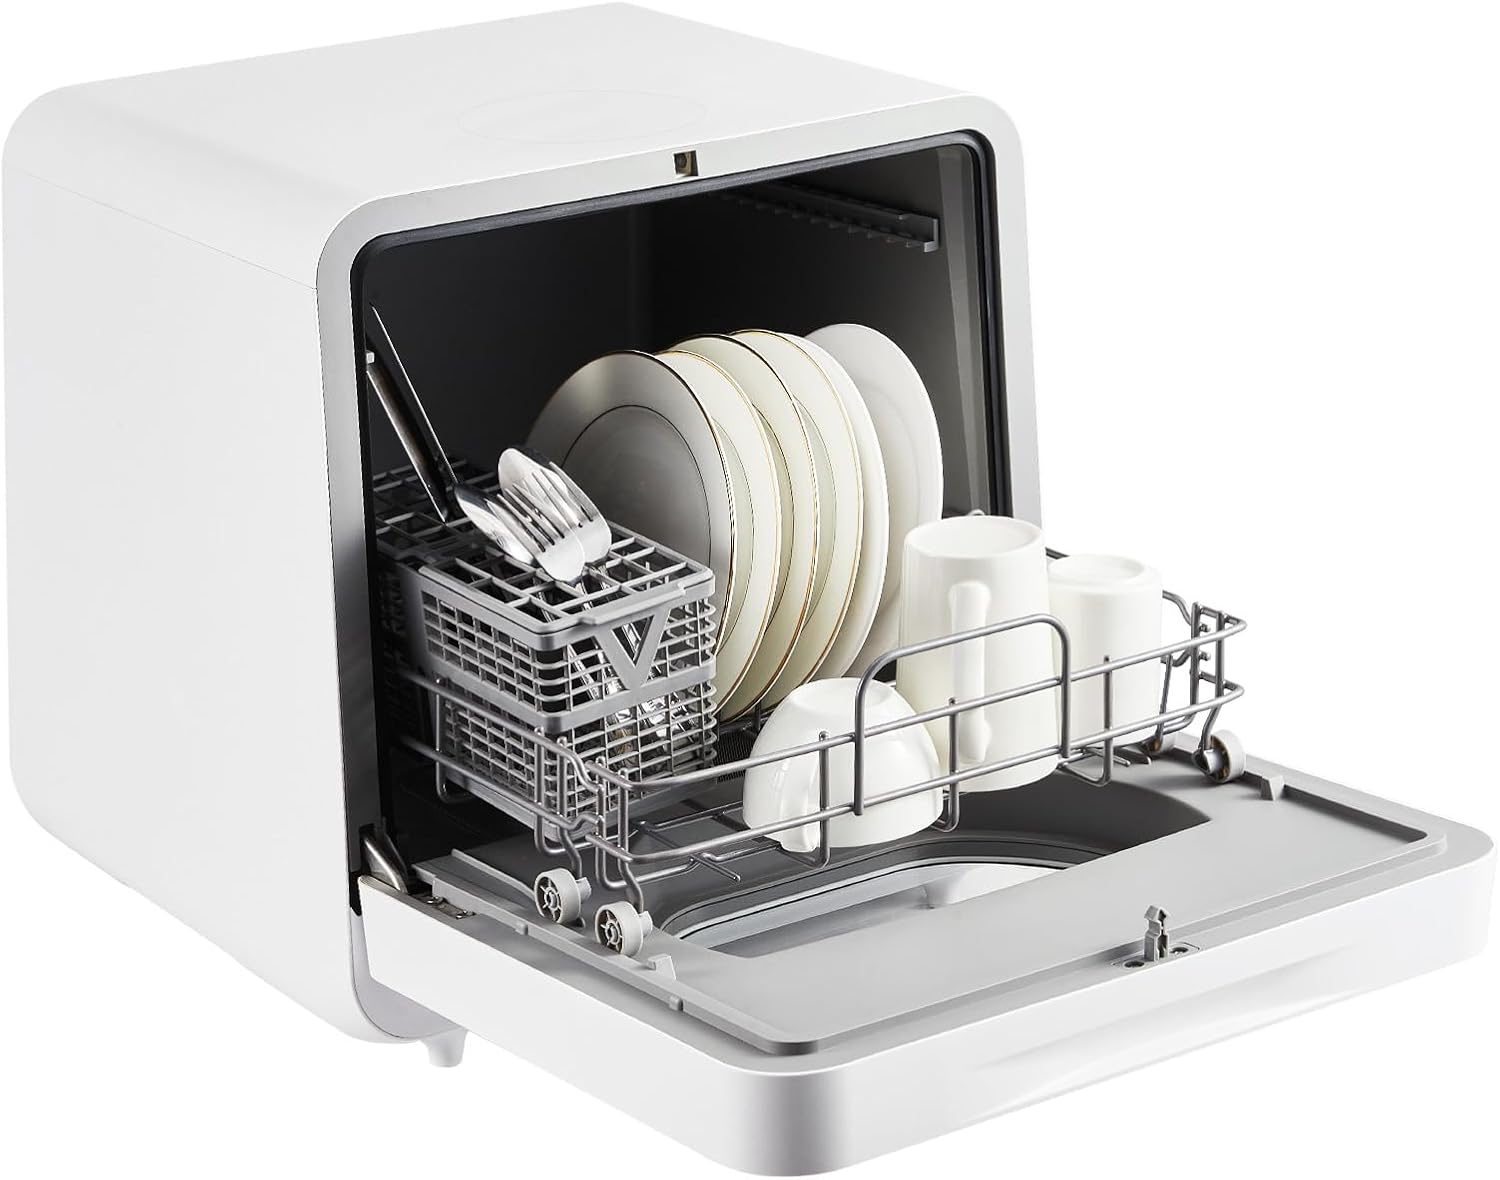
1. Loading Dishes
- Scrape off large food particles from dishes before loading.
- Place larger items like plates and bowls in the main basket.
- Use the cutlery basket for forks, spoons, and knives.
- Ensure dishes do not block the spray arms or detergent dispenser.
2. Adding Detergent
Add the recommended amount of dishwasher detergent (liquid or pod) to the dispenser located on the inner side of the door. Refer to the detergent manufacturer's instructions for precise dosage.
3. Selecting a Wash Program
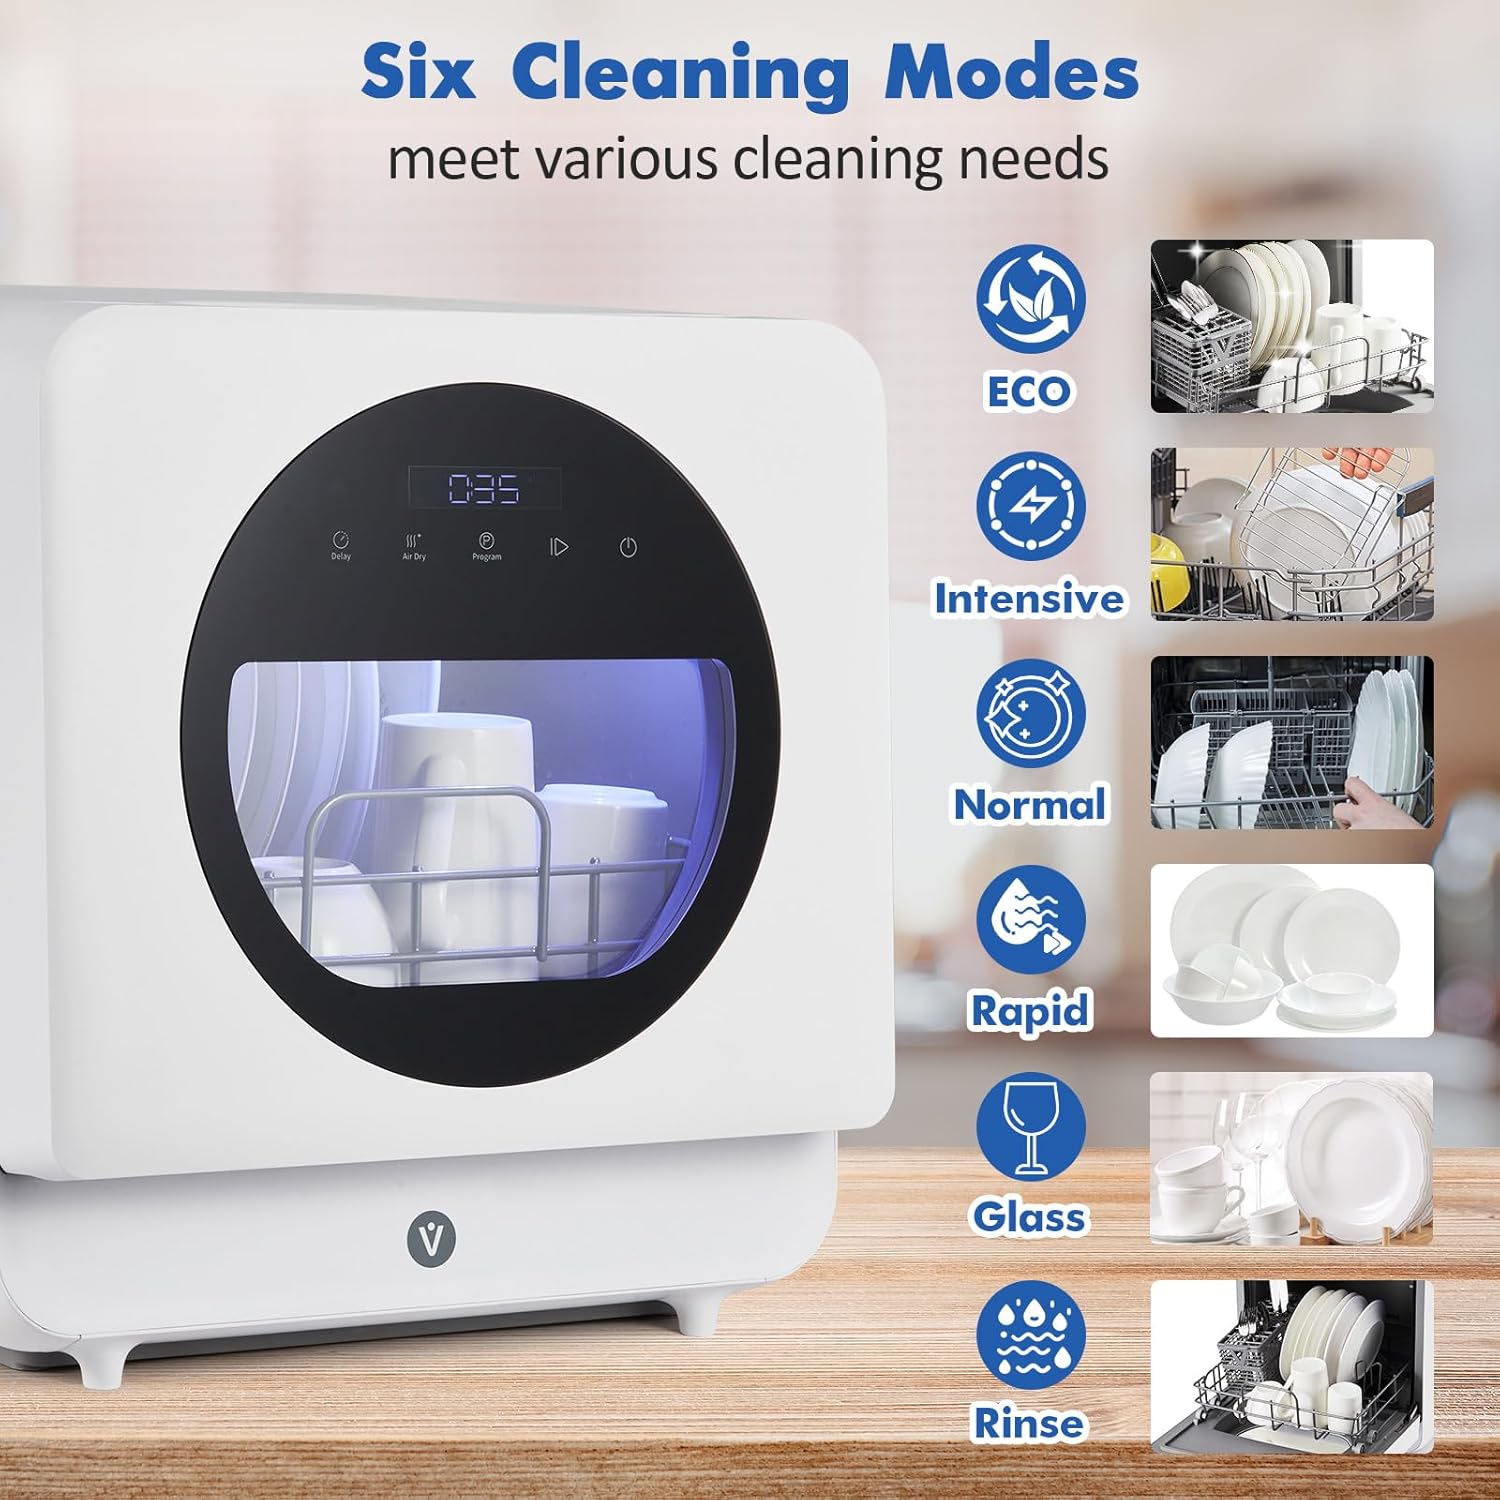
The dishwasher features 6 washing programs:
- Intensive: For heavily soiled items.
- Normal: For everyday dishware.
- Rapid: A quick wash cycle (approx. 10 minutes).
- ECO: Energy-efficient cycle.
- Glass: Gentle wash for delicate glassware.
- Rinse: For rinsing dishes without detergent.
Press the 'Program' button to cycle through the available options until your desired program is selected. The display will show the estimated cycle time.
4. Delayed Start Function
To set a delayed start, press the 'Delay' button repeatedly to choose a delay time from 1 to 24 hours. The dishwasher will automatically start the selected program after the set delay.
5. Hot Air Dry Function
The dishwasher features an efficient PTC hot air drying system that reaches temperatures up to 162°F (72°C). This function ensures dishes emerge spotless and odor-free through powerful air circulation. This is typically integrated into most wash cycles.

6. Start/Pause
Press the 'Start/Pause' button to begin the selected wash program. You can press it again to pause the cycle if needed, for example, to add forgotten items.
Maintenance
1. Cleaning the Filter
Regularly check and clean the filter located at the bottom of the dishwasher to prevent food debris buildup and ensure optimal performance. Twist to remove the filter, rinse it under running water, and remove any trapped particles. Reinsert securely.
2. General Cleaning
Wipe down the interior and exterior of the dishwasher with a soft, damp cloth after each use. Do not use abrasive cleaners or solvents.
3. Storing the Dishwasher
If storing the dishwasher for an extended period, ensure it is completely dry inside to prevent mold or odors. Leave the door slightly ajar to allow air circulation.
Troubleshooting
| Problem | Possible Cause | Solution |
|---|---|---|
| Dishwasher does not start | Power cord not plugged in; Door not closed properly; No water in tank (Self-Priming Mode); Faucet not turned on (Faucet Mode). | Check power connection; Ensure door latches securely; Fill water tank; Turn on faucet. |
| Dishes not clean | Filter clogged; Spray arms blocked; Insufficient detergent; Incorrect program selected. | Clean filter; Rearrange dishes; Add more detergent; Select appropriate wash program. |
| Water leaking | Hose connections loose; Drain hose improperly placed. | Check and tighten all hose connections; Ensure drain hose is securely placed in sink/bucket. |
| Dishwasher making unusual noise | Dishes obstructing spray arms; Foreign object in pump. | Rearrange dishes; Check and remove any foreign objects from the filter/pump area. |
Specifications
| Feature | Detail |
|---|---|
| Brand | Towallmark |
| Model Name | FEE7571APM |
| Voltage | 120V |
| Cycle Options | Intensive, Normal, Rapid, ECO, Glass, Rinse |
| Recommended Uses | Everyday dishware and glassware, heavily soiled items |
| Number of Settings | 6 |
| Item Weight | 31.9 pounds |
| Product Dimensions | 20.16"D x 19.96"W x 20.79"H |
| Annual Energy Consumption | 1000 Watts |
| Special Features | Portable |
| Capacity | 5 Liters (water tank) |
| Controls Type | Touch |
| Noise Level | 40 Decibels |
Warranty and Support
For warranty information, technical support, or service inquiries, please refer to the contact details provided in the included User Manual or visit the official Towallmark website. Keep your purchase receipt as proof of purchase for warranty claims.