1. Product Overview
This manual provides instructions for the installation, operation, and troubleshooting of the daydmaly Washer Latch Assembly, part numbers W11414731 and W11513248. This component is essential for the safe and proper functioning of your washing machine by ensuring the lid remains securely locked during operation.

Image 1.1: Overview of the Washer Latch Assembly, showing its design and connection points.

Image 1.2: The daydmaly Washer Latch Assembly with its wiring harness.
2. Product Specifications
- Part Numbers: W11414731, W11513248
- Replaces: DTL60003, DTL6000, 4964074, AP7002928, PD00073744, PS16543458, EAP16543458
- Package Dimensions: 6.06 x 5.16 x 1.65 inches
- Item Weight: 4.6 ounces
- Material: High-quality durable materials for stable signal transmission and longevity.
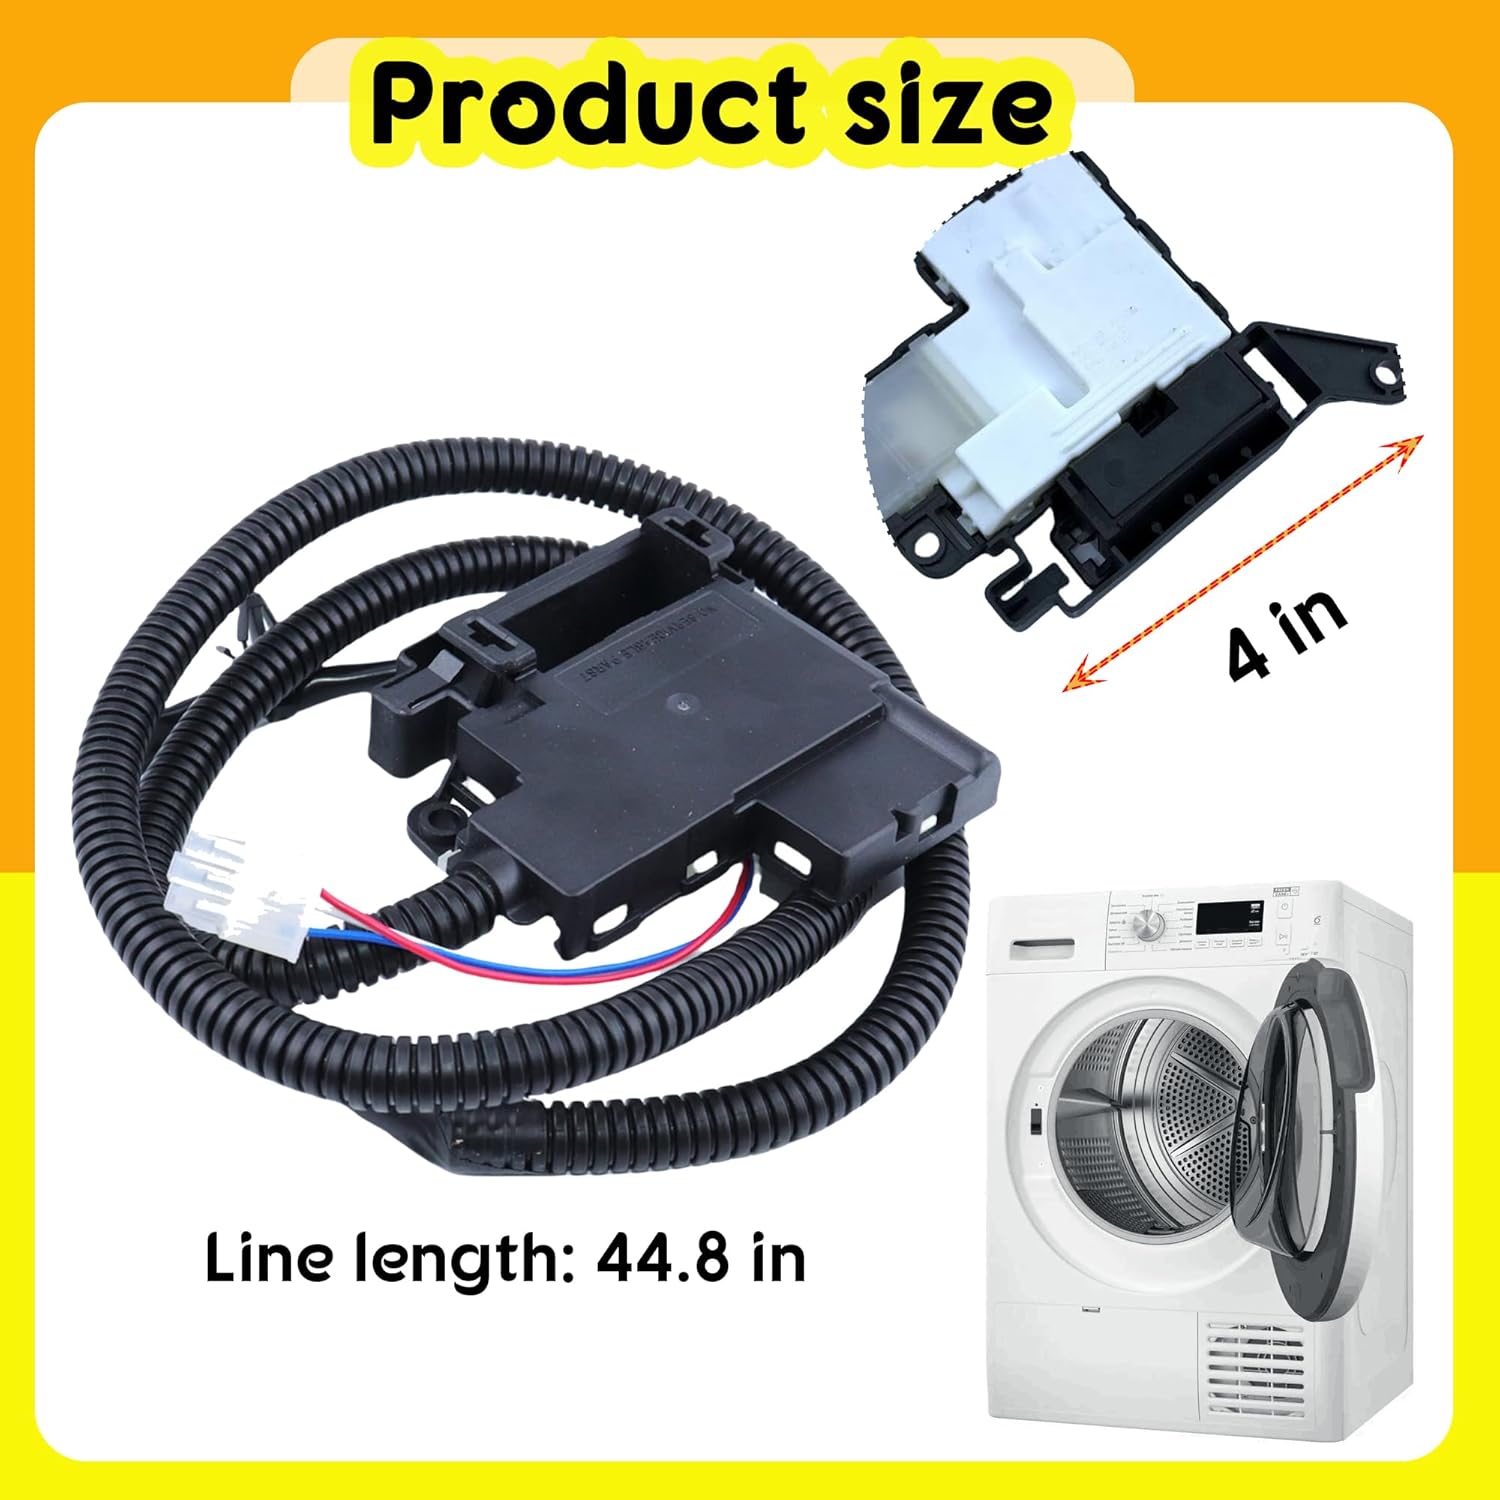
Image 2.1: Product dimensions, showing the latch assembly length of approximately 4 inches and a line length of 44.8 inches.
3. Compatibility
This washer latch assembly is compatible with a range of washing machine models from Whirlpool, Crosley, and Maytag. Please verify your washing machine's model number against the list below to ensure compatibility.
Compatible Whirlpool Models:
- WTW5010LW0
- WTW5010LW1
- WTW5015LW0
- WTW5015LW1
- WTW5057LW0
- WTW5057LW1
Compatible Crosley Models:
- CAW45125LW0
- CAW45125LW1
Compatible Maytag Models:
- MVW5035MW0
- MVW5430MW0

Image 3.1: Visual representation of compatible models for the washer latch assembly.
Replaces the following part numbers:
- W11513248
- DTL60003
- DTL6000
- 4964074
- AP7002928
- PD00073744
- PS16543458
- EAP16543458

Image 3.2: List of part numbers that this assembly replaces.
4. Safety Precautions
Before attempting any installation or repair, always prioritize safety. Failure to follow these precautions can result in serious injury or damage to your appliance.
- Disconnect Power: Always unplug the washing machine from the electrical outlet before beginning any work.
- Turn Off Water Supply: Close the hot and cold water supply valves to the washing machine.
- Wear Protective Gear: Use appropriate personal protective equipment, such as gloves, if necessary.
- Professional Assistance: If you are unsure about any step, consult a qualified appliance technician.
5. Installation Guide
This section outlines the general steps for replacing the washer lid latch assembly. Specific steps may vary slightly depending on your washing machine model. Refer to your appliance's service manual for detailed instructions if available.
Required Tools (May Vary):
- Screwdriver (Phillips and/or Flathead)
- Pliers
- Nut Driver (if applicable)
Step-by-Step Installation:
- Prepare the Washer: Ensure the washing machine is disconnected from power and water supply as per the safety precautions.
- Access the Latch Assembly: Depending on your model, you may need to remove the top panel of the washer or access the latch from the front or rear. This typically involves removing screws or clips.
- Disconnect Old Latch: Carefully disconnect the wiring harness from the old latch assembly. Note the orientation of the wires if they are not color-coded or keyed.
- Remove Old Latch: Unscrew or unclip the old latch assembly from its mounting position.
- Install New Latch: Position the new daydmaly Washer Latch Assembly in place and secure it with the screws or clips.
- Connect Wiring: Connect the wiring harness to the new latch assembly. Ensure a secure connection. The upgraded harness connector is designed for stable signal transmission.
- Reassemble Washer: Reattach any panels or covers that were removed.
- Test Functionality: Restore power and water supply. Test the washer's lid lock function by attempting to start a cycle. The lid should lock securely.

Image 5.1: Detail showing the ease of installation and the quality of the component.
6. Operation of the Washer Lid Lock
The washer lid lock switch is a critical safety feature. It is designed to be normally closed and locked during the washing machine's operation, particularly during the spin and drain cycles. This mechanism prevents the lid from being opened while the drum is in motion, enhancing user safety and preventing water spillage.
- When a wash cycle begins, the lid lock engages, securing the washer lid.
- The washer will not proceed with the wash, drain, or spin cycles if the lid is not properly closed and locked.
- The lid will remain locked until the cycle is complete and the drum has come to a stop, or if the cycle is paused/canceled and the machine has safely disengaged the lock.

Image 6.1: Illustrates the function of the washing machine lid switch, ensuring the lid is locked during operation to prevent water spillage.
7. Maintenance
The daydmaly Washer Latch Assembly is constructed from high-quality materials designed for durability and longevity. Regular maintenance of the latch itself is generally not required. However, to ensure optimal performance and extend the life of your washing machine components, consider the following:
- Keep Area Clean: Periodically clean the area around the lid and the latch mechanism to prevent lint, detergent residue, or foreign objects from interfering with its operation.
- Avoid Forceful Closing: Do not slam the washer lid shut, as this can put undue stress on the latch mechanism over time.
- Inspect for Damage: Occasionally inspect the latch and its wiring for any visible signs of wear, damage, or corrosion.
8. Troubleshooting Common Issues
A malfunctioning lid lock switch can cause several operational problems with your washing machine. If you experience any of the following issues, the lid latch assembly may need inspection or replacement.
- Washer Will Not Start: If the lid lock fails to engage, the washer's control system will prevent the cycle from starting as a safety measure.
- Washer Will Not Drain or Spin: The lid lock must be engaged for the washer to proceed to the drain and spin cycles. A faulty lock will prevent these functions.
- Lid Will Not Close or Open: A broken or jammed lid lock can prevent the lid from closing properly or from releasing after a cycle.
- Error Codes: Your washing machine may display specific error codes related to the lid lock mechanism. Consult your washer's user manual for error code interpretations.
If you suspect the lid latch assembly is the cause of these issues, follow the installation guide to replace the part after ensuring power and water are disconnected.
Image 8.1: Details common causes of door lock switch failure, such as normal wear, moisture, shock damage, or electronic component failure.
9. Warranty and Customer Support
Information regarding specific warranty terms for the daydmaly Washer Latch Assembly is not provided in the product details. For warranty inquiries or customer support, please refer to the retailer or manufacturer's contact information provided at the time of purchase.