CAMECHO B0DS2186YH
CAMECHO 7" Wireless Backup Camera System User Manual
Model: B0DS2186YH
1. Introduction
This manual provides detailed instructions for the installation, operation, and maintenance of your CAMECHO 7" Wireless Backup Camera System. This system is designed to enhance driving safety by providing a clear rear view for various vehicles, including cars, trucks, pickups, RVs, campers, trailers, boats, SUVs, and vans.
The system features stable digital signal transmission, a durable 7-inch IPS display monitor, an AHD backup camera with IP68 waterproof rating, and a blind spot warning function.
2. Safety Information
- Ensure all connections are secure and properly insulated to prevent short circuits.
- Do not attempt to disassemble or modify the system components. This may void the warranty and cause damage.
- Always check your surroundings manually before reversing, even with the camera system installed. The system is an aid, not a substitute for safe driving practices.
- Keep the camera lens clean for optimal image clarity.
- Install the monitor in a location that does not obstruct your view of the road or interfere with vehicle controls.
3. Package Contents
Verify that all items listed below are included in your package:
- 1 x 7" Wireless Color IPS Monitor
- 1 x Weatherproof Wireless Backup Camera
- 2 x Wireless Antenna
- 1 x Power Cable (for monitor)
- 2 x Extended Cable (for camera power)
- 1 x Bracket (for monitor mounting)
- 1 x Stickers (for mounting)
- 1 x Screw Kit (for camera mounting)
- 1 x User Manual (this document)

Image: Illustration of all components included in the CAMECHO 7" Wireless Backup Camera System package.
4. Product Overview
The CAMECHO wireless backup camera system consists of a 7-inch IPS monitor and a robust wireless camera. Key features include:
- 7-inch IPS Display Monitor: Provides a clear, vivid 1080P image with adjustable grid lines.
- Wireless AHD Camera: Features 1080P resolution, IP68 waterproof rating, and 18 built-in infrared LEDs for night vision.
- Digital Signal Transmission: Ensures stable and smooth video feed without lag or flickers.
- Blind Spot Warning (BSD): Alerts drivers to pedestrians in a pre-set blind spot area.
- Wide Compatibility: Suitable for 12-36V vehicles including RVs, trucks, trailers, pickups, campers, and buses.

Image: Front view of the CAMECHO 7-inch IPS monitor and wireless backup camera.
5. Setup and Installation
5.1 Camera Installation
- Choose Camera Location: Select a suitable location at the rear of your vehicle, typically near the license plate or marker light, ensuring a clear view.
- Mount the Camera: Securely attach the camera using the provided screw kit. Ensure it is firmly mounted to withstand vehicle movement and vibrations.
- Connect Power: Connect the camera's power cable. The red wire connects to a 12V-36V positive power source (e.g., reverse light power for automatic activation, or a constant power source for full-time monitoring). The black wire connects to a negative (ground) terminal.
- Attach Antenna: Screw the wireless antenna onto the camera's antenna port.

Image: Diagram illustrating how to connect the camera's power wires to the vehicle's electrical system.
5.2 Monitor Installation
- Choose Monitor Location: Place the monitor on your dashboard or windshield using the provided bracket, ensuring it does not obstruct your driving view.
- Mount the Monitor: Secure the monitor bracket.
- Connect Power: Plug the monitor's power cable into your vehicle's cigarette lighter socket (12V-36V compatible).
- Attach Antenna: Screw the wireless antenna onto the monitor's antenna port.
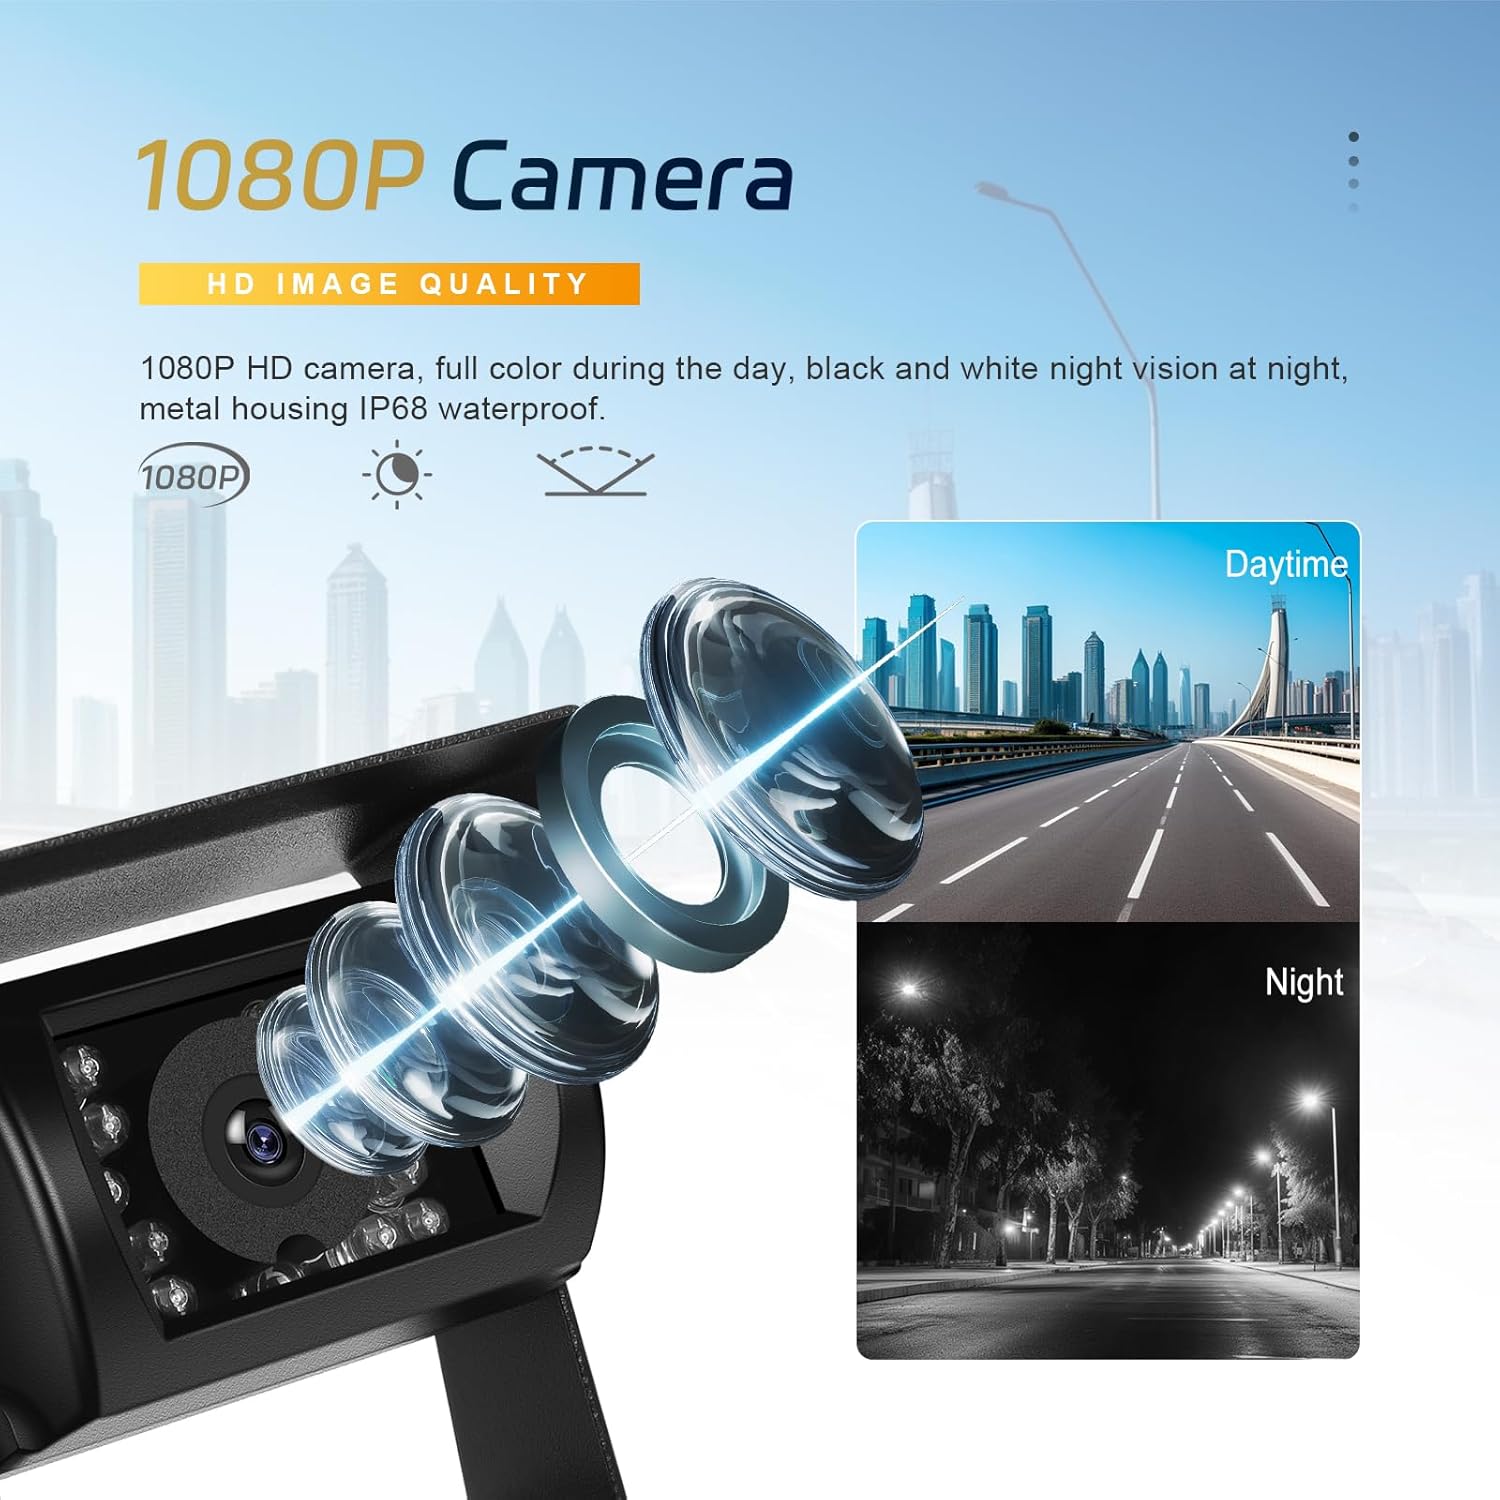
Image: Diagram showing the monitor connected to the vehicle's cigarette lighter for power.

Image: Visual guide for the three main installation steps: camera wiring, monitor placement, and power-on.
6. Operating Instructions
6.1 Basic Operation
- Power On/Off: The monitor will automatically power on when connected to a power source and the vehicle is started. To manually activate for monitoring, press the power button on the monitor.
- Image Display: The camera feed will automatically display on the monitor when the system is powered.
- Adjusting Grid Lines: The monitor allows for adjustment of parking grid lines to assist with parking in tight spaces. Refer to the monitor's on-screen menu for specific settings.
6.2 Blind Spot Warning (BSD)
The BSD feature helps detect pedestrians in a pre-defined blind spot area. When a pedestrian is detected, the system will emit an audible warning to alert the driver.
- Setting BSD Area: Access the monitor's menu to set and calibrate the blind spot warning area according to your vehicle's dimensions and preferences.
- Warning Activation: The warning activates automatically when a pedestrian is recognized within the set area.

Image: Illustration demonstrating the blind spot warning system detecting a pedestrian near a vehicle.

Image: Visual representation of the blind spot warning system detecting an object and alerting the driver.
6.3 Multiple Camera Support (Optional)
The system supports adding up to 4 cameras for multi-angle monitoring (additional cameras sold separately). The monitor can display single camera views (CH1, CH2, etc.) or a split-screen view.

Image: The monitor screen showing options for single camera views (CH1, CH2) and a split-screen view with two cameras.

Image: Examples of monitor display modes: front view, rear view, and split screen view with two cameras.
7. Features
- Stable Digital Signal: The system utilizes digital wireless transmission, providing a stable and interference-free connection up to 320ft in open areas. This ensures a clear and continuous video feed.
- IP68 Waterproof Camera: The camera features an IP68 waterproof rating, protecting it from dust and water ingress. This ensures reliable operation in various weather conditions, including rain, fog, and mud.
- 1080P HD Night Vision: Equipped with 18 infrared LEDs, the camera delivers clear 1080P images even in low-light or complete darkness, enhancing safety during night operations.
- Adjustable Guide Lines: The monitor allows users to turn parking guide lines on or off, and adjust their position, assisting with precise parking maneuvers.
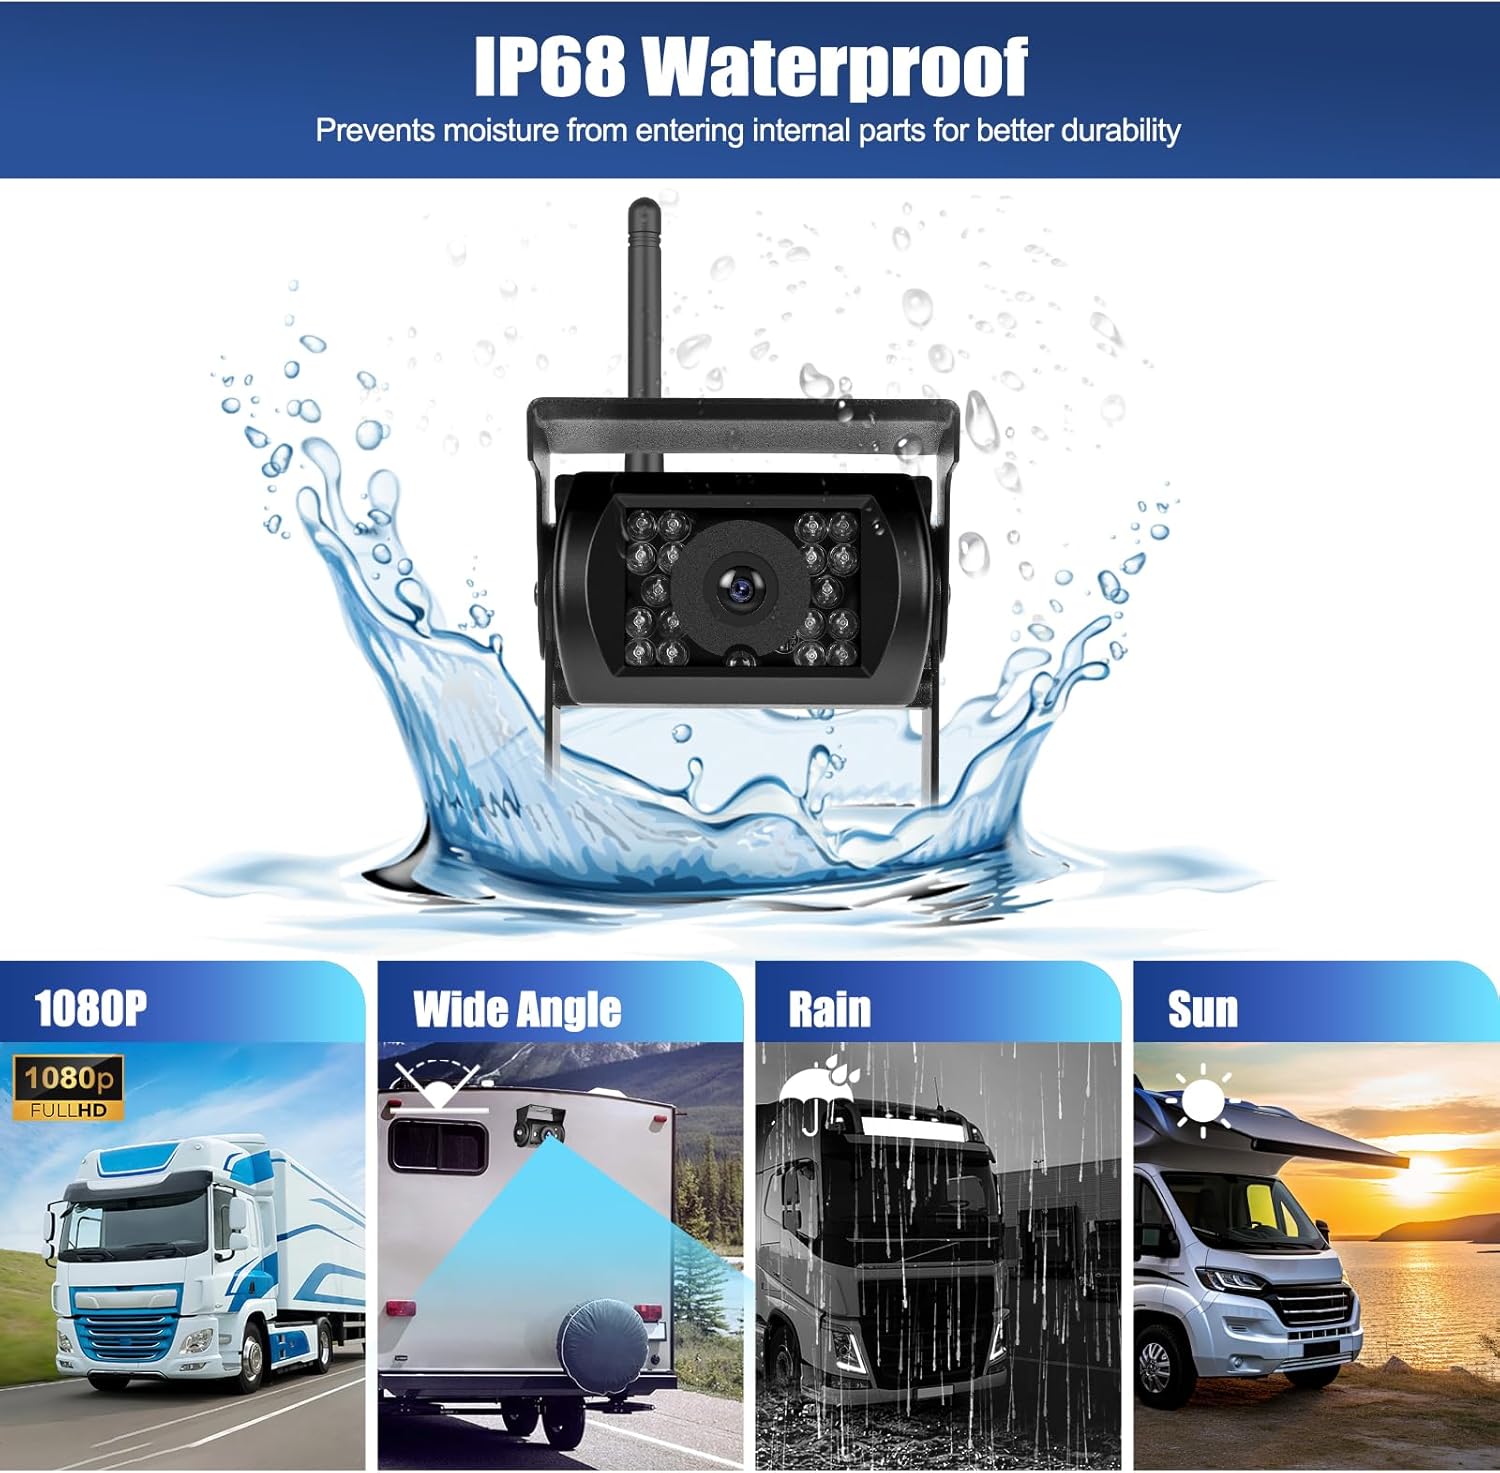
Image: The camera being splashed with water, demonstrating its IP68 waterproof capability.

Image: Visual representation of key features: clear HD image, effective night vision, and the option to toggle parking guide lines.

Image: Close-up of the 1080P camera lens, showing its ability to capture clear images in both daytime and nighttime conditions.
8. Maintenance
- Cleaning the Lens: Regularly clean the camera lens with a soft, damp cloth to ensure optimal image clarity. Avoid abrasive cleaners.
- Monitor Care: Wipe the monitor screen with a soft, dry cloth. Do not use liquid cleaners directly on the screen.
- Connection Check: Periodically check all cable connections to ensure they are secure and free from corrosion.
- Antenna Security: Ensure antennas on both the camera and monitor are securely fastened.
9. Troubleshooting
| Problem | Possible Cause | Solution |
|---|---|---|
| No image on monitor |
|
|
| Flickering or unstable image |
|
|
| Blind Spot Warning not working |
|
|
10. Specifications
| Brand | CAMECHO |
| Model | B0DS2186YH |
| Screen Size | 7 Inches |
| Video Capture Resolution | 1080p |
| Camera Waterproof Rating | IP68 |
| Viewing Angle | 105 Degrees (Actual) |
| Wireless Transmission Range | Up to 320ft (open area) |
| Power Supply | 12V-36V DC |
| Compatible Devices | Cars, Vehicle (RV, Van, Truck, Pickup, Trailer, Camper, Bus, Motorhome, Caravan) |
| Product Dimensions | 17.1L x 3.2W x 11.3H Centimetres (Monitor) |
11. Warranty and Support
For warranty information and technical support, please refer to the contact details provided with your product packaging or visit the official CAMECHO website. Keep your purchase receipt for warranty claims.
Manufacturer: Camecho
Place of Business: yanningqiu2021@163.com
Ask a question about this manual
Ask about setup, troubleshooting, compatibility, parts, safety, or missing instructions. Manuals+ will review the question and use this page’s manual context to help answer it.