
1. Introduction
Thank you for choosing the Linber Magnetic LED Video Light DC06. This compact and versatile lighting solution is designed to enhance your photography, videography, and content creation with adjustable brightness and color temperature. Please read this manual carefully to ensure proper use and optimal performance of your device.

Figure 1: Linber Magnetic LED Video Light DC06 showcasing its compact design and versatile mounting options.
2. What's in the Box
Verify that all items are present in your package:
- 1* DC06 Video Light
- 1* Phone Front Clip (for phone, laptop)
- 1* 1/4'' Hot Shoe Adapter (for DSLR Camera)
- 1* Type-c Charging Cable
Video 1: An overview of the Linber DC06 Magnetic Pocket Light, demonstrating its features and included accessories.
3. Key Features
- Magnetic, Compact & Portable: The DC06 features a magnetic back for easy attachment to metal surfaces, offering hands-free operation. Its lightweight design (3.8oz) ensures portability for on-the-go creators.
- Twist-and-Adjust LED Lighting: Easily adjust color temperature from 3000K to 9000K and brightness from 10% to 100% using the rear dial. Choose from warm, natural, or cold light modes.
- Professional LED Video Light: Equipped with 96 flicker-free bi-color LED beads, providing 1500 lux at 0.3m with a 120° wide beam for accurate color rendition.
- Broad Compatibility: Features a 1/4” screw hole, 3 cold shoe mounts, a phone front clamp, and a 1/4'' hot shoe adapter for mounting on tripods, cameras, smartphones, or laptops.
- 2000mAh Large Capacity Battery: Provides up to 90 minutes of continuous operation at maximum brightness or 10 hours at minimum brightness. Rechargeable via USB Type-C.

Figure 2: The magnetic back allows for convenient attachment to various metal surfaces.
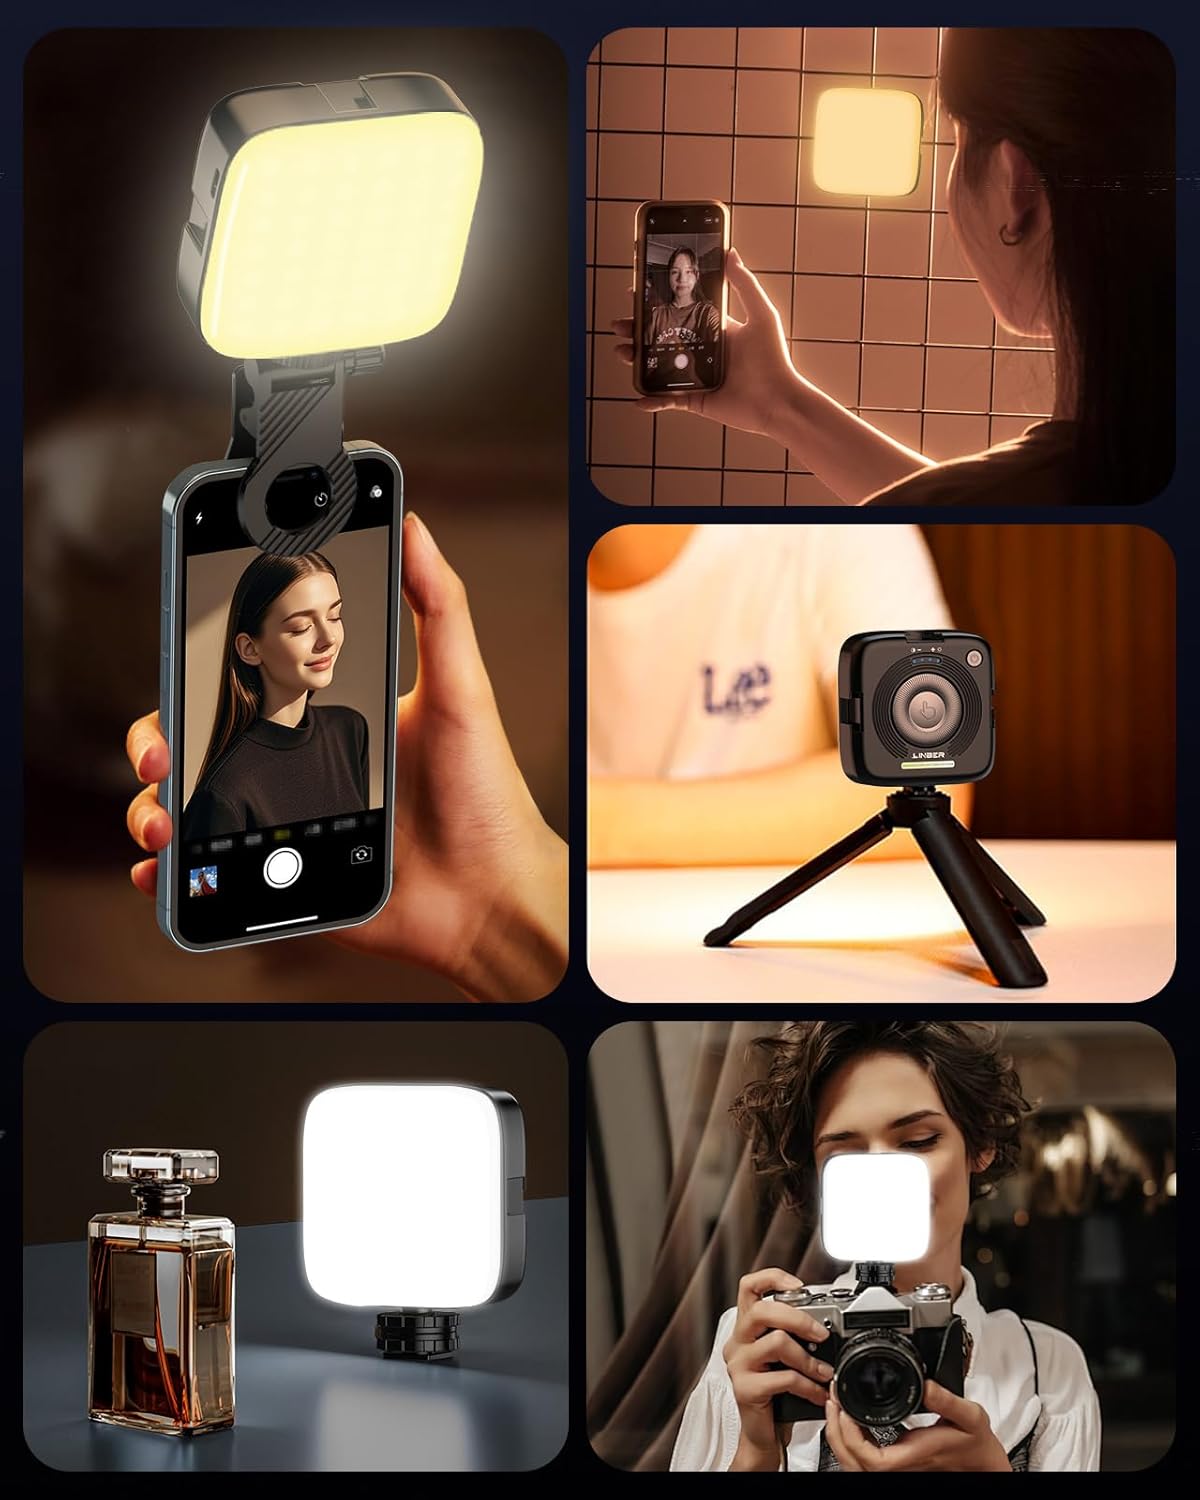
Figure 3: The twist-and-adjust dial provides intuitive control over lighting parameters.
4. Setup
- Attaching the Phone Front Clip: Slide the phone front clip into one of the cold shoe mounts on the DC06. Secure your smartphone or laptop screen within the clip.
- Attaching the 1/4'' Hot Shoe Adapter: Screw the 1/4'' hot shoe adapter into the 1/4” screw hole on the DC06. Then, slide the adapter into your DSLR camera's hot shoe mount and tighten the locking wheel.
- Mounting on a Tripod: The DC06 can be directly mounted onto any tripod with a 1/4” screw thread using its integrated screw hole.
- Using Cold Shoe Mounts: Utilize the three cold shoe mounts on the light to attach additional accessories or to connect multiple DC06 lights together for increased illumination.

Figure 4: Instructions for attaching the phone clip and hot shoe adapter for various devices.
5. Operating Instructions
- Power On/Off: Long press the power button (usually located on the side or back) for 3 seconds to switch the light on or off.
- Adjusting Brightness: Rotate the dial on the back of the light to steplessly adjust the brightness from 10% to 100%.
- Adjusting Color Temperature: Short press the dial to switch between color temperature adjustment and brightness adjustment. Once in color temperature mode, rotate the dial to change the color temperature from 3000K (warm light) to 9000K (cold light).
- Switching Light Modes: Short press the mode button (if available) to cycle through different light modes (e.g., warm light, natural light, cold light, or special effects if applicable).

Figure 5: One-hand operation for adjusting color temperature and brightness.
6. Charging
The Linber DC06 is equipped with a built-in 2000mAh rechargeable battery. To charge the device:
- Connect the included USB Type-C charging cable to the charging port on the side of the light.
- Plug the other end of the USB cable into a compatible USB power source (e.g., computer, wall adapter, power bank).
- The battery indicator lights on the back of the device will show the charging status.

Figure 6: Charging the DC06 via the USB Type-C port.
7. Specifications
| Feature | Value |
|---|---|
| Item Model Number | DC06 |
| Item Weight | 3.8 ounces |
| Package Dimensions | 5.39 x 3.78 x 1.73 inches |
| Battery Capacity | 2000mAh |
| Battery Life (Max Brightness) | 90 minutes |
| Battery Life (Min Brightness) | 10 hours |
| Color Temperature Range | 3000K-9000K |
| Brightness Range | 10%-100% |
| Connectivity Technology | 1/4'' Screw Hole, Cold Shoe, Type-c |
| Hardware Interface | USB Type C |
8. Maintenance
- Keep the device clean by wiping it with a soft, dry cloth.
- Avoid exposing the light to extreme temperatures or direct sunlight for prolonged periods.
- Store the light in a cool, dry place when not in use.
- Do not attempt to disassemble or repair the device yourself, as this may void the warranty.
9. Troubleshooting
- Light not turning on: Ensure the battery is charged. Connect the USB Type-C cable and charge the device.
- Brightness or color temperature not adjusting: Check if the dial is functioning correctly. Ensure you are in the correct adjustment mode (brightness or color temperature) by short pressing the dial.
- Unstable attachment: Ensure all clamps and screws are securely tightened when attaching the light to your device or tripod.
10. Warranty and Support
For warranty information or technical support, please refer to the product packaging or contact Linber customer service directly. Keep your purchase receipt as proof of purchase.