1. Safety Information
Operating welding equipment requires strict adherence to safety protocols to prevent injury or damage. Always read and understand all safety warnings and instructions before operating this machine.
General Safety Precautions:
- Electric Shock Can Kill: Ensure proper grounding. Do not touch live electrical parts. Wear dry welding gloves and protective clothing.
- Fumes and Gases Can Be Hazardous: Work in a well-ventilated area. Use fume extractors if necessary. Avoid breathing welding fumes.
- Arc Rays Can Burn Eyes and Skin: Wear a welding helmet with appropriate shade filter. Use protective clothing, including long sleeves and pants, and welding gloves.
- Fire and Explosion Hazard: Keep flammable materials away from the welding area. Have a fire extinguisher readily available.
- Hot Parts Can Cause Severe Burns: Allow welded materials and equipment to cool before handling.
- Over-current, Over-load, Over-voltage, and Overheating Protection: The HVM205P is equipped with these safety features to prevent damage and extend its lifespan. However, always operate within specified parameters.

Figure 1: Internal safety mechanisms of the HVM205P welder, including MCU intelligence and fan cooling for protection against overcurrent, overload, overvoltage, and overheating.
2. Product Overview
The HZXVOGEN HVM205P is a versatile 205A multi-process inverter welder designed for a wide range of welding applications. It supports Gas MIG (GMAW), Gasless MIG (FCAW), Stick (MMA), and Lift TIG welding processes. This machine is compatible with both 110V and 220V power inputs, making it suitable for various work environments.

Figure 2: The HZXVOGEN HVM205P 205A Multi-Process MIG Welder.
Key Features:
- 5-in-1 Multi-Process Capability: Supports Gas MIG, Gasless MIG, Stick, Lift TIG, and Spool Gun (spool gun and WP17V TIG gun sold separately).
- Synergic Control: Automatically adjusts voltage and wire feed speed based on selected wire diameter and gas type, simplifying setup for various materials.
- Dual Voltage Input: Operates on both 110V and 220V power supplies.
- Large LED Display: Provides clear, real-time welding data for easy monitoring.
- Advanced Safety: Includes over-current, over-load, over-voltage, and overheating protection.

Figure 3: The 5-in-1 Multi-Process capabilities of the HVM205P.
3. Package Contents
Verify that all items listed below are included in your package. If any items are missing or damaged, contact customer support immediately.

Figure 4: Included components with the HVM205P welder.
- MIG Welder (HVM205P unit)
- Voltage Adapter
- Welding Wire .030 (E71T-GS Flux-cored wire)
- Throat Hoop
- Conductive Nozzle
- Wire Feed Wheel
- Earth Clamp (Ground Clamp)
- Air Hose
- MIG Torch
- Welding Rods (5 pieces)
- Brush Hammer
- Electrode Holder (for Stick welding)
- Instruction Manual
Note: WP17V TIG gun and spool gun are sold separately and are not included in the standard package.
4. Setup
Proper setup is crucial for safe and effective welding. Follow these steps carefully for your chosen welding process.
4.1 Power Connection
- Ensure the welder is switched off before connecting to power.
- Connect the power cord to a suitable 110V or 220V power outlet. Use the provided voltage adapter if necessary.
- Verify the power source meets the welder's requirements.
4.2 MIG Welding Setup (Gasless Flux Core)
- Install the flux-cored welding wire onto the spool holder inside the welder. Ensure the wire feeds smoothly.
- Feed the wire through the MIG torch liner until it emerges from the contact tip.
- Connect the MIG torch to the appropriate port on the front panel.
- Connect the earth clamp to the positive (+) terminal and securely attach it to the workpiece.
- Set the welder to 'Flux' mode on the control panel.
4.3 MIG Welding Setup (Gas MIG)
- Install solid welding wire onto the spool holder.
- Feed the wire through the MIG torch liner.
- Connect the MIG torch to the appropriate port.
- Connect the earth clamp to the negative (-) terminal and securely attach it to the workpiece.
- Connect your shielding gas cylinder (e.g., CO2, Argon/CO2 mix) to the gas inlet on the rear of the welder using the air hose and a regulator (not included).
- Set the welder to 'Gas' mode on the control panel.
4.4 Stick (MMA) Welding Setup
- Connect the electrode holder to the positive (+) terminal.
- Connect the earth clamp to the negative (-) terminal and securely attach it to the workpiece.
- Insert the appropriate welding electrode into the electrode holder.
- Set the welder to 'MMA' mode.
4.5 Lift TIG Welding Setup (WP17V TIG gun sold separately)
- Connect the WP17V TIG torch to the negative (-) terminal.
- Connect the earth clamp to the positive (+) terminal and securely attach it to the workpiece.
- Connect an Argon gas cylinder to the TIG torch's gas inlet.
- Ensure a tungsten electrode is correctly installed in the TIG torch.
- Set the welder to 'TIG' mode.

Figure 5: Connection configurations for various welding processes.
5. Operating Instructions
The HVM205P features synergic control for simplified operation. Follow these steps to begin welding.
5.1 Control Panel Overview

Figure 6: HVM205P Control Panel with Synergic Function.
- Left LED Display: Shows voltage (V) for MIG, or current for MMA/TIG.
- Right LED Display: Shows amperage (A) for MIG, or wire feed speed.
- MODE Buttons: Select between welding processes (MIG, MMA, TIG) and material/gas types.
- Adjustment Knobs: Fine-tune welding parameters.
5.2 Synergic Control Operation
The synergic function simplifies setting up the welder by automatically recommending optimal parameters.
- Choose Mode: Press the 'MODE' button to select your desired welding process (MIG, MMA, TIG) and material/gas combination (e.g., AlSi/1.2 for aluminum MIG with 1.2mm wire, CO2/0.8 for steel MIG with 0.8mm wire).
- Adjust Welding Current: Use the adjustment knob to set the desired welding current (amperage). The synergic system will automatically adjust the corresponding voltage and wire feed speed for optimal performance.
- Fine-tune (Optional): For experienced users, minor adjustments to voltage or wire feed speed can be made to achieve specific weld characteristics.

Figure 7: Simplified 2-step operation with synergic control.
5.3 Welding Aluminum
The HVM205P is capable of welding aluminum, especially when paired with a spool gun (sold separately) for optimal wire feeding.
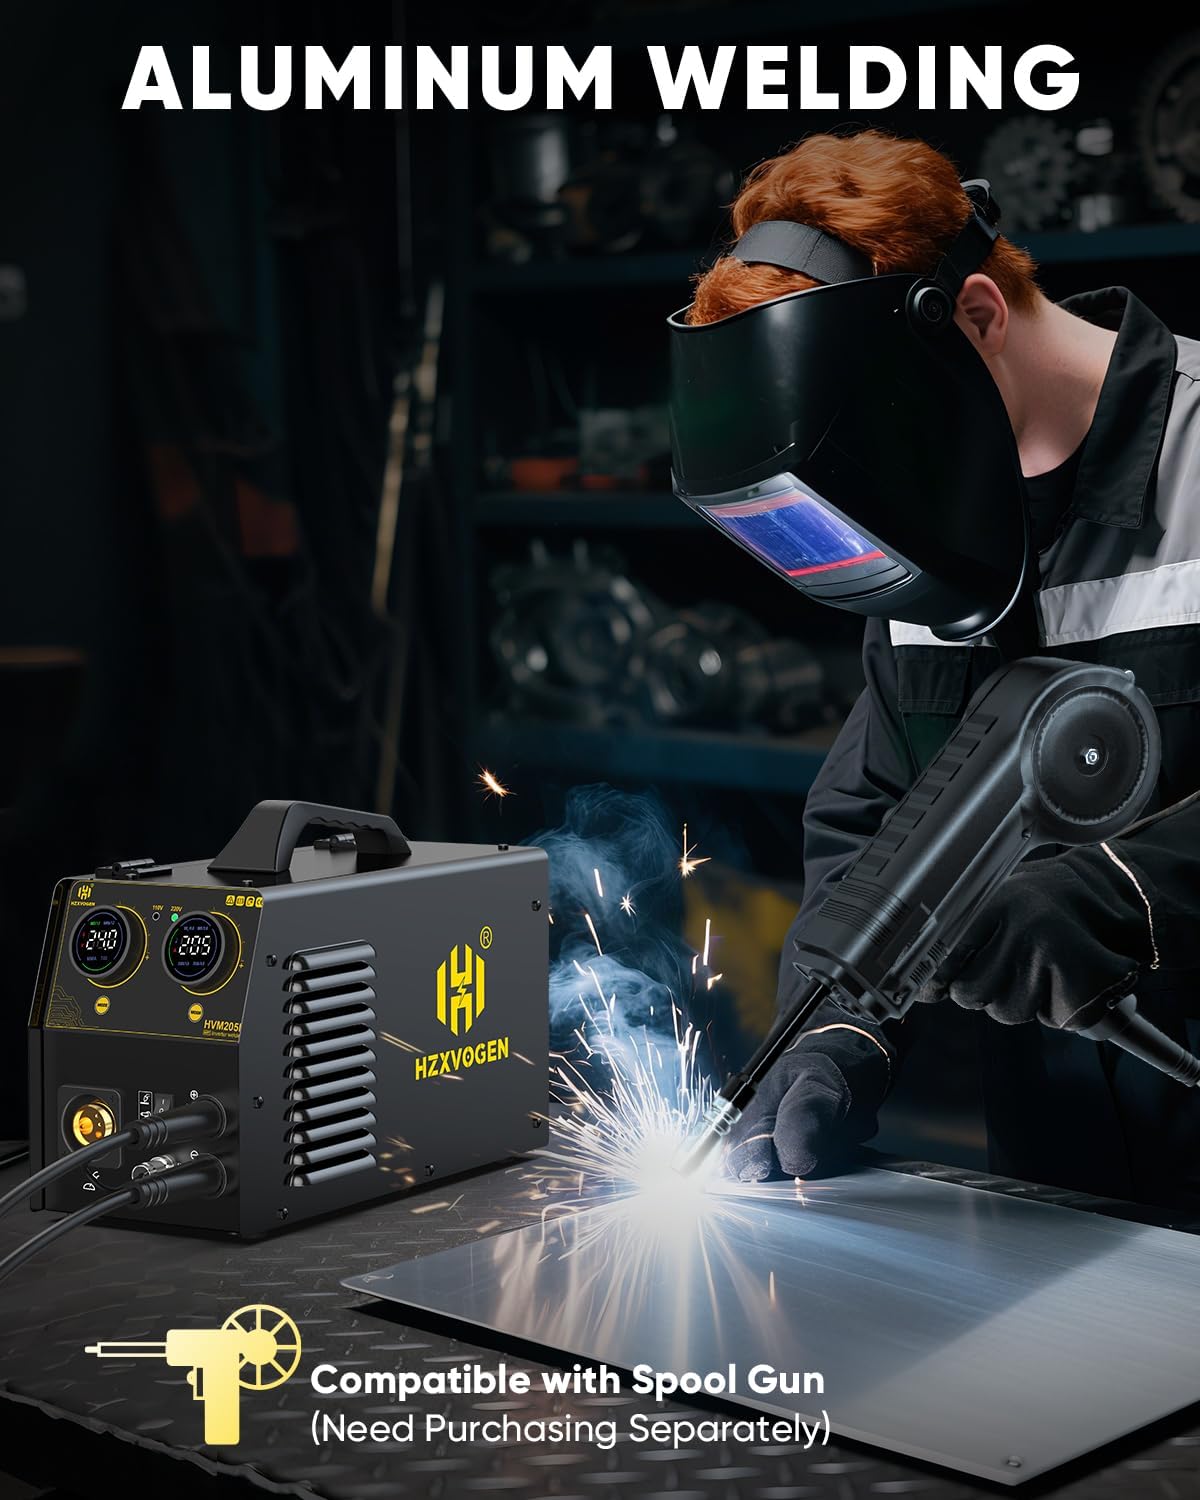
Figure 8: Aluminum welding in progress with the HVM205P and an optional spool gun.
For aluminum welding, use appropriate aluminum wire (.045" recommended) and 100% Argon shielding gas. The synergic control will assist in setting parameters for aluminum alloys.
5.4 Welding Performance Examples

Figure 9: Examples of welding quality on aluminum and steel.
6. Maintenance
Regular maintenance ensures the longevity and optimal performance of your HZXVOGEN HVM205P welder.
6.1 Daily Maintenance
- Clean the MIG torch nozzle and contact tip. Replace if worn or clogged.
- Inspect all cables for cuts, fraying, or loose connections.
- Ensure the earth clamp makes good contact with the workpiece.
- Wipe down the exterior of the machine to remove dust and debris.
6.2 Weekly/Monthly Maintenance
- Check the wire feed mechanism for proper tension and cleanliness.
- Inspect the cooling fan for obstructions and ensure it operates freely.
- Clean the interior of the machine using compressed air to remove accumulated dust, especially from circuit boards and heat sinks. Ensure the machine is unplugged before doing so.
- Verify gas connections are tight and leak-free (for Gas MIG/TIG).
6.3 Storage
- Store the welder in a clean, dry environment, away from excessive dust, moisture, and corrosive materials.
- Protect the MIG torch and cables from damage during storage.
7. Troubleshooting
This section provides solutions to common issues you might encounter during operation.
| Problem | Possible Cause | Solution |
|---|---|---|
| No power to the machine | Power switch off, loose power cord, tripped circuit breaker, faulty power outlet. | Turn on power switch. Check power cord connection. Reset circuit breaker. Test power outlet. |
| No arc/Poor arc starting | Loose ground clamp, incorrect welding parameters, dirty workpiece, worn contact tip (MIG), incorrect electrode (Stick/TIG). | Ensure good ground connection. Adjust current/voltage. Clean workpiece. Replace contact tip. Use correct electrode. |
| Wire feeding issues (MIG) | Incorrect wire tension, clogged liner, worn drive roller, wrong drive roller size, tangled wire spool. | Adjust wire tension. Clean/replace liner. Replace drive roller. Ensure correct drive roller for wire size. Untangle spool. |
| Overheat indicator active | Exceeded duty cycle, blocked cooling vents, high ambient temperature. | Allow machine to cool down. Clear cooling vents. Operate in a cooler environment. |
| Porosity in weld (MIG) | Insufficient shielding gas, gas leak, contaminated workpiece, worn nozzle, excessive wind. | Check gas flow and connections. Clean workpiece. Replace nozzle. Use wind screens. |
If you encounter issues not listed here or if the suggested solutions do not resolve the problem, please contact HZXVOGEN customer support.
8. Specifications
Detailed technical specifications for the HZXVOGEN HVM205P welder.
| Feature | Specification |
|---|---|
| Model Number | HVM205P |
| Input Voltage | 110V/220V (Dual Voltage) |
| Max Output Current | 205A |
| Welding Processes | Gas MIG, Gasless MIG (FCAW), Stick (MMA), Lift TIG, Spool Gun (accessories sold separately) |
| Compatible Wire Sizes | .030"/.039" solid/flux core wire, .045" aluminum wire |
| Power Source | DC |
| Item Weight | Approximately 27 pounds (12.25 kg) |
| Package Dimensions | 19.37 x 13.78 x 12.6 inches |
| Safety Features | Over-current, Over-load, Over-voltage, Overheating Protection |
9. Warranty and Support
HZXVOGEN is committed to providing reliable products and customer satisfaction.
9.1 Product Warranty
The HZXVOGEN HVM205P welder comes with a 2-Year Quality Support warranty. This warranty covers defects in materials and workmanship under normal use. Please retain your proof of purchase for warranty claims.
9.2 Customer Support
For technical assistance, troubleshooting, warranty claims, or any other inquiries, please contact HZXVOGEN customer support. Refer to the contact information provided in your product packaging or visit the official HZXVOGEN website.

Figure 10: HZXVOGEN commitment to quality and support.