
1. Introduction
This manual provides detailed instructions for the installation, configuration, and operation of the UAZNJFZ F4V3S Flight Controller. This flight controller is designed for use in quadcopters and RC drones, supporting both INAV and Betaflight firmware for FPV racing and general flight applications. Please read this manual thoroughly before attempting any installation or operation.
2. Product Overview
The F4V3S Flight Controller is a high-performance board featuring an STM32 F405 MCU. It integrates essential components for advanced drone control and telemetry.
Image 2.1: Top view of the UAZNJFZ F4V3S Flight Controller board.
Key Features:
- MCU: STM32 F405
- Firmware Support: INAV, Betaflight
- OSD: On-Screen Display configurable via Betaflight Configurator
- Barometer: BMP280 for precise altitude holding
- Gyro & Accelerometer: IC268G 6 SPI, compatible with MPU6500 in INAV firmware
- Receiver Ports: SBUS/PPM and Spektrum DSMX
- Blackbox: SD card slot for flight data logging
- BEC: 5V 3A SBEC
- Video Output: On-board video, capable of supplying 5V to VTX and camera
- SmartAudio: V2 support via TX6 on J10
- ESC Layout: 4x3 pin ESC pin layout
- IR Pins: For lap timing transponder
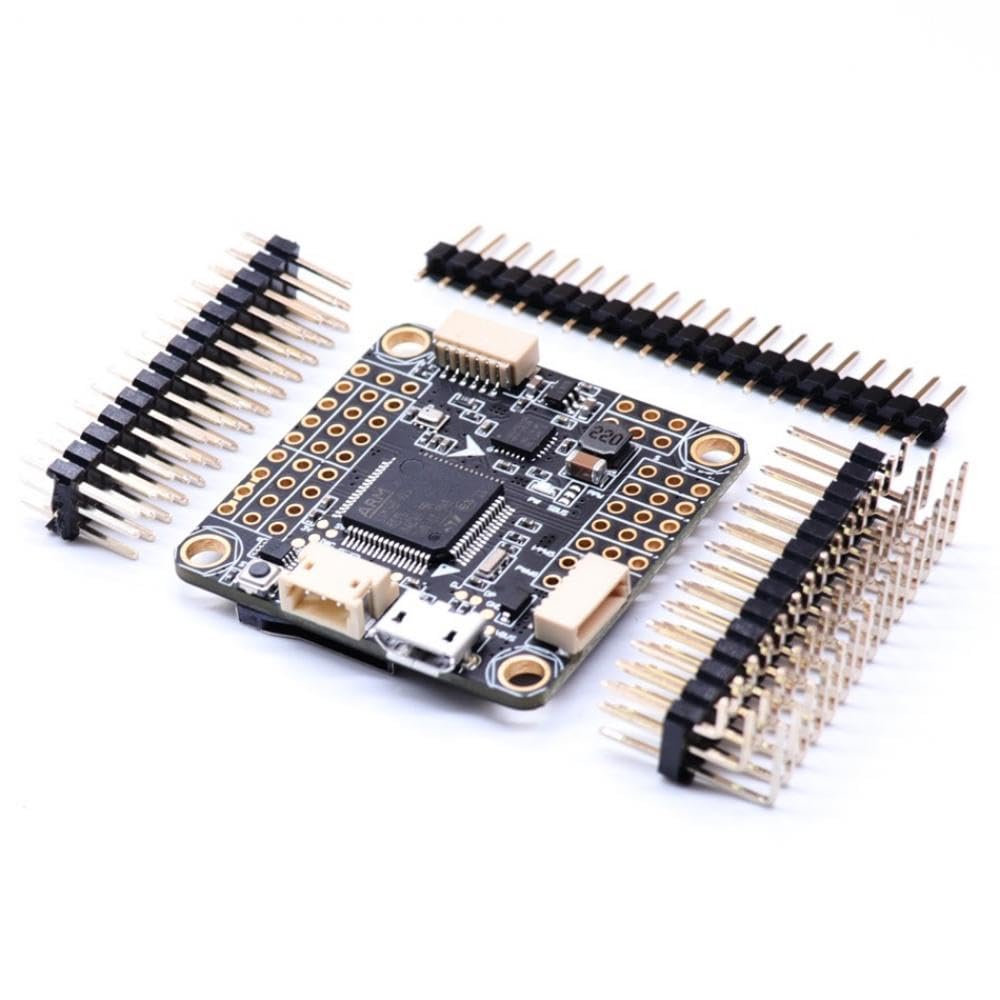
Image 2.2: UAZNJFZ F4V3S Flight Controller with included pin headers for connection.
3. Specifications
3.1 Flight Controller Board
- Material: Electronic component
- Standard Board Size: Approximately 36x36mm
- Standard Mount Hole: 30.5x30.5mm
3.2 VTX5848 LITE FPV Video Transmitter (if included)
- Input Voltage: DC 7-27V
- Input Current: 3S or 4S, 600mW 360 mA ±10 mA
- Output Voltage: DC 5V 1A
- Output Power: Switchable between 25/100/200/400/600mW
- Channel: 48CH
- Frequency Switch: Manual button/OSD (simultaneous support)
- Connector: MMCX
- Size: 36x36x9mm
- Mounting Hole: 30.5x30.5mm, M3
3.3 FPV Camera (if included)
- Sensor: 1/2.7 800TVL CCD
- Resolution: D1 1080P
- Lens: 5MP 2.1mm
- Video Formats: PAL/NTSC (OSD adjustable)
- Noise Ratio: > 60dB (AGC OFF)
- Electronic Shutter: PAL: 1/50-100,000, NTSC: 1/60-100,000
- Automatic Gain Control: Yes
3.4 General Product Information
- Model Number: UAZNJFZ888
- Package Dimensions: 1.18 x 0.79 x 0.39 inches
- Item Weight: 14.1 ounces (400 Grams)
4. Setup
Proper setup is crucial for the safe and effective operation of your drone. This section outlines the general steps for installing and configuring the F4V3S Flight Controller.
4.1 Physical Installation
- Mounting: Secure the flight controller to your drone frame using the 30.5x30.5mm mounting holes. Ensure proper vibration dampening.
- ESC Connection: Connect your Electronic Speed Controllers (ESCs) to the 4x3 pin ESC layout on the flight controller. Refer to your ESC and motor documentation for correct wiring.
- Receiver Connection: Connect your SBUS/PPM or Spektrum DSMX receiver to the designated ports.
- VTX and Camera Connection: If using the VTX5848 LITE and FPV camera, connect them to the appropriate video input/output and 5V power pads on the flight controller.
- GPS Module (BN880) Connection: Connect the BN880 GPS module for accurate navigation and positioning. Ensure correct TX/RX connections.
- Power Connection: Connect the main power lead from your battery to the flight controller's power input. Double-check polarity before applying power.
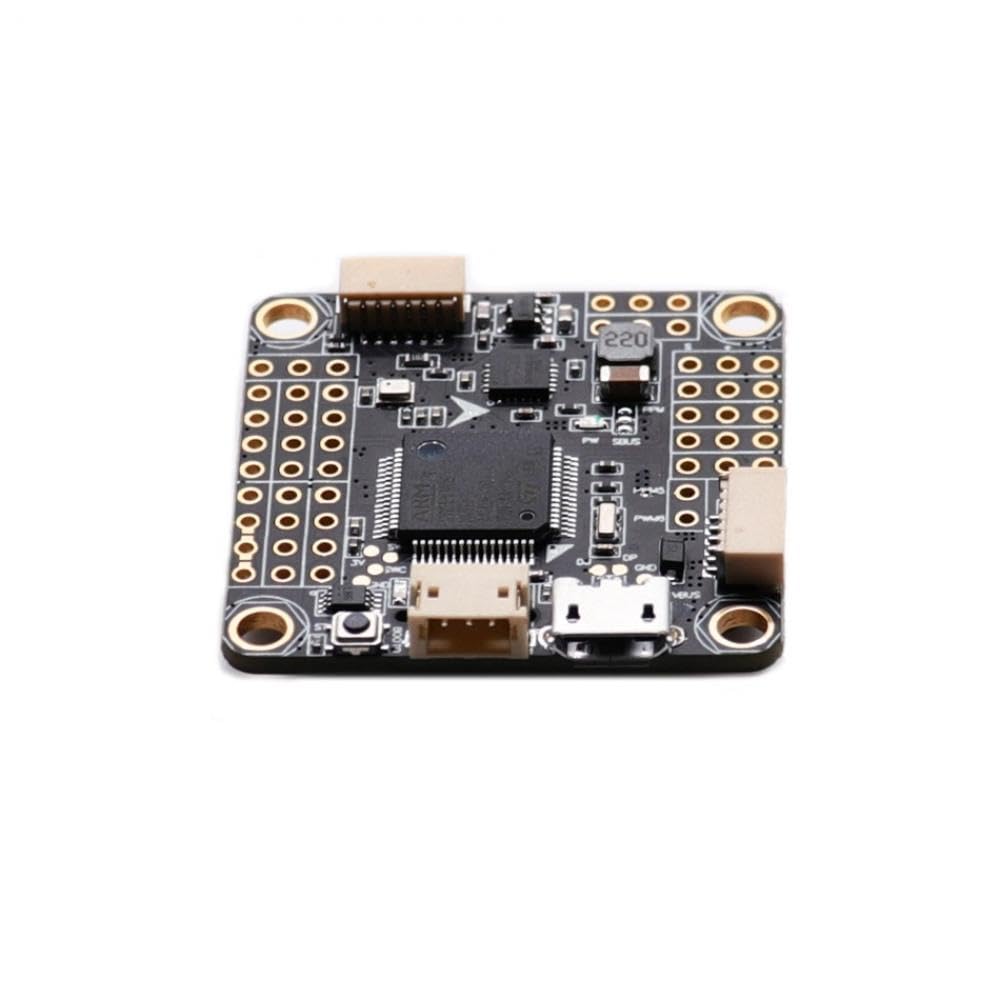
Image 4.1: Detailed top view of the F4V3S Flight Controller, illustrating component placement and connection points.
4.2 Firmware Flashing and Configuration
- Connect to PC: Connect the flight controller to your computer via a USB cable.
- Install Drivers: Ensure all necessary drivers are installed for your flight controller.
- Flash Firmware: Open Betaflight Configurator or INAV Configurator. Select the appropriate firmware target for the F4V3S and flash the latest stable version.
- Initial Configuration: Follow the setup wizard within the configurator to perform initial sensor calibration, ESC protocol selection (e.g., Dshot), and receiver setup.
- OSD Configuration: Configure the On-Screen Display (OSD) settings to show desired flight data (voltage, current, flight mode, GPS coordinates, etc.).
- SmartAudio V2: If using SmartAudio, configure it via TX6 on J10 to control your VTX settings from your remote or OSD.
- Blackbox Setup: If using an SD card for blackbox logging, ensure it is properly formatted and configured in the software.
- Test Motors: Carefully test motor direction and response in the configurator's motor tab (with propellers removed for safety).
5. Operating
Once the flight controller is set up, you can proceed with operating your drone. Always ensure you are in a safe environment and follow local regulations for drone operation.
5.1 Pre-Flight Checks
- Verify all connections are secure.
- Check propeller direction and tightness.
- Ensure battery is fully charged.
- Confirm GPS lock (if applicable) and home point set.
- Check OSD for critical information like battery voltage.
5.2 Flight Operation
- Arm the drone using your configured arming switch.
- Monitor OSD for real-time flight data, including altitude from the barometer.
- Adjust VTX power and channel as needed using SmartAudio or manual buttons on the VTX5848 LITE. Note that PIT mode (0mW output) can be enabled via OSD.
- Disarm the drone after landing.
6. Maintenance
Regular maintenance helps ensure the longevity and reliability of your F4V3S Flight Controller and drone system.
- Cleaning: Keep the flight controller free from dust, dirt, and moisture. Use compressed air or a soft brush for cleaning.
- Connection Checks: Periodically inspect all solder joints and connectors for signs of wear, corrosion, or looseness.
- Firmware Updates: Check for and install the latest stable firmware versions for Betaflight or INAV to benefit from bug fixes and new features.
- SD Card Management: Regularly back up and clear the SD card used for blackbox logging to prevent data loss and ensure continuous recording.
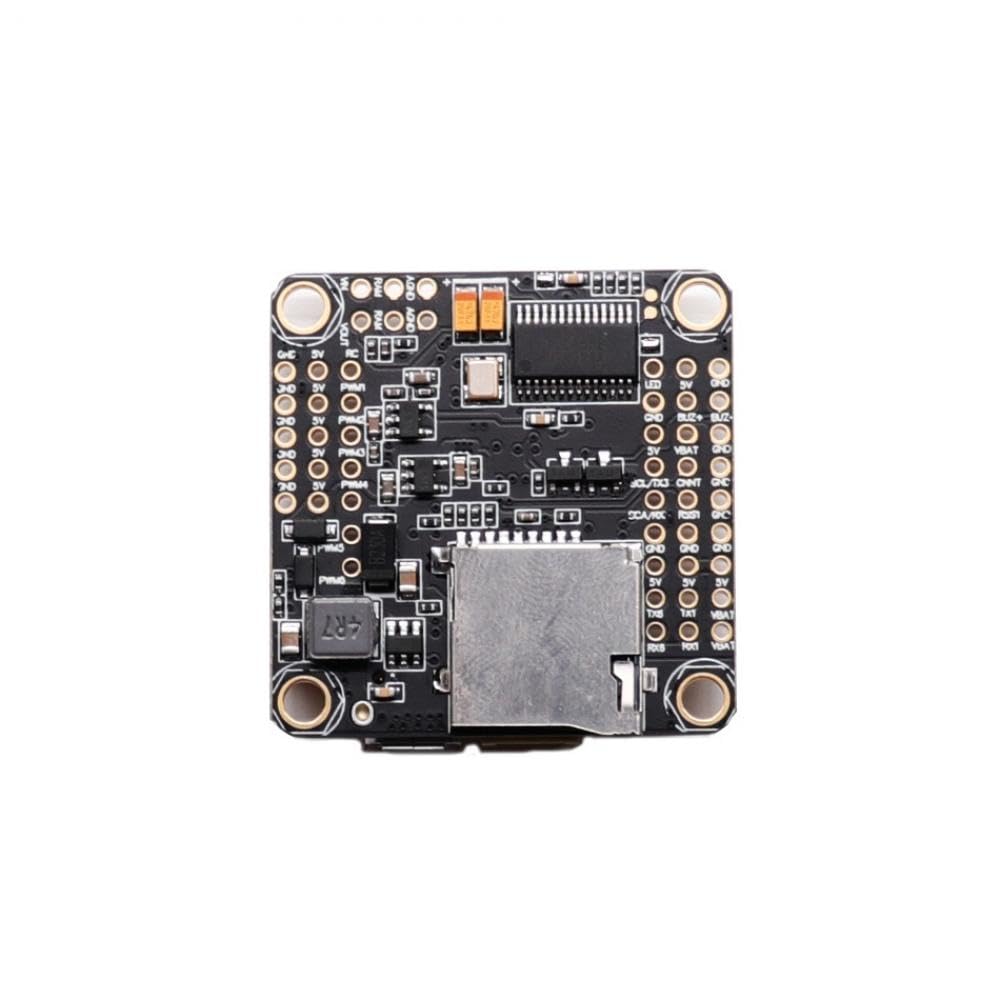
Image 6.1: Bottom view of the F4V3S Flight Controller, highlighting the SD card slot for blackbox logging.
7. Troubleshooting
This section provides general guidance for common issues. For more specific problems, consult the Betaflight or INAV documentation and community forums.
7.1 Common Issues and Solutions
- No Power: Check battery connection, power lead polarity, and ensure no short circuits. Verify the 5V SBEC is functioning.
- No Connection to Configurator: Ensure correct USB drivers are installed. Try a different USB cable or port. Verify the flight controller is powered.
- Motors Not Spinning: Check ESC connections, motor protocol settings in the configurator, and ensure the drone is armed. Calibrate ESCs if necessary.
- Unstable Flight: Re-check sensor calibration. Ensure propellers are balanced and undamaged. Review PID tuning settings in the configurator.
- No OSD Display: Verify OSD is enabled in the configurator. Check video connections between camera, flight controller, and VTX.
- GPS Not Locking: Ensure the BN880 module has a clear view of the sky. Check GPS wiring and configuration in INAV.
8. Warranty and Support
For warranty information, please refer to the terms and conditions provided by your retailer or the manufacturer, UAZNJFZ, at the time of purchase. Specific warranty details are not included in this manual.
For technical support or assistance with product-related issues, please contact the seller or manufacturer directly through their official support channels. Provide your product model (F4V3S) and purchase details when seeking support.