LIBRACTA LIBRACTA
LIBRACTA Morpheus 8 Professional Portable Radiofrequency Micro-needle Device User Manual
Model: LIBRACTA
1. Introduction
The LIBRACTA Morpheus 8 Professional Portable Radiofrequency Micro-needle Device is an innovative beauty instrument designed for advanced skin care. It combines Morpheus 8 radiofrequency (RF) energy with micro-needling technology to address various skin concerns, including wrinkles, acne, scars, and skin laxity. This manual provides comprehensive instructions for safe and effective operation, maintenance, and troubleshooting.
2. Safety Information
Please read all safety warnings and instructions carefully before using the device. Failure to follow these instructions may result in injury or device damage.
- Do not use the device on broken, irritated, or infected skin.
- Consult a healthcare professional before use if you have any underlying medical conditions, are pregnant, or have pacemakers/implants.
- Keep the device out of reach of children.
- Ensure the power supply matches the device's specifications (220V-240V).
- Do not immerse the device or its components in water.
- Always unplug the device before cleaning or when not in use.
- Use only original LIBRACTA replacement parts and accessories.
- Avoid direct eye contact with the micro-needle heads.
3. Product Overview and Components
Familiarize yourself with the main components of your LIBRACTA device.

Figure 3.1: Overview of the LIBRACTA Morpheus 8 device, showing the main unit with its touchscreen display, two attached handles (one micro-needle RF handle and one cold hammer handle), and a set of four different micro-needle tips.

Figure 3.2: Detailed diagram illustrating the key components of the device, including the high-definition screen, operation handles, connection points, power switch, and power input.
Key Components:
- Main Unit: Features a high-definition touchscreen for operation and settings adjustment.
- Radiofrequency Micro-needle Handle: Used for RF micro-needling treatments.
- BIO Microcurrent & Cold Hammer Handle: Provides microcurrent and cooling therapy.
- Interchangeable Micro-needle Heads: Includes 10-pin, 25-pin, 64-pin, and Nanochip heads for various treatment depths and areas.
- Power Cable: For connecting the device to an electrical outlet.

Figure 3.3: The microcrystal handle and the four distinct interchangeable treatment heads: 10-pin, 25-pin, 64-pin, and Nanochip, each designed for specific applications.
4. Setup
- Unpacking: Carefully remove all components from the packaging. Inspect for any damage.
- Placement: Place the main unit on a stable, flat, and dry surface. Ensure adequate ventilation around the device.
- Connect Handles: Connect the micro-needle RF handle and the BIO microcurrent & cold hammer handle to their respective ports on the main unit. Ensure they are securely fastened. Refer to Figure 3.2 for connection points.
- Attach Treatment Head: Select the appropriate micro-needle head (10-pin, 25-pin, 64-pin, or Nanochip) for your intended treatment and securely attach it to the micro-needle RF handle.
- Power Connection: Plug the power cable into the power input port on the back of the main unit, then plug the other end into a grounded electrical outlet (220V-240V).
- Power On: Press the power on/off button (refer to Figure 3.2) to turn on the device. The touchscreen display will illuminate.
5. Operating Instructions
This section details how to operate your LIBRACTA device for various skin treatments.
5.1. General Operation
- Screen Navigation: Use the high-definition touchscreen to select treatment modes, adjust parameters (time, depth, speed, suction, RF power), and monitor treatment progress.
- Mode Selection: The device typically offers manual and automatic modes. Choose the mode suitable for your treatment plan.
- Parameter Adjustment: Adjust settings such as needle depth (e.g., 0.2mm), speed, and RF power (0-150W) according to the specific treatment area and desired intensity. Start with lower settings and gradually increase as tolerated.

Figure 5.1: Visual representation of the diverse applications of the device, including facial lifting, pore reduction, skin rejuvenation, acne treatment, and wrinkle reduction.
5.2. Radiofrequency Micro-needling Treatment
This treatment combines mechanical stimulation from micro-needles with RF energy to stimulate collagen regeneration and skin repair.
- Preparation: Cleanse the skin thoroughly. Apply a numbing cream if desired, and remove it before treatment.
- Head Selection: Choose the appropriate micro-needle head (10, 25, 64 pins, or Nanochip) based on the treatment area and desired depth.
- Settings: Adjust the needle depth, RF power, and speed on the touchscreen.
- Application: Gently press the micro-needle RF handle onto the skin, ensuring full contact. Move the handle in small, overlapping sections across the treatment area.
- Post-Treatment: Apply a soothing serum or mask. Avoid direct sun exposure and use sunscreen.
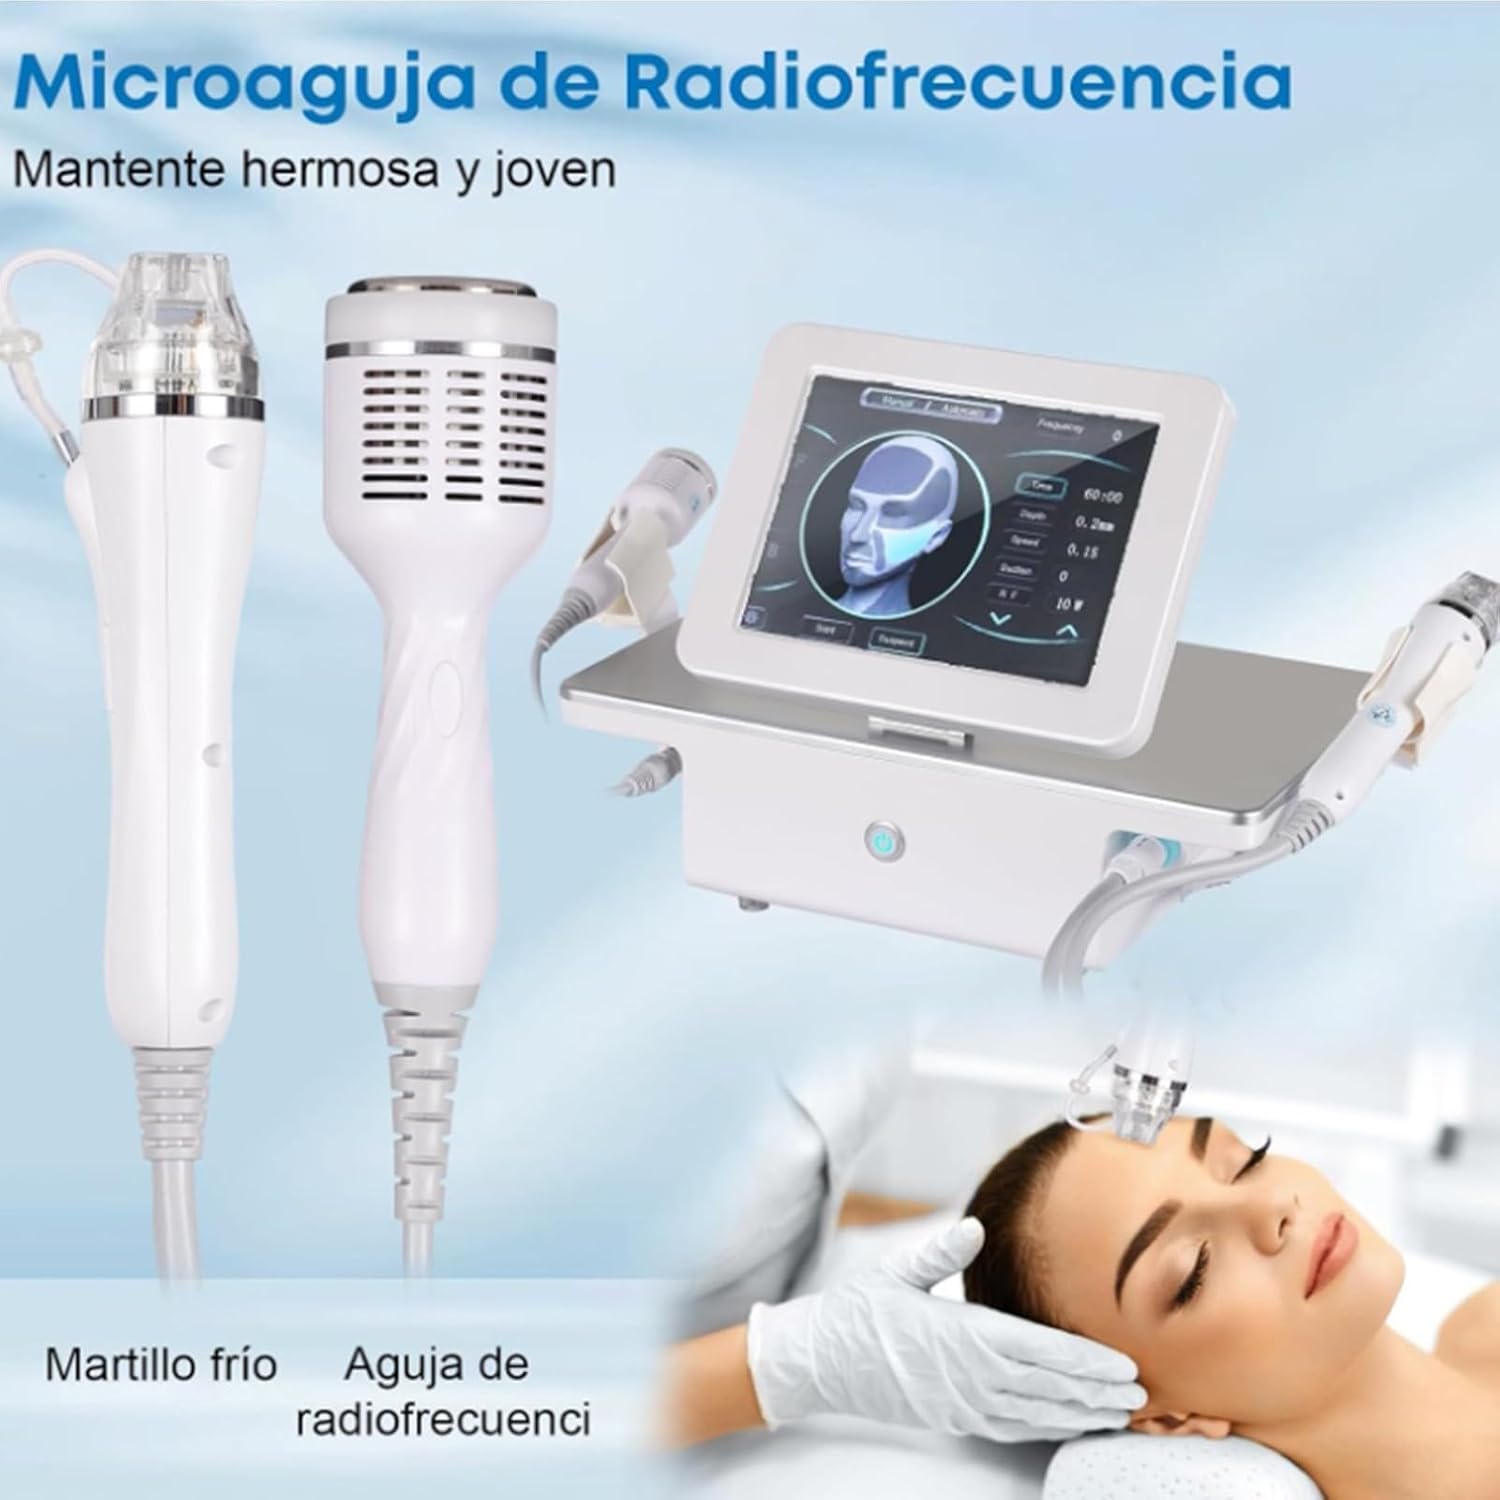
Figure 5.2: The two primary handles: the Radiofrequency Micro-needle handle and the Cold Hammer handle, illustrating their combined use for skin rejuvenation.
5.3. BIO Microcurrent & Cold Hammer Treatment
The BIO microcurrent function helps to tighten skin and improve facial contours, while the cold hammer reduces pores, redness, and swelling.
- Microcurrent Application: Use the BIO microcurrent handle on clean skin. Apply a conductive gel if necessary. Move the handle gently along facial contours to lift and firm.
- Cold Hammer Application: After other treatments or as needed, use the cold hammer handle. The cooling effect helps to soothe skin, reduce inflammation, and minimize pores.

Figure 5.3: Before and after comparison photos illustrating the device's effectiveness in improving various facial skin conditions, such as acne and wrinkles.

Figure 5.4: The device's adaptability for use in various settings, including home, office, and professional beauty salons, emphasizing its portable and user-friendly design.
6. Maintenance
Proper maintenance ensures the longevity and optimal performance of your device.
- Cleaning: After each use, unplug the device. Wipe the main unit and handles with a soft, damp cloth. Do not use abrasive cleaners or immerse in water.
- Micro-needle Heads: Dispose of used micro-needle heads responsibly after each treatment. Do not reuse them to prevent contamination and ensure efficacy.
- Storage: Store the device in a cool, dry place, away from direct sunlight and extreme temperatures. Keep it in its original packaging or a protective case when not in use.
- Inspection: Regularly inspect the power cable and handles for any signs of wear or damage. If any damage is found, discontinue use and contact customer support.
7. Troubleshooting
Refer to this section for common issues and their solutions.
| Problem | Possible Cause | Solution |
|---|---|---|
| Device does not power on. | Power cable not connected properly; Power outlet malfunction; Device fault. | Ensure power cable is securely plugged into both the device and a working outlet. Test the outlet with another appliance. If problem persists, contact customer support. |
| Screen is unresponsive. | Temporary software glitch; Screen damage. | Turn off the device, wait 30 seconds, then turn it back on. If the issue continues, contact customer support. |
| Handles not functioning. | Handles not securely connected; Internal connection issue. | Ensure handles are firmly connected to their ports. Disconnect and reconnect them. If still not working, contact customer support. |
| No RF energy output. | Incorrect settings; Faulty handle/head. | Check RF power settings on the screen. Ensure the micro-needle head is properly attached. If problem persists, contact customer support. |
For issues not listed above, or if troubleshooting steps do not resolve the problem, please contact LIBRACTA customer support.
8. Specifications
| Feature | Specification |
|---|---|
| Brand | LIBRACTA |
| Model Number | LIBRACTA |
| Output Frequency | 50 Hz ~ 60 Hz |
| Output Power | 0-150 W |
| Micro-needle Heads | 10-pin, 25-pin, 64-pin, Nanochip |
| Input Voltage | 220V-240V |
| Dimensions (approx.) | 53 x 39 x 35 cm |
| Weight (approx.) | 9 kg |
9. Warranty and Support
LIBRACTA is committed to providing high-quality products. For warranty information, technical support, or service inquiries, please contact your point of purchase or visit the official LIBRACTA website. Please have your model number and purchase date available when contacting support.
Contact Information: Refer to your purchase documentation or the LIBRACTA official website for the most up-to-date contact details.
Ask a question about this manual
Ask about setup, troubleshooting, compatibility, parts, safety, or missing instructions. Manuals+ will review the question and use this page’s manual context to help answer it.