
Introduction
This manual provides detailed instructions for the installation, operation, and maintenance of your FEISIKE Magnetic Solar Wireless Backup Camera System. This system is designed to enhance visibility and safety for various vehicles, including RVs, trucks, and trailers, featuring a 7-inch 1080P monitor, solar charging, and wireless connectivity.

Image: Overview of the FEISIKE Magnetic Solar Wireless Backup Camera System, showing the 7-inch monitor and the solar-powered camera unit.
Package Contents
Please verify that all items listed below are included in your package:
- Monitor
- Camera
- Accessories (including antennas and assembly accessories)
- User Manual
- Suction Cup Bracket
- Car Charger
- Battery Charger
- Sunshade
- U-Shaped Bracket

Image: A visual representation of all components included in the package, such as the monitor, camera, various brackets, chargers, and accessories.
Setup and Installation
Camera Installation
The camera features a super magnetic base for quick installation on metallic surfaces. For non-metallic surfaces, a bracket is provided.
- Magnetic Installation: Attach the camera's magnetic base directly to a suitable metal surface on your vehicle (e.g., the rear of an RV or trailer). Ensure the camera is securely fastened and will not detach during travel.
- Bracket Installation (for non-metallic surfaces):
- Secure the provided U-shaped bracket to the desired mounting location using appropriate fasteners (not included, depending on surface material).
- Attach the camera to the U-shaped bracket.
- Adjust the camera angle to achieve the desired viewing perspective. The camera offers a 150° wide viewing angle.

Image: Demonstrates the magnetic installation of the camera and the alternative method using a bracket for non-metallic surfaces, highlighting the ease of setup.
Monitor Installation and Powering
The 7-inch monitor can be mounted on your dashboard or windshield using the provided suction cup bracket.
- Attach the suction cup bracket to the monitor.
- Mount the monitor securely on your dashboard or windshield.
- Connect the monitor to power using either the car charger (cigarette lighter adapter) or a USB power source.

Image: Illustrates flexible mounting options for the monitor, including dashboard and windshield, along with methods for connecting power via a cigarette lighter or USB port.
Initial Pairing (if necessary)
The system is typically pre-paired. If the camera and monitor do not connect automatically, refer to the "Pairing" option in the monitor's system settings to re-establish the connection.
Operating Instructions
Powering On/Off and Auto-Sleep
- Press the POWER button on the monitor to turn the system on or off.
- When the monitor is turned off, the camera system will automatically enter sleep mode to conserve battery life.
Monitor Functions and Display Modes
The 7-inch 1080P HD monitor provides clear visuals and supports up to 4 camera channels. Use the CH button to cycle through channels and the MODE button to change display layouts.
- Full Screen: Displays a single camera feed.
- Split Screen: Displays two camera feeds simultaneously.
- Four-split Screen: Displays up to four camera feeds simultaneously (requires additional cameras, sold separately).

Image: Illustrates the different display modes available on the monitor, including full screen, split screen, and four-split screen, demonstrating multi-camera support.
Adjustable Parking Guide Lines
The system features adjustable parking guide lines to assist with reversing and parking maneuvers. These lines can be customized based on your vehicle's size and preferences.
- Access the guide line settings through the monitor's menu.
- Adjust the width, vertical position, and horizontal position of the guide lines.
- Guide lines can be turned on or off as needed.
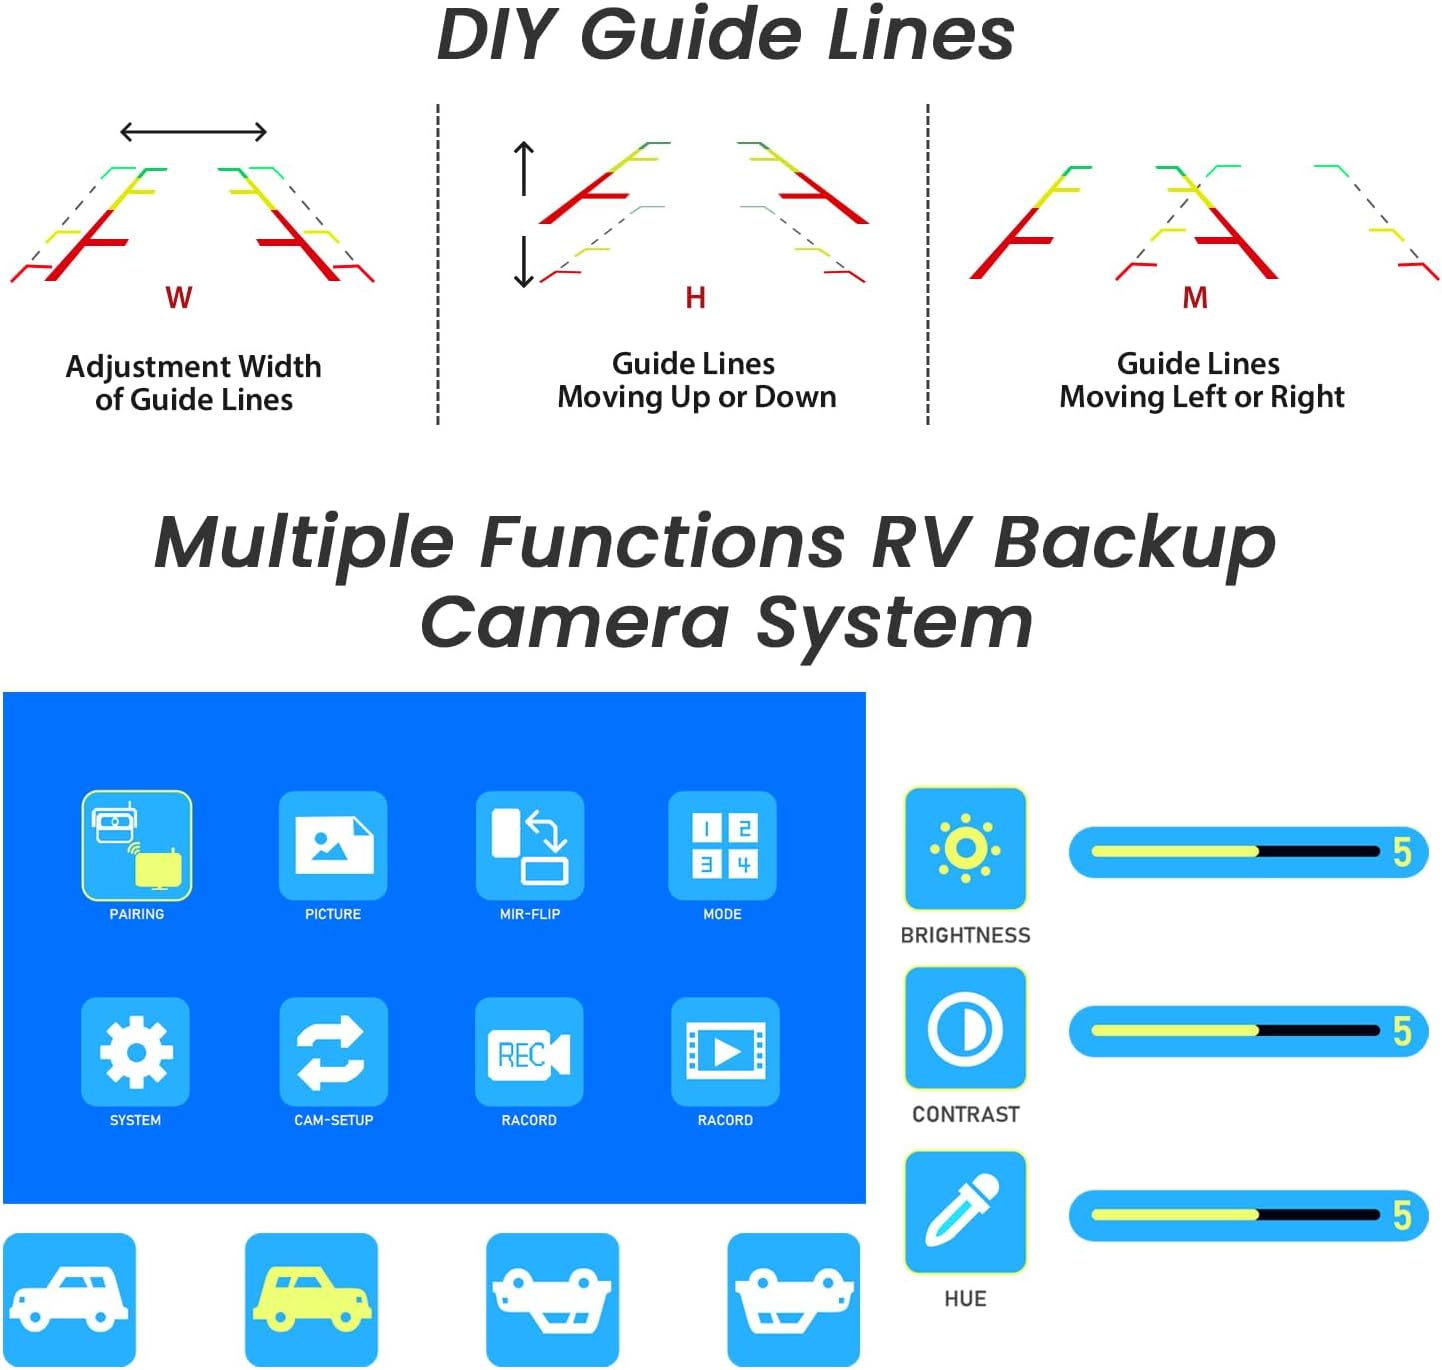
Image: A visual guide demonstrating how to customize the parking guide lines on the monitor, including adjustments for width and position.
DVR Loop Recording
The system supports DVR loop recording to continuously record footage. This feature requires an SD card (not included, supports up to 256GB).
- Insert a compatible SD card into the monitor's slot.
- The system will automatically begin loop recording, overwriting the oldest footage when the storage is full.
- Recorded footage can be played back directly on the monitor.

Image: Shows the DVR loop recording function, indicating SD card support (up to 256GB) and the ability to play back recorded video directly on the monitor.
Night Vision
The camera is equipped with induction infrared lights that automatically activate in low-light conditions, providing clear night vision for improved safety.

Image: Depicts the camera's night vision capability, showing how infrared lights illuminate the scene for clear visibility in dark conditions.
Maintenance
Solar Charging and Battery Management
The camera features a 5W solar panel and a high-capacity rechargeable battery. For optimal performance:
- Ensure the solar panel is clean and unobstructed to maximize charging efficiency.
- The battery provides up to 24 hours of use on a full charge.
- If solar charging is insufficient (e.g., during prolonged cloudy weather), use the provided battery charger to manually recharge the camera.

Image: Details the solar charging mechanism and the 9600mAh rechargeable battery, also showing the option for wired charging when solar power is not available.
Weather Resistance
The camera is IP69 waterproof, designed to withstand various weather conditions, including rain, snow, and extreme temperatures (-22°F to 176°F / -30°C to 80°C).
- Regularly inspect the camera for any physical damage.
- Clean the lens and solar panel with a soft, damp cloth as needed.
Troubleshooting
- No Signal/Intermittent Signal:
- Ensure the camera and monitor are powered on.
- Check for obstructions between the camera and monitor.
- Verify the antennas are securely attached to both units. The system uses a dual antenna design for strong signals up to 830ft in open areas.
- Re-pair the camera and monitor if necessary (refer to "Initial Pairing" in Setup section).
- Poor Image Quality:
- Clean the camera lens.
- Ensure the monitor screen is clean.
- Adjust brightness, contrast, and saturation settings on the monitor for optimal viewing.
- Camera Battery Drains Quickly:
- Ensure the solar panel is clean and exposed to direct sunlight.
- If operating in low-light conditions for extended periods, manually charge the camera battery using the provided charger.
- Verify the auto-sleep function is enabled to conserve power when the monitor is off.
- DVR Recording Issues:
- Ensure a compatible SD card (8-256GB) is inserted correctly.
- Format the SD card through the monitor's settings if recording problems persist.
Specifications
| Brand | FEISIKE |
| Model | Solar-1 Camera |
| Product Dimensions | 8 x 8 x 5 inches |
| Item Weight | 4.54 pounds |
| Batteries | 3 Lithium Ion batteries (included) |
| Other Display Features | Wireless |
| Video Capture Resolution | 1080p |
| Field Of View | 150 Degrees |
| Control Method | Touch |
| Screen Size | 7 Inches |
| Battery Cell Composition | Lithium Ion |
| Compatible Devices | RV, Trailers, Truck |
| Waterproof Rating | IP69 |
| Signal Range | Up to 830 FT (open area) |
| SD Card Support | 8-256GB (Not Included) |
Warranty and Support
For warranty information and technical support, please refer to the official FEISIKE website or contact their customer service directly. The contact details are typically provided in the packaging or on the manufacturer's official product page.
Please retain your purchase receipt for warranty claims.