1. Safety Information
Please read all instructions carefully before installation and use. Retain this manual for future reference.
- Electrical Safety: Ensure power is disconnected at the main circuit breaker before performing any electrical work. All electrical connections must be performed by a qualified electrician in accordance with local codes.
- Water Safety: Ensure all plumbing connections are secure and leak-free. Turn off the main water supply before installation.
- Wall Mounting: This vanity is designed for wall mounting. Ensure the wall structure is capable of supporting the weight of the vanity, sink, and mirror cabinet, including contents. Use appropriate mounting hardware for your wall type.
- Handling: Components can be heavy. Use proper lifting techniques and seek assistance to prevent injury.
- Children: Keep children away from the installation area. Do not allow children to play with the vanity or mirror cabinet.
2. Package Contents
Verify that all components are present and undamaged before beginning installation. If any parts are missing or damaged, contact customer support.
- Wall-Mounted Vanity Cabinet (1 unit)
- Integrated Ceramic Sink (1 unit)
- Anti-Fog LED Mirror Cabinet (1 unit)
- Mounting Hardware (screws, anchors, brackets)
- Installation Manual

Image 2.1: Overview of the 64-inch vanity with key dimensions and a visual representation of included accessories such as the faucet, integrated sink, drain assembly, and soft-close hinges.
3. Specifications
| Feature | Description |
|---|---|
| Brand | LUTHXAY |
| Model | 64 Inch Bathroom Vanity |
| Dimensions (L x W x H) | 64 x 20 x 19 inches (Vanity) |
| Mounting Type | Wall Mount / Floating |
| Material | Solid Wood (Cabinet), Ceramic (Sink) |
| Mirror Features | HD LED, Anti-Fog, Smart Touch Controls |
| Storage | 2 Large Drawers, 1 Open Space |
| Drawer/Door Mechanism | Soft-Closing Hinges and Slide Rails |
| Assembly Required | Yes |
4. Setup and Installation
Professional installation is recommended for optimal safety and performance.
4.1 Pre-installation Requirements
- Ensure the installation area has adequate wall support for a floating vanity.
- Verify plumbing (hot/cold water pipes, ground drainage) and electrical (220V power interface) connections are in place according to the diagram below.

Image 4.1: Pre-installation diagram indicating ideal locations for electrical outlets (60-64 inches from ground for vanity, wall reservation for mirror) and plumbing connections (hot/cold water pipes, ground drainage).
4.2 Wall Mounting the Vanity Cabinet
- Mark the desired height and position for the vanity on the wall. Use a level to ensure accuracy.
- Drill pilot holes for the mounting brackets according to the vanity's design and the provided hardware.
- Secure the mounting brackets to the wall using appropriate anchors and screws.
- Carefully lift the vanity cabinet and attach it to the wall brackets. Ensure it is securely fastened and level.
4.3 Installing the Integrated Sink
- Place the integrated ceramic sink onto the vanity cabinet.
- Connect the hot and cold water supply lines to the faucet (if included and not pre-installed).
- Install the drain assembly and connect it to the ground drainage pipe.
- Apply a bead of silicone sealant around the edges where the sink meets the vanity for a watertight seal.
4.4 Installing the LED Mirror Cabinet
- Mark the desired height and position for the mirror cabinet above the vanity.
- Drill pilot holes and install mounting hardware for the mirror cabinet.
- Mount the mirror cabinet securely to the wall.
- Connect the mirror's electrical wiring to the reserved power interface. Refer to the wiring diagram below.
4.5 Electrical Wiring for LED Mirror
There are two common wiring methods:

Image 4.2: Wiring method options for the LED mirror. Solution A: Connect the mirror's power cord directly to a reserved light cord in the wall. Solution B: Purchase a power cord with a plug and connect it to the reserved light cord, then plug into a nearby electrical socket.
- Solution A (Direct Connection): Connect the mirror's power cord directly to the reserved light cord in the wall. This typically requires hardwiring and should be done by a qualified electrician.
- Solution B (Plug-in): If a reserved light cord is available but no direct hardwire connection is desired, a power cord with a plug can be purchased, connected to the reserved light cord, and then plugged into a nearby electrical socket.
5. Operating Instructions
5.1 LED Mirror Cabinet
The LED mirror features touch controls for lighting and defogging functions.
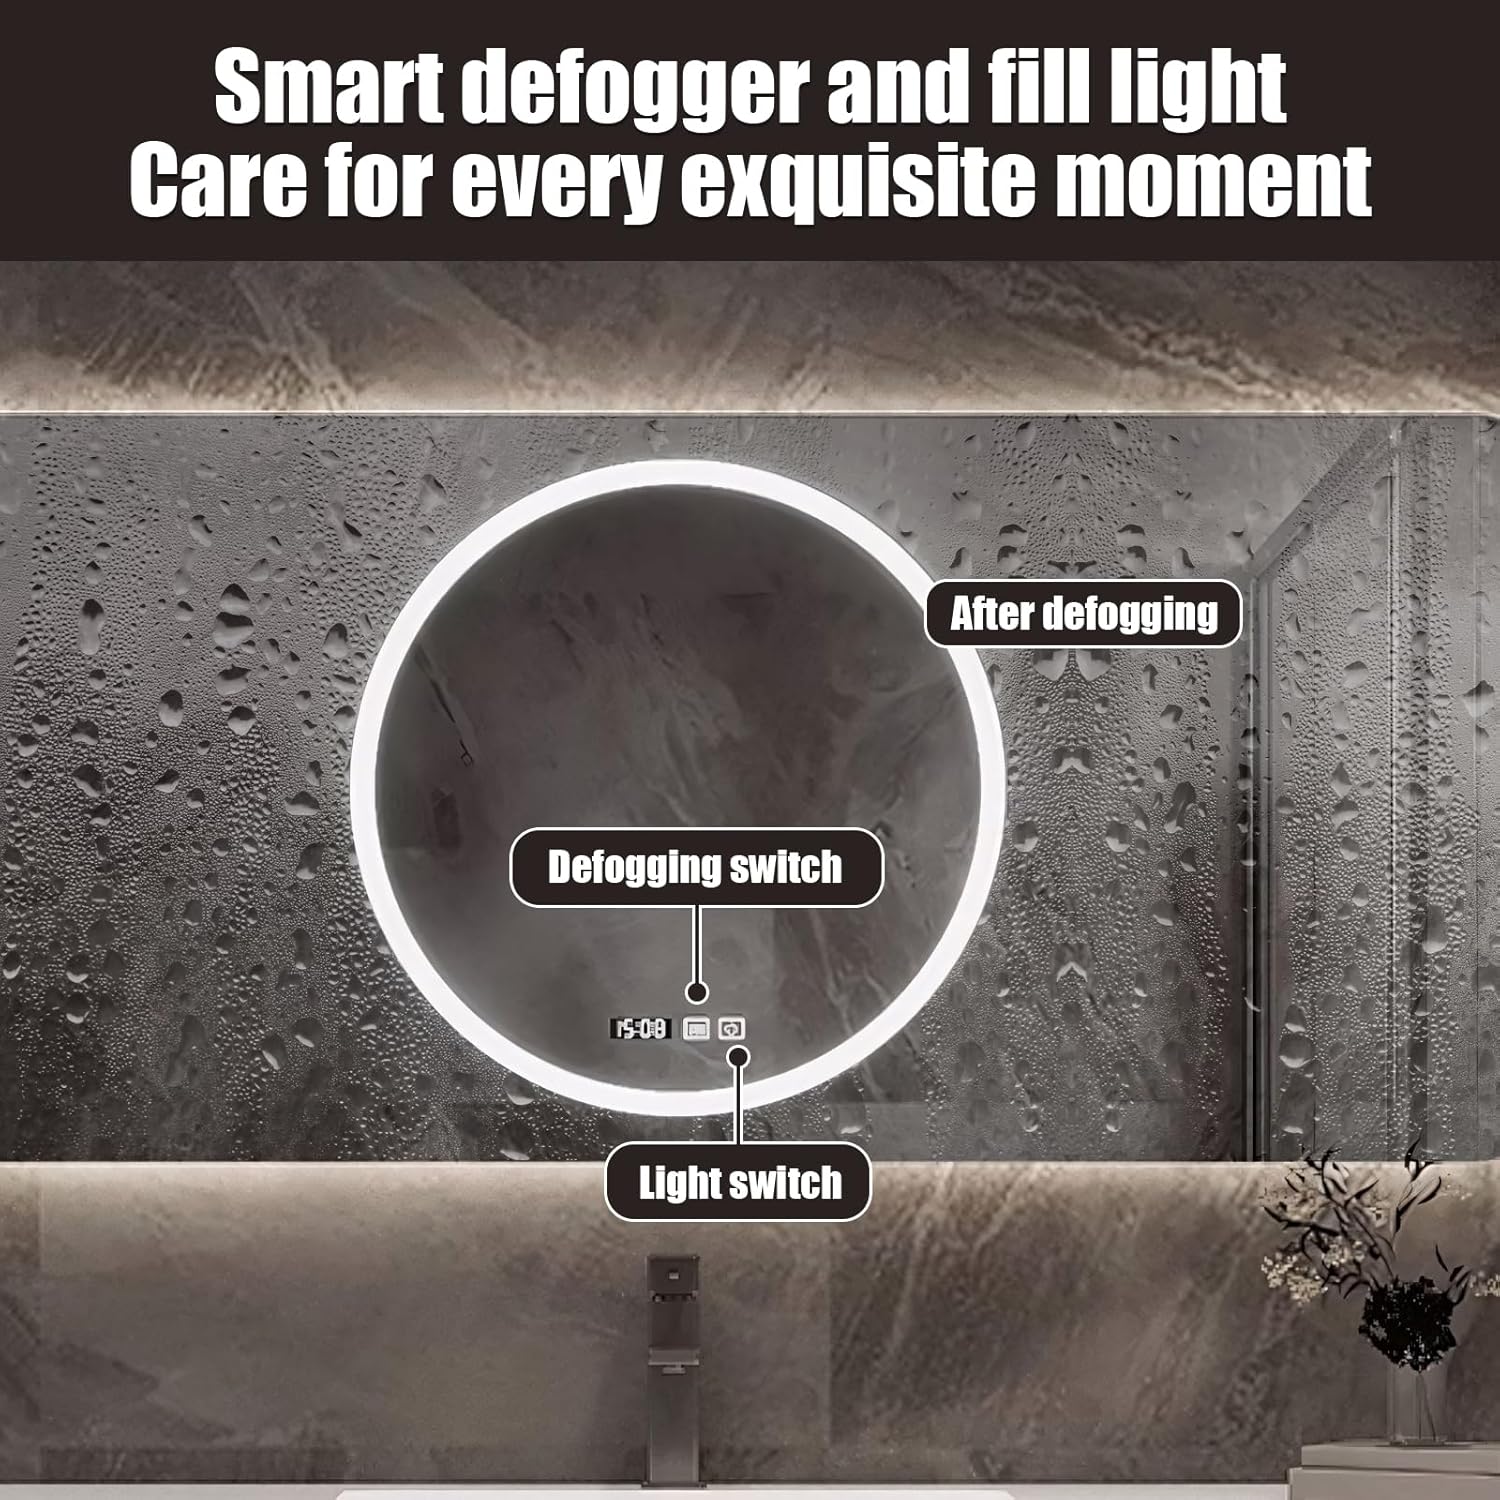
Image 5.1: Smart defogger and fill light controls. The image highlights the touch-sensitive 'Defogging switch' and 'Light switch' icons on the mirror surface, demonstrating the mirror's clarity after defogging.
- Light Switch: Touch the light icon on the mirror surface to turn the LED lighting on or off. Hold the button to adjust brightness if applicable.
- Defogging Switch: Touch the defogging icon to activate the anti-fog function. The defogger will clear condensation from the mirror surface within seconds. Touch again to deactivate.
5.2 Vanity Drawers and Storage
The vanity features two large drawers and an open storage space for organizing bathroom essentials.

Image 5.2: Refined partition storage. This image illustrates the vanity's storage capabilities, highlighting 'Storage area 1' (open shelf), 'Storage area 2' (open shelf), and 'Storage area 3' (drawer) with various items stored inside.
- Soft-Closing Drawers: The drawers are equipped with silent damping slide rails and buffer hinges, allowing them to open and close smoothly and quietly. Avoid forcing the drawers shut.
- Open Storage: Utilize the open shelf space for frequently accessed items or decorative elements.

Image 5.3: Silent damping slide rails and buffer hinges. This image provides detailed views of the hardware responsible for the quiet and smooth operation of the vanity's drawers and doors.
6. Maintenance
Regular cleaning and proper care will ensure the longevity and appearance of your LUTHXAY vanity.
6.1 Ceramic Sink Care
- Clean the ceramic sink regularly with a soft cloth and mild, non-abrasive cleaner.
- Avoid harsh chemicals, abrasive pads, or acidic cleaners, as these can damage the surface.
- Wipe spills promptly to prevent staining.
6.2 Wood Cabinet Care
- Wipe wood surfaces with a soft, damp cloth. Dry immediately with a clean, dry cloth.
- Avoid prolonged exposure to moisture. Wipe up water splashes immediately.
- Do not use abrasive cleaners or solvents on the wood finish.

Image 6.1: Solid wood panel. The bathroom cabinet is crafted from solid wood, offering exceptional durability and waterproof performance.
6.3 LED Mirror Care
- Clean the mirror surface with a soft, lint-free cloth and a glass cleaner. Spray cleaner onto the cloth, not directly onto the mirror.
- Avoid getting liquids into the electrical components or edges of the mirror.
7. Troubleshooting
If you encounter issues, refer to the following common problems and solutions:
| Problem | Possible Cause | Solution |
|---|---|---|
| LED Mirror not turning on | No power supply; Loose connection; Faulty switch | Check circuit breaker; Verify electrical connections; Contact customer support if switch is unresponsive. |
| Defogger not working | Defogger not activated; Electrical issue | Ensure defogger switch is pressed; Check power supply. |
| Drawers are stiff or noisy | Obstruction in slide rails; Dirt/debris; Misalignment | Check for obstructions; Clean slide rails; Realign drawers if necessary. |
| Sink leaking | Loose plumbing connection; Improper sealant | Tighten all plumbing connections; Reapply silicone sealant if needed. |
8. Warranty and Support
For warranty information or technical support, please contact LUTHXAY customer service. Keep your purchase receipt as proof of purchase.
Customer Service Contact: Refer to your purchase documentation or the LUTHXAY official website for contact details.