1. Safety Information
Please read all instructions carefully before assembly and use. Failure to follow these instructions may result in injury or damage to the product or your pet.
- Handle Glass with Care: The enclosure includes tempered glass panels. Handle them carefully to prevent breakage and injury.
- Secure Assembly: Ensure all components are securely fastened according to the assembly instructions. Loose parts can compromise the enclosure's integrity.
- Stable Placement: Always place the assembled enclosure on a flat, stable, and level surface capable of supporting its full weight, including substrate, decor, and the animal.
- Electrical Safety: If using heating or lighting elements, ensure all electrical cords are routed safely through the designated cable pass-through holes and are not pinched or damaged. Follow the manufacturer's instructions for all electrical accessories.
- Ventilation: The mesh top provides essential ventilation. Do not obstruct it, as this can lead to poor air circulation and overheating.
- Child and Pet Safety: Keep children and other household pets away from the enclosure during assembly and ensure the lock is engaged when the enclosure is in use to prevent accidental opening.
2. Package Contents
Verify that all components are present and undamaged before beginning assembly. If any parts are missing or damaged, please contact customer support.
- PVC Panels (Front, Back, Sides, Bottom, Top Frame)
- Heavy-Duty Screen Top
- Tempered Glass Sliding Doors
- Door Lock and Keys
- Door Handles
- Assembly Hardware (screws, connectors, etc.)
- Instruction Manual
3. Assembly Instructions
The REPWILD PVC Reptile Enclosure is designed for straightforward assembly. A detailed, step-by-step visual guide is included in the package to assist with the process. No additional tools are typically required.
General Assembly Steps:
- Unpack and Inspect: Carefully remove all components from the packaging. Check for any damage or missing parts.
- Assemble Base and Side Panels: Connect the bottom panel to the side and back panels using the provided hardware. Ensure all connections are snug but avoid over-tightening to prevent damage to the PVC.
- Install Front Frame: Attach the front frame, which will house the sliding glass doors.
- Insert Glass Doors: Carefully slide the tempered glass doors into the tracks of the front frame.
- Attach Door Handles and Lock: Secure the door handles to the glass doors and install the lock mechanism as per the visual guide. The upgraded lock design ensures security and ease of use.
- Place Mesh Top: Position the heavy-duty screen top onto the enclosure. This provides ventilation and allows for UVB and heat lamp penetration.
- Final Checks: Once assembled, ensure all panels are flush, connections are secure, and the doors slide smoothly and lock properly.

Image: Front-opening door and upgraded lock mechanism for secure access.

Image: Illustration of the upgraded sliding front door design and anti-breakaway lock for enhanced security.
Note on Sealing: For bioactive enclosures or environments requiring very high humidity, it is recommended to apply reptile-safe silicone sealant to the interior seams after assembly to ensure a leak-proof habitat.
4. Setup
Placement:
- Choose a location away from direct sunlight, drafts, and extreme temperature fluctuations.
- Ensure the surface is sturdy and level to prevent tipping or instability.
Cable Management:
The enclosure features multiple cable pass-through holes with rotated covers on the sides. These are designed for easy addition of heating elements, lighting, and other accessories while maintaining a secure environment.
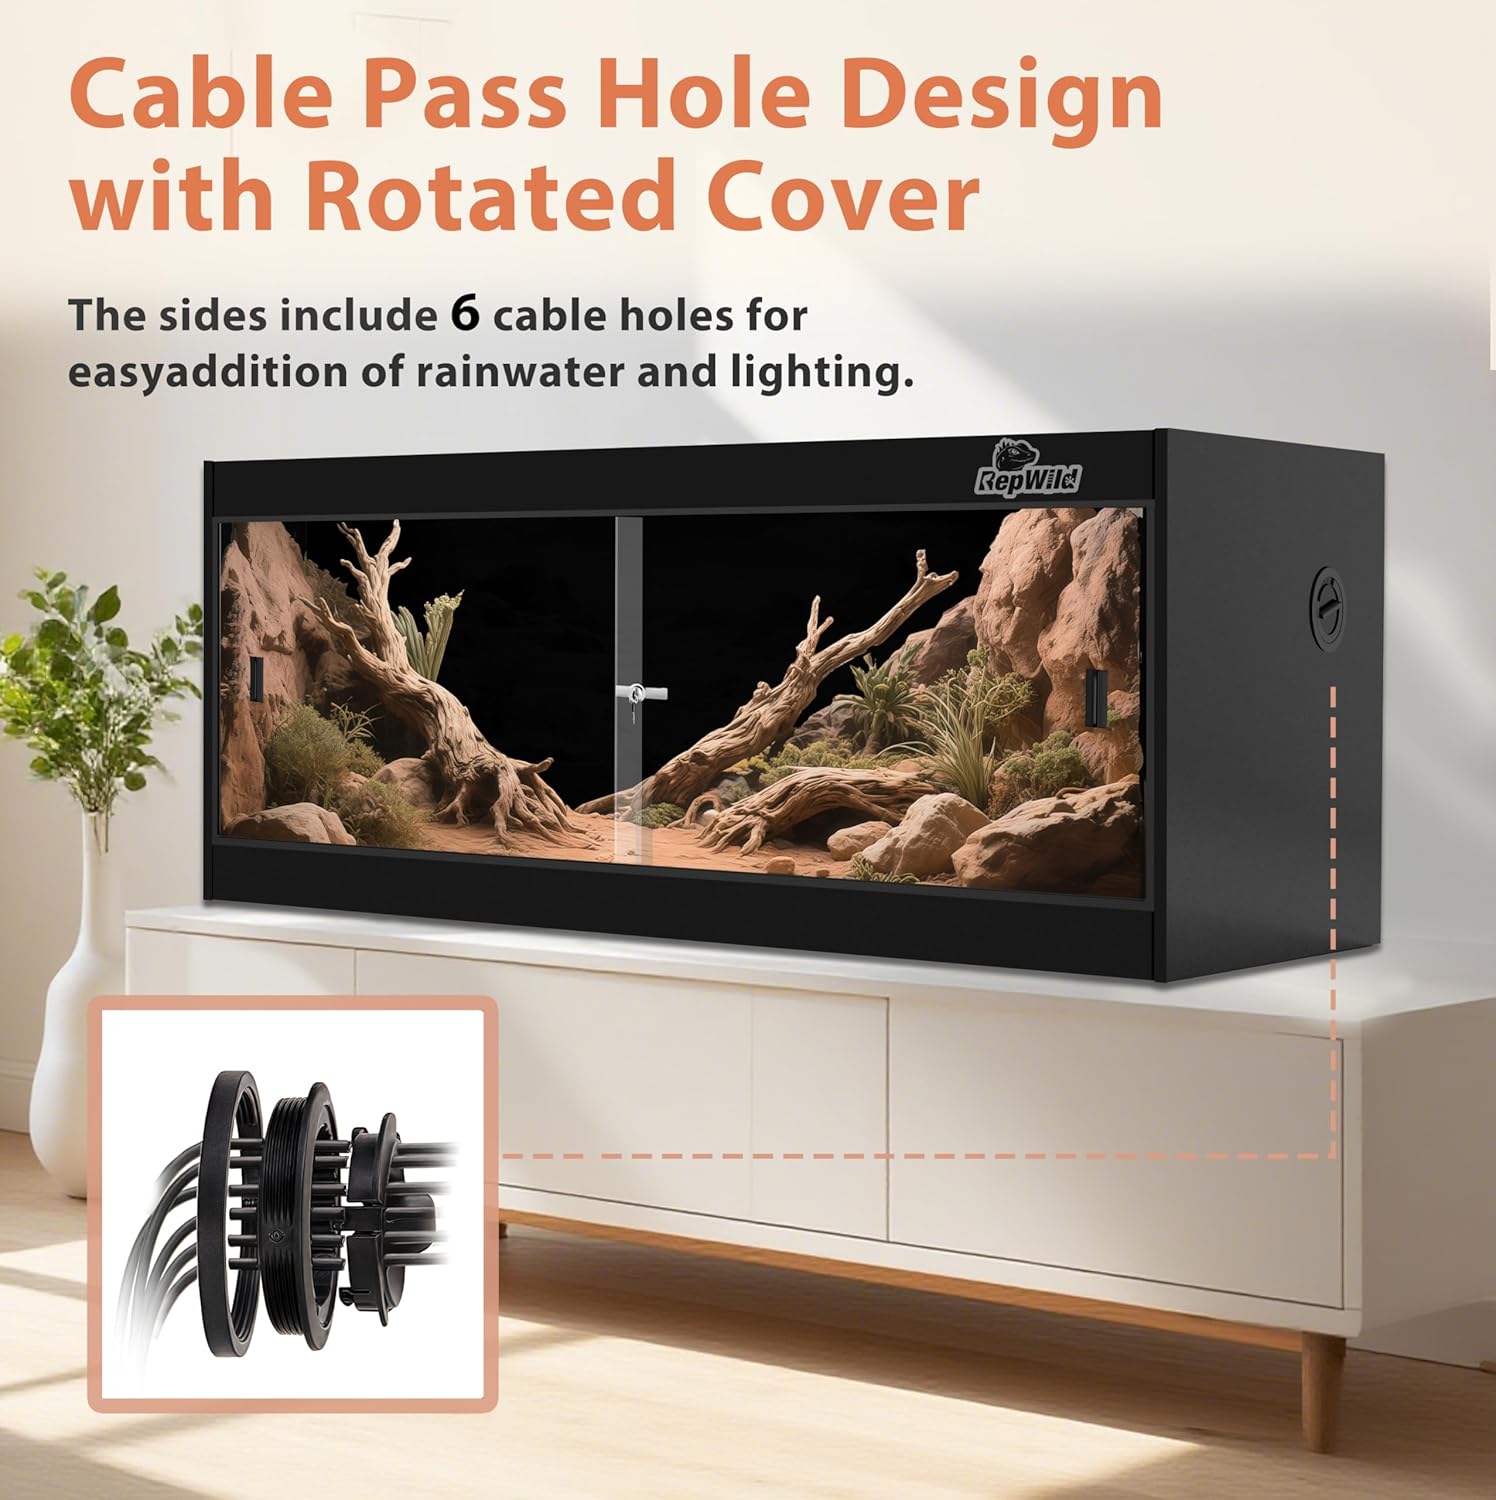
Image: Close-up of the cable pass-through holes with rotating covers for managing electrical cords.
Initial Cleaning:
Before introducing your pet, wipe down all interior surfaces with a reptile-safe disinfectant or a mild soap solution, then rinse thoroughly and allow to air dry completely.
5. Operating the Enclosure
Accessing the Enclosure:
The front-opening tempered glass doors slide smoothly for easy access. To open, unlock the door using the provided key, then gently slide the desired door. The door handles are designed to minimize fingerprints on the glass.
Ventilation:
The heavy-duty mesh top ensures ample airflow and proper ventilation, which is crucial for maintaining a healthy environment for your reptile. It also allows for optimal penetration of UVB and heat lamps.

Image: The mesh top design, highlighting its role in ventilation and creating a stress-free environment.

Image: The heavy-duty screen roof, illustrating its function in providing airflow and allowing heating/lighting penetration.
Suitable Species:
This 4x2x2 (120 Gallon) enclosure is suitable for a variety of reptile species, including but not limited to Bearded Dragons, Ball Pythons, Geckos, and Lizards. Always ensure the enclosure size meets the specific needs of your pet for adequate space and enrichment.
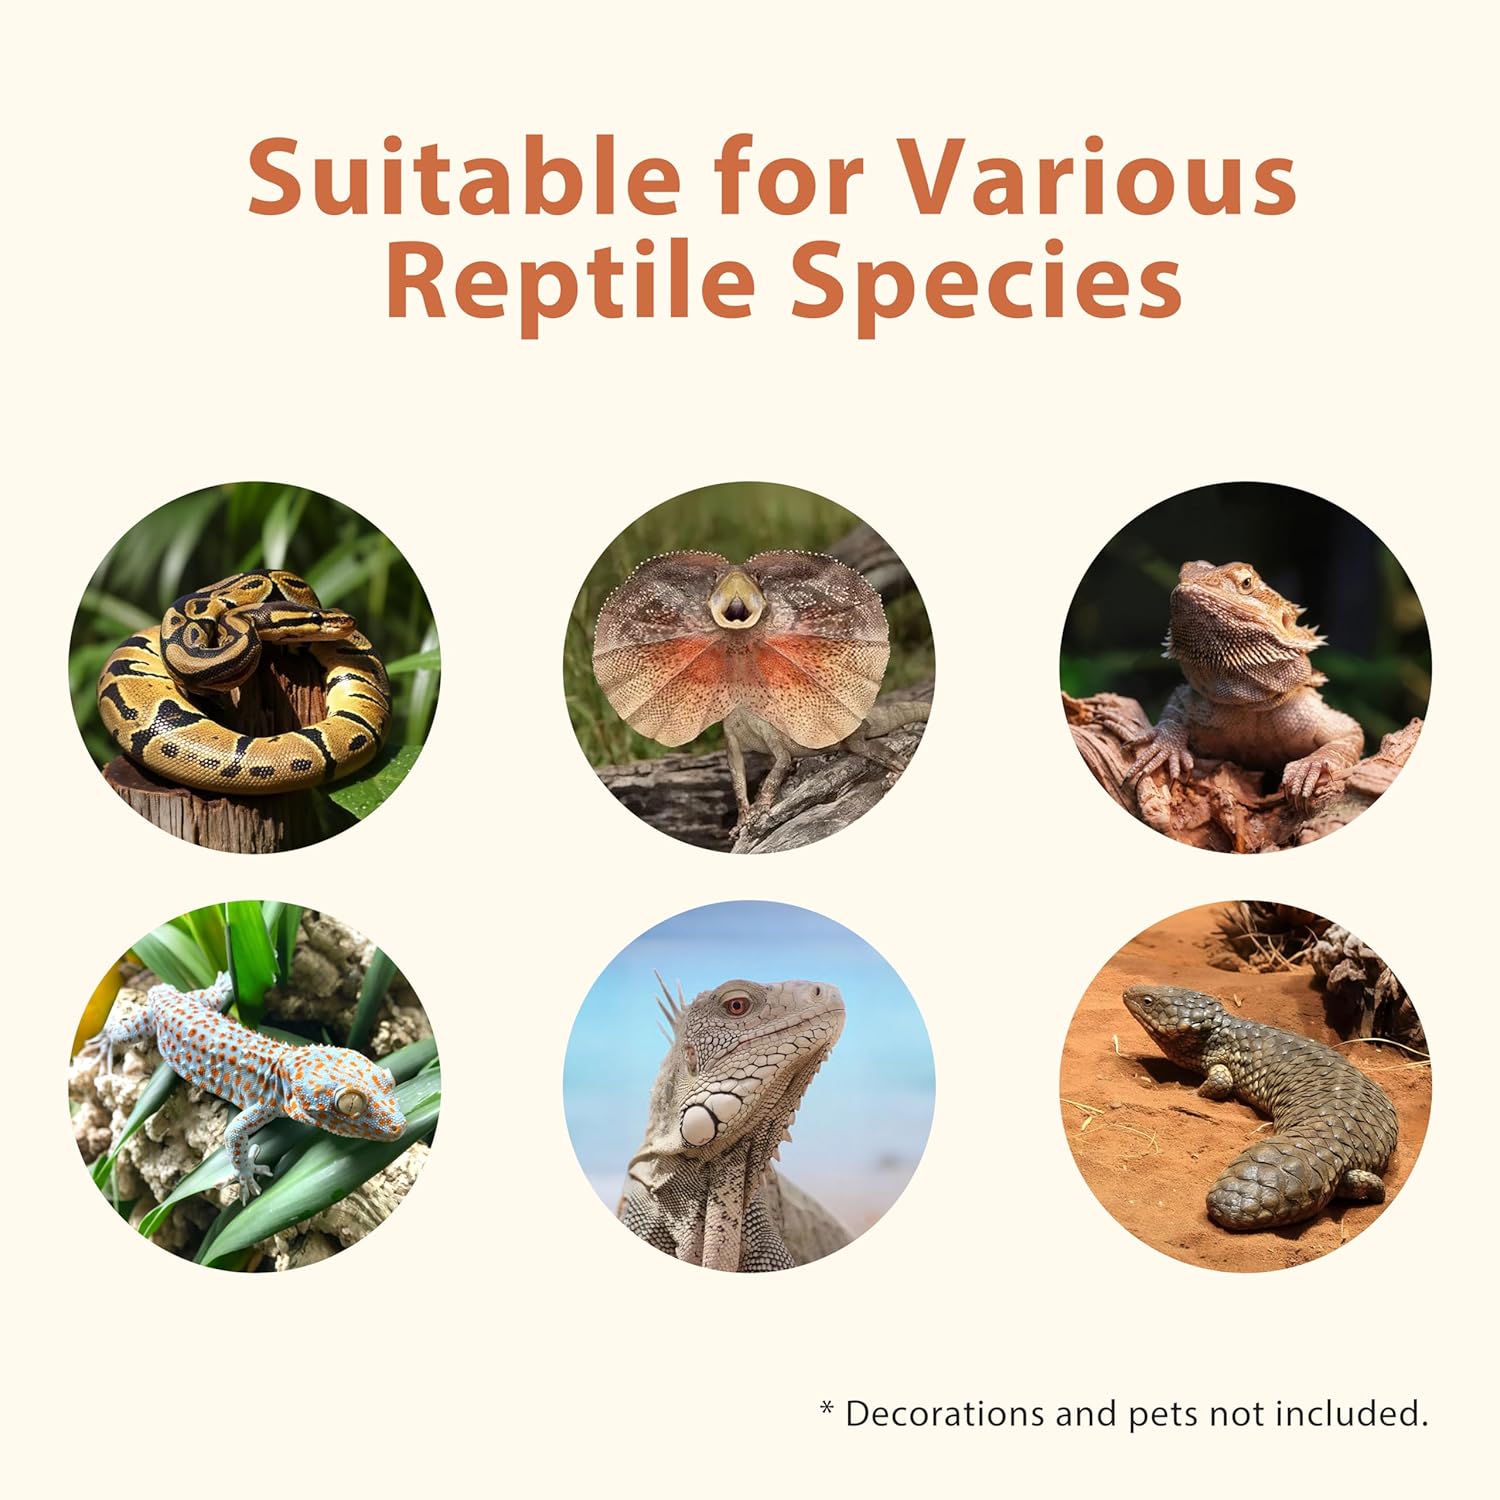
Image: Examples of various reptile species that can be housed in this enclosure.
6. Maintenance
Cleaning the Enclosure:
The PVC material is waterproof and easy to clean. Regular cleaning is essential for maintaining a hygienic environment for your pet.
- Interior Surfaces: Remove all substrate and decor. Wipe down the interior PVC panels with a reptile-safe disinfectant or a mild soap solution. Rinse thoroughly with water and dry completely before replacing items.
- Glass Doors: The thickened crystal-clear glass resists scratches and provides distortion-free visibility. Clean with a glass cleaner or a damp cloth. The doors can be easily uninstalled for more thorough cleaning if needed.
- Mesh Top: Periodically clean the mesh top to ensure proper airflow and light penetration. Use a soft brush or cloth to remove any debris.
Regular Inspection:
Periodically inspect the enclosure for any signs of wear, damage, or loose components. Ensure the lock mechanism is functioning correctly.
7. Troubleshooting
Assembly Difficulties:
- Loose Connectors: If plastic inserts spin during assembly, ensure you are not over-tightening the connector rods. Apply gentle, firm pressure to snug fit the components.
- Panels Not Aligning: Double-check the orientation of each panel against the visual guide. Sometimes a slight adjustment or re-seating of a panel can resolve alignment issues.
Door Operation:
- Sticking Doors: Ensure the tracks are clean and free of debris. A small amount of silicone lubricant (reptile-safe) can be applied to the tracks if needed.
- Lock Issues: If the lock is stiff, ensure it is properly aligned. Do not force the key.
Humidity/Temperature Control:
- Maintaining Humidity: The PVC construction helps retain heat and moisture. For higher humidity requirements, consider sealing interior seams with reptile-safe silicone.
- Temperature Regulation: Ensure appropriate heating and lighting elements are used and properly positioned on the mesh top to achieve desired temperature gradients.
8. Specifications
Detailed specifications for the REPWILD 4x2x2 (120 Gallon) PVC Reptile Enclosure.
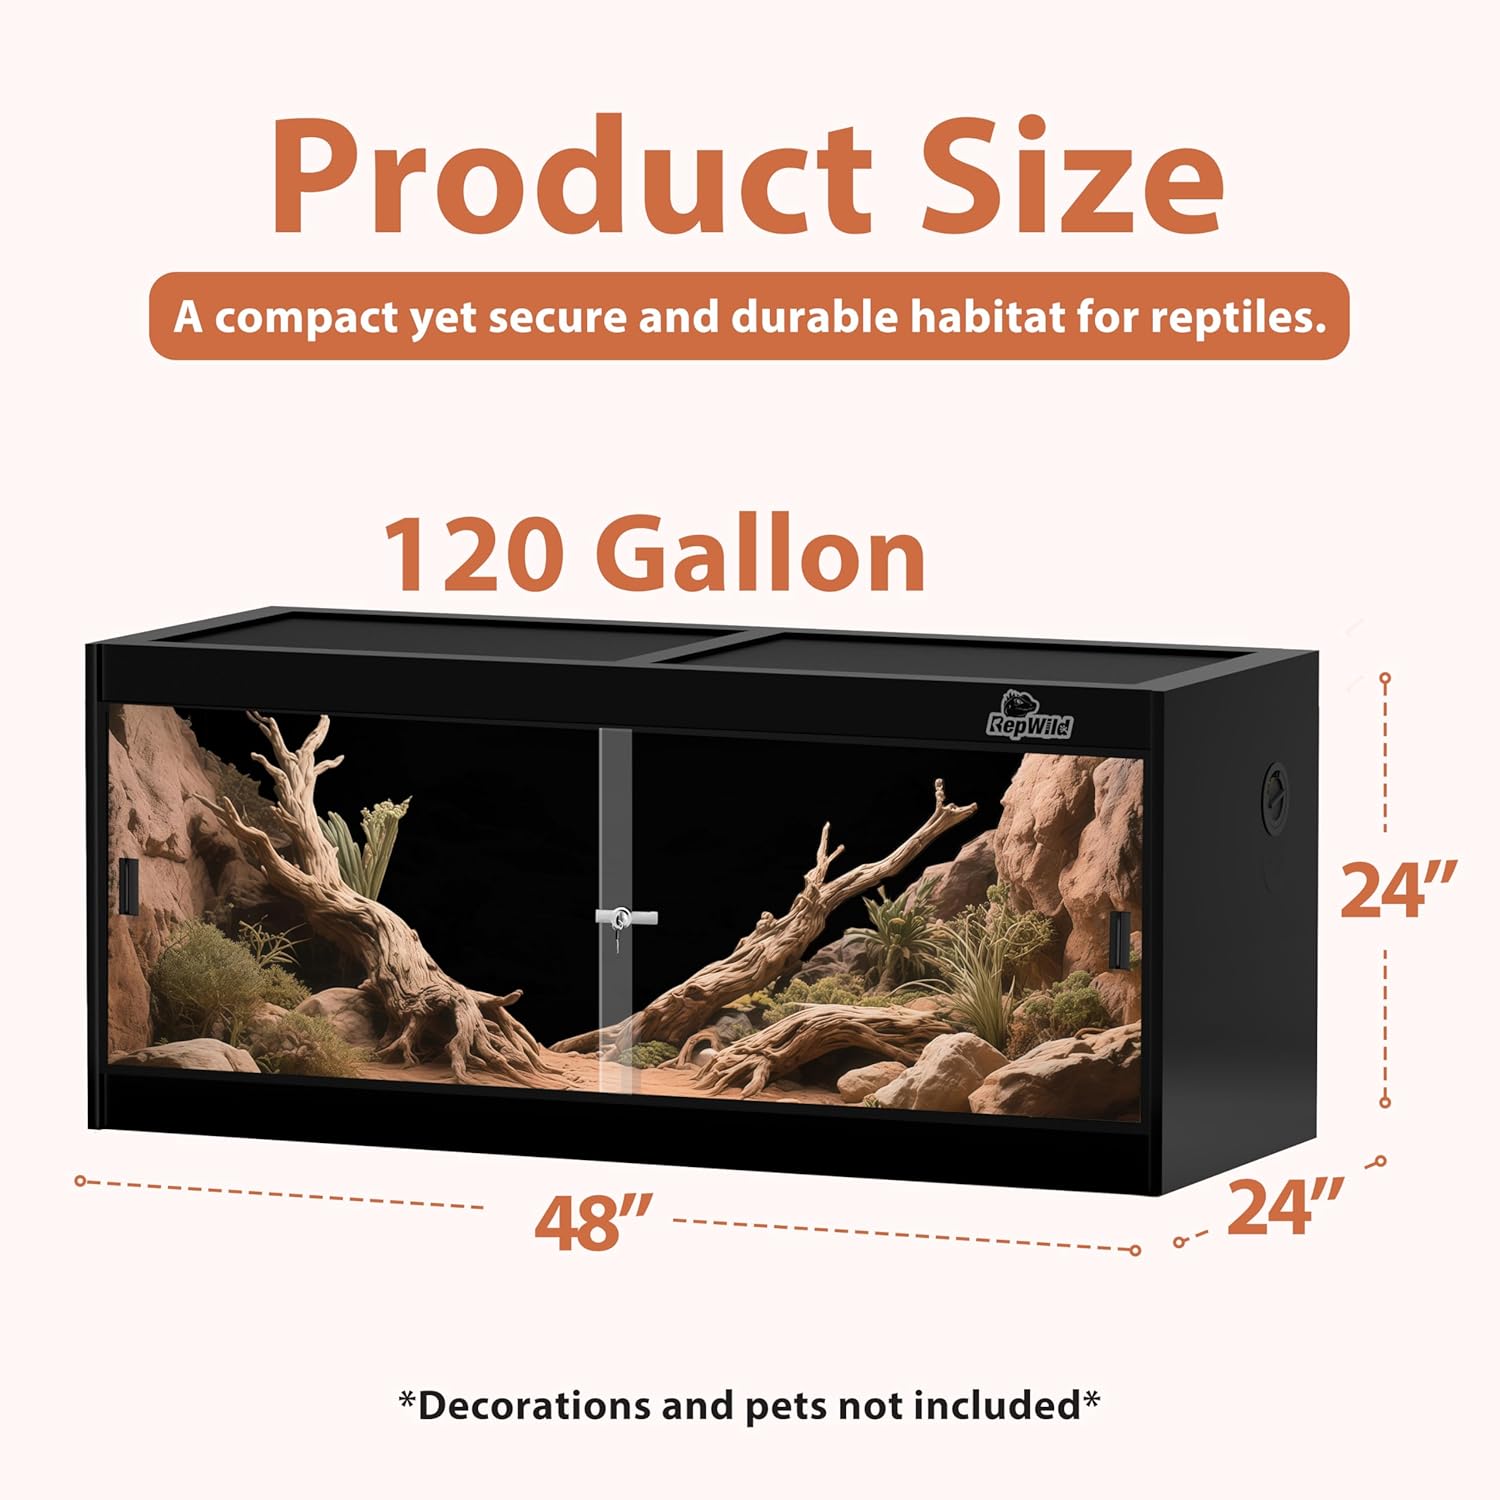
Image: Visual representation of the enclosure's dimensions.
| Feature | Detail |
|---|---|
| Model Name | PHA-4 |
| Dimensions (W x D x H) | 48" x 24" x 24" |
| Tank Volume | 120 Gallons |
| Material | Polyvinyl Chloride (PVC) |
| Color | Black |
| Item Weight | 62.9 pounds |
| Included Components | Glass Door, Handle, Lock, Mesh Top |
| Vivarium Type | Terrarium |
| Specific Uses | Indoor Reptile and Amphibian Housing |
9. Warranty and Support
Warranty Information:
This REPWILD product comes with a 12-month warranty from the date of purchase, covering manufacturing defects. Please retain your proof of purchase for warranty claims.
Customer Support:
For any questions, concerns, or assistance with assembly, operation, or warranty claims, please contact REPWILD customer support. Refer to the contact information provided with your purchase or visit the official REPWILD website.


