1. Introduction
This manual provides detailed instructions for the safe and effective use of your RayHong 5.0 Inch Digital Magnifier. Designed as an electronic reading aid, this device offers adjustable magnification and various viewing modes to assist individuals with low vision, macular degeneration, color blindness, and amblyopia. Please read this manual thoroughly before operating the device.
2. Package Contents
Upon unpacking, please verify that all the following items are included:
- RayHong 5.0 Inch Digital Magnifier (Main Unit)
- USB Charging Cable
- Power Adapter
- TV Output Cable (RCA)
- Cleaning Cloth
- Protective Pouch/Bag
- User Manual (this document)
- Lithium Polymer Battery (pre-installed or separate)
- Screen Protector (optional, may be pre-applied)

Image: Contents of the RayHong 5.0 Inch Digital Magnifier package, including the magnifier unit, cables, adapter, and cleaning cloth.
3. Product Overview and Components
Familiarize yourself with the main parts of your digital magnifier:
- 5.0-inch HD Color LCD Screen: Displays magnified text and images.
- Control Buttons: Simplified buttons for power, zoom, color modes, and other functions.
- Foldable Handle/Stent: Provides ergonomic grip and acts as a stand for hands-free use.
- High Definition Camera: Captures the image for magnification.
- LED Lights: Integrated lighting for enhanced visibility.
- USB Port: For charging and data transfer.
- HDMI Output: Connects to external display devices like a TV.
- TF Card Slot: For storing captured photos and videos (TF card not included).

Image: Detailed view of the digital magnifier highlighting its key functions such as the high-definition camera, foldable handle, and underside LED lights.
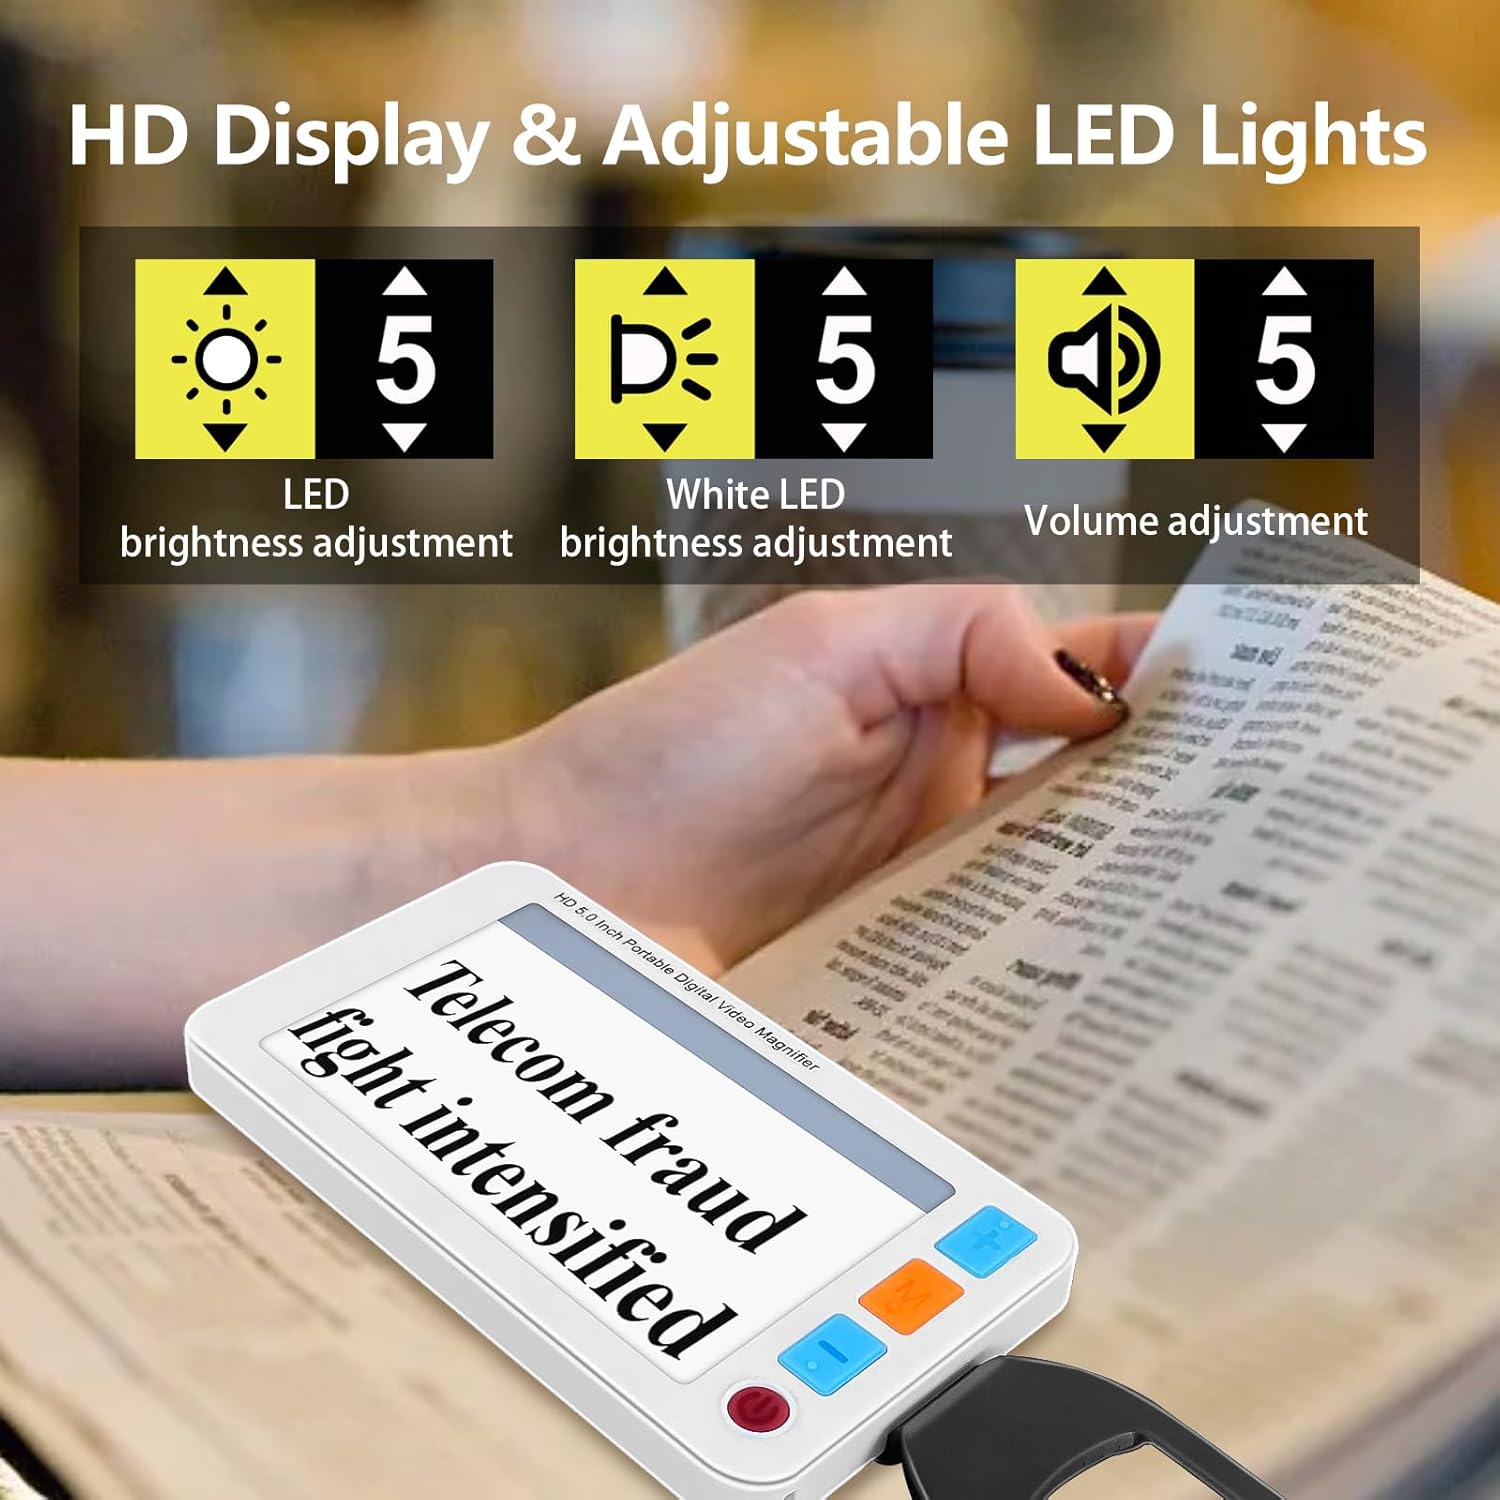
Image: The digital magnifier displaying adjustable LED brightness, white LED brightness, and volume adjustment settings.
4. Setup
- Battery Installation/Charging:
If the battery is not pre-installed, open the battery compartment and insert the provided Lithium Polymer battery. Connect the device to the power adapter using the USB charging cable. The charging indicator light (red) will be on during charging and turn off when fully charged. For first-time use, charge the battery completely.
Video: Demonstrates how to operate a 4.3-inch magnifier, including battery installation and charging.
- Power On/Off:
Press and hold the Power button (usually red) for a few seconds to turn the device on or off. The device will display a "Welcome" screen upon startup.
Video: Shows the basic operation of the digital magnifier, including powering on/off, zooming, and changing color modes.
- Adjusting the Stent/Handle:
The integrated stent/handle can be folded out to position the magnifier at an optimal reading angle for hands-free use. It can also be used as a handle for handheld operation.

Image: A person using the digital magnifier with its portable handle extended for comfortable reading.
5. Operating Instructions
- Zoom In/Out (Magnification Adjustment):
Use the '+' and '-' buttons to adjust the magnification level from 3X to 48X. Place the device over the text or object you wish to magnify.

Image: The digital magnifier demonstrating various zoom levels (3X, 10X, 15X, 32X, 48X) on a newspaper.
Video: Shows a user adjusting the zoom level of a portable digital magnifier while reading a book.
- Color Mode Selection:
Press the 'M' button to cycle through the 26 available color modes, including 8 default selections like full color, black on white, white on black, blue on white, and yellow on black. Choose the mode that provides the best contrast and readability for your vision.

Image: A visual representation of 26 different color modes available on the digital magnifier, including various high-contrast options.
- Freeze Image Function:
Press the 'Freeze' button (often indicated by a play/pause icon) to capture and hold the current image on the screen. This allows for closer inspection without needing to keep the device perfectly still over the text. Press the button again to unfreeze.

Image: Demonstrates the freeze image function, showing a magnified medicine bottle label before and after freezing the image for detailed viewing.
- Photo and Playback Function:
Insert a TF card (up to 32GB, not included) into the designated slot. Press the camera button to take a photo. Press the playback button to view stored images or videos. You can navigate through files using the zoom buttons.
- Brightness Adjustment:
Adjust the LED and LCD brightness levels using the dedicated brightness controls (refer to product overview for button location) to optimize viewing in various lighting conditions.

Image: Illustrates the adjustable brightness levels for both LED and LCD displays on the digital magnifier.
- Reading Line:
Activate the reading line feature (if available, typically via a mode button) to help maintain focus and track text while reading. This can be particularly useful for long lines of text.
- TV Output Connection:
Connect the device to a TV or monitor using the provided TV output cable (RCA) or an HDMI cable (if supported by your model). This allows for a larger display of magnified content.

Image: Diagram showing the HDMI output and TF card slot on the digital magnifier, with an arrow pointing to a connected TV screen.
6. Maintenance
- Clean the screen and lens regularly with the provided soft cleaning cloth to remove dust and smudges.
- Avoid using abrasive cleaners or solvents, as these can damage the screen and casing.
- Store the device in its protective pouch when not in use to prevent scratches.
- Keep the device away from extreme temperatures, direct sunlight, and moisture.
7. Troubleshooting
| Problem | Possible Cause | Solution |
|---|---|---|
| Device does not power on. | Low battery or device not charged. | Charge the device fully. Ensure the power button is pressed and held for a few seconds. |
| Screen is blurry or out of focus. | Incorrect distance from object; dirty lens. | Adjust the distance between the device and the object. Clean the lens with the provided cloth. |
| Cannot change color modes or zoom. | Buttons not functioning or device frozen. | Ensure buttons are pressed firmly. Try restarting the device. |
| Cannot save photos/videos. | No TF card inserted or card is full/corrupted. | Insert a compatible TF card. Check if the card has sufficient space or try a different card. |
8. Specifications
- Brand: RayHong
- Model Number: RS543-1
- Screen Size: 5.0 inches
- Magnification: 3X-48X (adjustable)
- Display Resolution: 800*480 HD Color LCD
- Color Modes: 26 (including 8 default selections)
- Battery: 2500mAh Lithium Polymer (rechargeable)
- Battery Life: Over 4 hours of continuous use
- Storage: Supports TF card up to 32GB (not included)
- Connectivity: USB, HDMI Output
- Product Dimensions: 5.7"L x 3.3"W
- Item Weight: 1.07 pounds
- Lens Material: Glass
9. Warranty and Support
This product comes with a worry-free after-sales service. If you encounter any issues after receiving the goods, please contact RayHong customer support for assistance. We are committed to helping you until you are satisfied.
For further support, please refer to the contact information provided with your purchase or visit the official RayHong store on Amazon: Visit the RayHong Store