1. Introduction
Thank you for choosing Jumplushion Electric Bicycle Disc Brake Pads. These semi-metallic brake pads are designed to provide reliable and consistent braking performance for your electric bicycle. This manual provides essential information for proper installation, operation, and maintenance to ensure optimal safety and longevity of your brake pads.
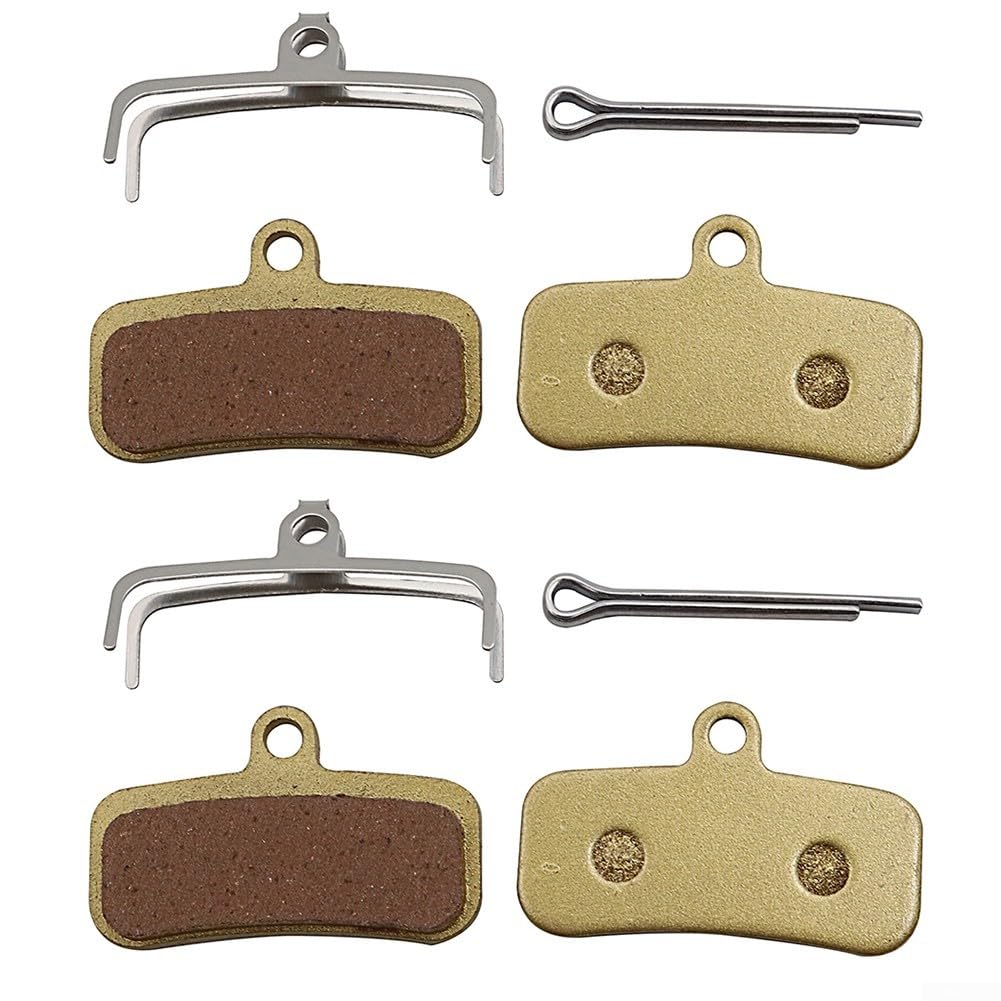
Figure 1: Jumplushion Electric Bicycle Disc Brake Pads (2 pairs shown).
2. Safety Information
Always prioritize safety when working on your bicycle's braking system. Improper installation or maintenance can lead to serious injury or damage. If you are unsure about any step, consult a qualified bicycle mechanic.
- Wear appropriate safety gear, including gloves and eye protection.
- Ensure your bicycle is stable and secure before beginning any work.
- Do not touch the brake rotor or pads immediately after riding, as they may be hot.
- Always test your brakes thoroughly after installation or maintenance before riding.
- Keep brake fluid (if applicable to your system) away from skin and eyes.
3. Package Contents
Your package includes the following items:
- 2 Pairs of Jumplushion Semi-Metallic Disc Brake Pads (4 individual pads)
- 2 Retaining Springs
- 2 Retaining Pins

Figure 2: Contents of one brake pad package, showing pads, springs, and pins.
4. Compatibility
These Jumplushion disc brake pads are specifically designed for use with:
- Surron Electric Bicycles
- Light Bee Electric Bicycles
Before installation, please verify the size and shape of your existing brake pads against the product images and specifications to ensure proper fitment and avoid compatibility issues.

Figure 3: Detailed view of the brake pads, showing the semi-metallic friction material.
5. Setup & Installation
Follow these steps to install your new brake pads. It is recommended to replace both sets of pads (front and rear) simultaneously for balanced braking performance.
- Prepare the Bicycle: Secure your bicycle in a repair stand or ensure it is stable. Remove the wheel corresponding to the brake caliper you are working on.
- Remove Old Pads:
- Locate the retaining pin that holds the brake pads in place. This is usually secured by a small clip or screw.
- Remove the clip/screw and then carefully pull out the retaining pin.
- Once the pin is removed, the old brake pads and spring can be pulled out from the caliper. Note their orientation.
- Clean the Caliper: Use a clean cloth and isopropyl alcohol to clean any dust or residue from inside the brake caliper. Do not use petroleum-based cleaners, as they can damage rubber seals.
- Reset Pistons: Gently push the brake caliper pistons back into their bores using a plastic tire lever or a dedicated piston press tool. This creates space for the new, thicker pads. Be careful not to damage the pistons or seals.
- Install New Pads:
- Place the new retaining spring between the two new brake pads, ensuring the spring's arms rest against the back of each pad.
- Insert the assembled pads and spring into the caliper, making sure they are correctly seated and aligned with the piston bores.
- Reinsert the retaining pin through the holes in the caliper and the brake pads. Secure it with the clip or screw.

Figure 4: New brake pads assembled with spring and pin.
- Reinstall Wheel and Adjust: Reinstall the wheel. Spin the wheel and check for any rubbing. If necessary, loosen the caliper mounting bolts slightly, squeeze the brake lever firmly to center the caliper, and then retighten the bolts.
- Test Brakes: Before riding, pump the brake lever several times until it feels firm. Perform a stationary brake test, then a slow-speed test in a safe area.
6. Operating Instructions (Bedding-In Process)
New brake pads require a "bedding-in" period to achieve optimal performance. This process transfers a thin layer of pad material onto the rotor, improving friction and reducing noise.
- Find a safe, flat area with no traffic.
- Accelerate to a moderate speed (approx. 10-15 mph or 15-25 km/h).
- Apply the brakes firmly and consistently until your speed is reduced to a slow walking pace. Do not come to a complete stop.
- Release the brakes and allow them to cool for a few seconds.
- Repeat this process approximately 20-30 times for each brake (front and rear).
- After the bedding-in process, the brakes should feel more powerful and consistent. Avoid hard braking or prolonged dragging of the brakes during the initial bedding-in period.
7. Maintenance
Regular maintenance ensures the longevity and performance of your brake pads.
- Regular Inspection: Periodically check your brake pads for wear. Replace pads when the friction material is worn down to approximately 0.5mm or less, or if you notice a significant decrease in braking performance.
- Cleaning: Keep your brake rotors and calipers clean. Use a clean cloth and isopropyl alcohol to remove dirt, oil, or grime. Avoid getting lubricants or grease on the brake pads or rotors.
- Rotor Condition: Inspect your brake rotors for excessive wear, warping, or contamination. A contaminated rotor can cause squealing and reduced braking power, even with new pads.
- Brake Fluid (Hydraulic Systems): For hydraulic disc brakes, ensure brake fluid levels are correct and bleed the system as recommended by your bicycle manufacturer.
8. Troubleshooting
| Issue | Possible Cause | Solution |
|---|---|---|
| Squealing Brakes |
|
|
| Poor Braking Power |
|
|
| Brake Rubbing |
|
|
9. Specifications
- Product Name: Jumplushion Bike Brake Pads
- Material: Semi-Metallic
- Dimensions: 39.5mm x 17mm (Approx.)
- Product Dimensions: 1.57 x 1.18 x 0.39 inches
- Item Weight: 2.57 ounces (per package of 2 pairs)
- Color: Gold (friction material)
- Model Number: E62KL1N8WG77G69T5111JEO670X
- Compatibility: Surron, Light Bee Electric Bicycles
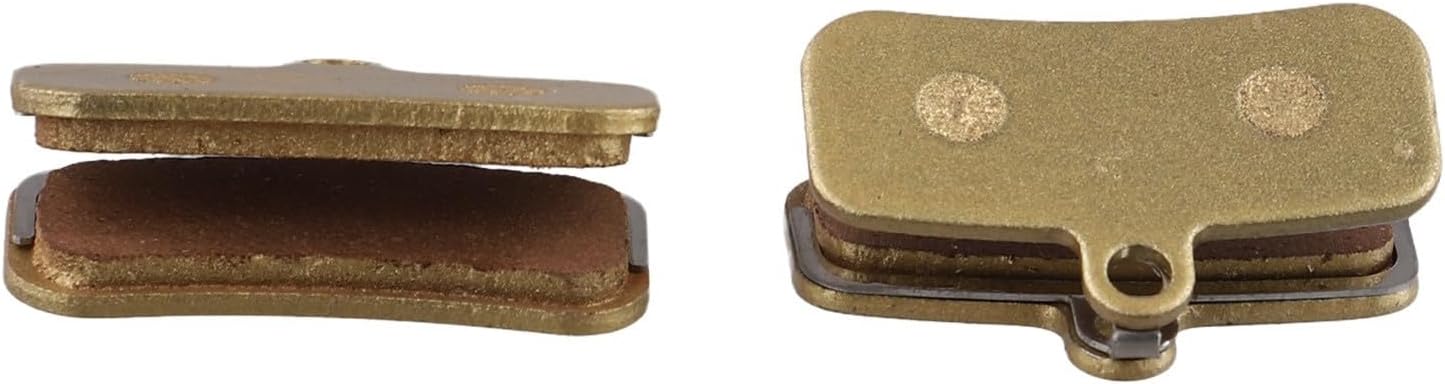
Figure 5: Side view of a single brake pad, illustrating its construction.
10. Warranty & Support
Specific warranty information for Jumplushion products may vary. Please refer to the original purchase documentation or contact your retailer for details regarding warranty coverage.
For technical support or inquiries, please contact Jumplushion customer service through the retailer's platform where the product was purchased.