
1. Introduction
This manual provides detailed instructions for the safe and effective operation of your BUUBO NPS-W series DC Power Supply. This miniature switching DC power supply is designed for laboratory, school, repair, and electrolyzation applications, offering adjustable and regulated voltage and current output. It features high-precision digital displays for voltage, current, and power, along with coarse and fine adjustment controls for precise parameter setting.

Figure 1: BUUBO NPS1203W DC Power Supply, front view.
2. Safety Information
Please read and understand all safety instructions before operating the device. Failure to follow these instructions may result in electric shock, fire, or damage to the product.
- Ensure the power supply is connected to a grounded outlet.
- Do not operate the device in wet or damp conditions.
- Do not open the casing of the power supply. There are no user-serviceable parts inside.
- Ensure proper ventilation. Do not block the ventilation openings.
- Disconnect power before making or breaking connections to the output terminals.
- Verify the input voltage switch setting (115V/230V) matches your local power supply before connecting to mains.
3. Product Overview
3.1 Front Panel Controls and Indicators

Figure 2: Front Panel Layout with labeled controls.
- Voltage Display: Shows the output voltage in Volts (V).
- Current Display: Shows the output current in Amperes (A).
- Power Display: Shows the output power in Watts (W).
- C.V Indicator: Illuminates when the power supply is operating in Constant Voltage mode.
- C.C Indicator: Illuminates when the power supply is operating in Constant Current mode.
- V-COARSE Knob: Coarse adjustment for output voltage.
- V-FINE Knob: Fine adjustment for output voltage.
- A-COARSE Knob: Coarse adjustment for output current.
- A-FINE Knob: Fine adjustment for output current.
- Power Switch Button: Toggles the power supply ON/OFF.
- Positive Output Interface (+): Red terminal for positive output connection.
- Negative Output Interface (-): Black terminal for negative output connection.
3.2 Rear Panel Features

Figure 3: Rear Panel Layout with labeled features.
- Built-in Temperature Controlled Fan: Automatically activates to dissipate heat, ensuring optimal operating temperature and extending product life.
- Output Conversion Switch (115V/230V): Allows selection of the appropriate input voltage for your region. Ensure this is set correctly before connecting to mains power.
- Power Outlet: For connecting the AC power cord.
- Fuse Box: Contains the protective fuse for the unit.
4. Setup
- Unpacking: Carefully remove the power supply and all accessories from the packaging. Verify all components are present: power supply unit, power cord, and output cables.

Figure 4: Power supply unit with included accessories.
- Input Voltage Selection: Locate the output conversion switch on the rear panel (Figure 3). Set it to either 115V or 230V to match your local mains power supply. Incorrect setting can damage the unit.
- Power Connection: Connect the provided AC power cord to the power outlet on the rear panel and then to a grounded wall outlet.
- Load Connection:
- Ensure the power supply is OFF before connecting any load.
- Connect the positive (+) terminal of your load to the red positive output interface on the power supply.
- Connect the negative (-) terminal of your load to the black negative output interface on the power supply.
- Ensure all connections are secure to prevent arcing or poor contact.
5. Operating Instructions
5.1 Powering On and Initial Adjustment
- Ensure all connections are correct and secure.
- Press the Power Switch Button (ON/OFF) on the front panel to turn on the power supply. The digital displays will illuminate.
- Before connecting a sensitive load, it is recommended to set the desired voltage and current limits with no load connected.
5.2 Adjusting Output Voltage
- Use the V-COARSE knob for large adjustments of the output voltage.
- Use the V-FINE knob for precise, small adjustments of the output voltage.
- Observe the Voltage Display to set the desired voltage.
5.3 Adjusting Output Current (Current Limit)
- Use the A-COARSE knob for large adjustments of the current limit.
- Use the A-FINE knob for precise, small adjustments of the current limit.
- The current limit determines the maximum current the power supply will deliver. If the load attempts to draw more current than the set limit, the power supply will switch to Constant Current (C.C) mode.
5.4 Constant Voltage (C.V) and Constant Current (C.C) Modes
- Constant Voltage (C.V) Mode: When the load resistance is high enough that the current drawn is less than the set current limit, the power supply maintains the set output voltage. The C.V indicator will be illuminated.
- Constant Current (C.C) Mode: When the load resistance is low enough that the current drawn reaches the set current limit, the power supply automatically switches to Constant Current mode. The output voltage will drop to maintain the set current. The C.C indicator will be illuminated. This protects both the power supply and the connected load from overcurrent.
6. Maintenance
- Cleaning: Disconnect the power supply from the mains before cleaning. Use a soft, dry cloth to wipe the exterior. Do not use abrasive cleaners or solvents.
- Ventilation: Ensure the ventilation openings on the sides and rear of the unit are clear of obstructions to allow for proper airflow and heat dissipation.
- Storage: When not in use for extended periods, store the power supply in a cool, dry place, away from direct sunlight and excessive dust.
- Fuse Replacement: If the unit does not power on, check the fuse in the fuse box on the rear panel. Replace only with a fuse of the same type and rating.
7. Troubleshooting
| Problem | Possible Cause | Solution |
|---|---|---|
| No power, display off. | Power cord not connected; Input voltage switch incorrect; Blown fuse. | Check power cord connection; Verify 115V/230V switch setting; Replace fuse if blown. |
| No output voltage/current. | Output terminals not connected; Voltage/current knobs set to zero; Overload protection activated. | Ensure load is properly connected; Adjust voltage/current knobs; Check load for short circuit or excessive current draw. |
| Voltage drops significantly under load. | Current limit set too low (C.C mode active); Load resistance too low for set voltage. | Increase the current limit (A-COARSE/A-FINE); Ensure the load's current requirement is within the power supply's capacity. |
| Unit overheats. | Blocked ventilation; Continuous operation at maximum capacity. | Ensure ventilation openings are clear; Reduce load or allow for cooling periods. |
8. Specifications
The following specifications apply to the BUUBO NPS1203W0.01V0.001A model:
| Parameter | Value |
|---|---|
| Model | NPS1203W0.01V0.001A |
| Output Voltage Range | 0 to 120V (continuously adjustable) |
| Output Current Range | 0 to 3A (continuously adjustable) |
| Voltage Display Precision | 0.01 V |
| Current Display Precision | 0.001 A |
| Power Display | Yes (W) |
| Input Voltage | AC 110V/220V (switchable) |
| Operating Protection | Over temperature protection, overload protection, short circuit protection |
| Cooling | Temperature controlled fan |
| Dimensions (Approx.) | 1.18 x 0.79 x 0.39 inches (Package Dimensions) - Note: Actual unit dimensions may vary, refer to product image for visual scale. |
| Item Weight | 2000 Grams (4.41 Pounds) |
Note: Specifications are subject to change without notice.
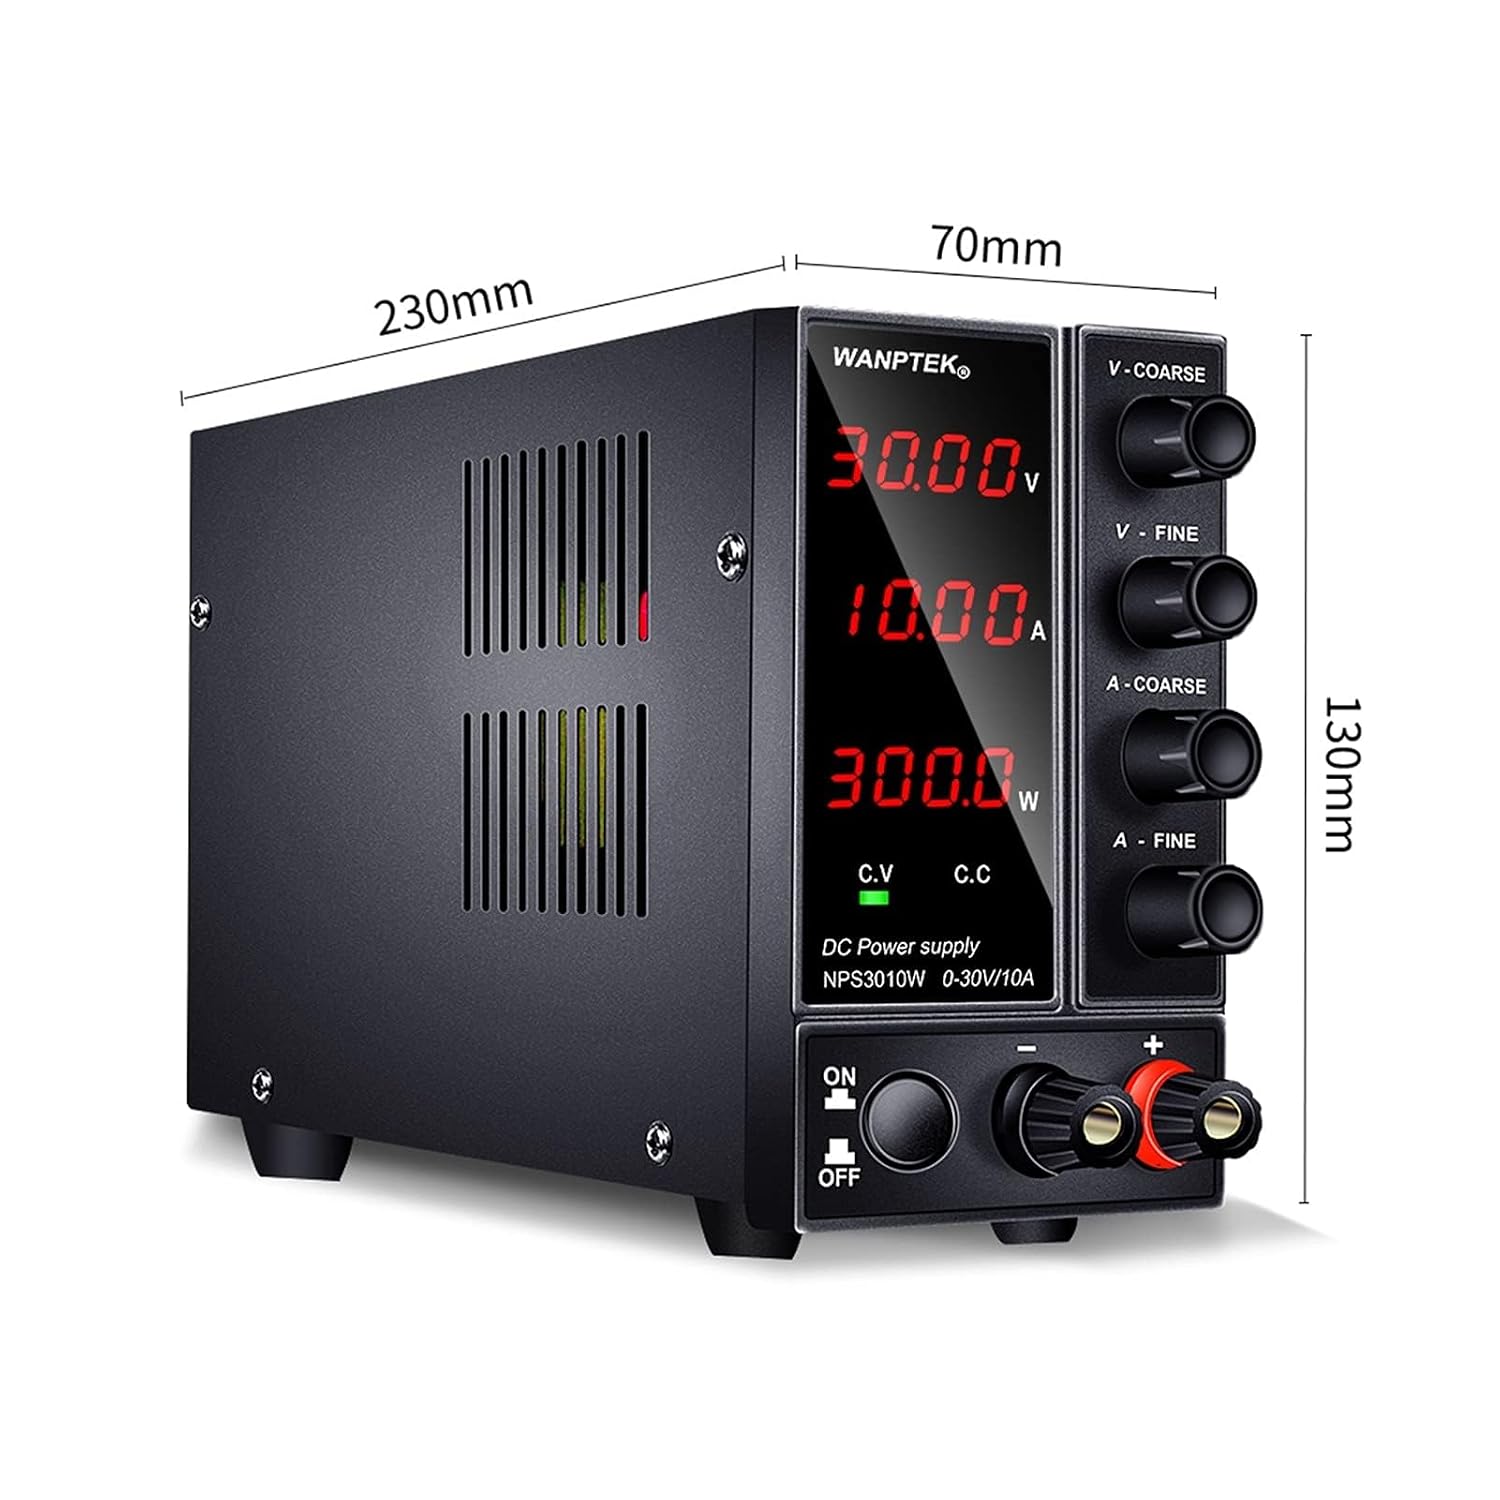
Figure 5: Approximate dimensions of the power supply unit.
9. Customer Support
For technical assistance, warranty information, or service inquiries, please contact your retailer or the manufacturer directly. Refer to your purchase documentation for contact details.