KGKGK BH-4A
User Manual for KGKGK BH-4A Multi Gas Detector
Model: BH-4A
1. Introduction
The KGKGK BH-4A is a portable 4-in-1 multi-gas detector designed for monitoring Oxygen (O2), Carbon Monoxide (CO), Hydrogen Sulfide (H2S), and Combustible Gas (LEL) levels. This device utilizes high-precision electrochemical sensors to provide accurate and reliable readings, ensuring safety in various environments. It features adjustable visual, audible, and vibration alarms to alert users when gas concentrations exceed preset thresholds. Its robust design makes it suitable for demanding conditions.
2. Safety Information
Please read this manual carefully before operating the device to ensure proper use and to prevent potential hazards. Failure to follow these instructions may result in injury or damage to the device.
- Do not attempt to open or modify the device. Unauthorized modifications can compromise safety and void the warranty.
- Ensure the device is regularly calibrated to maintain accuracy.
- Operate the device within the specified temperature and humidity ranges.
- Keep the device away from strong electromagnetic fields.
- Do not block the sensor openings.
- In case of an alarm, immediately follow your organization's safety protocols for gas leaks.
3. Product Overview
Familiarize yourself with the components of your BH-4A Multi Gas Detector.

Figure 3.1: Front view of the BH-4A detector with key components labeled, including LCD Screen, Menu Buttons, 4X Sensors (CO, O2, CO, H2S), Micro USB Recharge port, LED Alarm, Buzzer and Vibration Alarms, and Calibration Cap.
- LCD Screen: Displays gas concentrations, battery status, and menu options.
- Menu Buttons: Used for navigation and setting adjustments.
- Sensors: Four dedicated sensors for Oxygen (O2), Carbon Monoxide (CO), Hydrogen Sulfide (H2S), and Combustible Gas (LEL).
- Micro USB Recharge Port: For charging the built-in lithium battery.
- LED Alarm: Visual indicator for alarms.
- Buzzer and Vibration Alarms: Audible and tactile alerts for gas detection.
- Calibration Cap: Used during the calibration process.
- Metal Clip: For attaching the device to clothing or equipment.
4. Specifications
| Parameter | Value |
|---|---|
| Gas Types Detected | Oxygen (O2), Carbon Monoxide (CO), Hydrogen Sulfide (H2S), Combustible Gas (LEL) |
| O2 Measurement Range | 0~30%vol |
| CO Measurement Range | 0~999 umo/mol (ppm) |
| H2S Measurement Range | 0~100 umo/mol (ppm) |
| LEL Measurement Range | 0~100%LEL |
| Resolution | 0.1%vol (O2), 1 umo/mol (ppm) (CO/H2S), 1% LEL (Combustible) |
| Display | 2.4 inch HD display |
| Operating Temperature | -20°C to 50°C (LEL: 0°C to 40°C) |
| Operating Humidity | <95%RH (non-condensing) |
| Power Source | 3.7V Built-in Li-battery |
| Battery Runtime | Approximately 6-8 hours |
| Net Weight | 400g (with battery) |
| Dimensions (L×W×H) | 145mm × 69mm × 28mm |
| Protection Rating | Waterproof, dust-proof, and explosion-proof (Exib IIB T3 Gb) |
5. Setup
5.1 Initial Charging
Before first use, fully charge the device. Connect the provided USB charging cable to the Micro USB port on the detector and the other end to the charging adaptor. Plug the adaptor into a standard AC power outlet. The charging indicator on the device will show the charging status.
5.2 Powering On/Off
- To Power On: Press and hold the power button (usually marked with a circle and vertical line) until the display illuminates and the device performs a self-test.
- To Power Off: Press and hold the power button until the device prompts you to confirm shutdown, then confirm.
6. Operating Instructions
6.1 Real-time Monitoring
Once powered on, the device will automatically enter real-time monitoring mode. The 2.4-inch HD display will show the current concentration levels for O2, CO, H2S, and LEL. Ensure the sensor openings are clear for accurate readings.

Figure 6.1: The BH-4A detector displaying real-time gas concentrations for EX (LEL), O2, CO, and H2S.
6.2 Menu Navigation
Use the menu buttons (up, down, and select/power) to navigate through the device's settings and options. Refer to the on-screen prompts for specific functions like alarm settings or calibration options.
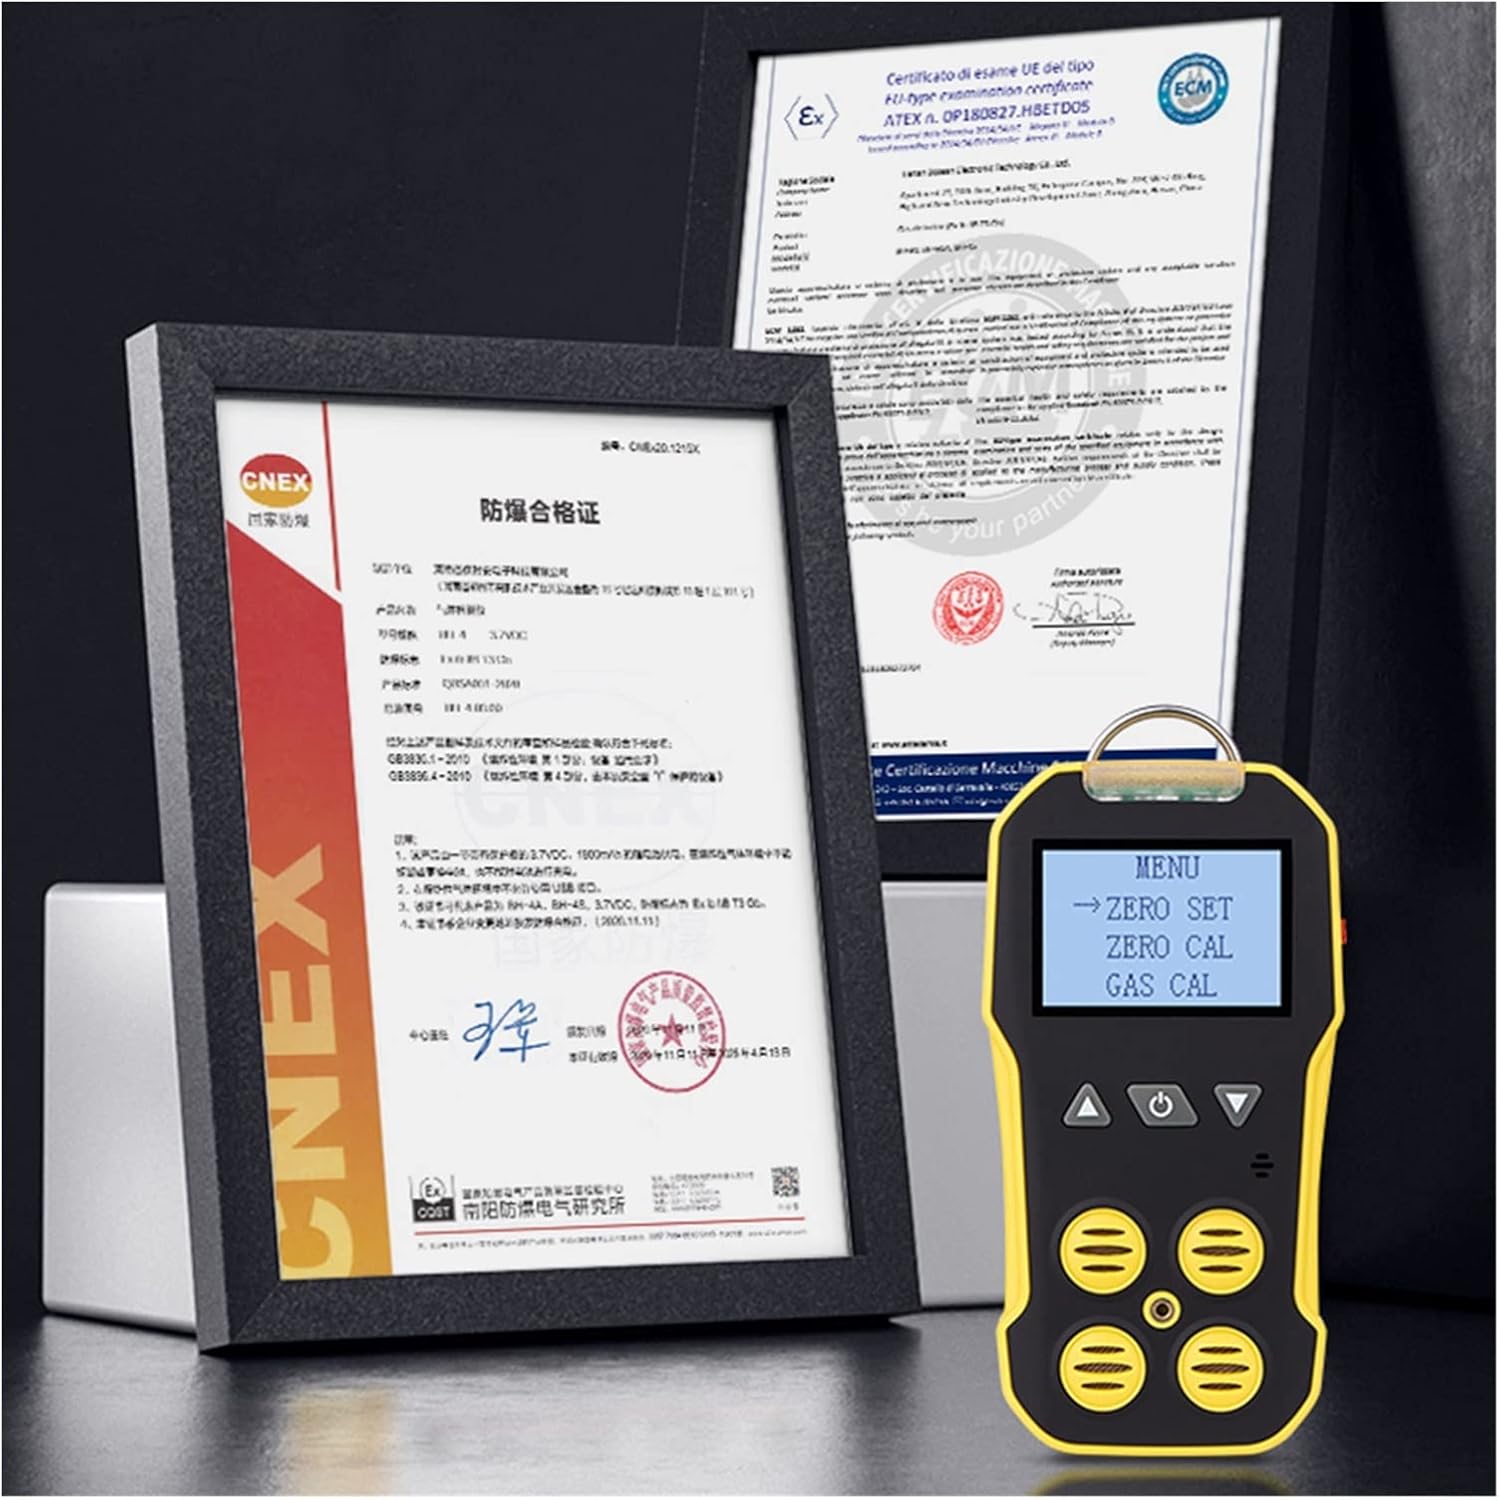
Figure 6.2: The BH-4A detector showing a menu with options such as "ZERO SET" and "GAS CAL" for calibration.
7. Calibration
The BH-4A comes factory calibrated. However, regular calibration is essential to maintain accuracy and ensure reliable performance. The device supports zero and span calibration options.
7.1 Zero Calibration
Zero calibration sets the baseline for gas readings in a clean air environment. This should be performed in an area known to be free of target gases.
- Enter the calibration menu using the navigation buttons.
- Select "ZERO SET" or "Zero Calibration".
- Follow the on-screen instructions. Ensure the calibration cap is properly placed if required for zeroing specific sensors.
- Wait for the calibration process to complete (typically less than 30 seconds).
7.2 Span Calibration (Gas Calibration)
Span calibration involves exposing the sensors to a known concentration of calibration gas. This should only be performed by trained personnel using certified calibration gas.
- Enter the calibration menu.
- Select "GAS CAL" or "Span Calibration".
- Attach the calibration cap and connect the appropriate calibration gas cylinder.
- Follow the on-screen instructions to apply the gas and complete the calibration.
8. Alarms
The BH-4A detector is equipped with multiple alarm methods to alert users to hazardous gas levels. Alarm values are adjustable.

Figure 8.1: The BH-4A detector highlighting its light alarm (LED), vibration alarm (tactile feedback), and buzzer alarm (audible sound).
- Sound Alarm: An audible buzzer will sound, with an alarm sound level up to 80dB.
- Light Flashing: The LED alarm light will flash.
- Vibrating Alert: The device will vibrate to provide tactile feedback.
- Screen Display: The screen will show the alarm condition and the gas concentration.
8.1 Setting Alarm Thresholds
You can adjust the low and high alarm thresholds for each gas type through the device's menu. Consult the on-screen interface for detailed instructions on navigating to and modifying these settings.
9. Maintenance
- Cleaning: Wipe the device with a soft, damp cloth. Do not use abrasive cleaners or solvents.
- Storage: Store the device in a cool, dry place away from direct sunlight and extreme temperatures.
- Battery Care: Recharge the battery regularly, even if the device is not in frequent use, to prolong its lifespan. Avoid fully discharging the battery.
- Sensor Care: Keep the sensor openings clean and free from dust or debris.
- Regular Calibration: As mentioned in Section 7, regular calibration is crucial for maintaining accuracy.
10. Troubleshooting
| Problem | Possible Cause | Solution |
|---|---|---|
| Device does not power on. | Low battery; device malfunction. | Charge the device fully. If problem persists, contact support. |
| Inaccurate readings. | Needs calibration; blocked sensors; sensor lifespan expired. | Perform zero and span calibration. Clean sensor openings. If issues persist, sensors may need replacement. |
| Alarms not sounding/flashing/vibrating. | Alarm settings disabled; device malfunction. | Check alarm settings in the menu. Ensure volume/vibration is enabled. Contact support if problem continues. |
| Battery drains quickly. | Aging battery; continuous high alarm activity. | Ensure full charge before use. Consider battery replacement if runtime significantly decreases. |
11. Package Contents
The following items are included in your product package:
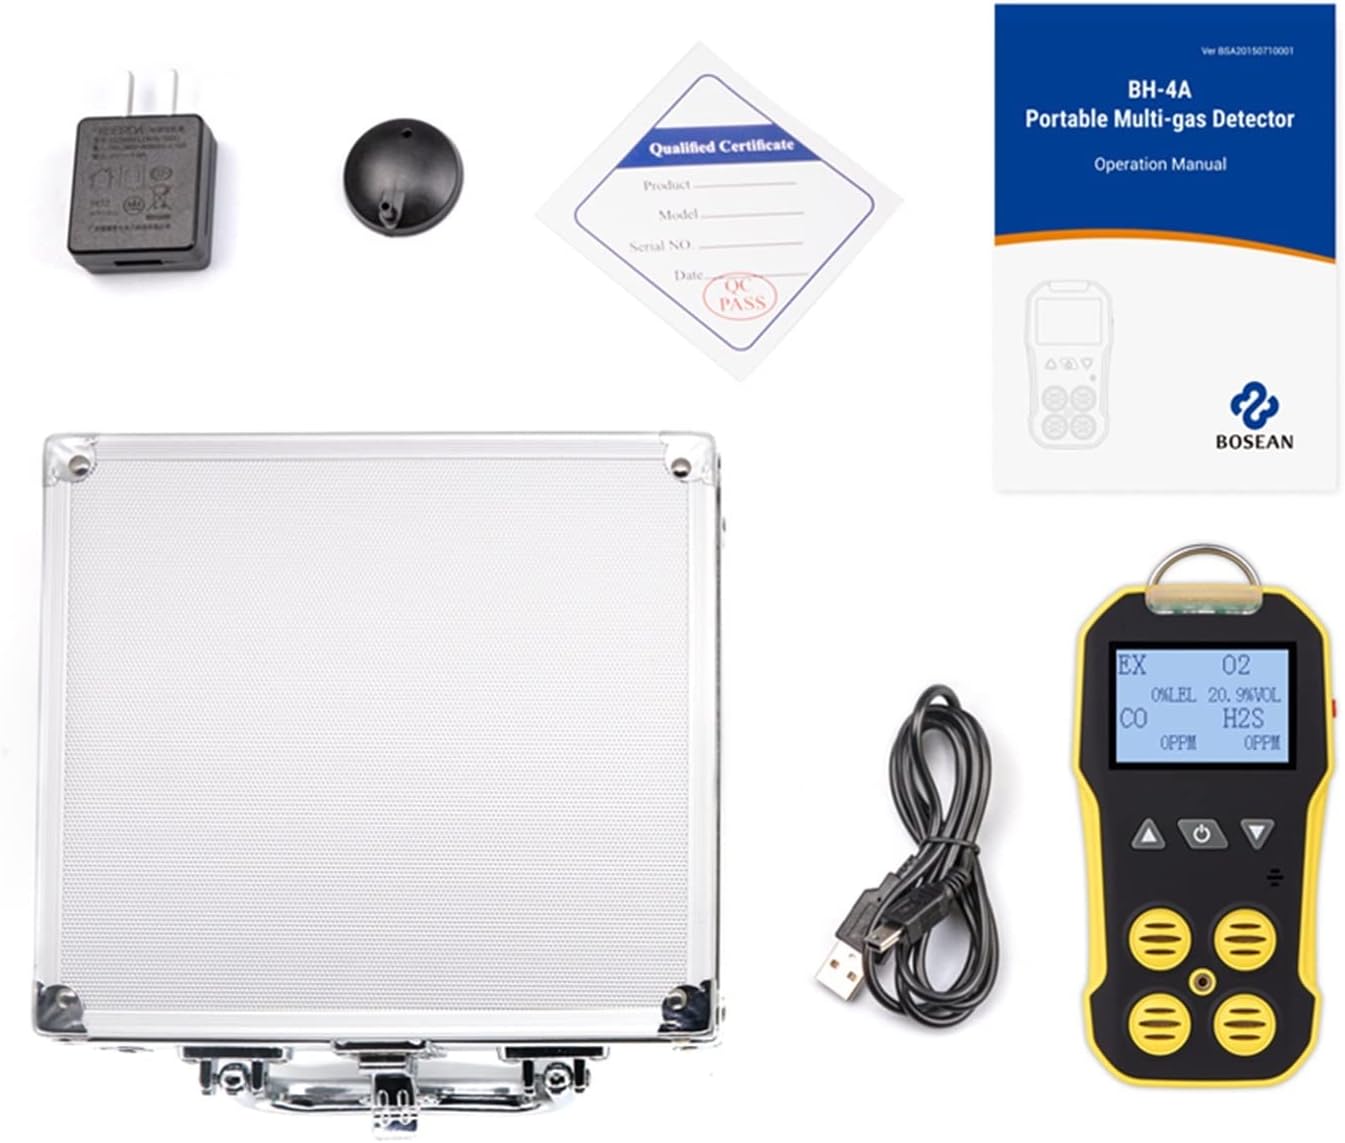
Figure 11.1: All items included in the BH-4A product package: the 4-in-1 multi-gas monitor, English user manual, charging adaptor, USB charging cable, calibration cover, and a metal aluminum box for storage.
- 1 x KGKGK BH-4A 4-in-1 Multi Gas Monitor
- 1 x English User Manual
- 1 x Charging Adaptor
- 1 x USB Charging Cable
- 1 x Calibration Cover
- 1 x Metal Aluminum Box
12. Warranty and Support
For warranty information, technical support, or service inquiries, please refer to the contact details provided in the separate warranty card or contact your point of purchase. Keep your purchase receipt as proof of purchase.
Ask a question about this manual
Ask about setup, troubleshooting, compatibility, parts, safety, or missing instructions. Manuals+ will review the question and use this page’s manual context to help answer it.